Alright, friends, gather 'round! Let's talk about turkey bacon, specifically how to get it perfectly crispy on the stovetop. I'm not talking about limp, soggy bacon here. No, we're going for that glorious, satisfying crunch that makes your taste buds sing. This is the method I've perfected after years of bacon experimentation, and I'm ready to share it with you. It's simple, it's quick, and it's guaranteed to elevate your breakfast game.
Part 1: Gathering Your Supplies: The Essential Kitchen Arsenal
Before we embark on this bacon adventure, we need to make sure we've got the right tools for the job. You wouldn't try to build a house without a hammer, would you? So let's gather our culinary essentials:
1. A Non-Stick Skillet: Your Bacon's Best Friend
This is absolutely crucial, my friends. We want our bacon to crisp up beautifully, not stick to the pan like a stubborn toddler on a sugar rush. That's why a good, reliable non-stick skillet is our first order of business. Choose one that's sturdy and well-seasoned for the best results.
2. Turkey Bacon: The Star of the Show
Now, let's talk about the star of the show: the turkey bacon itself. I highly recommend going for thick-cut, if you can find it. It gives you a more substantial bite, a beautiful meaty texture, and a satisfying chew. If thick-cut isn't available, regular sliced turkey bacon will work just fine.
3. A Tongs: Your Bacon Flipping Companions
You'll need these trusty tongs to expertly flip your bacon and ensure even cooking. Plus, tongs are just handy to have around in general. Who hasn't found themselves in a situation where they desperately needed a pair of tongs?
4. Paper Towels: The Grease-Gobblers
These are crucial for blotting away any excess grease after cooking. Remember, we want that bacon to be crispy, not soggy!
5. (Optional) A Spatula: For Those Stubborn Bits
This is for those stubborn bits of bacon that like to cling to the pan for dear life. Not entirely essential, but definitely a helpful addition to your bacon arsenal.
Part 2: Preparing the Bacon: Setting the Stage for Crispiness
Now that you've got your gear ready, it's time to prep the bacon for its starring role. We want those delicious little slices ready to sizzle and shine on the stovetop.
1. Laying out the Bacon: Giving Each Slice its Space
Take your turkey bacon and lay it out in a single layer on a plate. We want to ensure each slice has its own space to breathe and cook evenly. Don't overcrowd the skillet! Imagine it as a fancy dinner party, where each slice gets its own comfortable spot at the table.
2. No Need to Preheat: Let the Pan Warm Naturally
Some folks like to preheat their skillet, but I've found that it's not necessary. Just put the pan on a medium heat and let it warm up while you're prepping your bacon. It's like letting your guests arrive and get comfortable before the party truly begins.
3. No Need to Wash the Bacon: Preserve Those Flavors
Now, some folks say you should rinse your bacon under cold water to remove any excess salt. I disagree. I've found that it just washes away some of the natural, delicious flavor. Plus, you're going to be cooking it anyway. So, let's leave those flavor bombs be!
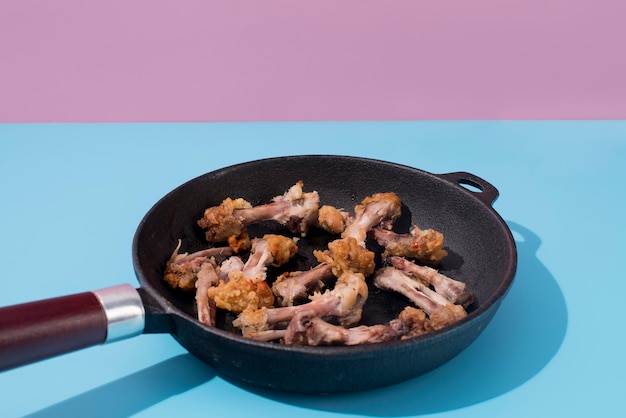
Part 3: Cooking the Bacon: The Grand Performance Begins
Alright, friends, now we're getting to the good stuff! This is where your bacon will go from ordinary to extraordinary.
1. Adding the Bacon to the Pan: A Gentle Introduction
Once your skillet is hot, carefully add your bacon to the pan. Remember, just a single layer! Don't overcrowd it. Imagine it as a graceful dance, where each slice takes its place in the pan with a gentle glide.
2. cooking time: Finding the Perfect Rhythm
Now, the cooking time will vary depending on your stovetop and the thickness of your bacon. But, as a general rule of thumb, you want to cook it for about 3-4 minutes per side, or until it's nice and crispy.
3. Flipping the Bacon: A Dance of Precision
After about 3-4 minutes, use your trusty tongs to flip the bacon over. You want to make sure both sides are cooked evenly, so take your time and make sure you get all the slices. It's like a delicate waltz, where each piece is carefully guided to its next move.
4. Watching for Crispiness: The Signs of Success
As the bacon is cooking, keep a close eye on it. You'll want to make sure it's getting nice and crispy. You can tell it's ready when it starts to curl up at the edges and the fat is rendered out. The bacon will take on a golden hue and you'll hear that delightful sizzle, like a musical symphony.
5. Don't Be Afraid to Adjust the Heat: Finding the Sweet Spot
If your bacon isn't getting crispy enough, you can increase the heat a bit. Just be careful not to burn it. It's all about finding that sweet spot, where the bacon cooks evenly and achieves that glorious crunch.
6. Adding Some Flavor (Optional): The Flavor Symphony
Now, if you want to get really fancy, you can add some flavor to your bacon while it's cooking. I like to sprinkle a bit of smoked paprika or black pepper onto the pan. It adds a lovely depth of flavor, like a rich, smoky melody. You can even experiment with other spices! It's all about having fun and creating a flavor symphony that pleases your palate.
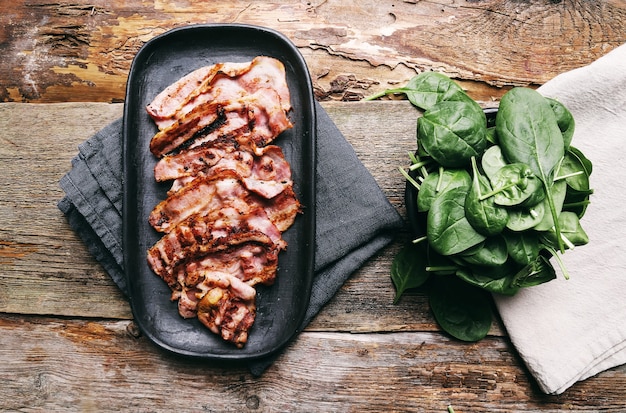
Part 4: Draining the Bacon: The Grease Farewell
Once your bacon is perfectly cooked, you need to drain off the excess grease.
1. Transferring to a Paper Towel-Lined Plate: A Gentle Landing
Using your tongs, carefully transfer the bacon from the skillet to a plate lined with paper towels. This will help absorb any remaining grease.
2. Blotting the Bacon: The Final Touches
Now, gently blot the bacon with the paper towels to get rid of any lingering grease. We're aiming for that satisfying crunch, not a greasy mess. It's like a final polish, bringing out the beauty and crispness of our bacon masterpiece.
3. Storing the Bacon: Keeping the Flavor Alive
If you're not eating your bacon right away, you can store it in an airtight container in the refrigerator for up to a week. It's best to let it cool down completely before storing it. This ensures the bacon remains fresh and ready to be enjoyed.
Part 5: Serving and Enjoying: The Grand Finale
And there you have it! Perfectly crispy turkey bacon, ready to be enjoyed.
1. Serving Options: A Feast for the Senses
Now, you can enjoy your bacon any way you like! Here are a few ideas:
- Sandwiches: Add it to a classic BLT or a breakfast sandwich. It'll add a delicious salty crunch to your favorite breakfast staple.
- Salads: Crumble it over your salad for a protein boost and a delicious, salty topping. It's a great way to add a bit of extra flavour and texture to your salads.
- Breakfast Burritos: Add a few strips to your breakfast burrito for a tasty, protein-packed meal.
- Pasta: Add a few strips of crispy bacon to your pasta dish for a rich, smoky flavor. The combination of pasta and bacon is a classic for a reason.
Part 6: bacon fat: A Culinary Treasure
Now, don't throw away the bacon fat! It's a culinary treasure, my friend!
1. Storing the Bacon Fat: Preserving the Flavor
Pour the bacon fat into a jar or container and store it in the refrigerator. It'll keep for several weeks and can be used to cook all sorts of things. It's a great way to add flavor to your cooking.
2. Using the Bacon Fat: The Magic of Flavor
You can use bacon fat to fry eggs, sauté vegetables, or even make gravy. Just be sure to let it cool down completely before using it. It adds a depth of flavor and a touch of richness to any dish.
Part 7: Troubleshooting: Facing the Challenges
Alright, let's talk about those pesky little problems that can sometimes arise when cooking bacon.
1. Bacon Sticking to the Pan: Solving the Stickiness
If your bacon is sticking to the pan, it's probably because it's not hot enough. Just increase the heat a bit and try again. If it's still sticking, then you might need to use a spatula to loosen it up.
2. Bacon Not Getting Crispy: Achieving that Crunch
If your bacon isn't getting crispy, you might need to increase the heat or cook it for a longer time. Just make sure you keep an eye on it so it doesn't burn.
3. Bacon Burning: Preventing Disaster
If your bacon is burning, you need to reduce the heat. You might also want to move the bacon to a cooler part of the pan.
Part 8: FAQs: Answering Your Burning Questions
Alright, let's tackle some common questions about cooking turkey bacon.
1. Is turkey bacon healthier than pork bacon?
Yes, turkey bacon is generally considered to be healthier than pork bacon. It's lower in calories, fat, and sodium. But, it's still bacon, so don't go overboard!
2. Is turkey bacon as tasty as pork bacon?
That's a matter of personal preference. Some people love the taste of turkey bacon, while others prefer the taste of pork bacon. I find that the flavor of turkey bacon is a bit milder, but it's still delicious.
3. Can I cook turkey bacon in the oven?
Yes, you can cook turkey bacon in the oven. Just place the bacon on a baking sheet lined with parchment paper and bake it at 400°F (200°C) for about 15-20 minutes, or until crispy.
4. How do I make sure turkey bacon doesn't dry out?
The key to cooking turkey bacon without drying it out is to watch it carefully. Don't overcook it. Once it's crispy, take it off the heat immediately.
5. Can I cook turkey bacon in a microwave?
You can, but it's not the best way to cook it. It won't be as crispy. But, if you're in a pinch, it'll do the trick. Just be sure to follow the instructions on the package.
Part 9: Conclusion: A Culinary Triumph
So there you have it! My fool-proof method for cooking crispy turkey bacon on the stovetop. It's simple, it's quick, and it's delicious. Go forth and cook up a storm. You won't regret it!
Everyone is watching

Prime Rib Roast Cooking Time Chart: Per Pound Guide
Cooking TipsPrime rib roast. Just the name conjures images of lavish dinners, crackling fires, and hearty laughter. It’s ...

How Long to Bake Potatoes in the Oven (Perfect Every Time)
Cooking TipsBaked potatoes are a staple in my kitchen. They're incredibly versatile, delicious, and surprisingly easy to m...

Perfect Rice Every Time: The Ultimate Guide to Cooking Rice
Cooking TipsAs a self-proclaimed foodie, I've always been a bit obsessed with rice. It's the foundation of countless cuisi...

The Ultimate Guide to Cooking Asparagus: Tips, Techniques, and Recipes
Cooking TipsAsparagus. The mere mention of this spring delicacy conjures up images of vibrant green spears, crisp and burs...

Ultimate Guide to Cooking the Perfect Thanksgiving Turkey
Cooking TipsThanksgiving. Just the word conjures up images of overflowing tables laden with delicious food, the scent of r...