Ah, corn on the cob. A summertime classic. I'm talking about that sweet, juicy, melt-in-your-mouth kind of corn that makes you want to grab another ear and just keep going. But sometimes, you don't have a barbecue handy or the weather's just not cooperating. That's when the oven becomes your new best friend. And trust me, when you get it right, oven-baked corn is a total game-changer. It's like a secret weapon in the kitchen, perfect for those nights when you're craving that sweet corn taste without the hassle of grilling.
I've tried a gazillion ways to cook corn in the oven, and let me tell you, I've had my fair share of disasters. Scorched kernels, dry cobs, the whole shebang. But after countless experiments, I finally cracked the code. This isn't your average oven-baked corn. This is the kind that will have you saying "wow!" with every bite. So, grab a cob (or two, why not?) and let's get started!
(Part 1) The Prep Work - It's All About Getting It Right
You know the saying, "Failing to prepare is preparing to fail"? Well, that definitely applies to cooking corn on the cob. It’s about setting yourself up for success. Think of it as a little bit of mindfulness before you dive in and start cooking. It's all about getting into that calm, focused zone, so you can really appreciate the process.
Get Your Corn Ready - Choosing the Right Ears
First things first: the corn. Head to your local market or farmers' market and pick out some beautiful, fresh ears. Look for those plump, juicy ears with vibrant green husks, no signs of wilting or browning. If you're lucky enough to have a garden bursting with sweet corn, even better! Nothing beats homegrown. Now, give those husks a good wash under cold running water. Get rid of any dirt or debris. It's a small detail, but it makes a difference in the final taste and appearance.
The Silk Removal - A Little Patience Goes a Long Way
Next comes the silk. Some folks like to keep it on, believing it adds a bit of flavour. But I'm a bit of a purist. I prefer my corn clean and simple. So, grab a sharp knife and gently peel back the husk, being careful not to cut into the cob. Then, with your fingers, gently pull out the silk. It might seem like a tedious task, but trust me, the effort is worth it. Don't worry if some bits stick, we'll deal with that later. Just make sure it's mostly gone.
The Husk Decision - Two Methods, One Delicious Outcome
Here's where things get interesting. You have a choice: husk or no husk. Both methods have their pros and cons, and I've tried them both. I'm going to share both so you can decide which one suits you best.
Method 1: Husk It Up! - Classic and Clean
This is the classic way to cook corn on the cob. Peel back the husk, remove the silk, and then completely peel it off. This method is all about simplicity and control. You get a nice, clean cob, which allows for even cooking. You can really see how it’s browning and know exactly when it’s ready.
Method 2: Leave It On! - A Steamy, Flavorful Adventure
Now, this method is a bit more unusual, but it yields some really delicious results. You keep the husk on, but you fold it back over the cob and secure it with a bit of string, like a little corn burrito. This method helps steam the corn as it cooks, keeping it moist and flavourful. It also adds a nice, rustic touch. You can even add a bit of butter or herbs to the husk before you fold it back for extra flavour. The downside? You’ll have to wait a bit longer to see how the corn is cooking.
Buttering Up - Adding a Touch of Flavor
Alright, now it's time to add some flavor. Whether you're husking or not, you can still butter up your corn. I like to use a simple blend of butter and salt. Just brush it all over the cob. You can even add a touch of garlic powder or herbs like parsley or thyme. If you're feeling fancy, you can even mix in some chili flakes. Just a sprinkle will give it a nice kick.
(Part 2) Oven Time! - Navigating the Oven's Mysteries
So, you've prepped your corn, you've got your oven ready, and now it's time to get cooking! The oven can be a bit of a mystery sometimes, isn't it? It can be a little unpredictable, but don't worry, we're going to tackle it head-on.
Heating Up - Getting That Oven Ready
Preheat your oven to 400°F (200°C). Now, remember, ovens vary, so check the temperature with an oven thermometer just to be sure. It’s always better to be safe than sorry, especially when it comes to baking.
The Baking Dish - A Home for Your Corn
Alright, now you need a baking dish. A roasting pan works perfectly, but any baking dish that's big enough to fit your corn will do. Line the dish with some baking paper. This will help prevent sticking and make cleanup a breeze.
Arranging the Corn - Giving Them Space to Breathe
Now, it's time to arrange your corn cobs in the baking dish. Make sure they are not touching each other. You want them to bake evenly, so give them a bit of space. If you’re using the husk-on method, make sure the husk is wrapped around the corn tightly.
Time to Bake! - A Little Patience is Key
Now, here's the tricky part: the baking time. It varies depending on whether you’re husking or not. Here’s a general guideline, but remember, you always want to check for doneness.
Husked Corn - A Quick and Easy Bake
Bake for about 15-20 minutes, flipping the corn halfway through. Keep an eye on it to make sure it doesn’t burn.
Husk-On Corn - A Steamy, Flavorful Journey
Bake for about 25-30 minutes. The corn will be ready when the husks are slightly browned and the kernels are tender.
The doneness test - Making Sure it's Just Right
Now, how do you know if your corn is cooked through? Well, you can test it with a sharp knife. If it goes in easily, without resistance, your corn is ready. You can also try pressing on a kernel. If it gives way easily, it’s good to go.
(Part 3) The Finishing Touches - Adding a Bit of Magic

Okay, your corn is cooked, and it’s looking beautiful. Now, it’s time to add those finishing touches, that little something extra that takes your corn from good to absolutely divine.
Let it Rest - Allowing the Flavors to Mingle
First things first, let your corn rest for a few minutes before you serve it. This will allow the heat to distribute evenly. You can even wrap it in a tea towel, which will help keep it warm and moist.
Butter and Seasoning - Classic and Creative Combinations
Now, it’s time to go wild with the butter and seasoning. If you’re feeling traditional, stick with a simple butter and salt combo. But don’t be afraid to experiment. If you’re feeling adventurous, try a blend of herbs like parsley, thyme, and oregano. A little bit of garlic powder is always a good idea too.
More Flavorful Options - Getting Creative in the Kitchen
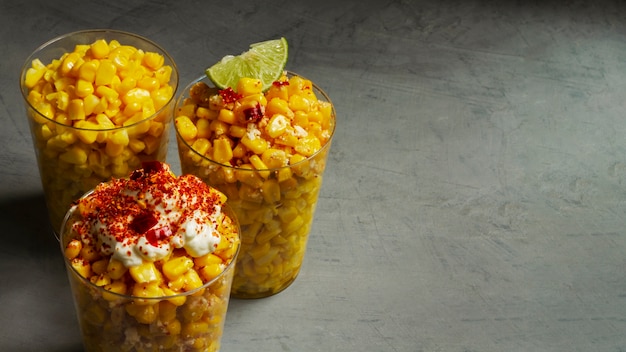
There’s no limit to what you can add to your corn. Some of my favourite additions include a sprinkle of chili flakes for a bit of heat, a squeeze of lime for a citrusy kick, or even a drizzle of honey for a touch of sweetness. The possibilities are endless!
(Part 4) Serving Up - A Feast for the Eyes and the Palate
Alright, your corn is cooked, seasoned to perfection, and ready to be devoured. It’s time to serve it up with a smile.
The Classic Presentation - Simplicity at its Finest
For a classic presentation, just serve the corn on a platter, with a side of butter and salt. You can also add some lemon wedges or fresh herbs for a little extra flair.
Get Creative - Beyond the Traditional Plate
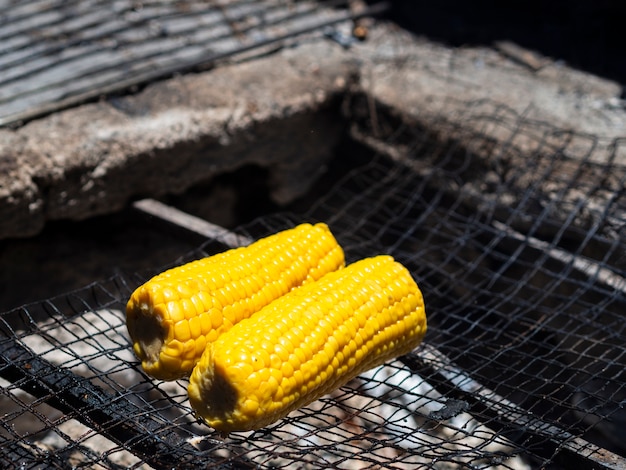
But who says you have to stick with the classics? Feel free to get creative and serve your corn on a skewer, with a side of your favourite dipping sauce. If you’re having a barbecue, you can even grill the corn after it’s been baked in the oven, which adds a smoky flavour.
side dish Perfection - The Perfect Accompaniment
Corn on the cob is a perfect side dish for any meal. It pairs beautifully with grilled meats, fish, and vegetables. And don’t forget about the summer staples: burgers, hot dogs, and salads.
(Part 5) Storage and Leftovers - Making the Most of Your Creation
Okay, you’ve made a beautiful batch of corn on the cob, and you’re left with some leftovers. Don’t worry, it happens to the best of us. The good news is that corn on the cob stores well and is perfect for reheating.
Storage Tips - Keeping Your Corn Fresh
If you have leftover corn, you can store it in the refrigerator for up to 3 days. Just wrap it tightly in plastic wrap or foil. This will help keep it from drying out.
Reheating Leftovers - Bringing Back the Flavor
There are a few ways to reheat your leftover corn. You can reheat it in the oven, wrapped in foil, at 350°F (175°C) for about 10 minutes. You can also microwave it, wrapped in a damp paper towel, for about 1-2 minutes. Just make sure you don’t overcook it!
(Part 6) Variations and Twists - Exploring New Flavor Frontiers
So, you’ve mastered the basic recipe for oven-baked corn on the cob. But what if you want to add a little something extra?
Sweet and Savoury - A Delightful Balance of Flavors
For a sweet and savoury twist, try adding a drizzle of honey and a sprinkle of chili flakes to your corn. It’s a delicious combination of sweet and spicy, and it’s perfect for those who love a bit of heat.
Herby Delight - A Bouquet of Flavor
If you’re a fan of herbs, you can try adding a blend of parsley, thyme, and oregano to your corn. You can even add a pinch of garlic powder for extra flavour.
Citrusy Zing - A Refreshing Twist
For a citrusy zing, try squeezing a little lime juice over your corn. It adds a refreshing touch, and it pairs perfectly with the sweetness of the corn.
Creamy Goodness - A Decadent Indulgence
If you’re feeling extra indulgent, you can even add a dollop of sour cream or crème fra??che to your corn. It’s a decadent touch that will elevate your corn to new heights.
(Part 7) The Corn Controversy: Husked or Husk-On? - A Culinary Debate
Now, you might be wondering, which method is better, husked or husk-on? It’s a bit of a debate, isn't it? Both methods have their pros and cons. Ultimately, it comes down to personal preference.
Husked Pros - Simplicity and Control
The biggest advantage of husking your corn is that it cooks evenly and you can see how it’s browning. You can also control the amount of seasoning you use.
Husked Cons - The Risk of Drying Out
The downside of husking is that it can dry out the corn, especially if you overcook it. You also have to be careful not to burn the corn, as it’s exposed to the heat of the oven.
Husk-On Pros - Moist, Flavorful, and Rustic
The husk-on method helps to steam the corn as it cooks, which keeps it moist and flavourful. You can also add butter and herbs to the husk before you fold it back, which adds a lot of flavour. It also has a nice, rustic appeal.
Husk-On Cons - Patience and Uncertainty
The downside of the husk-on method is that it can take a bit longer to cook. You also can’t really see how the corn is browning, so you have to rely on the husk as a guide.
The Verdict - A Matter of Taste and Preference
So, which method should you choose? It really depends on what you’re looking for. If you want even cooking and control over the seasoning, go with the husked method. If you want a moist, flavourful corn, go with the husk-on method.
(Part 8) FAQs - Answering Your Burning Questions
Now, I’ve tried to cover everything you need to know about cooking corn on the cob in the oven. But I know, there are always those pesky questions that pop up. So, here are some frequently asked questions and their answers.
- Can I cook frozen corn on the cob in the oven?
Yes, you can! Just make sure you thaw the corn completely before you bake it. You can also cook it straight from frozen, but it will take longer.
- What if I don’t have any butter?
No worries, you can use olive oil or even coconut oil. Just make sure it’s melted before you brush it on the corn.
- What are some other ways to cook corn on the cob?
Of course! You can boil it, grill it, or even microwave it. Each method has its own unique flavour and texture.
- How long can I keep corn on the cob in the refrigerator?
You can keep corn on the cob in the refrigerator for up to 3 days. Just make sure it’s wrapped tightly in plastic wrap or foil.
- How can I tell if corn is ripe?
A good way to tell if corn is ripe is to look for a husk that’s green and vibrant. The kernels should be plump and juicy. You can also check the tip of the cob. If it’s brown and dry, the corn is past its prime.
Now you have all the tools you need to cook perfect oven-baked corn on the cob. So, go forth and impress your friends and family with your newfound culinary skills. And remember, don't be afraid to experiment with different flavours and techniques. The best cooks are the ones who aren't afraid to try something new!
Everyone is watching

Prime Rib Roast Cooking Time Chart: Per Pound Guide
Cooking TipsPrime rib roast. Just the name conjures images of lavish dinners, crackling fires, and hearty laughter. It’s ...

How Long to Bake Potatoes in the Oven (Perfect Every Time)
Cooking TipsBaked potatoes are a staple in my kitchen. They're incredibly versatile, delicious, and surprisingly easy to m...

Perfect Rice Every Time: The Ultimate Guide to Cooking Rice
Cooking TipsAs a self-proclaimed foodie, I've always been a bit obsessed with rice. It's the foundation of countless cuisi...

The Ultimate Guide to Cooking Asparagus: Tips, Techniques, and Recipes
Cooking TipsAsparagus. The mere mention of this spring delicacy conjures up images of vibrant green spears, crisp and burs...

Ultimate Guide to Cooking the Perfect Thanksgiving Turkey
Cooking TipsThanksgiving. Just the word conjures up images of overflowing tables laden with delicious food, the scent of r...