(Part 1) The Importance of a Good Pan
You might be thinking, "This is basic stuff," but hear me out. Choosing the right pan is the foundation of perfect bacon. You want something sturdy, built for high heat and capable of distributing heat evenly. Cast iron and heavy-bottomed stainless steel are your best bets. Why? Because uneven heating can lead to burnt edges and undercooked centres. A good pan ensures a consistent, even cook, resulting in that glorious, uniform crispness we all crave.
The Cast Iron Argument
Now, I'm a bit of a cast iron enthusiast. They're a commitment, yes, but properly seasoned cast iron pans last a lifetime. They get incredibly hot, ensuring your bacon cooks through quickly and crisps up beautifully. Plus, the seasoning prevents sticking, making cleaning a breeze. Just remember to oil the pan lightly before cooking and never wash it with soap – a good scrub with hot water and a bit of salt is all you need.
(Part 2) choosing the right bacon
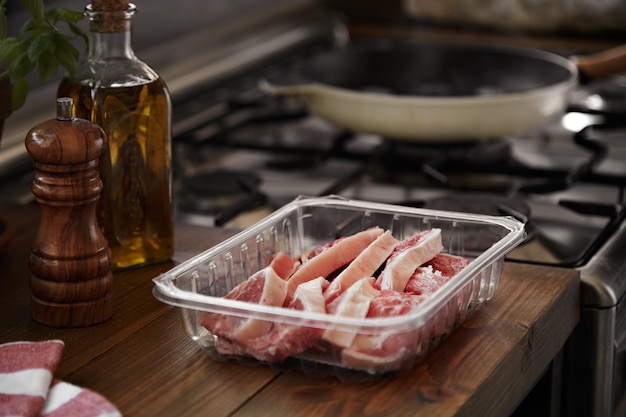
With your pan sorted, let's move on to the star of the show: the bacon itself. There's a vast world of bacon out there, from thick-cut to smoked, maple-flavored to everything in between. But when it comes to stovetop cooking, I personally prefer a thinner cut. It cooks faster, crisps up more evenly, and doesn't require a lot of fuss.
The Pros and Cons of Different types of bacon
Let's break down the different types and their strengths and weaknesses:
- thick-cut bacon: This is a luxurious choice, offering a rich, meaty flavour. However, it can be tricky to cook evenly on the stovetop. You might end up with some parts being overcooked while others are still soft. It's best suited for baking or grilling, where it has more space to cook evenly.
- Thin-cut bacon: This is my go-to for stovetop cooking. It's quick to cook, crisps up nicely, and doesn't require a lot of fuss.
- smoked bacon: This classic choice delivers a smoky flavour that's hard to resist. Just be mindful that the smoke can linger in your kitchen, so make sure you have adequate ventilation.
- Maple-flavored bacon: This is a sweet and savory option, perfect for breakfast or brunch. Just be sure to watch it carefully, as the sugar in the maple syrup can cause it to burn quickly.
Ultimately, the choice comes down to personal preference. But I highly recommend trying a few different types to discover your favourite.
(Part 3) Setting Up Your Stove
Now, we're getting into the nitty-gritty. Before you even think about turning on the stove, let's make sure your equipment is ready to go. You'll need a stovetop, your chosen pan, your bacon, and, of course, a good spatula for flipping.
The Importance of a Clean Stove
This might seem like a no-brainer, but a clean stovetop is essential for successful bacon cooking. Grease and food splatters can create uneven heating and make it difficult to control the cooking process. So, give your stove a quick wipe-down before you begin. You'll be glad you did.
(Part 4) The Art of Preheating
Alright, time to fire up the stove. You want to preheat your pan over medium heat. This is crucial for achieving that perfect crisp. Adding cold bacon to a cold pan will result in a longer cooking time and could lead to soggy bacon. Preheating your pan ensures the bacon starts to cook immediately upon contact, resulting in that even browning and beautiful crispness.
How to Know When Your Pan is Ready
Here's a simple trick to gauge the heat: Place a drop of water in the pan. If it sizzles and evaporates quickly, your pan is hot enough. If it just sits there, give it a few more minutes.
(Part 5) The First Cook
The moment you've been waiting for: adding the bacon. Now, this is where things get a bit personal. I like to lay my bacon in a single layer, ensuring each piece has space to cook evenly. If you're cooking a lot of bacon, do it in batches. It's better to cook smaller quantities at a time for the best results.
Don't Overcrowd the Pan
Overcrowding the pan will lead to steaming rather than frying, which is not what we want. Give your bacon some breathing room. It's the key to achieving that crispy texture.
(Part 6) The Flip
After a few minutes, the bottom of your bacon will start to turn golden brown. This is your cue to flip those beauties over. Use your spatula to carefully lift the bacon and flip it gently. We don't want any tears in our precious bacon!
The "Flip Test"
Here's a little tip: when you flip the bacon, if you see some fat rendering out, that's a good sign it's cooked enough. You can move on to the next step.
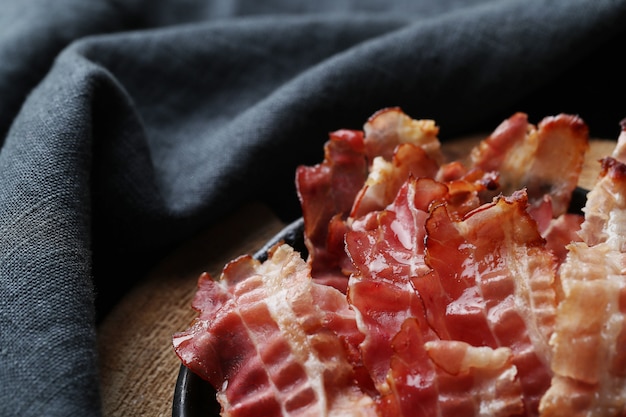
(Part 7) The Crisp Factor
This is where the magic happens. Reducing the heat to medium-low is key to achieving that glorious crisp. Let the bacon cook for a few more minutes, flipping occasionally to ensure even cooking. Keep an eye on it – you want that golden brown color and that satisfying "crackle" when you touch it.
The "Crackle Test"
To check if your bacon is fully cooked, gently touch it with your spatula. If it makes a loud "crackle" sound, it's ready. If it's still soft, give it a few more minutes.
(Part 8) Removing the Bacon
Your bacon is perfectly crisp! Now it's time to remove it from the pan. Carefully lift it with your spatula and place it on a plate lined with paper towels. The paper towels will absorb any excess grease. If you're using a cast iron pan, leave the bacon on the pan to cool for a few minutes before transferring it to the plate. This will help the bacon crisp up even more.
The "Rest"
Allow the bacon to rest for a few minutes before devouring it. This gives the grease time to redistribute, making it even crispier and more delicious.
(Part 9) The Leftover bacon grease
Don't throw away that delicious bacon grease! It's a culinary treasure trove, perfect for cooking and frying. Let it cool in the pan, then carefully pour it into a container and store it in the fridge for later use. It will last for several weeks.
How to Use Leftover Bacon Grease
Here are a few ideas for using your bacon grease treasure:
- Fry potatoes: For crispy, golden hash browns or fries, use bacon grease instead of oil. It gives them a delicious smoky flavour.
- Sauté vegetables: Bacon grease adds a rich, savory flavour to sauteed onions, peppers, and other vegetables. It's a simple way to elevate your cooking.
- Make popcorn: For a truly decadent snack, pop your popcorn in bacon grease. It's a game-changer.
- Bake biscuits: Add a tablespoon of bacon grease to your biscuit dough for a richer, flakier texture.
- Make gravy: Use bacon grease as a base for your next gravy. It adds a wonderful depth of flavour.
(Part 10) FAQs
Let's tackle some frequently asked questions about cooking bacon on the stovetop:
1. How long does it take to cook bacon on the stove?
The cooking time varies depending on the thickness of the bacon and the heat of your stove. Generally, it takes about 5-7 minutes to cook bacon on the stovetop. However, it's important to keep an eye on it and adjust the cooking time as needed. You can always use a meat thermometer to ensure the bacon has reached an internal temperature of 155°F (68°C).
2. Should I use high heat to cook bacon?
While high heat might seem tempting, it's not recommended for stovetop bacon. It can cause the bacon to burn before it has a chance to cook through. Medium heat is the best choice for ensuring even cooking and a crispy texture.
3. How do I know if bacon is cooked?
There are a few ways to tell if your bacon is cooked:
- The bacon will have a golden brown color and a crispy texture.
- The fat will have rendered out, leaving the bacon with a lean appearance.
- When you touch the bacon with your spatula, it will make a loud "crackle" sound.
4. Can I cook bacon in the oven?
Absolutely! baking bacon in the oven is a great option if you're cooking a large quantity or want to avoid the splattering mess. Just preheat your oven to 400°F (200°C) and line a baking sheet with aluminum foil. Place the bacon on the baking sheet and bake for 15-20 minutes, or until crispy. You can also cook bacon in the oven on a wire rack over a baking sheet. This allows the fat to drain away, resulting in crispier bacon.
5. What should I do with the bacon grease after cooking?
Bacon grease is a culinary treasure! Don't throw it away! Let it cool in the pan, then pour it into a container and store it in the fridge for later use. As mentioned earlier, it can be used to fry potatoes, sauté vegetables, make popcorn, bake biscuits, or even make gravy. It's a versatile and delicious ingredient that will add a savory flavour to any dish.
(Part 11) Final Thoughts
And there you have it, folks: my guide to cooking bacon on the stovetop perfectly every time. It's a simple yet satisfying process that requires a bit of practice, but once you get the hang of it, you'll be a bacon-cooking pro in no time. Just remember to use a good pan, choose the right type of bacon, preheat your pan, and be patient. Most importantly, have fun and enjoy the process! And don't forget to savour that delicious, crispy goodness.
Everyone is watching

Prime Rib Roast Cooking Time Chart: Per Pound Guide
Cooking TipsPrime rib roast. Just the name conjures images of lavish dinners, crackling fires, and hearty laughter. It’s ...

How Long to Bake Potatoes in the Oven (Perfect Every Time)
Cooking TipsBaked potatoes are a staple in my kitchen. They're incredibly versatile, delicious, and surprisingly easy to m...

Perfect Rice Every Time: The Ultimate Guide to Cooking Rice
Cooking TipsAs a self-proclaimed foodie, I've always been a bit obsessed with rice. It's the foundation of countless cuisi...

The Ultimate Guide to Cooking Asparagus: Tips, Techniques, and Recipes
Cooking TipsAsparagus. The mere mention of this spring delicacy conjures up images of vibrant green spears, crisp and burs...

Ultimate Guide to Cooking the Perfect Thanksgiving Turkey
Cooking TipsThanksgiving. Just the word conjures up images of overflowing tables laden with delicious food, the scent of r...