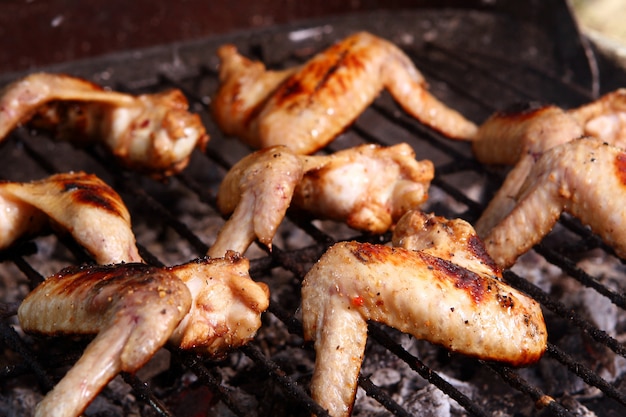
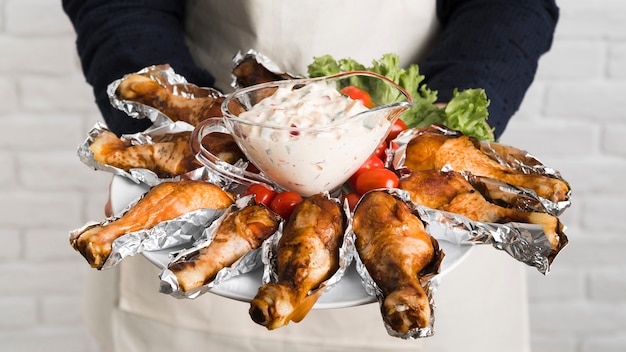
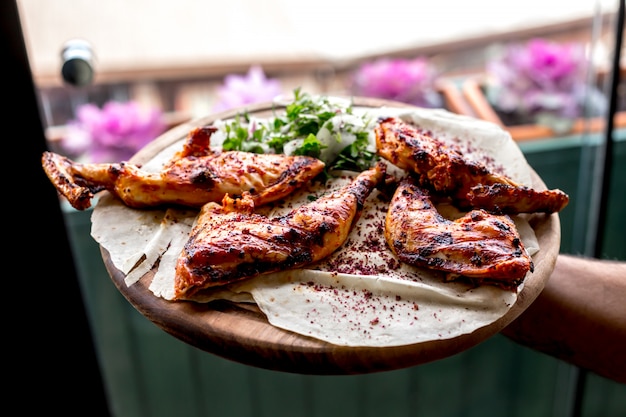
Let's face it, there's something undeniably satisfying about a perfectly grilled chicken leg. The crispy, golden skin, the juicy, tender meat, the smoky aroma that fills the air - it's a quintessential summertime treat. But achieving that perfect balance between crispy and tender can feel like a culinary gamble, especially if you're a grilling newbie. One minute you're celebrating a juicy success, the next you're staring at a dry, disappointing chicken leg.
I've been there, trust me. I've had my fair share of overcooked chicken disasters. But over the years, with a bit of trial and error (and some helpful advice from seasoned grill masters), I've cracked the code. It's not just about the grilling time, but about understanding the science behind grilling chicken and how to adjust your techniques for a flawless outcome.
So, join me on this journey as we explore the art of grilling chicken legs, from choosing the perfect cut to mastering the flip, and everything in between. We'll tackle the common questions, debunk grilling myths, and arm you with the knowledge you need to conquer the grill and create those mouthwatering, perfectly grilled chicken legs. Ready to level up your grilling game?
(Part 1) Choosing Your Chicken: The Foundation of Flavor

The journey to perfect grilled chicken legs starts with choosing the right ingredients. Not all chicken legs are created equal, and selecting the right cut is crucial for a juicy, flavorful end result.
1. Bone-in or Boneless? The Great Chicken Leg Debate
This is a topic that sparks debate among grill masters, but my personal preference is bone-in. Bone-in chicken legs, especially drumsticks and thighs, retain moisture better than boneless, skinless thighs. The bone acts like a natural insulator, preventing the meat from drying out. This results in a juicier, more flavorful chicken leg.
Now, if you're looking for a quicker cooking option or prefer a less messy presentation, boneless thighs can work. However, I find that they can sometimes be a little dry. If you choose boneless, make sure to marinate them thoroughly to lock in moisture.
2. Size Matters: Drumsticks vs. Thighs
Once you've chosen bone-in or boneless, it's time to consider the size of your chicken legs. Drumsticks are smaller and cook faster, making them a good choice for a quick weeknight meal or a smaller gathering. Thighs are larger and take a bit longer to cook, so they're perfect for larger groups or when you have a bit more time.
For a balanced meal, I often mix drumsticks and thighs for a variety of textures and cooking times. This way, you won't end up with some overcooked drumsticks while the thighs are still underdone.
3. Quality Counts: Choosing Fresh or Frozen
Always opt for fresh chicken legs whenever possible. They'll have a better flavor and texture than frozen. However, if you're in a pinch, frozen chicken legs can work. Just make sure to thaw them completely in the refrigerator before grilling, allowing plenty of time for them to thaw properly. Grilling frozen chicken legs will lead to uneven cooking and potentially dry results.
(Part 2) Prepping for Grilling: The Foundation for Flavor

Once you've chosen your perfect chicken legs, it's time to get them prepped and ready for the grill. Proper preparation is essential for ensuring juicy, flavorful results.
1. Pat Dry: The Secret to crispy skin
Before seasoning, pat your chicken legs dry with paper towels. Excess moisture can create steam, hindering the browning process and resulting in a less flavorful, soggy chicken leg. Think of it as giving your chicken legs a little spa treatment before they hit the grill.
2. Season Generously: Building the Flavor Profile
Don't be shy with the seasoning! Season your chicken legs liberally with salt, pepper, and your favorite herbs and spices. Salt is crucial for enhancing the natural flavors of the chicken, while pepper adds a touch of heat.
Feel free to get creative with your spice blends. I love to use a simple mix of paprika, garlic powder, onion powder, and a pinch of cayenne pepper for a kick. You can also experiment with lemon pepper seasoning, Italian herbs, or a blend of smoked paprika and chili powder.
3. Marinate for Extra Flavor and Tenderness (Optional)
Marinating your chicken legs in advance can add an extra layer of flavor and tenderness. The acid in the marinade helps to break down the protein, resulting in more tender meat. The marinade also infuses the chicken with delicious flavors that will permeate the meat.
My go-to marinade for chicken legs is a simple blend of olive oil, lemon juice, garlic, and fresh herbs. The olive oil adds moisture and richness, while the lemon juice helps to tenderize the chicken. You can also use other marinades, such as soy sauce, honey, or even yogurt for a tangy twist.
Just remember to marinate your chicken legs for at least 2 hours, or even overnight for maximum flavor. Store them in the refrigerator in an airtight container to prevent cross-contamination.
(Part 3) Firing Up the Grill: Creating the Perfect Environment

Now that your chicken legs are prepped and ready, it's time to get your grill fired up and ready for action. A hot grill is crucial for achieving those beautiful sear marks and creating a crispy, flavorful exterior.
1. Preheating Your Grill: Setting the Stage
Preheat your grill to medium-high heat, typically around 375-400°F (190-200°C). You can use a grill thermometer to check the temperature. A hot grill allows for faster cooking and prevents the chicken from sticking to the grates.
2. Cleaning Your Grill: A Clean Grill is a Happy Grill
Before you start grilling, take a few minutes to clean your grill. A clean grill prevents sticking and ensures even cooking. Use a grill brush to scrub the grates, removing any leftover food or debris. Then, wipe the grates with a damp cloth to remove any remaining residue.
If you're using a gas grill, preheat with the lid closed to distribute the heat evenly. Remember, a clean grill is a happy grill and will contribute to a more successful grilling experience.
(Part 4) Grilling Time: Mastering the Art of the Flip
With your grill preheated and your chicken legs prepped, it's time to hit the heat. But don't just throw them on the grill and forget about them. There are some key grilling techniques that will ensure your chicken legs come out juicy and flavorful.
1. Placement is Key: Direct vs. Indirect
When grilling chicken legs, you have two main options: direct or indirect grilling. Each method offers a different cooking style and can be chosen based on your desired outcome.
Direct Grilling: For a Quick Sear and Crispy Skin
Direct grilling involves placing your chicken legs directly over the heat source, exposing them to intense heat. This method is great for achieving a quick sear on the outside and crispy skin. Place your chicken legs on the hottest part of the grill, close the lid, and cook for about 10 minutes per side.
Indirect Grilling: For Even Cooking and Juicy Results
Indirect grilling involves cooking your chicken legs over a lower heat source, with the heat concentrated on one side of the grill. This method is ideal for cooking larger cuts of chicken, like thighs, as it prevents overcooking and ensures even doneness throughout. Place the chicken legs on the cooler side of the grill, close the lid, and cook with the lid closed, flipping them halfway through. This method will generally take a bit longer than direct grilling.
2. The One-Flip Rule: The Secret to juicy chicken
One of the biggest grilling mistakes people make is flipping the chicken too often. Each flip disrupts the cooking process and can lead to drier meat. The goal is to get that beautiful, crispy sear on the first side. Therefore, flip your chicken legs only once during the grilling process.
3. Timing is Everything: The Art of Patience
Grilling chicken legs requires patience. Don't rush the process. The key is to cook them slowly and evenly to ensure the inside is cooked through while the outside is crispy and golden. Here's a general guideline for grilling times, but remember that these are just starting points and can vary based on the size and thickness of your chicken legs:
- Drumsticks: 30-40 minutes
- Thighs: 40-50 minutes
(Part 5) Doneness Check: Ensuring Safety and Perfection
Patience is crucial, but so is ensuring your chicken is cooked through to a safe internal temperature. You want juicy, flavorful chicken, but also safe to eat. There are a few methods you can use to check for doneness.
1. The Internal Temperature Method: The Most Accurate Approach
This is the most reliable method for ensuring your chicken is cooked through. Use a meat thermometer inserted into the thickest part of the thigh, making sure to avoid touching the bone. Chicken is considered safe to eat when it reaches an internal temperature of 165°F (74°C).
If you're using a digital thermometer, it's important to have it calibrated correctly. You can test it by inserting it into a glass of ice water. The temperature should read 32°F (0°C). If it's off, adjust it accordingly.
2. The Touch Test (Optional): A Less Precise Method
This method isn't as accurate as using a thermometer, but it can be helpful as a rough guide. If the chicken feels firm to the touch and the juices run clear when you cut into it, it's likely cooked through. However, it's best to rely on the internal temperature method for accurate results.
(Part 6) Resting Your Chicken: Releasing the Flavors
After grilling, don't jump right into carving and serving. Give your chicken legs a 5-10 minute rest before cutting into them. This allows the juices to redistribute throughout the meat, resulting in a more tender and flavorful final product. Think of it as a final step in the cooking process, giving those flavors time to mingle.
While your chicken legs are resting, you can prepare your sides. You can keep them warm in a slow cooker or on a serving platter.
(Part 7) Serving Your Grilled Chicken Legs: Endless flavor combinations
Your chicken legs are perfectly grilled, juicy, and flavorful. Now it's time to serve them up and enjoy the fruits of your grilling labor. There are endless possibilities when it comes to serving grilled chicken legs. Here are a few ideas to inspire you:
1. The Classic side dish: A Timeless Pairing
Grilled chicken legs are delicious served with simple side dishes like mashed potatoes, green beans, or a classic green salad. The combination of creamy potatoes, tender green beans, and juicy chicken legs is a quintessential comfort food combination. The salad adds a refreshing touch of freshness and balance.
2. The BBQ Twist: Adding a Smoky, Tangy Kick
For a more flavorful twist, pair your grilled chicken legs with a homemade bbq sauce. The smoky, tangy notes of the BBQ sauce complement the savory flavors of the chicken. Experiment with different BBQ sauce recipes to find your favorite. You can use a classic tangy BBQ sauce, a smoky chipotle BBQ sauce, or even a sweet and spicy BBQ sauce.
You can also brush the BBQ sauce on the chicken legs while they're grilling for a glaze that caramelizes and adds extra flavor. Just be careful not to overdo it, as too much sauce can make the chicken greasy.
3. Mediterranean Flair: A Light and Refreshing Meal
For a lighter, more Mediterranean-inspired meal, serve your grilled chicken legs with a side of couscous, roasted vegetables, and a simple lemon-herb sauce. The couscous adds a fluffy texture, the roasted vegetables provide a medley of vibrant flavors, and the lemon-herb sauce adds a refreshing, tangy note. It's a light and flavorful meal that's perfect for a summer evening.
(Part 8) Beyond the Basics: Tips and Tricks for Mastering the Grill
Now that you have the fundamentals down, let's dive into some advanced tips and tricks to elevate your chicken leg grilling game. These are the little things that can make a big difference in your final results.
1. Don't Overcrowd the Grill: Spacing for Even Cooking
To ensure even cooking and prevent steam build-up, give your chicken legs some space on the grill. Don't cram them together, as this will hinder the browning process and create uneven cooking. Leave a few inches between each chicken leg to allow for proper airflow and heat distribution.
2. Don't Be Afraid to Experiment: Creating Your Signature Flavor
There's no limit to the creative flavor combinations you can create with grilled chicken legs. Don't be afraid to experiment with different herbs, spices, and sauces. You can use a simple salt and pepper seasoning, or go bold with a blend of chili powder, cumin, and paprika. The possibilities are endless, so explore and find what flavors you enjoy most.
3. Get Creative with Your Tools: Expanding Your Arsenal
For a more flavorful chicken leg, try using a grill pan or a cast-iron skillet. These tools offer more even heat distribution and can create beautiful sear marks. The weight of the pan also helps to press the chicken down, ensuring even contact with the heat source and more consistent cooking.
4. The Thermometer is Your Best Friend: For Consistent Success
To eliminate any guesswork and ensure safe and delicious results, a meat thermometer is a must-have tool for any grill master. It allows you to check the internal temperature of your chicken legs without having to cut into them, ensuring they're cooked through but not overcooked.
5. Planning Ahead: Maximizing Flavor and Efficiency
If you're planning a big grilling session, marinating your chicken legs in advance can be a game-changer. It allows the flavors to permeate the meat and ensures a more tender, flavorful result. Simply marinate your chicken legs in the refrigerator for at least 2 hours, or even overnight for maximum flavor. Just remember to store them in an airtight container to prevent cross-contamination.
(Part 9) FAQs: Addressing the Common Questions
Let's address some common questions that arise when tackling the art of grilling chicken legs.
1. Can I Grill Chicken Legs Frozen?
While it's technically possible to grill chicken legs from frozen, it's not recommended. Frozen chicken legs take longer to cook and won't develop a nice sear. They also tend to cook unevenly, leading to dry, overcooked meat. Always thaw your chicken legs completely in the refrigerator before grilling for the best results.
2. How Long Do I Grill Chicken Legs for a Juicy Finish?
The best way to achieve juicy chicken legs is to cook them over medium-high heat and check for doneness using a meat thermometer. Aim for an internal temperature of 165°F (74°C). This ensures that the chicken is cooked through but not dry.
Remember to adjust your grilling time based on the size and thickness of your chicken legs. Smaller drumsticks will cook faster than larger thighs.
3. What If My Chicken Legs Are Too Big?
If you have large chicken legs, you might want to try indirect grilling. This method helps to prevent overcooking and ensures even doneness throughout. You can also cut the chicken legs into smaller pieces if needed. This will allow for faster cooking and more even heat distribution.
4. Can I Grill Chicken Legs with Other Proteins?
Absolutely! You can grill chicken legs alongside other proteins like steak, burgers, or sausages. Just make sure to give each protein enough space to cook properly. This ensures that each protein cooks evenly without overcrowding the grill.
5. What Should I Do If My Chicken Legs Are Overcooked?
It's happened to the best of us. If your chicken legs are slightly overcooked, they might be dry. However, there are a few things you can do to salvage the situation. You can try adding a little bit of sauce or gravy to help moisten the meat. You can also try shredding the chicken and using it in a salad or other dish.
Remember, overcooked chicken is still edible, it just might not be as juicy and flavorful. The key is to try to prevent overcooking in the first place by using a meat thermometer and adjusting your grilling time as needed.
(Part 10) The Takeaway: Embrace the Grill Master Within
Grilling chicken legs doesn't have to be a mystery. By following the tips and tricks in this guide, you'll be able to grill delicious, juicy chicken legs every time. So, gather your ingredients, fire up your grill, and get ready for a delicious barbecue feast!
Remember, the key to success is understanding the science behind grilling, embracing patience, and most importantly, enjoying the process. Happy grilling!
Everyone is watching

Prime Rib Roast Cooking Time Chart: Per Pound Guide
Cooking TipsPrime rib roast. Just the name conjures images of lavish dinners, crackling fires, and hearty laughter. It’s ...

How Long to Bake Potatoes in the Oven (Perfect Every Time)
Cooking TipsBaked potatoes are a staple in my kitchen. They're incredibly versatile, delicious, and surprisingly easy to m...

Perfect Rice Every Time: The Ultimate Guide to Cooking Rice
Cooking TipsAs a self-proclaimed foodie, I've always been a bit obsessed with rice. It's the foundation of countless cuisi...

The Ultimate Guide to Cooking Asparagus: Tips, Techniques, and Recipes
Cooking TipsAsparagus. The mere mention of this spring delicacy conjures up images of vibrant green spears, crisp and burs...

Ultimate Guide to Cooking the Perfect Thanksgiving Turkey
Cooking TipsThanksgiving. Just the word conjures up images of overflowing tables laden with delicious food, the scent of r...
