Part 1: choosing the right cut

Alright, first things first, we need the right piece of meat. Don't get confused between a tenderloin and a sirloin! A tenderloin, also known as a filet mignon, is that long, cylindrical muscle that runs along the backbone. It's naturally super tender, and it's a lean cut of meat. Look for a tenderloin that's about 1 1/2 to 2 inches thick, perfect for achieving that lovely pink centre. Ask your butcher for a good quality tenderloin – they'll know their stuff. Check the colour; it should be a rich red with no discolouration. Trust me, it makes all the difference!
Part 2: Preparing the Tenderloin

Now, we've got our tenderloin, so let's prep it. First, we need to get rid of any excess fat or that annoying silver skin. Silver skin is that tough, silvery membrane that can make the meat tough. You can remove it with a sharp knife or a pair of kitchen shears. Be careful! Once you've removed the excess fat and silver skin, pat the tenderloin dry with paper towels – this helps it brown nicely when cooking. You want that gorgeous golden crust!
Part 3: Seasoning and Marinating

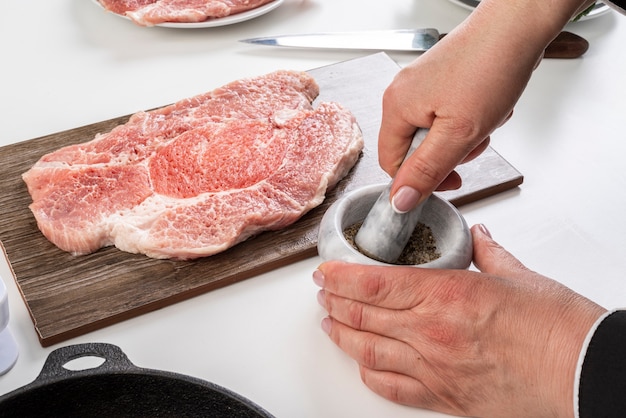
Here's where we have some fun! Seasoning is all about adding flavour and depth. I'm a fan of keeping it simple, but go crazy if you like! Salt and pepper are a classic, but you can also add garlic powder, onion powder, paprika, or even a bit of cayenne pepper for a touch of heat. Want to get really adventurous? Try a marinade! Marinades help tenderize the meat and infuse it with flavour. A simple marinade of olive oil, lemon juice, and herbs is great, but you can also get creative with soy sauce, honey, or balsamic vinegar. Let your imagination run wild!
Part 4: Grilling
4.1: Setting up the Grill
Grilling is a classic way to cook tenderloin – it gives it that smoky flavour. You need to get your grill nice and hot. I use a gas grill, but a charcoal grill works too. Aim for between 450 and 500 degrees Fahrenheit. Give those grill grates a good scrub with a wire brush before you start so your tenderloin doesn’t stick. Nobody wants a stuck tenderloin!
4.2: Cooking the Tenderloin
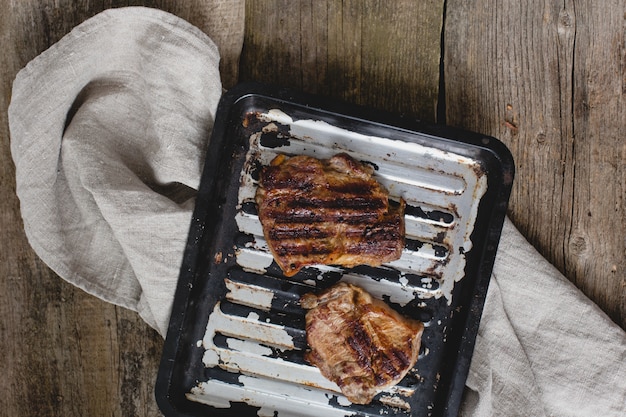
Now, let's grill! Place the tenderloin on the grill and close the lid. Cook for 5-7 minutes per side. After the initial grilling, reduce the heat to medium and continue cooking for another 5-7 minutes per side, or until the internal temperature reaches 135 degrees Fahrenheit for medium-rare. If you prefer your tenderloin well-done, cook it until the internal temperature reaches 145 degrees Fahrenheit.
The best way to check the temperature is to use a meat thermometer. It's the most accurate way to make sure your tenderloin is cooked to your liking. And remember, we want a nice golden brown crust on the outside and a juicy, pink centre. This is where the magic happens!
4.3: Resting the Tenderloin
This is crucial, so don’t skip this step! Let the tenderloin rest for 10-15 minutes before slicing. This lets the juices redistribute, giving you a much more tender and juicy steak. Cover it loosely with foil and let it relax while you prepare your sides. It's like a little mini spa treatment for your tenderloin. It deserves it after all that heat!
Part 5: Roasting
5.1: Preheating the Oven
Roasting is a great option if you're cooking for a crowd. Start by preheating your oven to 400 degrees Fahrenheit. You'll need a roasting pan for this. Line the roasting pan with foil for easy cleanup later. I always do this – it saves so much time and effort after dinner!
5.2: Cooking the Tenderloin
Place the seasoned tenderloin in the roasting pan and cook for 15-20 minutes. Then, reduce the oven temperature to 350 degrees fahrenheit and cook for another 15-20 minutes, or until the internal temperature reaches 135 degrees Fahrenheit for medium-rare. Again, if you want it well-done, cook it until the internal temperature reaches 145 degrees Fahrenheit.
You'll want to look for a nice golden brown crust on the outside and that lovely pink centre. Don't forget to use a meat thermometer to check the internal temperature for the perfect level of doneness!
5.3: Resting the Tenderloin
Once your tenderloin is cooked, remove it from the oven and let it rest for 10-15 minutes before slicing. This is essential for letting those lovely juices settle back into the meat, so don't skip this step. Cover it loosely with foil and let it rest. It's all about getting that perfect, juicy, tender result!
Part 6: Pan-Searing
6.1: Heating the Pan
Pan-searing is perfect if you're short on time or cooking a smaller tenderloin. Heat a large skillet or cast-iron pan over medium-high heat. Add a tablespoon or two of olive oil to the pan. You want that oil to shimmer – that's how you know it's hot enough!
6.2: Cooking the Tenderloin
Once the oil is shimmering, place the tenderloin in the pan. Cook for 3-4 minutes per side, or until you get a nice crust forming. Reduce the heat to medium and continue cooking for another 5-7 minutes per side, or until the internal temperature reaches 135 degrees Fahrenheit for medium-rare. Remember, if you want a well-done tenderloin, cook it until the internal temperature reaches 145 degrees Fahrenheit.
Keep an eye on it. We want a crispy exterior and a juicy, pink centre. Use that meat thermometer to check the internal temperature and make sure it's cooked to your liking!
6.3: Resting the Tenderloin
Once again, let the tenderloin rest for 10-15 minutes before slicing. This is vital for a juicy, delicious result. Cover it loosely with foil and let those juices redistribute. You'll be glad you did this step!
Part 7: Slicing the Tenderloin
Now that your tenderloin is perfectly cooked and rested, it's time to slice it. I prefer to slice it thinly, about 1/2 inch thick. Use a sharp knife to slice against the grain. This means slicing perpendicular to the direction of the muscle fibres. This helps to tenderize the meat and makes it easier to chew.
Imagine the muscle fibres as tiny little strings. Cutting against the grain breaks those strings, so you get a tender, more manageable bite. It makes a huge difference!
Part 8: Serving and Enjoying
Alright, your hard work is paying off! Now it's time to enjoy the fruits of your labor! Serve your tenderloin with your favourite sides – maybe mashed potatoes, roasted vegetables, or a refreshing salad. And don't forget a delicious sauce! A simple pan sauce made with the drippings from the pan is absolutely amazing. It's a great way to use the flavour you've created!
This is the moment you've been waiting for – savor every bite of your perfectly cooked tenderloin!
Part 9: Tips and Tricks
Here are a few extra tips and tricks to ensure your tenderloin is a culinary triumph:
- Don't overcook it! Tenderloin is best cooked to medium-rare or medium. Overcooked tenderloin will be dry and tough. You want that juicy tenderness.
- Use a meat thermometer. This is the best way to ensure your tenderloin is cooked to your desired level of doneness. You don't want to guess – get that thermometer out!
- Don't overcrowd the pan. If you're pan-searing or grilling, don't overcrowd the pan. This will lower the temperature of the pan and prevent the tenderloin from browning properly. Give it some space to breathe.
- Let it rest! I can't stress this enough. It's essential for ensuring that juicy, tender tenderloin. Give it a chance to relax and redistribute those juices.
Part 10: FAQs
10.1: What is the difference between a tenderloin and a sirloin?
A tenderloin is a long, cylindrical muscle that runs along the backbone, while a sirloin is a cut of meat that comes from the rear end of the cow. Sirloin is generally a tougher cut of meat. They are two different cuts of meat, so don't mix them up!
10.2: How do I know when my tenderloin is done?
The best way to tell if your tenderloin is done is to use a meat thermometer. The internal temperature should be 135 degrees Fahrenheit for medium-rare or 145 degrees Fahrenheit for medium. If you don't have a meat thermometer, you can also check for doneness by pressing on the tenderloin. If it feels firm and springs back, it's done. If it feels soft and squishy, it's not done yet.
10.3: What are some good side dishes for tenderloin?
Tenderloin goes well with a variety of side dishes. Some of my favourites include:
- Mashed potatoes
- Roasted vegetables
- green beans
- Asparagus
- Salad
- A simple pasta dish
- A creamy risotto
The possibilities are endless! Choose sides that complement the richness of the tenderloin. Think about creating a balance of flavours and textures. A nice, fresh salad is a great way to cut through the richness of the meat.
10.4: Can I cook a tenderloin in a slow cooker?
While you can technically cook a tenderloin in a slow cooker, it's not the best way to do it. Slow cookers are designed for tough cuts of meat, and tenderloin is already a tender cut of meat. You're likely to end up with a dry and tough tenderloin if you cook it in a slow cooker. Stick to grilling, roasting, or pan-searing for the best results.
10.5: Can I freeze a tenderloin?
Yes, you can freeze a tenderloin, but it's best to freeze it before it's been cooked. Wrap it tightly in plastic wrap and then aluminum foil. You can freeze a tenderloin for up to 3 months. Just make sure to thaw it in the refrigerator for 24 hours before cooking.
Freezing and thawing can affect the texture of the meat, so it's always better to cook it fresh if possible.
Part 11: Conclusion
So there you have it, a complete guide to cooking tenderloin. It's a fantastic cut of meat that's perfect for any special occasion. With a little practice, you'll be able to cook a tenderloin that's juicy, tender, and flavourful. Just remember to choose the right cut, season it well, and cook it to your desired level of doneness. And don't forget to let it rest! Happy cooking!
Everyone is watching

Perfect Rice Every Time: The Ultimate Guide to Cooking Rice
Cooking TipsAs a self-proclaimed foodie, I've always been a bit obsessed with rice. It's the foundation of countless cuisi...

Prime Rib Roast Cooking Time Chart: Per Pound Guide
Cooking TipsPrime rib roast. Just the name conjures images of lavish dinners, crackling fires, and hearty laughter. It’s ...

The Ultimate Guide to Cooking Asparagus: Tips, Techniques, and Recipes
Cooking TipsAsparagus. The mere mention of this spring delicacy conjures up images of vibrant green spears, crisp and burs...

Ultimate Guide to Cooking the Perfect Thanksgiving Turkey
Cooking TipsThanksgiving. Just the word conjures up images of overflowing tables laden with delicious food, the scent of r...

How Long to Bake Potatoes in the Oven (Perfect Every Time)
Cooking TipsBaked potatoes are a staple in my kitchen. They're incredibly versatile, delicious, and surprisingly easy to m...
