It's a universal culinary dilemma: You've got your chickpeas soaking, plump and promising, but the question looms – how long do you cook them for? It's a question that's haunted my cooking escapades for years, particularly when aiming for that elusive, melt-in-your-mouth texture that makes you want to lick the bowl clean.
I've been on a quest, you see, a journey through the world of chickpea cooking, from mushy mishaps to tough, chewy chickpeas that felt like tiny marbles in my mouth. It's been a rollercoaster of textures, but through trial and error, I've finally cracked the code to consistently achieving perfectly tender, flavorful chickpeas.
So, grab your trusty pot, a pinch of curiosity, and get ready to embark on this chickpea cooking odyssey. This isn't just a guide, it's a journey into the heart of chickpea perfection, a path to becoming a true chickpea connoisseur.
(Part 1) The Importance of Soaking: Setting the Stage for Chickpea Perfection
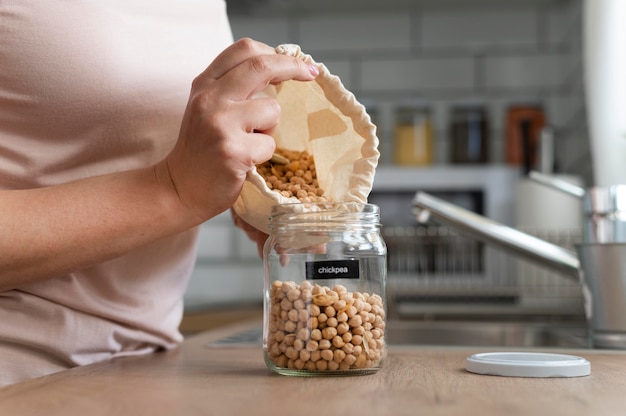
Before we even delve into cooking times, let's talk about the fundamental step that sets the stage for culinary chickpea success – soaking. It's like giving those little legumes a spa day, a chance to rejuvenate and rehydrate. Soaking not only makes them softer and quicker to cook, but it also helps to break down certain compounds that can cause digestive upset, which is a win-win in my book.
Soaking Time: A Balancing Act of Time and Texture
I'm a firm believer in overnight soaking – giving them 8-12 hours lets them fully plump up and transform. But if you're short on time, a quick soak of 2-4 hours will still do the trick. Just remember, the longer the soak, the softer they'll become, and the quicker they'll cook.
Tips for Soaking: Elevate Your Chickpea Game
- Spacious Soaking: Use a large bowl or container, as the chickpeas will expand significantly during soaking.
- Drowning in Water: Cover the chickpeas generously with cold water, at least 2-3 inches above their level.
- A Pinch of Salt: Add a pinch of salt to the soaking water – it helps enhance the flavor and creates a more flavorful base for cooking.
- Thorough Rinse: After soaking, rinse the chickpeas thoroughly to remove any sediment or debris that might have accumulated, ensuring a clean start for cooking.
(Part 2) Understanding the Basics: Mastering the Art of Chickpea Cooking
Now that our chickpeas are plump and ready to go, let's talk about the fundamental methods for cooking them, understanding their nuances and how they impact texture.
Cooking Methods: Choosing Your Chickpea cooking style
There are two main methods for cooking chickpeas, each with its own benefits and considerations:
- Stovetop: This is my go-to method, especially when I want complete control over the cooking process. It's simple, reliable, and allows you to adjust the cooking time based on your desired texture.
- pressure cooker: A pressure cooker is a time-saving wonder, particularly for busy weeknights. But keep in mind that the intense heat can lead to softer chickpeas, so adjust your cooking time accordingly.
Essential Tools: The Chickpea Cooking Toolkit
You'll need a few basic tools to embark on your chickpea cooking journey:
- Spacious Pot: A large pot or saucepan with a lid, big enough to comfortably hold the chickpeas and water.
- Draining Device: A slotted spoon or strainer to easily drain the chickpeas after cooking or soaking.
- Measuring Tool: A measuring cup for accurately adding the required amount of water.
- Stirring Buddy: A spoon for stirring the chickpeas during cooking, ensuring even heating.
(Part 3) Mastering the Stovetop Method: A Step-by-Step Guide
Let's dive into the stovetop method, my personal favourite for its versatility and control over texture.
Step 1: Draining and Rinsing: A Fresh Start
Begin by draining the soaking water and rinsing the chickpeas thoroughly under cold running water. This removes any sediment and prepares them for cooking.
Step 2: Fresh Water and Salt: Setting the Stage for Flavor
Add the rinsed chickpeas to your pot or saucepan. Fill the pot with fresh cold water, ensuring the water level is at least 2 inches above the chickpeas. Add a pinch of salt to the water – it's not just about seasoning, but about enhancing the flavor of the chickpeas and creating a tastier base for cooking.
Step 3: Boiling and Simmering: The Crucial First Steps
Bring the water to a rolling boil over high heat. This initial boil helps to activate the cooking process. Once boiling, reduce the heat to a low simmer, cover the pot with a lid, and let the chickpeas simmer gently.
Step 4: The Art of Time: Finding the Perfect Texture
Now comes the crucial part – the cooking time. It's not a one-size-fits-all scenario, as factors like:
- Age of Chickpeas: Older chickpeas may take longer to cook than fresher ones.
- Size of Chickpeas: Larger chickpeas require more cooking time.
- Desired Texture: Do you envision soft and creamy chickpeas, or slightly firm ones for salads?
As a general guideline, soaked chickpeas typically cook for 45-60 minutes on the stovetop until they're tender but still hold their shape. The fork test is your trusty companion. Gently insert a fork into a chickpea. If it goes through easily with minimal resistance, they're ready! If it meets resistance, they need more cooking time.
(Part 4) The Power of the Pressure Cooker: A Quick and Efficient Option
For those who appreciate the speed and efficiency of pressure cooking, here's how to harness its power for your chickpeas.
Step 1: Draining and Rinsing: A Clean Slate
Just like with the stovetop method, begin by draining the soaking water and rinsing the chickpeas thoroughly under cold running water. This ensures a clean start for pressure cooking.
Step 2: Pressure Cooker Prep: Getting Ready for High-Pressure Cooking
Add the rinsed chickpeas to your pressure cooker along with fresh water, covering the chickpeas by at least 2 inches. Add a pinch of salt, and you're ready to go.
Step 3: Pressure Cooking Time: A Time-Saving Technique
Bring the pressure cooker to high pressure, then reduce the heat to maintain pressure. Cook for 20-25 minutes for tender chickpeas.
Remember, pressure cooking tends to result in softer chickpeas compared to the stovetop method. If you prefer a firmer texture, reduce the cooking time by a few minutes.
(Part 5) Testing for Doneness and How to Fix Overcooked Chickpeas: A Troubleshooting Guide
The moment of truth has arrived – testing for doneness! Let's make sure your chickpeas are cooked to perfection.
The Fork Test: Your Chickpea Doneness Indicator
The fork test is the most reliable way to determine if your chickpeas are cooked. Gently insert a fork into a chickpea. If it goes through easily with minimal resistance, they're done! If they're still firm, they need more cooking time.
Overcooked? Don't Despair: Rescue Your Chickpeas
Don't panic if you've overcooked your chickpeas and they've become a little too mushy. There's a quick and easy fix!
- Draining and Rinsing: Remove the chickpeas from the pot and drain them thoroughly.
- Cooling Time: Spread the chickpeas on a baking sheet lined with parchment paper and allow them to cool completely. This helps to firm them up a bit.
- New Life: You can now use the overcooked chickpeas in recipes where texture isn't as critical, like hummus, soups, or dips.
(Part 6) Beyond the Basics: Flavoring Options and Uses: Unlocking Chickpea Versatility
Now that you've mastered the art of cooking chickpeas, let's explore the exciting world of flavoring options and the countless ways to use these versatile legumes.
Flavor Boosters: Add a Touch of Magic
Don't just stop at salt! Experiment with these flavor-enhancing ingredients:
- Spice Up Your Life: Cumin, coriander, turmeric, paprika, or smoked paprika add warmth and depth.
- Herbs for Freshness: Fresh parsley, cilantro, dill, or mint bring a refreshing touch.
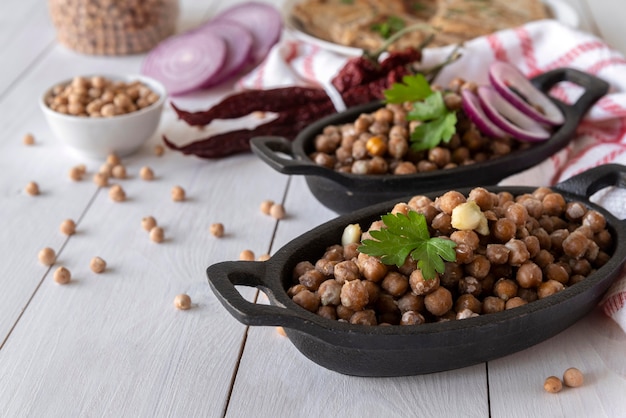
A World of Chickpea Possibilities: Creative Chickpea Cuisine
Cooked chickpeas are incredibly versatile, making them a staple in my kitchen. Here are just a few of the ways you can use them:
- Salads: Add a protein boost and delightful texture to your favourite salads.
- Hummus: The classic chickpea dip is a must-try – a creamy, flavorful delight.
- Soups: Thicken and add flavor to soups, stews, and chilis.
- chickpea fritters are a classic street food, a crunchy treat.
(Part 7) Storing and Freezing Cooked Chickpeas: Making Life Easier
Want to streamline your cooking routine? Cook a large batch of chickpeas and store them for later use.
Storage Tips: Keep Your Chickpeas Fresh
- Refrigerator: Store cooked chickpeas in an airtight container in the refrigerator for up to 5 days.
(Part 8) Troubleshooting Common Chickpea Cooking Problems: Conquering Chickpea Challenges
Let's face it, even the most seasoned cooks encounter hiccups in the kitchen. Here are some common problems you might face when cooking chickpeas and their solutions:
Problem Solution Chickpeas are too firm Cook them for longer, checking them every 10 minutes. If they're still too firm, add a little more water and continue cooking. Chickpeas are too mushy Reduce the cooking time next time. You can also try draining the chickpeas and letting them cool to firm up a bit. Chickpeas have a strong, beany flavour Soak them for longer or try using a different brand of chickpeas. Adding a pinch of baking soda to the soaking water can also help. Chickpeas have a metallic taste Use a non-reactive pot, like stainless steel or enamelware. Avoid using aluminum pots, as they can give chickpeas a metallic taste. (Part 9) FAQs: Addressing Your Chickpea Queries
1. Can I cook chickpeas without soaking them?
Yes, but it will take significantly longer. It might take up to 2-3 hours on the stovetop. Soaking is highly recommended for quicker cooking and better texture.
2. Should I add salt to the cooking water?
Yes, adding salt to the cooking water enhances the flavor and creates a more flavorful base for the chickpeas. But avoid adding too much salt, as it could make the chickpeas too salty.
3. Can I cook chickpeas in a slow cooker?
Yes, but it may take longer than other methods. Soak the chickpeas as usual, then add them to the slow cooker with enough water to cover them. Cook on low for 6-8 hours, or on high for 3-4 hours.
4. What if I forget to soak my chickpeas?
Don't despair! Rinse the chickpeas well and add them to a pot of cold water. Bring the water to a boil, then reduce the heat and simmer for 2-3 hours, or until tender. It will take longer than if you'd soaked them, but it's still doable.
5. How long can I keep cooked chickpeas in the refrigerator?
Cooked chickpeas can be stored in the refrigerator for up to 5 days in an airtight container. They'll keep their texture and flavour best within those 5 days.
There you have it! Now you're a chickpea expert, equipped with the knowledge to cook them to perfection, unlock their versatility, and enjoy their deliciousness. So go forth, experiment, and let those chickpeas shine in your culinary creations!
Everyone is watching

Prime Rib Roast Cooking Time Chart: Per Pound Guide
Cooking TipsPrime rib roast. Just the name conjures images of lavish dinners, crackling fires, and hearty laughter. It’s ...

How Long to Bake Potatoes in the Oven (Perfect Every Time)
Cooking TipsBaked potatoes are a staple in my kitchen. They're incredibly versatile, delicious, and surprisingly easy to m...

Perfect Rice Every Time: The Ultimate Guide to Cooking Rice
Cooking TipsAs a self-proclaimed foodie, I've always been a bit obsessed with rice. It's the foundation of countless cuisi...

The Ultimate Guide to Cooking Asparagus: Tips, Techniques, and Recipes
Cooking TipsAsparagus. The mere mention of this spring delicacy conjures up images of vibrant green spears, crisp and burs...

Ultimate Guide to Cooking the Perfect Thanksgiving Turkey
Cooking TipsThanksgiving. Just the word conjures up images of overflowing tables laden with delicious food, the scent of r...