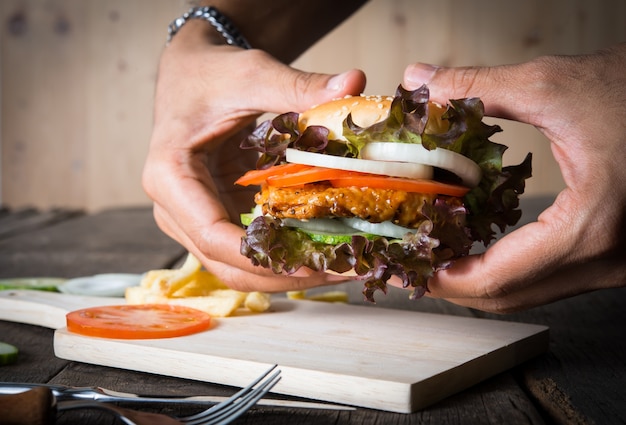
I've always been a bit of a burger fanatic. There's something about the simple yet satisfying combination of a juicy patty, soft bun, and all the delicious toppings that just hits the spot. But you know what really grinds my gears? A burger that's overcooked and dry, or worse, still pink in the middle. That's a culinary crime, in my book!
So, I’ve spent a fair bit of time perfecting my burger-making skills, and one of the key things I’ve learned is the importance of cooking time. You can have the best ingredients and the most elaborate toppings, but if your patty isn't cooked to your liking, the whole experience falls flat. It's like trying to build a castle on a wobbly foundation - it's doomed from the start!
This guide is all about demystifying the art of cooking a perfect hamburger on the stovetop. We’ll cover everything from choosing the right pan and understanding the different levels of doneness to ensuring a juicy and flavorful patty every time. We'll even explore some fun variations and my personal favorite recipe to get your burger game on point!
(Part 1) The Basics of Stovetop burger cooking

Before we delve into the nitty-gritty of cooking times, let's get the basics sorted. Here's what you need to know to get started:
Choosing the Right Pan: The Foundation of a Great Burger
The first step is selecting the right pan. I prefer to use a cast iron skillet for its excellent heat retention and even cooking. Cast iron also gives the burgers a lovely sear, adding a touch of crispy goodness. However, a heavy-bottomed stainless steel pan will also do the trick.
Whatever pan you choose, make sure it's large enough to accommodate your burgers without overcrowding. Overcrowding the pan can cause the burgers to steam instead of sear, which can lead to a less flavorful patty. Remember, we want that beautiful sear, not a soggy mess!
Prepping Your Burgers: The Art of Patty Perfection
Now, let's talk about prepping your patties. This is where you can really make your burgers shine.
- Start with good quality ground beef. I usually opt for 80/20 or 85/15 ground beef for the perfect balance of fat and lean. The fat content adds flavor and juiciness, while the lean portion ensures the patty doesn't become too greasy.
- Shape your patties. Aim for a thickness of about 1 inch. You can make them slightly thicker for a more hearty burger. Don’t overwork the meat or pack it too tightly, as this can lead to a dry patty. We want the meat to be loose and airy, allowing the juices to flow freely.
- Season your patties. I like to keep it simple with salt and pepper, but you can get creative with other seasonings like garlic powder, onion powder, or paprika. Just be mindful not to go overboard, you want to complement the flavor of the beef, not drown it out.
- Make an indentation. Use your thumb to make a small indentation in the center of each patty. This helps prevent the burgers from puffing up too much while they cook. The indentation allows the patty to cook evenly, preventing a dome shape that can trap moisture and lead to uneven doneness.
Now, you’re ready to cook! The stage is set, and the show is about to begin.
(Part 2) Cooking Times and Doneness: Understanding the Different Levels

Okay, here’s where things get really interesting: understanding the different levels of doneness.
The recommended internal temperature for safe consumption is 160°F (71°C). This ensures the burger is cooked through and safe to eat. But beyond safety, it’s about finding the right doneness for your personal taste.
I like to use a meat thermometer to ensure my burgers are cooked to my liking. It’s a great tool for beginners, and it helps to eliminate any guesswork. You don't want to end up with a burger that's either undercooked or overdone.
Understanding Doneness: A Guide to Personal Preference
- Rare: The center is cool and red, with a very slight pink color around the edges. The texture is soft and juicy, almost like a steak. This is for the adventurous eaters who like their burgers on the less cooked side.
- Medium Rare: The center is slightly warm and pink, and the edges are a bit more cooked. The texture is still juicy and tender, a perfect balance between cooked and raw. This is a popular choice for many burger enthusiasts.
- Medium: The center is warm and mostly pink, with the edges being more brown. The texture is firm and slightly springy, indicating a more cooked patty. This is a safe bet for those who prefer a more cooked burger but still want to enjoy some juiciness.
- Medium Well: The center is mostly brown, with a slight pink tinge. The texture is firmer and less juicy, but still has a hint of pink in the center. This is a good choice if you want a more cooked burger with a bit of pinkness.
- Well Done: The center is completely brown, with no pink at all. The texture is dry and firm, the most well-cooked level. This is for those who prefer their burgers well done and are less concerned with juiciness.
Cooking Times (Approximate): A Guide to Timing Perfection
It’s crucial to remember that these cooking times are just estimates and can vary depending on the thickness of your patties, the heat of your pan, and the type of meat you’re using.
Always use a meat thermometer to ensure your burgers are cooked to your liking. It's the ultimate tool for burger perfection!
| Doneness | Time Per Side (Minutes) | Internal Temperature (°F) |
|---|---|---|
| Rare | 2-3 | 125-130 |
| Medium Rare | 3-4 | 130-140 |
| Medium | 4-5 | 140-150 |
| Medium Well | 5-6 | 150-160 |
| Well Done | 6-7 | 160 |
You'll notice that the chart doesn't offer exact cooking times. This is because the thickness of your patty plays a crucial role in determining the cook time. Thicker patties will need a bit longer, while thinner patties will cook faster.
Always check the internal temperature of your burgers with a meat thermometer for an accurate reading of their doneness.
(Part 3) Mastering the Stovetop Sizzle: The Art of the perfect burger Cook

Now, let’s get into the specifics of cooking burgers on the stovetop.
1. Preheat Your Pan: Setting the Stage for Sizzling Success
Start by preheating your pan over medium-high heat. This is crucial to ensure that the burgers develop a nice sear and cook evenly. You can tell your pan is ready when a drop of water sizzles and evaporates immediately.
2. Add the Burgers: A Gentle Introduction to the Heat
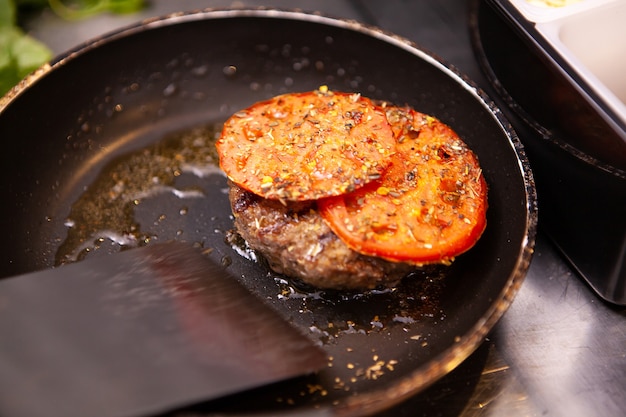
Gently place your patties in the hot pan, making sure not to overcrowd the pan. You want to ensure that each patty has enough space to cook evenly and develop a crispy crust.
Don’t touch the burgers for the first 3-4 minutes! Resist the urge to prod or flip them too early. Give the patties time to develop a nice sear on the first side. This will create a delicious crust and lock in the juices.
3. Flip and Cook the Other Side: The Second Act of Burger Perfection
Once the first side is nicely browned, flip the burgers using a spatula. The second side will cook a bit faster, so keep an eye on them and adjust the heat accordingly. You want to ensure both sides are cooked to your liking.
4. Add Toppings (Optional): The Finishing Touches
Once the burgers are cooked to your liking, you can add your toppings. I like to add cheese during the last minute of cooking, so it melts nicely.
If you're adding toppings like onions or mushrooms, I recommend cooking them separately to ensure they don't steam the burger. This ensures they retain their texture and flavor.
(Part 4) Tips and Tricks: The Secrets to Burger Mastery
Here are some tips and tricks that I’ve picked up over the years.
- Don't press down on the burgers. This squeezes out the juices and results in a drier patty. Let the burgers cook undisturbed, and they'll turn out juicy and flavorful.
- Use a meat thermometer. It’s a foolproof way to ensure your burgers are cooked to your liking and to eliminate any guesswork. No more overcooked or undercooked disasters!
- Rest your burgers. After cooking, let the burgers rest for a few minutes before assembling your burgers. This allows the juices to redistribute, resulting in a more juicy and flavorful patty.
- Don't overcook your burgers. This is probably the biggest mistake people make when cooking hamburgers. Overcooked burgers are dry and tough, so make sure to cook them to your preferred level of doneness.
- Season your burgers generously. Salt and pepper are essential, and you can also add other seasonings like garlic powder, onion powder, paprika, or chili powder. Let your creativity flow!
- Experiment with different toppings. There are endless possibilities when it comes to burger toppings. Get creative and see what you like best. The world is your oyster!
(Part 5) FAQs: The Burger Q&A Session
1. How do I know if my burger is cooked?
The best way to know if your burger is cooked is by using a meat thermometer. Insert the thermometer into the thickest part of the burger, and check the temperature against the chart in Part 2. It's the most reliable way to ensure your burger is cooked to your liking.
2. Can I cook frozen burgers on the stovetop?
Yes, you can cook frozen burgers on the stovetop. Just add a few minutes to your cooking time to account for the extra time it takes for the burgers to thaw. Be sure to monitor the burgers carefully to ensure they cook evenly.
3. What if my burgers are sticking to the pan?
If your burgers are sticking to the pan, it's likely because the pan wasn't hot enough when you added the burgers. Try preheating your pan over higher heat next time.
You can also try greasing the pan with a bit of butter or oil before adding the burgers. This will help prevent them from sticking.
4. What are some good toppings for hamburgers?
The possibilities are endless when it comes to burger toppings! Some of my favorites include:
- Cheese: Cheddar, Monterey Jack, American, Swiss, or blue cheese. Each cheese adds its own unique flavor and texture.
- Vegetables: Lettuce, tomato, onion, pickles, mushrooms, avocado, or jalapenos. Add a burst of freshness and flavor to your burger with these delicious vegetables.
- Sauces: Ketchup, mustard, mayonnaise, bbq sauce, or sriracha. A touch of sauce can elevate your burger to new heights.
- Other: Bacon, caramelized onions, fried egg, or crispy onion rings. These toppings add a delightful crunch and richness to your burger.
5. How can I make my burgers juicier?
Here are a few tips for making juicier burgers:
- Use a good quality ground beef with a higher fat content. The fat adds flavor and juiciness.
- Don't overwork the meat when you're shaping the patties. Overworking the meat can squeeze out the juices, leading to a drier patty.
- Make a small indentation in the center of each patty to prevent them from puffing up too much. This helps the patty cook evenly.
- Don't press down on the burgers while they're cooking. This squeezes out the juices.
- Let the burgers rest for a few minutes after cooking. This allows the juices to redistribute, resulting in a more juicy burger.
(Part 6) Beyond the Basics: Exploring Different Techniques
Now that you’ve got the basic burger-making down, let’s delve into some more advanced techniques.
1. reverse searing: A Masterful Technique for Even Cooking
Reverse searing is a technique that involves cooking the burgers slowly over low heat until they reach your desired internal temperature, then finishing them with a quick sear over high heat.
This method helps to ensure that the burgers cook evenly and stay juicy. It’s perfect for those who like their burgers cooked medium or well done.
2. Using a Burger Press: Shaping Perfection
A burger press is a handy tool that can help you create perfectly formed patties with uniform thickness. It also helps to prevent the burgers from puffing up too much while they cook. The result is a burger that cooks evenly and looks beautiful.
3. The Smash Burger Technique: A Crispy Crust Revolution
Smash burgers are all the rage these days, and for good reason! This technique involves smashing the patties flat on a hot pan to create a crispy, flavorful crust.
The key to this technique is using a heavy pan and a spatula to flatten the burgers as quickly as possible. This creates a thin, crispy crust that adds a delightful crunch to your burger.
(Part 7) Experimenting with Flavors: Unleashing Your Burger Creativity
The beauty of burger making lies in the endless possibilities for flavor. Let’s explore some ideas to elevate your burger game.
1. Adding Flavors to the Meat: Beyond Salt and Pepper
Instead of just salt and pepper, get creative with your seasoning. Try adding:
- Garlic powder and onion powder: This classic combination adds a savory depth to your burgers.
- Paprika: Smoked paprika brings a hint of smokiness, while sweet paprika adds a touch of sweetness.
- Chili powder: A little kick of heat can really liven up your burgers.
- Herbs: Try adding fresh or dried herbs like thyme, rosemary, or oregano. They add a wonderful aromatic dimension to your burger.
2. Unique Burger Toppings: Beyond the Ordinary
Step outside the box with your toppings. Consider:
- Caramelized onions: These add a sweet and savory element to your burger.
- Roasted peppers: Roasted red peppers provide a sweet and smoky flavor.
- pickled onions: A tangy and crunchy topping that adds a nice contrast.
- Avocado: Creamy and flavorful, avocado is a great healthy addition.
- Fried egg: A classic topping that adds richness and protein.
- Bacon: Always a crowd-pleaser!
(Part 8) Burgers Around the World: A Global Burger Tour
The burger is a truly global phenomenon. Let's explore some variations from around the world.
1. The Cheeseburger (United States): A Classic American Favorite
The cheeseburger is the quintessential American burger. It’s a simple yet delicious combination of a beef patty, cheese, and your favorite toppings.
2. The Hamburger (Germany): The Original Burger
The Hamburger is a German invention, consisting of a patty made from ground beef and spices. It's often served on a bun with ketchup, mustard, and pickles.
3. The Kobe Beef Burger (Japan): A Luxurious Indulgence
Kobe beef is a type of Japanese wagyu beef, known for its rich flavor and buttery texture. A Kobe beef burger is a luxurious treat.
4. The “Tartare” Burger (France): A Raw and Flavorful Experience
The French "Tartare" Burger features a raw beef patty that's marinated in seasonings like mustard, capers, and shallots. It’s typically served with a fried egg and a side of frites.
(Part 9) My Favorite burger recipe: A Recipe for Success
Now, let me share my go-to burger recipe that’s a crowd-pleaser.
Ingredients
- 1 pound ground beef (80/20 or 85/15)
- 1 teaspoon salt
- 1/2 teaspoon black pepper
- 1/4 teaspoon garlic powder
- 1/4 teaspoon onion powder
- 4 burger buns
- 4 slices cheddar cheese
- Lettuce, tomato, onion, pickles, and mustard (to taste)
Instructions
- Preheat a cast iron skillet over medium-high heat.
- Combine the ground beef, salt, pepper, garlic powder, and onion powder in a bowl. Gently mix the ingredients together without overworking the meat.
- Shape the mixture into four patties, about 1 inch thick. Make a small indentation in the center of each patty using your thumb.
- Place the patties in the hot skillet. Don’t touch the burgers for the first 3-4 minutes, allowing them to develop a nice sear.
- Flip the burgers and cook for another 3-4 minutes, or until they reach your desired level of doneness.
- Add the cheese slices to the burgers during the last minute of cooking.
- Serve the burgers on toasted buns with your favorite toppings.
Enjoy!
The beauty of burgers lies in their simplicity and versatility. Experiment with different flavors, toppings, and cooking techniques to create your own perfect burger.
Everyone is watching

Perfect Rice Every Time: The Ultimate Guide to Cooking Rice
Cooking TipsAs a self-proclaimed foodie, I've always been a bit obsessed with rice. It's the foundation of countless cuisi...

Prime Rib Roast Cooking Time Chart: Per Pound Guide
Cooking TipsPrime rib roast. Just the name conjures images of lavish dinners, crackling fires, and hearty laughter. It’s ...

The Ultimate Guide to Cooking Asparagus: Tips, Techniques, and Recipes
Cooking TipsAsparagus. The mere mention of this spring delicacy conjures up images of vibrant green spears, crisp and burs...

Ultimate Guide to Cooking the Perfect Thanksgiving Turkey
Cooking TipsThanksgiving. Just the word conjures up images of overflowing tables laden with delicious food, the scent of r...

How Long to Bake Potatoes in the Oven (Perfect Every Time)
Cooking TipsBaked potatoes are a staple in my kitchen. They're incredibly versatile, delicious, and surprisingly easy to m...
