As a seasoned article editor, I've spent years dissecting the nuances of language, and I've realized even the simplest things can hold a surprising depth of complexity. Take cooking greens, for example. It seems like a no-brainer: throw them in a pot with some water, let it boil, and then… well, that's where things get tricky. You can end up with mushy, flavorless greens, or worse, tough, stringy ones that are practically inedible. The secret? Getting the cooking time just right. It's an art form, really, and today I'm going to share my secrets to achieving that perfect tenderness in your greens.
Part 1: The Basics of Cooking Greens
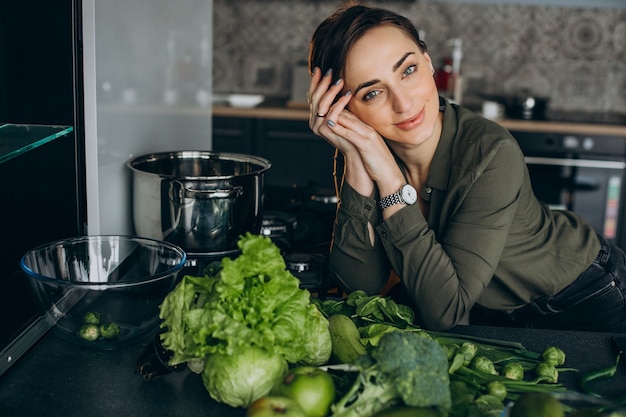
Let's start with the fundamentals. When I say "greens," I'm talking about those leafy vegetables like kale, spinach, collard greens, mustard greens, and chard. They're the workhorses of the vegetable world, bursting with nutrients and flavor. But they also have a tendency to become tough and rubbery if overcooked. So, what's the magic formula for perfect tenderness?
Understanding the Factors that Impact Cooking Time
The first rule of thumb is to start with fresh greens. If you're using frozen greens, defrost them completely before cooking. This is vital, as frozen greens release more water as they thaw, leading to soggy greens if added to the pot while still frozen. And, of course, the type of greens you're cooking will impact the cooking time. Spinach cooks much faster than collards, for instance. But there are other factors to consider, too. The amount of greens, the size of the pot, and even the altitude can all play a role.
The Importance of Choosing the Right Pot
The pot you choose can actually make a difference in how your greens cook. A wider pot will allow the greens to cook more evenly, while a narrower pot can lead to uneven cooking and potential scorching at the bottom. Personally, I prefer a large, wide pot for cooking greens, as it allows me to cook a larger batch, which I can then store in the fridge for later use.
Part 2: Preparation is Key
Now, let's talk about preparation. It might seem like a simple step, but it's crucial for achieving that perfect tenderness. Here's my personal approach:
Washing and Chopping: Essential First Steps
First, I give the greens a thorough wash in cold water. I use a large bowl and gently swish them around to remove any dirt or grit. Then I drain them thoroughly. Now, here’s where my personal preference comes in. I like to chop my greens into bite-sized pieces. This ensures they cook evenly and speeds up the process. If you prefer larger pieces, go for it, but be aware that they might need a bit more time to cook through.
The Power of Salt: More Than Just Flavor
Next, I add a generous amount of salt to the pot of boiling water. I'm talking about a good tablespoon or two. Why? Well, salt helps draw out the moisture from the greens, resulting in a more tender and flavorful dish. Trust me on this one. I've tried cooking greens without salt, and it just doesn't compare. The flavor is blander, and the greens tend to be a bit tough. Plus, salt enhances the natural sweetness of the greens, bringing out their true flavor.
Part 3: Mastering the Stovetop Method
Now that our greens are prepped, it's time to get cooking. I prefer the stovetop method because it gives me more control over the cooking process. Here's how I do it:
Step 1: The Boiling Point: Crucial for Even Cooking
Fill a large pot with enough water to cover the greens, and bring it to a rolling boil. Once the water is boiling, add the greens. You'll notice the water will stop boiling briefly as the greens cool it down. Don't worry, it will come back to a boil soon enough. It's important to start with boiling water to ensure the greens cook quickly and evenly. Adding them to cold water will slow down the cooking process and can make them tough.
Step 2: The Cover and Cook: Controlling the Heat
Cover the pot with a lid and reduce the heat to medium-high. This will allow the steam to build up and cook the greens quickly and evenly. Now, here's where the real artistry comes in. You need to keep a close eye on the greens and adjust the cooking time depending on the type of greens you're using and how tender you like them. You’ll know they’re getting close when they start to wilt and become soft.
Part 4: Finding That Sweet Spot: A Guide to Cooking Times
As a general rule of thumb, I find that most greens cook for about 3-5 minutes, but it can vary greatly. Here's a quick guide to help you get started:
Type of Greens - Cooking Time (Approximate)
This table is a great starting point, but remember to adjust the cooking time based on your preferences. If you like your greens to have a bit of bite, cook them for a shorter period. If you prefer them to be super tender and wilted, cook them for a little longer.
| Type of Greens | Cooking Time (Approximate) |
|---|---|
| Spinach | 2-3 minutes |
| Kale | 3-5 minutes |
| Collard Greens | 5-10 minutes |
| Mustard Greens | 5-10 minutes |
| Chard | 3-5 minutes |
Part 5: The Ultimate Test for Tenderness: The Fork Test
How do you know when your greens are perfectly cooked? There are a couple of things to look for. First, the color. As they cook, the greens will turn a vibrant green color and their volume will decrease considerably.
Here's my favorite test for tenderness: Use a fork to poke the greens. If the fork goes through easily, then they’re cooked through. If it feels tough or the greens bounce back, they need a bit more time. I usually start checking the greens after about 3 minutes, and then every minute or so after that. It’s better to err on the side of undercooked than overcooked. Overcooked greens will become mushy and lose their vibrant color.
Part 6: Draining and Serving: Unlocking Flavor
Once the greens are cooked to your liking, drain them in a colander. This removes any excess water, which will help prevent them from becoming soggy. Now comes the fun part: adding flavor! I like to toss the greens with a bit of butter, olive oil, or even a drizzle of lemon juice. You can also add spices like garlic powder, onion powder, or black pepper. Get creative and experiment with different combinations! The possibilities are endless.
Part 7: Storing Leftovers: Keeping Greens Fresh
If you’ve cooked a large batch of greens, you can store the leftovers in the refrigerator for up to 3 days. I like to store them in an airtight container or a resealable bag. To reheat them, simply add a few tablespoons of water to a saucepan and simmer over low heat until they’re heated through. You can also reheat them in the microwave, but I find that they tend to become a little soggy that way.
Part 8: Common Mistakes to Avoid: Tips for Success
Speaking of soggy greens, that’s one of the biggest mistakes people make when cooking greens. Here are a few other common mistakes to avoid:
- Overcrowding the pot: Make sure you have enough space for the greens to cook evenly. If you cram them into a small pot, they won’t cook properly and they might become soggy.
- Adding too much water: You don’t need a lot of water to cook greens. Just enough to cover them is sufficient. If you add too much water, the greens will be diluted and they might not cook evenly.
- Using cold water: Start with boiling water to ensure that the greens cook quickly and evenly. Adding them to cold water will slow down the cooking process and can make them tough.
- Overcooking: It's tempting to keep cooking the greens until they're completely wilted, but this can lead to a mushy texture. Remember to check them frequently and stop cooking them when they're just tender.
Part 9: Beyond the Stovetop: Alternative Cooking Methods
While the stovetop is my go-to method for cooking greens, there are other ways to achieve that perfect tenderness. Here are a few alternative options:
The Microwave Method: Quick and Easy Cooking
For a quick and easy way to cook greens, try the microwave. Simply add the greens to a microwave-safe dish with a few tablespoons of water, cover with a lid or plastic wrap, and microwave on high for 2-3 minutes, or until tender. Be careful, as the steam can be hot, so use oven mitts to remove the dish from the microwave.
The Roasting Method: Flavorful and Crispy
If you’re looking for a more flavorful way to cook greens, try roasting them. Preheat the oven to 400 degrees Fahrenheit, toss the greens with olive oil, salt, and pepper, and spread them on a baking sheet. Roast for 15-20 minutes, or until tender. This method gives the greens a crispy texture and a slightly charred flavor.
Part 10: FAQs: Answers to Your Burning Questions
You know, I've been cooking greens for years, and I've learned a lot along the way. Over the years, I've been asked a lot of questions about cooking greens. Here are some of the most common ones:
1. How do I prevent greens from turning brown?
To keep greens from turning brown, it's best to cook them quickly and drain them thoroughly. You can also add a squeeze of lemon juice or a splash of vinegar to the cooking water, which will help to preserve their color. If you’re storing leftover greens, keep them in an airtight container or a resealable bag. This will prevent them from getting exposed to air, which can cause them to turn brown.
2. How do I make greens less bitter?
Some greens, like kale and collard greens, can have a bitter taste. To reduce the bitterness, try these tips: Soak the greens in cold water for 30 minutes before cooking. This will help to draw out some of the bitterness. You can also add a sweetener, like sugar or honey, to the cooking water. This will help to balance out the bitterness. Another trick is to add a pinch of baking soda to the water, which helps to neutralize the bitterness.
3. Can I cook greens in broth?
Absolutely! Cooking greens in broth is a great way to add flavor and nutrients. You can use any type of broth you like, such as chicken broth, vegetable broth, or even beef broth. Simply bring the broth to a boil, add the greens, and cook until tender. The broth will infuse the greens with its flavor, creating a more complex taste.
4. What can I do with leftover greens?
Leftover greens are a versatile ingredient and can be used in a variety of dishes. You can add them to soups, stews, and casseroles. You can also use them to make smoothies, salads, or wraps. I love to add a handful of leftover greens to my breakfast omelets for a boost of nutrition.
5. What are some good recipes for greens?
There are endless possibilities when it comes to recipes for greens! Here are a few of my favorites:
- Sautéed Greens with Garlic and Parmesan: A simple and flavorful way to cook greens. Simply sauté the greens with garlic, olive oil, and Parmesan cheese.
- greens and sausage soup: A hearty and comforting soup that’s perfect for a cold day. Combine cooked greens, italian sausage, broth, and vegetables like carrots, celery, and onions.
- greens and potato salad: A unique and refreshing salad that’s perfect for a summer picnic. Combine cooked greens, potatoes, onions, and a creamy dressing.
I hope this guide has given you a better understanding of how to cook greens for perfect tenderness. It’s all about finding that sweet spot between undercooked and overcooked. Don’t be afraid to experiment with different types of greens, cooking methods, and flavors. And most importantly, have fun with it! Cooking should be an enjoyable experience. Enjoy your perfectly cooked greens!
Everyone is watching

Prime Rib Roast Cooking Time Chart: Per Pound Guide
Cooking TipsPrime rib roast. Just the name conjures images of lavish dinners, crackling fires, and hearty laughter. It’s ...

How Long to Bake Potatoes in the Oven (Perfect Every Time)
Cooking TipsBaked potatoes are a staple in my kitchen. They're incredibly versatile, delicious, and surprisingly easy to m...

Perfect Rice Every Time: The Ultimate Guide to Cooking Rice
Cooking TipsAs a self-proclaimed foodie, I've always been a bit obsessed with rice. It's the foundation of countless cuisi...

The Ultimate Guide to Cooking Asparagus: Tips, Techniques, and Recipes
Cooking TipsAsparagus. The mere mention of this spring delicacy conjures up images of vibrant green spears, crisp and burs...

Ultimate Guide to Cooking the Perfect Thanksgiving Turkey
Cooking TipsThanksgiving. Just the word conjures up images of overflowing tables laden with delicious food, the scent of r...