There's a reason why corn on the cob is a summer staple. Its sweet, juicy flavour, the satisfying crunch, and the way it melts in your mouth...it's a taste of sunshine that never gets old. But nailing that perfect bite can be tricky. Overcook it, and you're left with a mushy mess. Undercook it, and you'll be chewing on tough, chewy kernels. So, how long do you cook corn on the cob for? That's where this comprehensive guide comes in.
I've been grilling, steaming, and boiling corn for as long as I can remember. My family has always had a bit of a competitive streak when it comes to summer barbecues, and I'm pretty confident I've mastered the art of the perfect cob. Over the years, I've tried every method imaginable, from the classic boiling technique to the slightly more adventurous grilling approach. And along the way, I've learned a few things – some tried and tested, others passed down from generations – that I'm eager to share with you.
So, grab a cob (or two, or a whole bag!), settle in, and let's get cooking. We're about to embark on a journey to discover the sweet secrets of perfect corn on the cob.
Part 1: Understanding the Basics

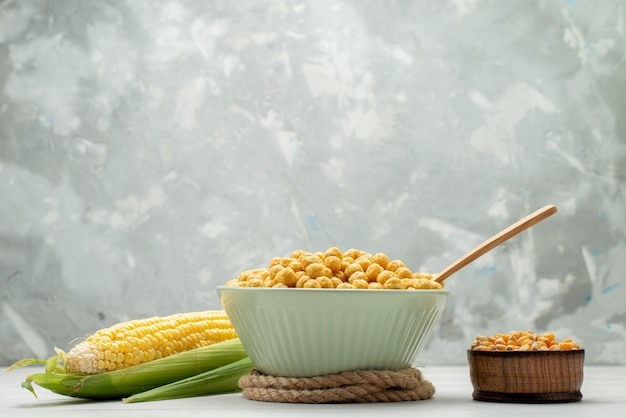
Before diving into specific cooking methods, it's crucial to grasp the fundamentals. Let's start by discussing the type of corn. The most common variety you'll find in supermarkets is sweet corn (also called sugar corn). It's known for its high sugar content, which delivers that delightful sweetness we all love. Now, the cooking time depends on the maturity of the cob. A younger, fresher cob will need less time than a more mature one, which will have a deeper yellow hue.
1.1. Freshness and Maturity: The Key to Tenderness
Think of it this way: the younger the corn, the more tender and delicate the kernels. Imagine those sweet, juicy kernels bursting with flavour. On the other hand, the older the corn, the more starch it develops. This is why it can get a bit chewy if you're not careful with the cooking time. But don't worry, there are ways to deal with those more mature cobs too!
1.2. How to Tell if Corn is Fresh: A Quick Guide
You can often assess the freshness of your corn by examining the husks. They should be a vibrant green, slightly moist, and the silks should be brown and not too dry. If the husks are dry and brown, or the silks are brittle and broken, the corn is probably not as fresh. You can also give the cob a gentle squeeze. If it feels firm and full, it's likely fresh. If it feels soft and mushy, it might be past its prime.
1.3. Choosing the Right Corn: A Greengrocer's Tip
If you're unsure about the freshness, it's always best to ask your greengrocer for guidance. They'll know their produce best and can point you towards the freshest cobs available. You might also come across "super sweet" corn, which boasts an even higher sugar content for an extra sweet flavour. They're usually labelled as such, so keep an eye out for them.
Part 2: The Golden Rules of cooking corn: Mastering the Art

Now that we've covered the basics, let's move on to the actual cooking process. There are a few key principles that apply to all methods. Think of them as the golden rules of corn on the cob cooking, guiding you towards perfection:
2.1. Don't Overcook: The Secret to Tenderness
Overcooked corn is a culinary tragedy! The kernels become mushy, and all that wonderful flavour gets lost. We want tender, juicy kernels bursting with flavour, not a mushy mess. So, keep a close eye on your corn and don't overcook it! A few minutes can make all the difference.
2.2. Keep the Kernels Moist: The Key to Juiciness
Ensure the kernels stay moist during cooking. This means using enough water when boiling, ensuring your steamer is filled with enough water, and keeping a watchful eye on your corn when grilling. It's all about keeping those kernels plump and juicy, bursting with that sweet, delightful flavour.
2.3. Don't Forget the Seasoning: Adding a Touch of Magic
Corn on the cob is delicious on its own, but let's face it, adding a touch of flavour takes it to the next level. A simple sprinkle of salt and pepper does wonders, but you can also experiment with other herbs and spices. I love a good dose of paprika or a dash of cayenne for a bit of a kick. Feel free to get creative and try different combinations to find your perfect match!
Part 3: The Boiling Method: Classic and Simple

Let's start with the tried-and-true classic: boiling. It's the simplest method and often yields perfectly cooked corn, bringing out the natural sweetness of the kernels.
3.1. The Boiling Method Step-by-Step: A Foolproof Technique
Here's what you'll need:
- fresh corn on the cob
- Large pot
- Water
- Salt
Now, follow these steps:
- Fill your pot with enough water to cover the corn by about an inch. This ensures even cooking and prevents the kernels from drying out.
- Bring the water to a rolling boil. This is crucial for ensuring the corn cooks evenly and quickly.
- Add a generous pinch of salt to the boiling water. This adds flavour and helps to bring out the sweetness of the corn.
- Carefully add the corn to the boiling water, ensuring it's submerged. You can cook multiple cobs at once, but make sure they're not overcrowded in the pot. This prevents uneven cooking and ensures each cob gets the right amount of heat.
- Bring the water back to a boil. The corn should be cooked for about 3-5 minutes for younger, tender cobs, and 5-7 minutes for more mature cobs. Keep a close eye on it and adjust the cooking time as needed. Remember, the goal is tender kernels, not mushy ones.
- Once the corn is cooked, drain it thoroughly. You can use a colander or simply tip the pot over the sink. Be careful not to burn yourself!
- Serve immediately, seasoned with salt and pepper to your liking. The key is to enjoy the fresh, sweet flavour of the corn as soon as it's cooked.
3.2. Tips for Boiling Corn: Elevate Your Classic
Here are a few extra tips to make your boiled corn even better:
- Don't overcook! Keep a close eye on the corn, and remove it from the pot as soon as it's tender. You can always cook it for a bit longer if needed, but it's harder to undo overcooking.
- Add a splash of vinegar to the water for a slightly tangy flavour. It also helps to brighten the colours of the kernels, making them look more vibrant and inviting.
- Try adding herbs and spices to the boiling water for additional flavour. I like to add a bay leaf and a few sprigs of thyme for a more complex taste. Experiment with different combinations to discover your own favourite flavour profile.
Part 4: The Steaming Method: A Light and Flavourful Choice
If you're looking for a lighter approach to cooking corn, steaming is a great option. It retains more of the corn's natural sweetness and flavour, making it a healthier and more delicate alternative to boiling.
4.1. The Steaming Method Step-by-Step: A Gentle Approach
You'll need:
- fresh corn on the cob
- Steamer basket
- Pot with lid
- Water
- Salt
Now, follow these steps:
- Fill the pot with a few inches of water. This creates a gentle steam that will cook the corn evenly.
- Place the steamer basket inside the pot. Make sure it's above the waterline so the corn doesn't get soggy.
- Bring the water to a rolling boil. This ensures the steam is hot enough to cook the corn properly.
- Add the corn to the steamer basket, ensuring it's not overcrowded. This prevents uneven cooking and ensures each cob gets the right amount of heat.
- Cover the pot with the lid, and steam the corn for about 5-7 minutes for younger cobs and 8-10 minutes for more mature cobs. Keep an eye on it, and adjust the cooking time as needed. The corn should be tender but not mushy.
- Remove the corn from the steamer basket and serve immediately, seasoned to your liking. This preserves the freshness and flavour of the corn.
4.2. Tips for Steaming Corn: Enhance Your Steamed Delight
Here are a few things to keep in mind when steaming corn:
- Make sure the water is boiling before adding the corn to the steamer basket. This ensures even cooking and prevents the corn from getting soggy.
- You can add herbs and spices to the water for extra flavour. Try adding lemon slices, a sprig of rosemary, or a few cloves of garlic. This adds a subtle yet delicious aroma to the corn as it cooks.
- Steaming corn retains more moisture than boiling, so you can also add a bit of butter or olive oil to the corn before serving for a richer flavour. This enhances the natural sweetness and adds a touch of indulgence.
Part 5: The Grilling Method: A Smoky and Delicious Treat
Let's get a bit more adventurous! grilling corn on the cob adds a smoky, charred flavour that's truly irresistible, turning a simple side dish into a culinary adventure.
5.1. The Grilling Method Step-by-Step: Embrace the Smoke
You'll need:
- Fresh corn on the cob
- Grill
- Olive oil
- Salt and pepper
- Optional: herbs and spices
Now, follow these steps:
- Preheat your grill to medium heat. This ensures the corn gets a nice char without burning.
- Remove the husks from the corn, leaving about an inch of husk at the bottom to act as a handle. Pull back the husks and remove the silks. This allows the heat to penetrate the corn and prevents it from sticking to the grill.
- Brush the corn with olive oil and season with salt and pepper. You can also add other herbs and spices at this stage. I love a good sprinkle of paprika or chili powder for a bit of heat. This adds flavour and helps to create a beautiful char on the corn.
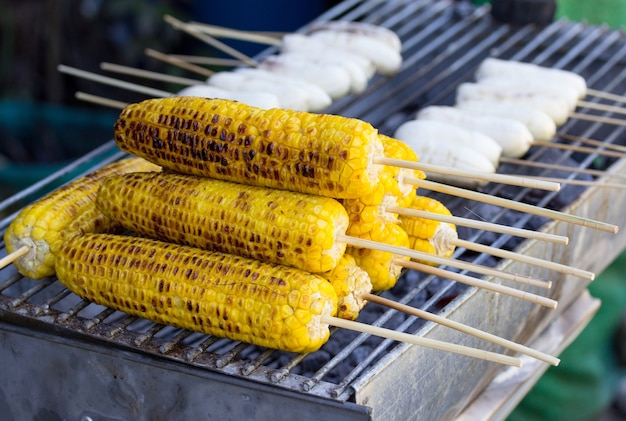
- Place the corn on the grill and cook for about 10-15 minutes, turning every few minutes. This allows the corn to cook evenly and get a nice char on all sides.
- Once the corn is cooked, remove it from the grill and serve immediately. This ensures the corn remains warm and the smoky flavour is at its peak.
5.2. Tips for Grilling Corn: Elevate Your Grilled Delight
Here are a few things to remember when grilling corn on the cob:
- Make sure the grill is hot enough before you add the corn. This helps to get a good char without overcooking the corn.
- Don't overcook! The corn should be tender and slightly charred. If you leave it on the grill for too long, it will dry out and become tough.
- For a sweeter flavour, brush the corn with a honey-butter mixture before grilling. It adds a delightful glaze that caramelizes as it cooks, creating a beautiful contrast of sweet and smoky.
Part 6: The Microwave Method: A Quick and Easy Option
In a pinch, the microwave can be a lifesaver for cooking corn on the cob. It's super fast and requires minimal effort. But keep in mind that the flavour won't be as rich as grilling or steaming. It's a good option for a quick and easy meal but won't give you the same depth of flavour.
6.1. The Microwave Method Step-by-Step: Convenience at Its Best
You'll need:
- Fresh corn on the cob
- Microwave-safe dish
- Water
- Salt and pepper
Now, follow these steps:
- Place the corn on the cob in the microwave-safe dish. Add about a tablespoon of water to the bottom of the dish to prevent the corn from drying out. This creates a moist environment for the corn to cook in.
- Cover the dish with plastic wrap, leaving a small vent to allow steam to escape. This traps the moisture and helps to cook the corn evenly.
- Microwave the corn on high for 3-5 minutes, or until tender. The cooking time will vary depending on the power of your microwave and the maturity of the corn.
- Remove the corn from the microwave, let it cool slightly, and serve immediately, seasoned to your liking.
6.2. Tips for Microwaving Corn: Making the Most of microwave cooking
Here are a few tips to make your microwave corn a bit more enjoyable:
- Don't overcook! The corn should be tender but not mushy. If it's overcooked, it will lose its sweetness and become dry.
- Add a splash of milk or cream to the water for a richer flavour. It also helps to keep the corn moist. This adds a touch of creaminess and depth of flavour.
- To ensure even cooking, rotate the corn halfway through the cooking time. This prevents one side from overcooking while the other remains undercooked.
Part 7: Serving Your Corn on the Cob: Beyond the Basics
Now, the moment you've been waiting for! You've cooked your corn to perfection, and it's time to enjoy the fruits (or should we say, kernels?) of your labour. But how do you serve it?
7.1. The Classic Way: With Butter and Salt: A Timeless Treat
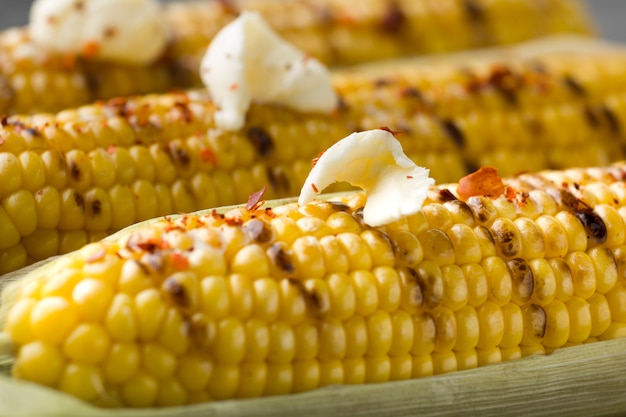
Let's be honest, a simple pat of butter and a sprinkle of salt is often all you need. The simplicity highlights the natural sweetness of the corn, and the butter melts deliciously into those juicy kernels, enhancing the flavour and creating a satisfying experience.
7.2. Getting Creative With Toppings: Unleash Your Inner Chef
But hey, why stop there? There's a whole world of topping possibilities waiting to be explored! Here are a few ideas to get your creative juices flowing:
- Spice it up: Add a sprinkle of chili powder, cayenne pepper, or smoked paprika for a spicy kick. This adds a touch of heat and complexity to the sweet flavour of the corn.
- Go cheesy: Shred some cheddar, Monterey Jack, or Parmesan cheese over the corn. You can also mix in some crumbled blue cheese for a bolder flavour. This adds a creamy, salty element that complements the sweetness of the corn.
- Herbs galore: Fresh herbs like dill, parsley, chives, or cilantro add a vibrant touch and a burst of freshness. These herbs provide a fragrant and aromatic contrast to the sweetness of the corn.
- Sweet and savoury: Drizzle with a honey-mustard sauce, a balsamic glaze, or a tangy lemon-butter sauce. These sauces add a touch of sweetness or acidity, balancing the natural sweetness of the corn and creating a delicious complexity of flavours.
- Get adventurous: Experiment with crumbled bacon, roasted nuts, crumbled goat cheese, or even a dollop of pesto. The possibilities are endless! These unconventional toppings add a surprising and delightful twist to the classic corn on the cob experience.
7.3. Serving side dishes: The Perfect Corn Pairings
Corn on the cob is a fantastic side dish that complements a wide range of meals. Here are a few classic pairings that never disappoint:
- Barbecue: Nothing says summer like barbecued ribs, chicken, or sausages served with a side of corn on the cob. It's the perfect combination of smoky and sweet! The sweetness of the corn cuts through the richness of the barbecue, creating a delightful balance of flavours.
- Seafood: The sweetness of corn pairs beautifully with the delicate flavour of grilled fish or seafood. Think grilled salmon, cod, or shrimp. You could even try it with a simple lobster roll! The combination of sweet and savory creates a delicious symphony of flavours.
- Summer Salads: Corn on the cob adds a touch of sweetness and texture to summer salads. Toss it with grilled chicken, vegetables, and a vinaigrette dressing for a light and refreshing meal. The corn adds a vibrant burst of flavour and a satisfying crunch to the salad, creating a balanced and enjoyable meal.
Part 8: Corn on the Cob: A Culinary Treasure
Corn on the cob isn't just a side dish; it's a culinary treasure. It's a versatile ingredient that can be enjoyed in countless ways. From simple boiled corn with butter to smoky grilled cobs, there's a method and a topping for every taste bud.
So, next time you're craving a taste of summer, grab a few cobs of fresh corn and get cooking. And remember, the perfect corn on the cob is all about experimentation. Don't be afraid to try different methods, toppings, and flavour combinations until you find what you love. Happy cooking!
FAQs
1. How do I know when corn on the cob is cooked?
The best way to know when corn is cooked is by feeling it. It should be tender to the touch, almost yielding slightly when you press on it gently. You can also test it by piercing a kernel with a fork. If it easily slides off the cob, it's cooked. Don't overcook! The kernels should be tender, but not mushy. Overcooked corn will lose its sweetness and become unappealing.
2. Can I freeze corn on the cob?
Yes, you can freeze corn on the cob. First, blanch the corn in boiling water for 3-5 minutes. This helps to preserve the colour, texture, and flavour of the corn. Then, cool it quickly in an ice bath. This stops the cooking process and prevents the corn from becoming mushy. Remove the husks and silks, and wrap each cob individually in plastic wrap. This prevents freezer burn and keeps the corn fresh. Place the wrapped cobs in a freezer bag and freeze for up to 12 months. To cook frozen corn, thaw it overnight in the refrigerator or microwave it for a few minutes. Then, follow your preferred cooking method. Frozen corn can be a great way to enjoy the taste of summer even when it's not in season.
3. What's the difference between sweet corn and field corn?
Sweet corn, also known as sugar corn, is bred for its sweetness and tenderness. It has a high sugar content, which gives it its characteristic flavour. Field corn, on the other hand, is grown for animal feed and other uses. It has a lower sugar content and a starchy texture. Field corn is rarely consumed directly by humans. It's typically used as a source of starch and is often processed into various products like cornmeal, corn syrup, and ethanol. If you're looking for the sweet and juicy taste we all love, stick with sweet corn for your corn on the cob adventures.
4. Can I cook corn on the cob in the oven?
Yes, you can cook corn on the cob in the oven. Preheat your oven to 400°F (200°C). Wrap the corn in aluminum foil, leaving a small opening to allow steam to escape. This creates a moist environment for the corn to cook in and prevents it from drying out. Bake for 15-20 minutes, or until tender. You can also roast the corn uncovered for a more caramelized flavour. This gives the corn a slightly crispier texture and a more intense flavour.
5. How do I store fresh corn on the cob?
Fresh corn on the cob is best stored in the refrigerator, where it will last for 3-5 days. Store it in the refrigerator drawer, with the husks intact. This helps to keep the corn moist and fresh. If you've removed the husks, wrap each cob individually in plastic wrap or a damp paper towel before storing. This prevents the corn from drying out and keeps it fresh for longer.
Everyone is watching

Perfect Rice Every Time: The Ultimate Guide to Cooking Rice
Cooking TipsAs a self-proclaimed foodie, I've always been a bit obsessed with rice. It's the foundation of countless cuisi...

Ultimate Guide to Cooking the Perfect Thanksgiving Turkey
Cooking TipsThanksgiving. Just the word conjures up images of overflowing tables laden with delicious food, the scent of r...

The Ultimate Guide to Cooking Asparagus: Tips, Techniques, and Recipes
Cooking TipsAsparagus. The mere mention of this spring delicacy conjures up images of vibrant green spears, crisp and burs...

Can You Cook Spaghetti with Gasoline? (The Shocking Truth)
Cooking TipsWe've all seen those crazy internet trends. You know, the ones that make you wonder, "Did someone actually try...

Chorizo and Eggs Recipe: The Ultimate Guide
Cooking TipsRight, let’s talk about chorizo and eggs. You know, that classic Spanish dish that's always a winner. It's th...
