As a seasoned cook, I've had my fair share of kitchen mishaps. But one that consistently pops up is: how long do I cook chicken breasts on the stovetop? It seems like a simple question, but the answer can be trickier than you might think. It's all about finding that sweet spot between juicy and tender chicken, and avoiding the dreaded dry, rubbery texture. I've been there, and believe me, it's not fun! That's why I'm sharing my secrets and hard-earned tips for achieving perfectly cooked stovetop chicken breasts every time.
Part 1: Understanding the Importance of Thickness

Before you even grab your pan, the first thing to do is to assess your chicken breasts. This might seem obvious, but the thickness of your chicken will have a huge impact on cooking time. Thin breasts cook up in a flash, while thicker ones need a bit more patience. I've learned this lesson the hard way, ending up with dry chicken more times than I care to admit. So, here's a general guide for different thicknesses, assuming your chicken is at room temperature:
1. Thin Chicken Breast (less than 1 inch thick):
These are your speedy cooks, ready to be cooked in a jiffy. Don't overcook them, or you'll end up with dry, stringy chicken. I’ve found that thin chicken breasts are perfect for quick meals or adding to salads.
2. Medium Chicken Breast (1-1.5 inches thick):
This is the most common size you'll find at the supermarket. They take a bit longer than thin breasts but are still relatively quick to cook. These are versatile and perfect for a variety of dishes. I often use medium breasts for stir-fries, sandwiches, or simple pan-fried dinners.
3. Thick Chicken Breast (over 1.5 inches thick):
This is where things get a little more challenging. You'll need to adjust your cooking time and maybe even use a combination of methods to ensure even cooking. I've found that thicker breasts benefit from a combination of stovetop searing and finishing in the oven to make sure they cook through without drying out. These are perfect for roasting and serving with a flavorful sauce.
Part 2: Preparing Your Chicken Breast for Success

Now that you've got a good understanding of the thickness, it's time to prep those chicken breasts. This is my chance to get organized and set myself up for success. I've learned that taking the time to do things properly makes all the difference in the final result.
1. Patting Dry:
The key to achieving that perfectly golden, crispy skin is a good pat-down. Grab some kitchen paper and get rid of any excess moisture. Damp chicken will steam instead of sear, resulting in a soggy, pale crust. It’s a simple step, but a crucial one for achieving a beautiful and flavorful outcome.
2. Seasoning:
This is where you can really let your creativity shine. I'm a big fan of simple salt and pepper, but you can add any herbs and spices you like. A sprinkle of paprika, a pinch of cayenne, or a pinch of garlic powder all add amazing flavor and complexity to the dish. Don't be afraid to experiment! Remember, you can always add more seasoning later, so start with a light hand and taste as you go.
3. Consider Marinade:
For an extra boost of flavor and moisture, marinating your chicken breast before cooking can be a great option. This can be as simple as a mix of olive oil, lemon juice, and herbs or as complex as a flavorful blend of soy sauce, ginger, garlic, and chili. I find that marinating for at least 30 minutes, or even better, overnight, really allows the flavors to penetrate and enhance the chicken.
Part 3: Choosing the Right Pan for the Job

With your chicken prepped and ready to go, it’s time to choose the right pan. This isn't just about aesthetics, it's about getting that perfect sear and ensuring even cooking. I’ve learned that the right pan can make all the difference in the final outcome.
1. Cast Iron:
I’ve always been a fan of cast iron skillets. They retain heat beautifully and create those gorgeous sear marks that take your chicken to the next level. But they can be a bit heavy, so it’s not the best choice if you're lacking upper body strength. They also need a bit more care and attention, but the results are worth it.
2. Stainless Steel:
A good stainless steel pan is a reliable workhorse. It heats up quickly and is relatively easy to clean. I find that a good quality stainless steel pan can achieve a nice sear, too. Just be sure to heat it thoroughly before adding the chicken to ensure proper browning.
3. Non-Stick:
A non-stick pan is an excellent choice if you're looking to minimize fuss and mess. You can get away with using less oil, and it's great for those with delicate cookware. However, you might not get the same level of sear that you would with cast iron or stainless steel. I tend to use a non-stick pan for quick weeknight meals where I don’t need a super-crisp exterior.
Part 4: Mastering the Art of Searing
The key to juicy, flavorful chicken breast lies in a good sear. Think of it as a beautiful golden crust that traps in all the moisture and flavor. Here's how to make it happen:
1. Heat the Pan:
Before you even think about adding your chicken, heat your pan over medium-high heat. You want it hot enough to sizzle immediately when you add the chicken. I find a good way to test if the pan is hot enough is to drop a tiny bit of water in the pan. It should sizzle and evaporate quickly. If it just sits there, your pan needs more heat.
2. Oil It Up:
Once your pan is screaming hot, add a generous amount of oil. Don't be afraid to use a good amount. You want your chicken to glide easily across the pan, not stick to it like glue. I typically use a neutral oil like canola or vegetable oil for searing, but you can also use olive oil if you prefer. Just be careful not to let it smoke, which can impart a bitter flavor to the chicken.
3. Sear It:
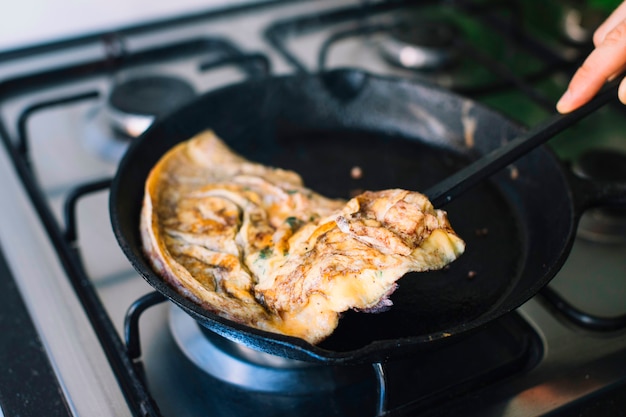
Gently place your chicken breast into the hot pan. Don't crowd the pan! If you need to, do them in batches. Let the chicken cook undisturbed for 3-4 minutes per side, or until it forms a beautiful golden-brown crust. Resist the urge to flip it too soon; give it time to sear properly. You can tell the chicken is ready when it releases easily from the pan. If it sticks, it needs more time.
Part 5: The Finish Line: Cooking to Perfection
You’ve seared your chicken, but it’s not done yet! Now comes the final step – cooking it through to the perfect level of doneness.
1. Reduce Heat:
Once you've seared both sides of your chicken breast, reduce the heat to medium-low. You'll want to slow down the cooking process to ensure the inside cooks evenly. This is where patience is key, and a little bit of time will make all the difference in achieving that juicy, tender result.
2. Check for Doneness:
This is the tricky part – finding that perfect balance between juicy and cooked through. You can use a meat thermometer, but I find that a good poke test is also quite helpful. Use a fork to pierce the thickest part of the chicken. If the juices run clear and the chicken feels firm to the touch, it's done. If the juices run pink or the chicken feels wobbly, it needs to cook a bit longer.
3. Rest:
Once your chicken breasts are cooked through, take them off the heat and let them rest for 5-10 minutes before slicing and serving. This allows the juices to redistribute and prevents the chicken from becoming dry and tough. It’s a simple step but an important one for achieving a moist and tender chicken breast.
Part 6: How to Adjust Cooking Time Based on Thickness
So far, we’ve been talking about general guidelines. But every chicken breast is different. Here’s how to adjust cooking times based on thickness:
1. Thin Breasts:
These require less time on the stovetop. After searing, they usually only need 2-3 minutes per side on medium-low heat.
2. Medium Breasts:
This is the most common thickness. After searing, expect to cook them for 4-5 minutes per side on medium-low heat.
3. Thick Breasts:
These require a longer cooking time. After searing, plan on 6-8 minutes per side on medium-low heat. You might want to use a combination of stovetop and oven to ensure they cook evenly.
Part 7: Creative Chicken Breast Variations
Stovetop chicken breast is incredibly versatile. Here are some ideas for variations to take your cooking to the next level:
1. Garlic Butter Chicken:
This is a classic for a reason. Simply melt some butter in the pan after searing the chicken, add a few cloves of garlic, and let it simmer until the chicken is cooked through. The buttery, garlicky aroma will fill your kitchen and entice everyone to the table.
2. Lemon Herb Chicken:
Add a squeeze of lemon juice and some fresh herbs (like rosemary, thyme, or parsley) to the pan after searing. Let it simmer for a few minutes until the chicken is cooked through and the flavors have melded. The citrus and herb combination will add a bright and refreshing touch to your chicken.
3. Spicy Chicken:
For a bit of a kick, add some chili flakes or a splash of hot sauce to the pan after searing. You can also use a spicy rub on the chicken before cooking. This is a great option for those who like a bit of heat. Experiment with different types of chili flakes and hot sauces to find your perfect level of spice.
4. Chicken Breast with Vegetables:
Add sliced onions, peppers, or mushrooms to the pan after searing the chicken. Let them cook until tender, then serve alongside the chicken. This is a healthy and delicious way to add more vegetables to your meal.
5. Chicken Breast with Creamy Sauce:
For a richer and more indulgent meal, you can create a creamy sauce to go with your chicken. Simply add a tablespoon or two of butter to the pan after searing the chicken, then whisk in some flour. Gradually add milk or cream, whisking constantly until the sauce thickens. You can add herbs, spices, or even a bit of cheese for extra flavor.
6. Chicken Breast with Asian-inspired Flavors:
Add a splash of soy sauce, a pinch of ginger, and a clove of garlic to the pan after searing the chicken. Let it simmer for a few minutes until the chicken is cooked through and the flavors have melded. You can also add a touch of sesame oil for extra flavor and aroma.
Part 8: FAQs: Clearing Up Common Chicken Breast Questions
Let's clear up some common questions about stovetop chicken breast cooking.
1. How do I know if my chicken is cooked through?
You can use a meat thermometer to check the internal temperature. The safe temperature is 165 degrees Fahrenheit (74 degrees Celsius). You can also use the poke test. If the juices run clear and the chicken feels firm to the touch, it's cooked.
2. What if my chicken is overcooked?
Overcooked chicken is dry and tough. There's not much you can do to fix it, unfortunately. The best way to avoid overcooking is to use a meat thermometer or the poke test and to cook the chicken for the appropriate amount of time.
3. Can I use a marinade?
Yes, you can absolutely marinade your chicken before cooking it. This will help to add flavor and keep the chicken juicy. Just make sure to pat the chicken dry before searing it. This will help to ensure that the chicken sears properly and develops a nice golden crust.
4. How do I reheat leftover chicken breast?
Reheat leftover chicken breast in a pan over low heat with a little bit of butter or oil. You can also reheat it in the oven or microwave. Just make sure it's heated through before serving.
5. Can I cook frozen chicken breast on the stovetop?
It's not recommended to cook frozen chicken breast on the stovetop. You'll need to thaw it first. The best way to thaw chicken is in the refrigerator overnight. You can also thaw it quickly in a bowl of cold water or in the microwave, but it's important to cook it immediately after thawing.
Part 9: Final Thoughts: Becoming a Chicken Breast Master
cooking chicken breast on the stovetop might seem simple, but it's all about mastering the details. With a little practice, you’ll be turning out juicy, flavorful chicken every time. Remember, the key is to pay attention to the thickness, sear it properly, and cook it to the perfect temperature. Happy cooking!
Everyone is watching

Prime Rib Roast Cooking Time Chart: Per Pound Guide
Cooking TipsPrime rib roast. Just the name conjures images of lavish dinners, crackling fires, and hearty laughter. It’s ...

How Long to Bake Potatoes in the Oven (Perfect Every Time)
Cooking TipsBaked potatoes are a staple in my kitchen. They're incredibly versatile, delicious, and surprisingly easy to m...

Perfect Rice Every Time: The Ultimate Guide to Cooking Rice
Cooking TipsAs a self-proclaimed foodie, I've always been a bit obsessed with rice. It's the foundation of countless cuisi...

The Ultimate Guide to Cooking Asparagus: Tips, Techniques, and Recipes
Cooking TipsAsparagus. The mere mention of this spring delicacy conjures up images of vibrant green spears, crisp and burs...

Ultimate Guide to Cooking the Perfect Thanksgiving Turkey
Cooking TipsThanksgiving. Just the word conjures up images of overflowing tables laden with delicious food, the scent of r...
