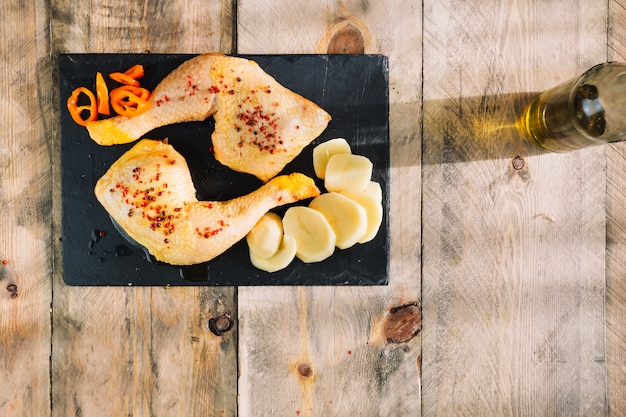
chicken breast. It's a culinary chameleon, a blank canvas for countless dishes. But let's be honest, cooking it perfectly can be a bit of a dance. You don't want to end up with a dry, rubbery brick, do you? No, no, no. We want juicy, tender, flavorful chicken. That's why I'm sharing my ultimate guide to conquering the chicken breast. From the basics to some more advanced techniques, we'll be covering everything you need to know to become a chicken-cooking champion.
Part 1: Getting Started

The perfect chicken Breast
First things first, we need the right ingredients. I always go for boneless, skinless chicken breasts. They're easier to work with and you don't have to worry about fussing with the skin. When you're picking your chicken, give it a good look. It should be firm and springy, not mushy or discolored. If you're unsure, ask the butcher or the person at the meat counter for their advice. They're usually happy to help.
Cooking Methods
Okay, now the fun part: how to cook it! There are a ton of methods, from the classic pan-frying to roasting and grilling. We'll be diving into each one in detail, but here's a quick rundown:
Pan-frying: Simple, quick, and great for a weeknight meal.
Baking: Perfect for cooking multiple breasts at once and achieving juicy results.
Roasting: A more elevated approach, allowing for a slow, even cook and tender, flavorful chicken.
Grilling: For those smoky, summery vibes.
Sous Vide: The ultimate in tenderness and precision cooking.
Timing is Everything
This is where it gets a little more specific. The cooking time will vary depending on the size of the breast, the cooking method, and the temperature of your oven or stovetop. We'll get into the nitty-gritty of specific cooking times later, but remember, these are just guidelines. The best way to ensure your chicken is cooked through is to check its internal temperature.
Part 2: pan-frying chicken Breast

The Classic Method
Pan-frying is a tried-and-true method, and for good reason. It's quick, easy, and delivers a delicious golden-brown crust.
- Get your pan hot! We're talking sizzling hot, ready to sear those chicken breasts. Add a little oil, I prefer olive oil, but you can use whatever you like.
- Season the chicken generously with salt and pepper. Don't be shy! A good sprinkle of spices, herbs, or even a touch of garlic powder can elevate the flavor.
- Place the chicken in the pan, but don't overcrowd it. Cook for about 3-4 minutes on each side, or until you get that beautiful golden brown color and the chicken is cooked through.
- Once it's cooked, remove it from the pan and let it rest for a few minutes. This will allow the juices to redistribute, resulting in a more tender breast.
Tips for Pan-Frying Success
- Don't overcrowd the pan. This will prevent even cooking, leading to some parts being overcooked and others undercooked. Cook in batches if needed.
- Use a meat thermometer. This is your best friend when it comes to chicken. It should reach 165°F (74°C) for safe consumption.
- Pat the chicken dry. This will help to create a crispier crust.
Part 3: baking chicken Breast

The Oven-Friendly Option
Baking is a reliable and easy way to cook chicken breasts, especially if you're dealing with multiple portions.
- Preheat your oven to 375°F (190°C). This is a good starting point, but you might adjust it slightly depending on your oven.
- Line a baking sheet with parchment paper or foil for easier cleanup. Trust me, you'll thank me later.
- Season those breasts generously! Salt, pepper, garlic powder, paprika, whatever your heart desires.
- Place the chicken on the baking sheet and bake for 20-25 minutes. You can flip them halfway through to ensure even cooking.
- Check the internal temperature with your trusty meat thermometer. It should reach 165°F (74°C).
Tips for Baking Perfection
- Give them space. Don't overcrowd the baking sheet. The chicken needs room to breathe and cook evenly.
- Keep it moist. Adding a few slices of onion or lemon to the baking sheet will help steam the chicken, keeping it juicy and flavorful.
- Crispy crust? For a crispy finish, you can broil the chicken for a few minutes at the end of cooking.
Part 4: roasting chicken Breast
Elevated Flavor
Roasting chicken breasts takes things up a notch. It allows for a slow, even cook that results in succulent, flavorful chicken.
- Preheat your oven to 400°F (200°C). You can experiment with different temperatures, but this is a good starting point.
- Drizzle the breasts with olive oil and generously season them with salt, pepper, and your favorite spices and herbs.
- Place them in a roasting pan or baking dish. If you're feeling fancy, you can add some vegetables like carrots, potatoes, or onions to the pan.
- Roast for 20-25 minutes, or until the internal temperature reaches 165°F (74°C).
- Let the chicken rest for a few minutes before slicing and serving.
roasting tips
- For a crispy crust. Crank up the oven temperature to 450°F (232°C) for the last 5 minutes of cooking.
- Amplify the flavor. Rub the chicken with a paste of herbs, spices, and garlic before roasting.
- Cook vegetables evenly. If you're roasting chicken with vegetables, make sure to cut them into similar sizes so they cook at the same rate.
Part 5: grilling chicken breast
Summertime Delight
Grilling is a summer classic, and chicken breast is a perfect companion. It absorbs that smoky flavor so beautifully.
- Preheat your grill to medium heat.
- Season those breasts generously with salt, pepper, and your favorite grilling spices.
- Place the chicken on the grill and cook for about 5-6 minutes per side, or until cooked through.
- To prevent sticking, spray the grill grates with non-stick cooking spray.
- For those iconic grill marks, cook a little longer on each side.
grilling tips
- Don't overcook. We want juicy, tender chicken, not dry, tough chicken.
- Gas grill? Keep the lid closed while cooking to promote even heat distribution.
- charcoal grill? Make sure the coals are hot and evenly distributed.
- Amp up the flavor. Create a marinade by combining olive oil, lemon juice, garlic, and herbs. Marinate the chicken for at least 30 minutes before grilling.
Part 6: Sous Vide Chicken Breast
The Ultimate in Tenderness
sous vide cooking is all about precision and control. It involves cooking food in a water bath, ensuring perfectly cooked, juicy results. It's a bit more of an investment, but worth it for the incredible texture.
- Season the chicken breasts generously with salt, pepper, and any other spices or herbs you like.
- Place the chicken breasts in a vacuum-sealed bag. If you don't have a vacuum sealer, use a freezer-safe bag and submerge it in a bowl of water to remove as much air as possible.
- Fill a pot with water and heat it to the desired temperature. The ideal temperature for cooking chicken breasts sous vide is 145°F (63°C).
- Place the vacuum-sealed bag of chicken in the water bath and cook for 1-2 hours, or until the internal temperature reaches 165°F (74°C).
- Once the chicken is cooked, remove it from the water bath and pat it dry.
- For a crispy crust, sear the chicken in a hot pan for a few minutes.
Sous Vide Benefits
- Perfectly cooked. Sous vide ensures even cooking, preventing overcooked or undercooked areas.
- Juicy and tender. The low and slow cooking method helps to retain moisture, resulting in incredibly tender chicken.
- Meal prep friendly. You can cook chicken breasts sous vide in advance and reheat them later, making it perfect for meal prepping.
Part 7: chicken breast recipe ideas
Get Creative in the Kitchen
Now that you've got the basics down, let's get creative with some recipe ideas. There's a whole world of delicious possibilities with chicken breast!
- Grilled Lemon Herb Chicken Breast: Marinate chicken breasts in a mixture of olive oil, lemon juice, garlic, and fresh herbs like rosemary and thyme. Grill them on medium heat until cooked through and serve with a side of roasted vegetables.
- Creamy Chicken and Mushroom Pasta: Pan-fry chicken breasts with sliced mushrooms and then add a creamy sauce made with heavy cream, Parmesan cheese, and a touch of white wine. Serve over your favorite pasta.
- Honey Garlic Glazed Chicken Breast: Coat chicken breasts in a sticky honey garlic glaze and bake them in the oven until golden brown and cooked through. Serve with a side of rice or mashed potatoes.
- Chicken Caesar Salad: Grill or pan-fry chicken breasts and slice them into strips. Toss them with romaine lettuce, croutons, Parmesan cheese, and a creamy Caesar dressing.
- Chicken Fajitas: Marinate chicken breasts in a mixture of lime juice, cumin, chili powder, and garlic. Grill or pan-fry them and serve with warm tortillas, bell peppers, onions, salsa, and sour cream.
- chicken tikka masala: This Indian classic features chicken marinated in yogurt and spices, then cooked in a creamy tomato-based sauce.
- Chicken Stir-Fry: Chicken breast is a staple in countless stir-fry dishes. Combine it with your favorite vegetables and a flavorful sauce for a quick and healthy meal.
- chicken salad Sandwiches: Shred cooked chicken breast and combine it with mayonnaise, celery, onion, and herbs for a classic sandwich filling.
Part 8: Storage and Leftovers
Keeping Chicken Fresh
- If you're not planning on cooking the chicken breasts right away, store them in the refrigerator for up to 2 days.
- Make sure to wrap them tightly in plastic wrap or aluminum foil to prevent them from drying out.
- You can also freeze chicken breasts for up to 3 months.
- To freeze them, wrap them tightly in plastic wrap and then place them in a freezer-safe bag.
- To defrost frozen chicken breasts, transfer them to the refrigerator overnight.
Leftover Chicken: Don't Waste It!
- leftover chicken breasts can be used in a variety of dishes.
- You can slice them and add them to salads, soups, or sandwiches.
- You can also shred them and use them in chicken enchiladas, tacos, or pasta dishes.
- To reheat leftover chicken, you can microwave it, bake it in the oven, or pan-fry it.
- Chicken soup anyone? Leftover chicken makes a great base for a comforting chicken soup.
- Chicken salad for lunch? A classic chicken salad sandwich made with shredded chicken, mayonnaise, celery, and onion is always a good idea.
Part 9: Safety First
food safety: It's Not a Joke
It's crucial to handle chicken properly to prevent foodborne illness.
- Always wash your hands thoroughly with soap and water after handling raw chicken.
- Wash all surfaces, utensils, and cutting boards that have come into contact with raw chicken.
- Don't cross-contaminate other foods by placing cooked chicken on the same surface that held raw chicken.
- Never partially cook chicken and then refrigerate it for later.
- Always cook chicken to an internal temperature of 165°F (74°C).
Part 10: FAQs
1. How long does it take to cook a chicken breast?
The time it takes to cook a chicken breast depends on the size of the breast, the cooking method, and the temperature of your oven or stovetop. As a general guideline, a 4-ounce chicken breast will take about 15-20 minutes to cook through. However, it's always best to use a meat thermometer to check the internal temperature, which should reach 165°F (74°C).
2. How do I know if my chicken breast is cooked through?
The best way to determine if your chicken breast is cooked through is to use a meat thermometer. The internal temperature should reach 165°F (74°C). You can also check the chicken by cutting into it with a knife. The juices should run clear, not pink.
3. What happens if I overcook my chicken breast?
overcooked chicken breast will be dry and tough. It's important to cook chicken breast to the right temperature, but you don't want to overcook it. If you're unsure, it's always better to err on the side of undercooking it slightly. You can always cook it a little longer if needed.
4. What are some good side dishes for chicken breast?
Chicken breast goes well with a variety of side dishes, including roasted vegetables, mashed potatoes, rice, pasta, salads, and fruit. Choose side dishes that complement the flavors of your chicken breast and your overall meal.
5. Can I reuse the marinade I used for chicken breast?
It's not recommended to reuse the marinade that you used for raw chicken. The marinade may contain harmful bacteria that can cause foodborne illness. If you want to reuse the marinade, you can bring it to a boil on the stovetop for 1 minute to kill any bacteria. However, it's best to use a fresh marinade for each batch of chicken.
And there you have it, folks. My ultimate guide to cooking chicken breasts. Whether you're a seasoned chef or just starting out, I hope this guide has given you some useful tips and tricks to help you cook perfect chicken breasts every time. Happy cooking!
Everyone is watching

Perfect Rice Every Time: The Ultimate Guide to Cooking Rice
Cooking TipsAs a self-proclaimed foodie, I've always been a bit obsessed with rice. It's the foundation of countless cuisi...

Prime Rib Roast Cooking Time Chart: Per Pound Guide
Cooking TipsPrime rib roast. Just the name conjures images of lavish dinners, crackling fires, and hearty laughter. It’s ...

The Ultimate Guide to Cooking Asparagus: Tips, Techniques, and Recipes
Cooking TipsAsparagus. The mere mention of this spring delicacy conjures up images of vibrant green spears, crisp and burs...

Ultimate Guide to Cooking the Perfect Thanksgiving Turkey
Cooking TipsThanksgiving. Just the word conjures up images of overflowing tables laden with delicious food, the scent of r...

How Long to Bake Potatoes in the Oven (Perfect Every Time)
Cooking TipsBaked potatoes are a staple in my kitchen. They're incredibly versatile, delicious, and surprisingly easy to m...
