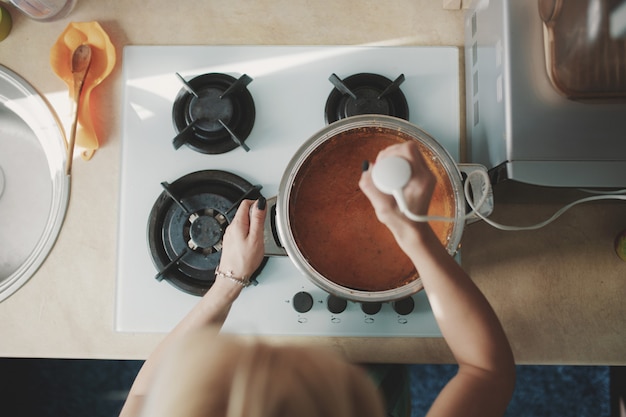
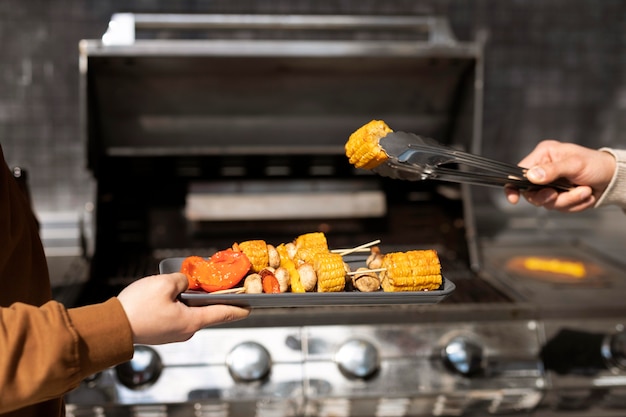
Ah, brats. The quintessential summer sausage, sizzling on the grill, the air thick with smoky aromas… pure bliss. But what about those rainy days when the grill is a no-go? Or maybe you just don't feel like hauling out the charcoal? That's where stovetop cooking comes in. It's surprisingly simple, incredibly delicious, and a perfect way to satisfy your brat craving any day of the week.
My first attempt at stovetop brats was… well, let's just say it was a learning experience. I was a young whippersnapper, convinced I could whip up a gourmet sausage sandwich with nothing but good intentions and a pan. The result? Rubbery sausages that wouldn’t have been out of place on a medieval battlefield. Thankfully, I’ve learned a thing or two since then, and I'm ready to share those hard-earned lessons with you.
So, grab your skillet, gather your ingredients, and let's delve into the world of stovetop brat perfection!
Part 1: The Bratwurst Basics

Before we dive into the cooking process, let's talk about the star of the show: the bratwurst itself. It’s not just any sausage that will do! You want a brat that's bursting with flavor, juicy, and ready to become the star of your culinary masterpiece.
Picking the Perfect Brat:
- Freshness is Key: Always check the use-by date. You want those brats to be fresh and flavorful, not dry and disappointing. Make sure the packaging is intact and free of any tears or punctures.
- Size Matters: Brats come in different sizes. I generally prefer those that are about 6 inches long. This allows for good browning and a nice bite-sized portion.
- Quality Counts: Choose brats that are made with high-quality ingredients, particularly lean pork. You want sausages that are packed with flavor and free of fillers.
- Flavor is Personal: This is where your taste buds take the reins! From classic bratwurst to spicy chorizo, there's a flavor profile for everyone. Don't be afraid to experiment and find what you love!
Brats vs. italian sausage: A Little Clarity
Now, a quick word about those sausage names that often get tossed around interchangeably: brats and Italian sausage. While they might be used in similar dishes, they’re actually quite distinct.
Brats, true to their German origin, are usually made primarily with pork. They tend to have a coarser texture and are seasoned with a blend of spices like coriander, caraway, and marjoram. Think of them as a hearty, savory sausage, perfect for grilling or pan-frying.
Italian sausage, on the other hand, can be made with pork, beef, or a mix of both. It has a finer texture and is typically seasoned with fennel, garlic, and red pepper. This sausage is known for its distinct, robust flavor, often found in pasta dishes or as a standalone filling for sandwiches.
So, while you can definitely use Italian sausage as a substitute for brats (especially on the stovetop), just be aware that the flavor profile will be different. It’s a delicious alternative, but not quite the same as a traditional bratwurst.
Part 2: Prep Work for Success

You’ve got your brats. Now it’s time to set the stage for stovetop cooking success. Think of this stage as prepping your culinary battlefield for victory!
1. The Pan That Makes a Difference:
Over the years, I’ve experimented with various pots and pans for my brats. My go-to choice? A cast-iron skillet. It distributes heat beautifully, creating a gorgeous golden-brown crust on those sausages. Plus, it holds the heat well, crucial for achieving a delicious sear. But, if you don't have a cast-iron skillet, a heavy-bottomed stainless steel skillet will also do the trick.
2. Heat is Your Ally:
Don’t underestimate the power of heat in stovetop cooking. You want that skillet hot before you add those brats. Adding them to a cold pan will lead to steaming rather than searing, and nobody wants a steamed brat! My recommendation? Medium-high heat.
3. Oil is Your Friend (But Not Too Much):
Cooking brats on the stovetop will involve a little bit of grease, but that’s part of the charm. And remember, don't overcrowd the pan! Give those sausages some breathing room. I usually use a tablespoon or two of oil to coat the bottom of the skillet. vegetable oil is my go-to, but olive oil or a mix of oils works well too. Just make sure it has a high smoke point, so it doesn't burn before your brats are done.
Part 3: The Art of Stovetop Brat Cooking

We’re finally at the heart of the matter: cooking those brats! This is where those prep steps pay off, and where your patience and precision come into play.
1. Searing for Savory Perfection:
Once that oil is shimmering in your hot skillet, carefully place your brats in the pan. Remember, no overcrowding! You want those brats to have space to sear beautifully, creating that golden-brown crust we all crave. I typically let them sear for about 2-3 minutes per side, but keep a close eye on them. You don't want to burn the outsides, just achieve that delicious crispiness.
2. The Internal Battle: Making Sure They're Cooked Through
After those brats have a nice sear on all sides, it's time to ensure they're cooked through. There are two methods you can use:
- The Thermometer Method: Use a meat thermometer to check for an internal temperature of 155°F (68°C). This is the most accurate method for ensuring those brats are cooked to perfection.
- The Fork Test: This is the traditional method, where you use a fork to poke the brat. If you see clear juices, then those sausages are ready. But be warned: this method can be a little less reliable than the thermometer method, so exercise caution.
3. Slow and Steady Wins the Race:
Now, you don't want to just dump those brats in the pan and forget about them! The key here is slow cooking over medium heat, allowing them to cook through evenly and become tender and juicy. I typically cook them for about 10-15 minutes, turning them occasionally to ensure even cooking.
4. The Finishing Touches: Adding Flavor and Depth
While those brats are cooking, start thinking about your finishing touches. I like to add a knob of butter to the skillet during the last few minutes of cooking. This creates a rich, flavorful sauce that coats the brats, adding another layer of depth. You can also add a splash of beer, broth, or even apple cider for extra flavor. Just let the brats simmer in the liquid for a few minutes to absorb all those delicious flavors.
5. Rest and Relaxation: A Crucial Step
Once those brats are cooked through, remove them from the skillet and set them aside on a plate. Let them rest for a few minutes. This allows the juices to redistribute throughout the sausage, resulting in a more tender, flavorful brat.
Part 4: The Perfect Stovetop Brat Pairings
You've got your perfectly cooked brats, now it's time to think about your supporting cast! What sides will you pair those delicious sausages with?
1. Classic Companions:
- potato salad: A timeless classic for a reason! The creamy tanginess of potato salad is a perfect counterpoint to the rich, savory flavor of the brats.
- Macaroni Salad: Another crowd-pleaser, macaroni salad provides a creamy and comforting accompaniment to your brats.
- Sauerkraut: A traditional pairing for brats, sauerkraut adds a tangy kick with its fermented cabbage goodness. It’s even better with a dollop of mustard.
- Coleslaw: The crispness of coleslaw adds a refreshing contrast to the richness of the brats.
- Baked Beans: A hearty and comforting side dish that complements the satisfying nature of brats.
2. Beyond the Ordinary:
Feeling adventurous? Why not try some unexpected pairings with your brats? I’ve experimented over the years, and these have become some of my favorites:
- Grilled Pineapple: The sweetness of grilled pineapple creates a delightful harmony with the savory brats.
- roasted brussels sprouts: Crispy roasted Brussels sprouts add a nutty flavor that complements the richness of the brats.
- sweet potato Fries: A healthier alternative to classic chips, sweet potato fries offer a sweet and savory contrast to your brats.
Part 5: Bread Choices that Elevate the Brat Experience
We’re almost there: the perfect bread to hold those juicy, delicious brats. This is about finding the right balance of texture and taste to complement the star of the show.
1. Classic Bread Options:
- Hot Dog Buns: A classic for a reason! They’re soft, fluffy, and hold up well to those juicy brats.
- Kaiser Rolls: These rolls have a slightly sweet flavor and a satisfyingly crispy texture, providing a delicious contrast to the soft brats.
- Pretzel Rolls: The salty, chewy texture of pretzel rolls is a perfect match for those savory brats.
2. Bread Adventures Beyond the Basics:
Don’t be afraid to break free from the traditional bread choices!
- Ciabatta: This rustic Italian bread is perfect for soaking up all those delicious juices from the brats.
- Sourdough: The tangy flavor of sourdough complements the savory flavor of the brats.
- Baguettes: These long, crusty loaves are perfect for making a more substantial sandwich.
Part 6: Condiments that Make a Brat Sandwich Sing
We’re almost at the finish line! No brat sandwich is complete without a selection of condiments to elevate the flavor experience. Think of these as the final touches that transform your brat sandwich from good to amazing.
1. Mustard Magic:
Classic yellow mustard is always a safe bet, but if you’re feeling adventurous, explore these delicious alternatives:
- Stone-ground mustard: This mustard has a more intense, robust flavor than your standard yellow mustard.
- Honey mustard: The sweetness of honey adds a delightful touch to the savory brats.
- Dijon mustard: This mustard boasts a tangy, sharp flavor that cuts through the richness of the brats.
2. Sauerkraut Sauce: A Tangy Delight
For a tangy twist, try adding a dollop of sauerkraut sauce to your brat sandwich. It adds a unique flavor and texture that elevates the overall experience.
3. Relish Delight: A Burst of Freshness
Add a spoonful of relish for a refreshing burst of flavor. I’ve found that sweet relish, dill relish, or even jalapeno relish work beautifully with brats.
4. Pickles and Onions: Classic Accompaniments
Don’t forget the pickles and onions! These classics add a nice touch of acidity and crunch to your brat sandwich.
Part 7: Tips and Tricks for Stovetop Brat Success
Over the years, I've learned a few tips and tricks for cooking the perfect stovetop brats. Here are some of my favorites to share:
- Score the Brats: Before you cook those brats, score them with a knife. This helps them cook more evenly and prevents them from bursting open.
- Use a Spatula: Flip those brats during cooking with a spatula rather than a fork. This helps prevent them from falling apart.
- Don't Overcook: It's essential not to overcook your brats. They should be cooked through but remain juicy and flavorful.
- Don't Fear the Grease: Don't be afraid to let those brats get a bit greasy. It's part of what makes them so delicious.
- Get Creative with Flavors: Experiment with different flavors and toppings! The world of bratwurst is your oyster.
- Make it a Feast: Serve your stovetop brats with a variety of sides and condiments. It's a perfect meal for a casual get-together or a family dinner.
Part 8: FAQs
Here are some frequently asked questions about cooking brats on the stovetop.
Can I cook brats in a microwave?
I strongly advise against cooking brats in the microwave. It won't produce the same delicious, crispy texture. You'll end up with a rubbery, mushy mess.
Can I use a cast iron skillet to cook brats on the stovetop?
Absolutely! A cast iron skillet is the perfect pan for cooking brats on the stovetop. It heats up quickly and evenly, creating a beautiful sear.
How long does it take to cook brats on the stovetop?
It takes about 15-20 minutes to cook brats on the stovetop. The exact cooking time will depend on the thickness of the brats and the heat of your stove.
What's the best way to know if brats are cooked through?
You can use a meat thermometer to check the internal temperature of the brats. They should reach an internal temperature of 155°F (68°C). You can also use a fork to poke the brats. If you see clear juices, then they're done.
What happens if I overcook brats?
If you overcook brats, they will become dry and tough. They'll also lose their juicy flavor.
Part 9: Final Thoughts
I hope this guide has inspired you to try cooking brats on the stovetop. It's a simple, satisfying, and delicious way to enjoy your favourite sausages. Remember to experiment with different flavors, toppings, and sides to find your perfect combination. And most importantly, enjoy the process!
Everyone is watching

Perfect Rice Every Time: The Ultimate Guide to Cooking Rice
Cooking TipsAs a self-proclaimed foodie, I've always been a bit obsessed with rice. It's the foundation of countless cuisi...

Prime Rib Roast Cooking Time Chart: Per Pound Guide
Cooking TipsPrime rib roast. Just the name conjures images of lavish dinners, crackling fires, and hearty laughter. It’s ...

The Ultimate Guide to Cooking Asparagus: Tips, Techniques, and Recipes
Cooking TipsAsparagus. The mere mention of this spring delicacy conjures up images of vibrant green spears, crisp and burs...

Ultimate Guide to Cooking the Perfect Thanksgiving Turkey
Cooking TipsThanksgiving. Just the word conjures up images of overflowing tables laden with delicious food, the scent of r...

How Long to Bake Potatoes in the Oven (Perfect Every Time)
Cooking TipsBaked potatoes are a staple in my kitchen. They're incredibly versatile, delicious, and surprisingly easy to m...
