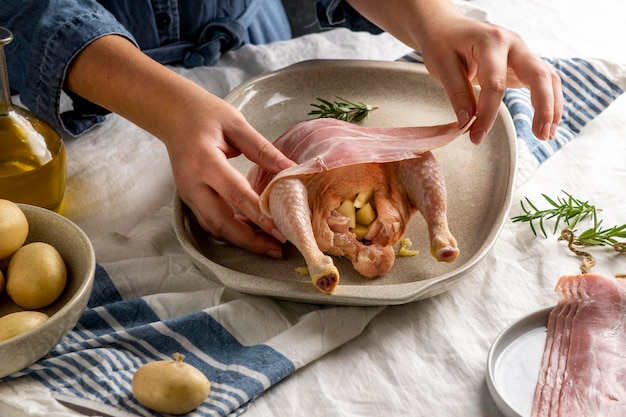
You've got a beautiful batch of bone-in chicken breasts, ready to be transformed into a delicious meal. But then the question hits you: how long do I cook these bad boys for? Don't worry, I've been there, staring at the oven timer, wondering if I'm about to create a dry, rubbery chicken disaster. But trust me, with a bit of know-how and the right techniques, you'll be whipping up succulent, juicy chicken breasts in no time.
This ultimate guide is your one-stop shop for all things bone-in chicken breast cooking. We'll dive into different cooking methods, exploring everything from oven baking to pan-frying, and unpack the factors that affect cooking time. I'll even share some handy tips and tricks I've picked up over the years, as well as my personal preferences for achieving the perfect, moist chicken breast. So grab a comfy chair, settle in, and let's get cooking!
(Part 1) Choosing the Right Chicken

It all starts with choosing the right chicken. You want to look for plump, firm breasts with a nice, even color. Avoid any that look dry or have a strange odor. The size of the breast will also determine cooking time, so it's good to have a rough idea of how much you're dealing with.
The Importance of Freshness
It's crucial to use fresh chicken for the best results. This means checking the 'use by' date and making sure the chicken is well-chilled. You can also smell the chicken for any off-putting scents. And if you're feeling fancy, opt for free-range or organic chicken for a richer flavour.
The Weight Game
Now, let's talk weight. For our bone-in chicken breast journey, we'll be focusing on breasts that weigh around 6-8 ounces each. This is a standard size that's perfect for individual servings and generally takes around 30-40 minutes to cook. But remember, every chicken is different, so don't be afraid to adjust cooking times based on weight.
Size Matters: Adjusting for Thickness
The thickness of the chicken breast will also affect cooking time. Thicker breasts will need a little longer to cook through than thinner ones. A good way to judge is to look at the breast from the side. If it's thicker than a couple of inches, you'll likely want to add a few minutes to the cooking time.
(Part 2) Oven Baking: The Classic Method

For a hassle-free approach, oven baking is a real winner. This method is perfect for batch cooking, as you can pop a whole tray of chicken breasts into the oven and let them do their thing.
The Oven Temperature
Preheat your oven to 375°F (190°C). This temperature ensures even cooking and a lovely golden-brown crust.
Prepping the Chicken
Pat your chicken breasts dry with paper towels. This helps them crisp up nicely and prevents any unwanted steam buildup. You can season them with salt and pepper, or get creative with your favourite herbs and spices. If you're feeling adventurous, try adding garlic powder, paprika, or even a pinch of cayenne pepper. You can also create a marinade for extra flavour.
The Baking Time
For bone-in chicken breasts, aim for 30-40 minutes, or until the internal temperature reaches 165°F (74°C). Use a meat thermometer to check the temperature accurately.
The Resting Stage
Once the chicken is cooked through, remove it from the oven and let it rest for 5-10 minutes before slicing. This allows the juices to redistribute throughout the meat, resulting in a more tender and juicy breast.
(Part 3) Pan-Frying: Quick and Easy

Pan-frying is a great option for a quick and easy meal. It's perfect for weeknight dinners when you're short on time but still crave a delicious, home-cooked meal.
Choosing the Right Pan
A cast-iron skillet is ideal for pan-frying, as it heats up quickly and distributes heat evenly. However, any heavy-bottomed pan will do the trick.
The Oil Factor
Heat a tablespoon or two of oil in your pan over medium-high heat. Don't be afraid to use a generous amount of oil; you want the chicken to sizzle and brown nicely.
Sealing the Deal
Season your chicken breasts with salt and pepper, then place them in the hot pan. Let them cook undisturbed for 3-4 minutes per side, or until they develop a lovely golden-brown crust.
Finishing Touches
Once the chicken is seared on both sides, reduce the heat to medium-low, cover the pan, and cook for an additional 10-15 minutes, or until the internal temperature reaches 165°F (74°C).
The Importance of a Good Sizzle
A good sizzle when you place the chicken in the pan is a sign that the oil is hot enough. If the chicken doesn't sizzle, the oil isn't hot enough and you risk ending up with a soggy chicken breast.
(Part 4) Factors Affecting Cooking Time
Now that we've covered the basics, let's delve into some factors that can affect cooking time and ensure you get those perfectly cooked chicken breasts every time.
The Thickness of the Breast
Thicker chicken breasts will take longer to cook than thinner ones. To account for this, check the internal temperature more frequently and adjust the cooking time accordingly.
The Size of the Bone
The size of the bone can also influence cooking time. A larger bone will take longer to heat up, so you may need to add a few extra minutes to the cooking time.
The Oven or Stove
Different ovens and stoves can vary in heat output, so it's always a good idea to keep an eye on your chicken and adjust cooking time as needed.
The Crowd
Are you cooking for a crowd? If you're making several chicken breasts at once, keep in mind that they might take slightly longer to cook as they'll compete for heat in the oven or pan.
(Part 5) Signs of Perfectly Cooked Chicken
Knowing when your chicken is cooked to perfection is key to avoiding dry, rubbery meat. Here are some telltale signs to watch out for:
The Colour Test
The chicken should be cooked through and no longer pink in the centre.
The Temperature Test
Use a meat thermometer to check the internal temperature. It should register 165°F (74°C) for bone-in chicken breasts. This is the most reliable method to ensure the chicken is cooked through and safe to eat.
The Touch Test
If you're not using a thermometer, you can test the chicken by gently pressing on it. If it feels firm and springy, it's cooked through.
The Juice Test
Cut a small slit in the chicken. The juices should run clear, not pink.
(Part 6) Common Pitfalls to Avoid
Now, let's talk about some common pitfalls that can lead to dry, disappointing chicken breasts.
Overcrowding the Pan or Oven
Overcrowding the pan or oven will prevent the chicken from cooking evenly. This can lead to unevenly cooked breasts with some parts overcooked and others undercooked.
Not Letting the Chicken Rest
Remember to let the chicken rest for 5-10 minutes after cooking. This allows the juices to redistribute, ensuring a more tender and juicy breast.
Using the Wrong Temperature
If you're cooking your chicken at too high a temperature, it can dry out quickly. Stick to the recommended temperatures for the best results.
Cutting into the Chicken Too Soon
Don't cut into the chicken too soon. This will allow the juices to escape, resulting in a dry breast.
(Part 7) Tips and Tricks for Success
Here are some handy tips and tricks to help you achieve the perfect, moist, and flavorful chicken breasts:
Use a Meat Thermometer
Invest in a good quality meat thermometer. This is the most accurate way to ensure your chicken is cooked through and safe to eat.
Don't Overcook
Overcooked chicken is dry and chewy. Cook it to the recommended internal temperature and no more.
Keep an Eye on the Heat
Adjust the oven temperature or heat on your stovetop as needed to ensure even cooking. You may need to reduce the heat slightly if your oven runs hot.
Don't Crowd the Pan
Give your chicken breasts plenty of room in the pan or oven. This will allow them to cook evenly and develop a nice crust. If you need to cook multiple breasts, it's best to cook them in batches rather than overcrowding the pan.
Rest Before Slicing
Remember to let the chicken rest for 5-10 minutes after cooking.
(Part 8) Variations and Ideas
Once you've mastered the basics, you can experiment with different flavours and techniques to add some variety to your chicken breasts. Here are a few ideas:
Mediterranean Chicken
Marinate your chicken breasts in a mixture of olive oil, lemon juice, garlic, oregano, and salt and pepper. Then, bake or pan-fry them until cooked through. Serve with a side of couscous or roasted vegetables for a complete Mediterranean meal.
Honey Garlic Chicken
Mix honey, soy sauce, garlic, and ginger together. Marinate the chicken breasts in this mixture, then bake or pan-fry them until cooked through. Serve over rice with a side of steamed vegetables.
Cajun Chicken
Season your chicken breasts with Cajun seasoning, then bake or pan-fry them until cooked through. Serve with a side of rice or potato salad for a flavorful Cajun feast.
(Part 9) Leftovers: Making the Most of Your Chicken
Don't let leftover chicken go to waste! There are plenty of delicious ways to use it up.
chicken salad
Dice the leftover chicken and mix it with mayonnaise, celery, onion, and your favourite seasonings. Serve it on bread, crackers, or lettuce leaves for a quick and easy lunch.
Chicken Soup
Add the leftover chicken to your favourite soup recipe. It's a great way to add protein and flavour to a comforting soup.
Chicken Pizza
Top your favourite pizza dough with leftover chicken, sauce, cheese, and other toppings for a delicious and creative pizza.
Chicken Stir-Fry
Slice the leftover chicken and add it to your favourite stir-fry recipe for a quick and easy dinner.
Chicken Quesadillas
Fill tortillas with leftover chicken, cheese, and other fillings for a cheesy and satisfying meal.
(Part 10) FAQs
Q1: Can I cook bone-in chicken breasts in a slow cooker?
A1: You can, but I wouldn't recommend it. Slow cookers are better suited for tougher cuts of meat, as the long, low cooking time can make chicken breasts dry and tough.
Q2: What if I accidentally overcook my chicken?
A2: Don't worry, it happens to the best of us! If you've overcooked your chicken, it might be a little dry, but it's still safe to eat. You can try to salvage it by adding a little bit of sauce or gravy to help moisten it up.
Q3: What's the best way to reheat leftover chicken?
A3: The best way to reheat leftover chicken is in the oven or microwave. Reheating in the oven will help it stay moist, while the microwave will be quicker but can lead to a slightly drier texture.
Q4: Can I freeze bone-in chicken breasts?
A4: Absolutely! Just wrap them tightly in plastic wrap or freezer paper before storing them in the freezer. They should last for up to 3 months.
Q5: What are some good sides to serve with chicken breasts?
A5: The possibilities are endless! Roasted vegetables, mashed potatoes, rice, pasta salad, and green salads are all great options. You can also get creative with different flavour profiles to complement your chicken dish.
And there you have it, my dear friend, your ultimate guide to cooking bone-in chicken breasts. Remember to choose fresh, plump breasts, follow the cooking guidelines, and don't be afraid to experiment with different flavours and techniques. Happy cooking!
Everyone is watching

Prime Rib Roast Cooking Time Chart: Per Pound Guide
Cooking TipsPrime rib roast. Just the name conjures images of lavish dinners, crackling fires, and hearty laughter. It’s ...

How Long to Bake Potatoes in the Oven (Perfect Every Time)
Cooking TipsBaked potatoes are a staple in my kitchen. They're incredibly versatile, delicious, and surprisingly easy to m...

Perfect Rice Every Time: The Ultimate Guide to Cooking Rice
Cooking TipsAs a self-proclaimed foodie, I've always been a bit obsessed with rice. It's the foundation of countless cuisi...

The Ultimate Guide to Cooking Asparagus: Tips, Techniques, and Recipes
Cooking TipsAsparagus. The mere mention of this spring delicacy conjures up images of vibrant green spears, crisp and burs...

Ultimate Guide to Cooking the Perfect Thanksgiving Turkey
Cooking TipsThanksgiving. Just the word conjures up images of overflowing tables laden with delicious food, the scent of r...
