I'll admit it: I've been there, standing in the kitchen, staring at a pot of boiling water and a basket of eggs, wondering how I could possibly get them perfectly hard-boiled every time. It feels like a simple task, but there's more to it than just throwing eggs in a pot and hoping for the best. I've had my fair share of disappointments: rubbery yolks, those dreaded grey-green rings around the yolk, and even the occasional cracked egg. But, trust me, it's not all doom and gloom. After years of trial and error, countless experiments, and more than a few culinary disasters, I've finally figured out the secret to consistently perfect hard-boiled eggs. Ready to join me on this journey? Let's crack this!
(Part 1) The Basics: Setting the Stage for Success
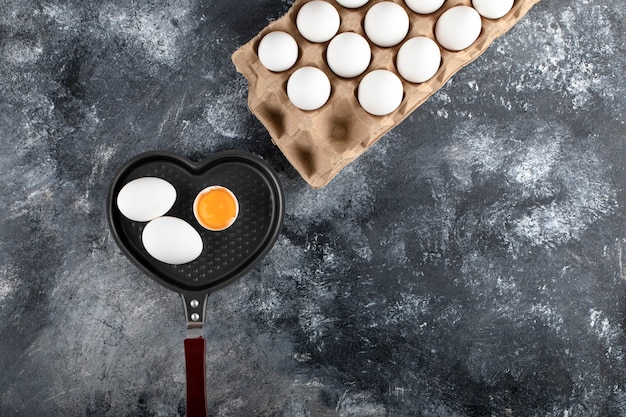
Choosing Your Eggs: Freshness Matters
The first step in achieving egg-cellent results is selecting the right eggs. Just like a painter needs the right canvas, you need the perfect starting point. fresh eggs are key. Think of it this way: the older an egg gets, the more air pockets it develops. These air pockets can cause cracking during cooking, leading to those messy, unevenly cooked results we all dread. Plus, they can lead to a rubbery texture, which is a definite no-no in my book.
Now, you might be thinking, "How do I know if my eggs are fresh?" Don't worry, I've got you covered. My grandma taught me this handy trick: give the egg a good spin on a flat surface. If it spins easily and comes to a stop slowly, it's fresh. If it spins quickly and comes to a sudden halt, it's a bit older. Simple, right?
Cold Water is Your Ally: Starting Off Right
Hold your horses! Don't even think about throwing your precious eggs into a pot of boiling water. Big mistake! Always start with cold water. Think of it as a gentle introduction for your eggs. It allows them to heat up gradually and evenly, minimizing the risk of those pesky cracks. Plus, starting with cold water gives you more control over the cooking process, leading to a more consistent texture.
(Part 2) The Boiling Process: The Heart of the Operation
Boiling with Precision: The Art of a Rolling Boil
Alright, here's where the fun begins. You've got your eggs in cold water, and you're ready to bring them to a boil. Here's the crucial part: the water needs to be a full-on rolling boil, not just a simmer. And here's the secret ingredient that my grandma swore by: a teaspoon of salt. It doesn't affect the taste of the egg, but it helps prevent cracking. Trust me, it's a game changer.
The Timing Game: Mastering the Art of cooking time
This is where things get a bit more technical. The cooking time determines the texture of your boiled eggs – from soft and runny to hard and firm. But remember, every egg is different, and the size can influence the cooking time. Here's a general guideline, but don't be afraid to tweak it based on your preferences:
| Desired Texture | Cooking Time |
|---|---|
| Soft-Boiled | 3-4 minutes |
| Medium-Boiled | 6-8 minutes |
| Hard-Boiled | 8-10 minutes |
For me, the perfect hard-boiled egg is cooked for around 9 minutes. It's just the right amount of time to achieve a firm yolk that's still slightly runny. But everyone has their own preferences, so don't be afraid to experiment! Try adding a minute or two to your cooking time until you find the texture that suits your taste buds.
(Part 3) The Cool Down: Preventing the Dreaded Green Ring
Ah, the dreaded green ring. You know, that greyish-green layer that forms around the yolk of hard-boiled eggs. It's not just unattractive, but it can also give the yolk a metallic taste, ruining the otherwise perfect egg. But fear not, there's a simple solution!
The ice bath: A Cooling Hero
As soon as your eggs are done cooking, immediately plunge them into a bowl of ice-cold water. This shock treatment stops the cooking process instantly, preventing that pesky green ring from forming. It also makes peeling the eggs a breeze.
(Part 4) The Peeling Process: Easing the Challenge
Mastering the Art of Peeling: Smooth Sailing
Okay, so now you have perfectly cooked eggs. But wait, there's one more hurdle to overcome – peeling. Sometimes, it feels like an impossible mission, especially if you're dealing with older eggs. But don't despair! I've learned some tricks over the years that make the process much easier.
First, gently tap the egg on the counter a few times to create some cracks in the shell. Then, roll the egg between your hands to loosen the shell further. Now, you can start peeling from the wide end, where the air pocket is located. If the shell is still stubborn, try gently sliding a spoon between the shell and the egg.
Dealing with Stubborn Shells: A Handy Solution
Let's be honest, sometimes you encounter those stubborn shells that refuse to cooperate. In those cases, I grab my trusty kitchen shears. Just cut a small hole at the top of the egg and carefully remove the shell from there. It's a bit messier, but it gets the job done.
(Part 5) Mastering the Hard-Boiled Egg: Beyond the Basics
The Art of the Perfect Hard-Boiled Egg: Your Personal Touch
Now, we've covered the basics, but what about that perfect hard-boiled egg? The one with a creamy, vibrant yolk, surrounded by a perfectly set white? It's all about finding your own personal touch, the secret ingredient that makes it truly yours.
Experimenting with Cooking Time: Finding Your Sweet Spot
For me, the perfect hard-boiled egg is cooked for around 9 minutes. It's just the right amount of time to achieve a firm yolk that's still slightly runny. But, like I said, it's all about personal preference. Don't be afraid to experiment! Try adding a minute or two to your cooking time until you find the perfect texture for your taste.
Incorporating Flavour: A culinary adventure
Once you've mastered the art of the perfect hard-boiled egg, why stop there? Get creative! Add some flavour to your eggs. You can infuse them with herbs and spices during the cooking process.
- Try adding a sprig of rosemary or thyme to the boiling water for a subtle, earthy flavour.
- Or, for something bolder, throw in a few peppercorns or a bay leaf.
You can also experiment with different marinades after the eggs are cooked.
- A simple vinaigrette can add a tangy kick.
- Or, get adventurous with a smoky paprika rub.
The possibilities are endless!
(Part 6) The Hard-Boiled Egg: A Culinary Hero
From deviled eggs to Salad Toppings: A Culinary Adventure
Now, you're probably thinking, "What can I even do with these perfect hard-boiled eggs?" Well, the possibilities are endless! They're a culinary chameleon, ready to transform into any dish.
- Make classic deviled eggs, a party favourite.
- Chop them up and add them to your salads.
- Create a delicious egg salad sandwich.
- Slice them and use them as a topping for avocado toast.
- Add them to your favourite grain bowls for extra protein and texture.
- Use them as a base for a quick and easy breakfast burrito.
- Experiment with making egg frittatas or quiches.
- Incorporate them into your favourite noodle dishes.
They're a perfect addition to breakfast, lunch, or even dinner.
(Part 7) Hard-Boiled Egg Fails: Learning from Mistakes
When Things Go Wrong: Troubleshooting and Tips
Let's face it, sometimes even the best of us make mistakes. But that's okay! It's all part of the learning process. I've made my fair share of blunders, from cracked eggs to rubbery yolks. But I've learned from those experiences, and I'm here to share some tips with you.
Cracked Eggs: What to Do?
If an egg cracks during the boiling process, don't panic! Just add a teaspoon of vinegar to the water. The acid will help to solidify the white and prevent it from leaking out.
Rubber Eggs: The Solution
If your eggs turn out rubbery, it's probably because you overcooked them. Next time, try reducing the cooking time by a minute or two.
Green Ring: The Solution
If you notice a green ring around the yolk, it's a sign of overcooking or inadequate cooling. Remember to plunge the eggs into an ice bath immediately after cooking to prevent this.
(Part 8) FAQs: Your Hard-Boiled Egg Queries Answered
1. Why Do My Eggs Crack?
Cracked eggs are a common problem, but there are a few things you can do to prevent them.
- Make sure you use fresh eggs. Older eggs are more prone to cracking.
- Start with cold water and bring it to a boil slowly.
- Add a teaspoon of salt to the water. This helps prevent cracking.
- Handle the eggs gently during the cooking process.
2. What If My Eggs Have a Green Ring?
That greenish ring around the yolk is a sign that the eggs were overcooked or not cooled down quickly enough. To prevent it, plunge your eggs into an ice bath immediately after cooking.
3. How Do I Get Eggs to Peel Easily?
This is a common challenge, but there are a few tricks that can help.
- Start with fresh eggs. Older eggs are harder to peel.
- Add a teaspoon of baking soda to the boiling water. This helps to loosen the shell.
- Gently tap the egg on the counter to create some cracks in the shell.
- Roll the egg between your hands to loosen the shell further.
- Peel the egg under cold running water. This makes the process smoother.
4. What Happens If I Overcook My Eggs?
Overcooked eggs can become rubbery and tough. The yolk will be dry and crumbly, and the white might have a greyish-green ring around it.
5. Can I Use Hard-Boiled Eggs for Baking?
Absolutely! Hard-boiled eggs can be used in baking. They add moisture and richness to cakes, cookies, and even bread. Just make sure to finely chop them before incorporating them into your recipe.
Everyone is watching

Prime Rib Roast Cooking Time Chart: Per Pound Guide
Cooking TipsPrime rib roast. Just the name conjures images of lavish dinners, crackling fires, and hearty laughter. It’s ...
How Long to Bake Potatoes in the Oven (Perfect Every Time)
Cooking TipsBaked potatoes are a staple in my kitchen. They're incredibly versatile, delicious, and surprisingly easy to m...
Perfect Rice Every Time: The Ultimate Guide to Cooking Rice
Cooking TipsAs a self-proclaimed foodie, I've always been a bit obsessed with rice. It's the foundation of countless cuisi...
The Ultimate Guide to Cooking Asparagus: Tips, Techniques, and Recipes
Cooking TipsAsparagus. The mere mention of this spring delicacy conjures up images of vibrant green spears, crisp and burs...
Ultimate Guide to Cooking the Perfect Thanksgiving Turkey
Cooking TipsThanksgiving. Just the word conjures up images of overflowing tables laden with delicious food, the scent of r...