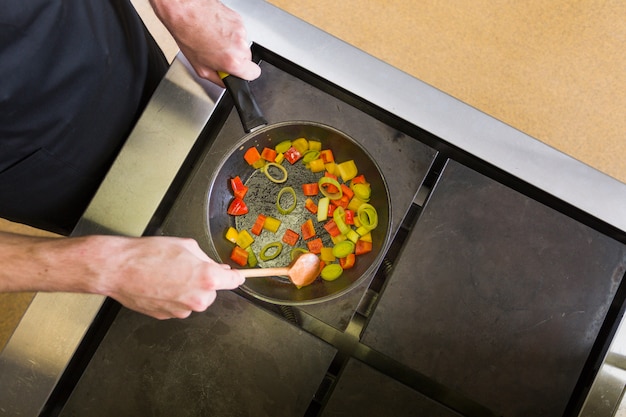
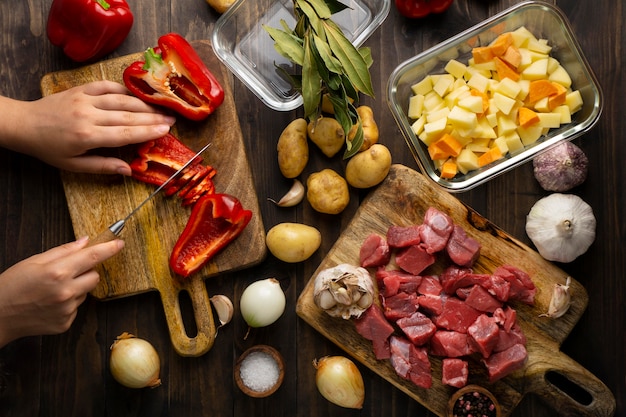
Ah, stuffing. That glorious bread-based delight, a true star of any roast dinner. But how long do you bake it for? It's a question that plagues even the most seasoned cooks. Let's face it, getting the timing right is essential. You want stuffing that's perfectly cooked, golden brown, and bursting with flavour, not dry and crumbly. So, grab your trusty oven mitts, settle in, and let's dive into the secrets of stuffing baking times together.
(Part 1) Understanding the Anatomy of Stuffing

Before we delve into those crucial oven temperatures and timings, let's get a little more intimate with the ins and outs of stuffing. This seemingly simple dish has its own set of nuances, and understanding them will help you master the art of baking the perfect stuffing.
1.1. The Building Blocks: Bread, Broth, and More
Stuffing, at its core, is a mixture of cubed bread, moistened with broth or stock. But that's just the foundation. It's the added ingredients that really give it personality and flavour. Imagine a blank canvas: herbs and spices are the colours you choose, while veggies, meats, and even fruits are the textures and shapes you add.
1.2. The Importance of Stale Bread
You might think fresh bread is the way to go, but for stuffing, stale bread is king. Why? It absorbs the broth better, leading to a more cohesive stuffing that won't be soggy. You can even dry out your bread in a low oven if you're in a pinch.
1.3. The Role of Herbs and Spices
Herbs and spices are the flavour heroes of stuffing. They're the secret weapons that take it from ordinary to extraordinary. Sage, thyme, parsley, and rosemary are classic choices, but don't be afraid to experiment. A touch of nutmeg or a pinch of cayenne pepper can add surprising depth.
1.4. The Versatility of Stuffing
One of the best things about stuffing is its versatility. It's a chameleon that can morph into whatever you want it to be. Want a hearty sausage stuffing? Go for it. Craving a sweet and tangy cranberry and apple stuffing? Absolutely! The sky's the limit. You can even use different grains like wild rice or quinoa for a unique twist.
(Part 2) The Baking Time Factors: Unlocking the Secrets

Now, let's get down to the nitty-gritty. The baking time for stuffing is not a one-size-fits-all equation. It's influenced by several factors that can make all the difference between a perfectly cooked masterpiece and a dry, disappointing mess.
2.1. The Size and Shape: A Matter of Surface Area
Think of a shallow, wide dish of stuffing compared to a deep, narrow one. That wide, shallow dish has more surface area exposed to the oven's heat, meaning it will cook faster. The deeper, narrow dish takes longer to heat through. It's all about that surface area!
2.2. The Density: Light and Fluffy vs. Hearty and Dense
A stuffing packed with meat, vegetables, and lots of herbs will take longer to cook than a lighter, airier version. Imagine a dense sourdough loaf versus a fluffy brioche. The sourdough, being more compact, needs more time in the oven to bake through.
2.3. The Oven Temperature: Hot and Fast vs. Slow and Steady
A high oven temperature will speed up the cooking process. Think of it like baking a cake. A hot oven creates a lovely golden crust quickly. But a lower oven temperature will require more time to cook the stuffing evenly. So, your choice of oven temperature has a direct impact on the baking time.
(Part 3) The Golden Rule: Temperature is King

Here's the most important thing to remember: regardless of the type of stuffing or the baking time, the golden rule is to bake it until it reaches an internal temperature of 165°F (74°C). That's the magic number that ensures your stuffing is cooked through and safe to eat.
3.1. The Power of the meat thermometer
A trusty meat thermometer is your best friend when baking stuffing. Insert it into the thickest part of the stuffing, ensuring it doesn't touch any metal or the dish. Once it reaches that magic 165°F (74°C), your stuffing is ready to go.
3.2. Don't Trust Your Eyes Alone
Just because the stuffing looks golden brown on top doesn't mean it's cooked through. The internal temperature is the ultimate indicator. So, always check with your thermometer to be sure.
(Part 4) Typical Baking Times: A General Guide
Okay, now for the practical stuff. Here are some general guidelines for baking times for different types of stuffing. Remember, these are just starting points. Always rely on the internal temperature as your final guide.
4.1. Traditional Bread Stuffing
For a classic bread stuffing, you're looking at about 45 minutes to an hour at 350°F (175°C). Think of it like a comfortable, predictable friend. It's reliable and easy to work with.
4.2. Sausage Stuffing: The Hearty Choice
Sausage stuffing, with its extra meatiness, needs a little more time, around 50 minutes to an hour and a half at 350°F (175°C). It's a more intense flavour profile, and you want to make sure that sausage is cooked through as well.
4.3. Cornbread Stuffing: A Southern Delight
Cornbread stuffing, known for its slightly denser texture, might need an extra 10-15 minutes, around 55 minutes to an hour and 15 minutes at 350°F (175°C). It's a bit more demanding, but worth the extra effort.
(Part 5) The Importance of Oven Placement: Even Cooking is Key
You might think the placement of your stuffing isn't a big deal, but it actually makes a difference. The middle rack is your best friend. It ensures that all sides of the stuffing are exposed to the oven's heat, leading to a more consistently cooked dish. It's like giving your stuffing a VIP treatment in the oven!
(Part 6) The Art of Knowing When Your Stuffing is Perfect
You've preheated your oven, placed your stuffing strategically, and you're anxiously waiting for the magic moment. But how do you know when it's done? Here are some visual cues and tests that will help you gauge the perfect level of doneness.
6.1. The Peek Test: A Sneak Peek
About halfway through the estimated baking time, peek into your oven. Give the stuffing a gentle nudge with a spoon. It should be firm to the touch and slightly browned on top. If it's still soft and pale, give it a few more minutes. You can also gently press a spoon into the centre. If it comes back clean, the stuffing is likely cooked through.
6.2. The Golden Crust: A Sign of Perfection
Another way to tell if your stuffing is done is to look for a nice golden crust on top. It's a visual indicator that the browning process is complete, suggesting the stuffing is cooked through. It's like a culinary badge of honour.
(Part 7) Avoiding the Common Mistakes: A Guide to Success
Now that you're equipped with the knowledge to bake stuffing, let's discuss some common pitfalls to avoid. They can make the difference between a culinary triumph and a disappointing meal.
7.1. Overcrowding the Oven: Giving Your Stuffing Room to Breathe
Don't cram your stuffing into a crowded oven. This can hinder air circulation, preventing the stuffing from cooking evenly. Give it some space to breathe, and it will reward you with a perfectly cooked masterpiece.
7.2. Underbaking: A Culinary No-No
Don't rush the baking process. Undercooked stuffing is a recipe for disaster. Not only will it taste bland and unappetizing, but it can also pose a food safety risk. Bake it long enough, and always double-check that internal temperature.
7.3. Overbaking: Dry and Crumbly Disaster
On the flip side, don't overdo it. Overbaking leads to dry, crumbly stuffing. The key is to find that perfect balance, where the stuffing is cooked through, golden brown, and still moist. Watch it carefully, and remove it from the oven just as it reaches that ideal state.
(Part 8) Recipe Inspiration: A Classic Stuffing
Now that you've got all the tips and tricks, are you ready to put your newfound knowledge to the test? Here's a classic stuffing recipe that's sure to please.
8.1. Ingredients
- 2 cups cubed stale bread
- 1 cup chopped onion
- 1/2 cup chopped celery
- 1/4 cup chopped fresh parsley
- 1/2 teaspoon dried sage
- 1/4 teaspoon black pepper
- 1/4 cup butter
- 2 cups chicken broth
- 1 egg, lightly beaten
8.2. Instructions
1. Preheat oven to 350°F (175°C). This is the starting point for most stuffing recipes, but adjust it as needed based on the type of stuffing and your oven's quirks.
2. In a large bowl, combine the bread cubes, chopped onion, celery, parsley, dried sage, and black pepper. This is the base of the stuffing. The proportions of the ingredients can be adjusted to your liking.
3. Melt the butter in a saucepan over medium heat. Add the melted butter to the bread mixture and toss to coat. This will add richness and flavour to the stuffing.
4. Pour the chicken broth over the mixture and stir to combine. This will moisten the stuffing, allowing the bread to absorb the liquid and become tender.
5. Add the lightly beaten egg and stir gently. The egg will help bind the stuffing together, creating a cohesive texture.
6. Transfer the mixture to a greased 9x13 inch baking dish. This will ensure the stuffing cooks evenly and prevents it from sticking.
7. Bake for 45 minutes to an hour, or until golden brown and cooked through. Remember to check the internal temperature with a meat thermometer to ensure it reaches 165°F (74°C).
8. Let the stuffing rest for 10 minutes before serving. This will allow the stuffing to cool slightly and settle, making it easier to serve and enjoy.
(Part 9) Variations and Flavour Twists: Unleash Your Creativity
Now, let's get creative! The beauty of stuffing is its endless possibilities. Experiment with different ingredients and flavour combinations to create your own unique masterpiece.
9.1. Sausage Stuffing: A Hearty Classic
Add 1 pound of cooked sausage to the basic stuffing mixture. This will add a rich, savoury flavour and extra texture. You can use any type of sausage you like, from italian sausage to breakfast sausage.
9.2. Apple and Cranberry Stuffing: A Sweet and Savoury Delight
Add 1 cup of chopped apples and 1/2 cup of dried cranberries to the stuffing mixture. This will add a sweet and tangy twist, perfect for complementing a savoury roast.
9.3. Wild Rice Stuffing: A Nutty and Earthy Twist
Swap out the bread for 1 cup of cooked wild rice. This will create a stuffing with a nutty and earthy flavour, perfect for those who enjoy a more rustic approach.
9.4. The Power of Herbs and Spices: Tailor Your Taste
Don't be afraid to play around with different herbs and spices. A sprinkle of dried thyme, a pinch of rosemary, or even a dash of paprika can add exciting layers of flavour.
(Part 10) Serving Suggestions: Elevate Your Dinner
Stuffing isn't just a side dish; it's a versatile culinary chameleon. Serve it alongside a roast dinner, of course, but it's also perfect as a stand-alone side dish, especially if you've added a flavourful twist. It can even be the star of the show, topped with a gravy or sauce.
10.1. Traditional Feast
Pair it with a juicy roast turkey, chicken, or beef for a classic roast dinner experience. The stuffing complements the main course perfectly.
10.2. Side Dish Extravaganza
Serve stuffing alongside a variety of dishes, from roasted vegetables to hearty soups and stews. It adds a comforting texture and a burst of flavour to any meal.
10.3. Stuffing Main Course
Elevate your stuffing to a main course by adding protein and a rich sauce. A sausage stuffing topped with a creamy mushroom sauce is a satisfying and flavourful meal.
(Part 11) Storage and Leftovers: Making the Most of Your Creation
Leftover stuffing? Don't even think about throwing it away! It's a gift from the culinary gods. It's fantastic the next day, cold or reheated. You can even turn it into a delicious sandwich or use it to stuff peppers for a hearty vegetarian meal.
11.1. The Fridge is Your Friend
Store your leftover stuffing in an airtight container in the fridge for up to 3 days. It will stay fresh and delicious, ready to be enjoyed whenever you crave it.
11.2. Reheating Your Stuffing: Multiple Options
You can reheat your stuffing in the oven, microwave, or even in a pan on the stovetop. Just be sure to heat it through until it's piping hot. The microwave is a quick option, but the oven will result in a crispier texture.
(Part 12) FAQs: Your Burning Stuffing Questions Answered
You've got your oven mitts on, you've got your stuffing ready, but a few questions might be swirling in your mind. Let's clear up those doubts and answer some of the most common questions about baking stuffing.
Q1. Can I bake stuffing ahead of time?
Yes, absolutely! Baking stuffing ahead of time is a great way to save time on the day of your roast dinner. Just bake it according to the instructions, let it cool completely, and store it in an airtight container in the fridge for up to 3 days. When you're ready to serve, reheat it in the oven or microwave until heated through.
Q2. Can I freeze stuffing?
Freezing stuffing is not recommended. The texture can change, and it might become soggy upon thawing. It's best to bake and eat it fresh or store it in the fridge for a few days. Freshly baked stuffing is the way to go!
Q3. What if my stuffing is a bit dry?
If your stuffing is a bit dry, don't fret! Add a little bit of chicken broth or water to it and stir it gently. Reheat it in the oven or microwave until heated through and the moisture is evenly distributed. A little bit of extra liquid can revive even the driest stuffing.
Q4. Can I add other vegetables to my stuffing?
Absolutely! Be creative and add any vegetables you like. Carrots, parsnips, mushrooms, butternut squash, and even Brussels sprouts can add flavour and texture. Just chop them up into small pieces and add them to the stuffing mixture.
Q5. What are some alternative ways to cook stuffing?
While oven baking is the most common method, you can also cook stuffing in a slow cooker or even in a skillet on the stovetop. Just adjust the cooking time and temperature accordingly. A slow cooker is a great option for a hands-off approach, while a skillet allows for a more caramelized texture.
There you have it! The complete guide to baking perfect stuffing. Embrace the knowledge, experiment with different recipes and flavours, and enjoy the delicious results. Happy stuffing!
Everyone is watching

Perfect Rice Every Time: The Ultimate Guide to Cooking Rice
Cooking TipsAs a self-proclaimed foodie, I've always been a bit obsessed with rice. It's the foundation of countless cuisi...

The Ultimate Guide to Cooking Asparagus: Tips, Techniques, and Recipes
Cooking TipsAsparagus. The mere mention of this spring delicacy conjures up images of vibrant green spears, crisp and burs...

Ultimate Guide to Cooking the Perfect Thanksgiving Turkey
Cooking TipsThanksgiving. Just the word conjures up images of overflowing tables laden with delicious food, the scent of r...

Can You Cook Spaghetti with Gasoline? (The Shocking Truth)
Cooking TipsWe've all seen those crazy internet trends. You know, the ones that make you wonder, "Did someone actually try...

Chorizo and Eggs Recipe: The Ultimate Guide
Cooking TipsRight, let’s talk about chorizo and eggs. You know, that classic Spanish dish that's always a winner. It's th...
