Alright, folks, let's talk turkey...or rather, ham! It's a real crowd-pleaser, especially around the holidays, and nothing beats a beautifully roasted ham, glistening with golden-brown glaze, piled high on a platter. But let's be honest, nailing the perfect roast can be a bit of a challenge. You don't want it dry as a bone, but you also don't want it undercooked. Trust me, I've been there! Through years of trial and error, I've finally cracked the code to consistently perfect ham roasting. Today, I'm sharing all my secrets with you.
This comprehensive guide is all about understanding those crucial cooking times and temperatures, making sure you get a juicy, flavorful ham every time. I'll even spill the beans on some insider tricks I've picked up along the way, like how to tell if it's truly cooked, keep it moist like a juicy peach, and whip up the most irresistible glaze that'll have everyone begging for seconds. So, grab a comfy chair, brew yourself a cuppa, and let's dive into the world of ham roasting!
(Part 1) The World of Ham: A Beginner's Guide
First things first, let's get to know our star ingredient: ham. It's not just a slab of meat, you know. There are actually quite a few things to consider that will influence your cooking time and overall experience.
1. types of ham: Navigating the Supermarket
When you're at the supermarket, you'll usually find two main types of ham: fresh and cured.
fresh ham: Straight from the Farm
This is raw ham, meaning it hasn't been cured or preserved. It needs to be cooked all the way through, just like any other roast. You'll usually find fresh ham sold bone-in, perfect for a traditional roast or hearty stew.
cured ham: Preserved for Flavor and Longevity
Here's where things get interesting! Cured ham has been preserved through a process involving salt, sugar, and sometimes nitrates or nitrites. This process gives it a longer shelf life and a unique salty, savory flavor. There are two main types of cured ham:
- Uncooked ham: This needs to be cooked before you can enjoy it. Think of it as a pre-salted ham, but still raw. It's often sold with a bone-in and can be quite large, ideal for a big gathering.
- Cooked Ham: This is pre-cooked, meaning it's safe to eat right out of the package. But you can still reheat it to get it nice and juicy, making it a convenient option for a quick meal.
2. Bone-in vs. Boneless: A Matter of Convenience
Whether your ham has a bone in it or not will affect the cooking time. bone-in hams tend to take a little longer to cook because the bone acts like a heat conductor, helping to keep the meat moist. boneless hams, on the other hand, are often easier to slice and serve, making them a practical choice for some.
3. Size and Weight: Scaling Your Ham Roast
The size and weight of your ham are major factors in determining how long it takes to cook. A smaller ham will cook much faster than a massive one. This is where those handy cooking time charts come in handy, which we'll dive into later.
(Part 2) The Oven: Your Culinary Partner in Crime
Alright, let's get down to the nitty-gritty of roasting your ham to perfection in the oven. We'll tackle the basics first, then move on to some of the more specific details, so you feel like a pro by the time we're done.
1. The Oven: Preheat and Prepare
The oven is your key tool in this process, so make sure it's in tip-top shape. Preheat it to the right temperature, which we'll discuss later, and keep an eye on the thermometer – you don't want any surprises!
2. Prepping Your Ham: Laying the Foundation for Flavor
Before you even think about putting the ham in the oven, you need to give it some TLC. This is where you can get creative and really make your ham stand out.
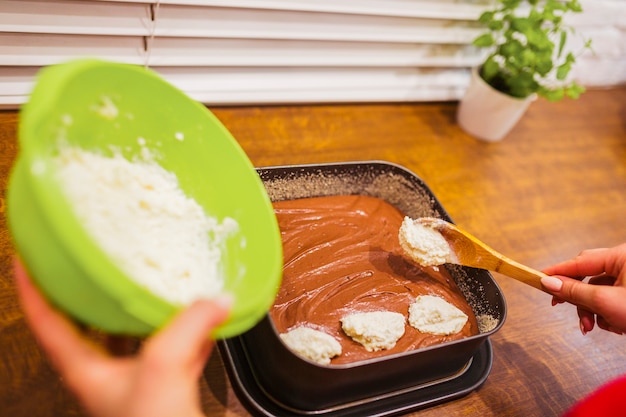
- Score the Ham: This step is all about helping the ham cook evenly and absorb the delicious glaze. Take a sharp knife and cut diagonal lines across the fat, about a half-inch deep. Don't go too deep! You just want to make a nice pattern. Think of it like a little welcome mat for the glaze.
- Season the Ham: Now, this is where you can really add your own touch. You can use a simple salt and pepper rub, or get more adventurous with herbs and spices. I personally love a good garlic and rosemary combo, but don't be afraid to experiment!
- Glaze the Ham: This is the finishing touch, and it's definitely worth the extra effort. You can use a store-bought glaze, but why not get creative and make your own? I'll give you a few recipes later on, but for now, think of it as a shimmering coat of deliciousness.
3. Roasting Your Ham: Taking it to the Finish Line
Okay, you've got your prepped ham, the oven is preheated, and you're ready to go!
- roasting pan: Choose a roasting pan that's big enough for the ham to fit comfortably. You might need to use a second pan if you've got a really large ham. No one wants a ham overflowing!
- Temperature: Preheat your oven to 325°F (165°C). I know it might seem low, but this is the key to keeping the ham moist and flavorful. High heat can dry it out.
- Cooking Time: Now, this is where things get interesting. The cooking time will depend on the size and type of ham. I'll give you a detailed chart later on, but remember that this is just a guideline. You'll need to check for doneness using a meat thermometer, which we'll discuss in the next section.
- Basting: While the ham is roasting, don't forget to baste it! This will help keep it moist and add extra flavor. Use the juices that collect in the pan, or your chosen glaze. Baste every 30 minutes or so, giving it that extra TLC.
(Part 3) Checking for Doneness: The Thermometer Test
One of the biggest mistakes people make with ham is not checking for doneness. You don't want to risk undercooked ham, but you also don't want to overcook it and dry it out. That's why using a meat thermometer is absolutely crucial. It's the only way to be sure your ham is cooked to perfection.
1. The Meat Thermometer: Your Culinary Guardian Angel
There are many types of meat thermometers available, but a digital thermometer is your best bet. It's quick, accurate, and easy to use. Invest in one if you don't already have one. You'll use it for all sorts of things, not just ham!
2. Where to Insert the Thermometer: Aim for the Thickest Spot
The key to getting an accurate reading is inserting the thermometer into the thickest part of the ham. Make sure it doesn't touch bone, as that could give you a false reading.
3. The Temperature to Aim For: Safe and Delicious
The safe internal temperature for ham is 145°F (63°C). That's what you're aiming for. Once the thermometer registers that temperature, you know your ham is cooked and ready to enjoy.
(Part 4) Ham Oven Cooking Time: Chart for Perfect Roasting
Here's the chart I promised, a handy guide for those roasting times based on ham size and type. Remember, these are just guidelines. You should always use a meat thermometer to ensure your ham is cooked to the right temperature.
| Type of Ham | Size (lbs) | Approximate Oven Cooking Time |
|---|---|---|
| Fresh Ham (bone-in) | 5-7 lbs | 1 1/2 - 2 hours |
| Fresh Ham (bone-in) | 8-10 lbs | 2 - 2 1/2 hours |
| Fresh Ham (bone-in) | 10-12 lbs | 2 1/2 - 3 hours |
| Cured Ham (uncooked, bone-in) | 5-7 lbs | 1 - 1 1/2 hours |
| Cured Ham (uncooked, bone-in) | 8-10 lbs | 1 1/2 - 2 hours |
| Cured Ham (uncooked, bone-in) | 10-12 lbs | 2 - 2 1/2 hours |
| Cured Ham (cooked, bone-in) | 5-7 lbs | 45-60 minutes |
| Cured Ham (cooked, bone-in) | 8-10 lbs | 1 - 1 1/2 hours |
| Cured Ham (cooked, bone-in) | 10-12 lbs | 1 1/2 - 2 hours |
Remember, these are just estimates. The actual cooking time may vary depending on your oven, the thickness of your ham, and your personal preference for how well-done you like it. It's always better to err on the side of caution, so check the temperature frequently with your trusty meat thermometer.
(Part 5) ham glaze: The Secret to Irresistible Flavor
Okay, we've tackled the basics, but now let's add some flair! Glazing your ham is the perfect way to take it to the next level. It adds a beautiful sheen, a burst of flavor, and that irresistible golden brown color that makes your ham look like a work of art. You can use a store-bought glaze, but why not get creative and make your own? Trust me, it's worth the effort!
1. Homemade Ham Glazes: Unleash Your Culinary Creativity
Here are a few simple glaze recipes that are perfect for ham. Feel free to experiment and find your favorites! You can even combine ingredients to create your own signature glaze.
Classic brown sugar glaze: A Sweet and Tangy Treat
This is a real crowd-pleaser, sweet and tangy with a hint of smoky flavor. It's a classic for a reason!
- 1/2 cup brown sugar
- 1/4 cup Dijon mustard
- 2 tablespoons apple cider vinegar
- 1 teaspoon Worcestershire sauce
- Pinch of black pepper
Combine all ingredients in a saucepan over medium heat. Bring to a simmer, stirring constantly, until the glaze thickens slightly. Pour over the ham in the last 30 minutes of cooking, basting every 10 minutes. This glaze is a beautiful balance of sweet, savory, and tangy, making it a perfect complement to the ham.
honey mustard glaze: A Sweet and Savory Symphony
This glaze is a bit sweeter, with a hint of mustard that adds a nice kick. It's perfect for those who like a little bit of a savory edge to their sweetness.
- 1/2 cup honey
- 1/4 cup Dijon mustard
- 1 tablespoon lemon juice
- Pinch of salt
Combine all ingredients in a saucepan over medium heat. Bring to a simmer, stirring constantly, until the glaze thickens slightly. Pour over the ham in the last 30 minutes of cooking, basting every 10 minutes. The lemon juice adds a touch of brightness, making this glaze a refreshing choice.
Spicy maple glaze: A Dash of Heat for the Bold
For those who like a bit of heat, this glaze is a real treat. It's sweet, smoky, and packs a punch.
- 1/2 cup maple syrup
- 1/4 cup brown sugar
- 2 tablespoons chili powder
- 1 teaspoon smoked paprika
- 1/2 teaspoon cayenne pepper
Combine all ingredients in a saucepan over medium heat. Bring to a simmer, stirring constantly, until the glaze thickens slightly. Pour over the ham in the last 30 minutes of cooking, basting every 10 minutes. This glaze adds a beautiful depth of flavor, with a subtle smokiness and a touch of heat.
2. Applying the Glaze: A Final Touch of Perfection
Once your glaze is ready, pour it over the ham in the last 30 minutes of cooking. Baste it every 10 minutes, making sure to coat the entire surface of the ham. The glaze will caramelize as it bakes, creating a beautiful golden brown crust that's both delicious and visually appealing.
(Part 6) ham leftovers: Delicious Second Helpings
Let's be honest, who can resist a good ham sandwich? But there's so much more you can do with those delicious leftovers. Get creative and turn your leftover ham into a feast of flavor!
1. ham sandwiches: The Classic comfort food
Freshly baked bread, crispy lettuce, juicy tomato, and a generous slice of ham - a classic for a reason. You can even get fancy with your sandwich fillings, adding mustard, cheese, or even a fried egg. It's a simple yet satisfying meal that always hits the spot.
2. Ham and potato soup: A Hearty and Comforting Bowl
This is a perfect way to use up leftover ham and potatoes. It's warm, comforting, and packed with flavor. You can add other vegetables like carrots, celery, and onions for added depth.
3. ham and bean casserole: A budget-friendly and Delicious Option
This casserole is a great way to stretch your ham and add some extra protein and fiber to your meal. It's also super easy to make. Simply combine leftover ham, beans, vegetables, and sauce, bake it in the oven, and enjoy! It's a hearty and satisfying dish that's perfect for a family meal.
4. ham and cheese quiche: A Savory and Versatile Option
This quiche is a delicious way to use up leftover ham and vegetables. It's perfect for breakfast, brunch, or even lunch. You can use any type of cheese you like, from cheddar to Swiss to Gruyere. It's a flavorful and impressive dish that's sure to please everyone.
5. Ham Salad: A Delicious and Easy Option
This salad is a great way to use up leftover ham, and it's super easy to make. Simply chop up the ham, add mayonnaise, mustard, celery, and onion, and you're good to go. You can serve it on bread, crackers, or lettuce for a light and refreshing meal.
(Part 7) ham storage: Keeping It Fresh and Flavorful
So you've got a lovely roasted ham, but how do you make sure it stays delicious and safe to eat? Here's a breakdown of how to store it properly.
1. Cooling the Ham: A Crucial Step
After cooking, let the ham cool completely at room temperature before storing it in the refrigerator. This will help prevent bacteria from growing. It's tempting to rush the process, but taking this extra step is worth it to ensure your ham stays safe and flavorful.
2. Storage: Keeping it Moist and Safe
Store the ham in an airtight container or wrap it tightly in plastic wrap and aluminum foil. This will help keep the ham moist and prevent it from drying out. It's all about creating that protective barrier to keep the flavors locked in.
3. Refrigeration: A Cool and Safe Environment
Keep the ham refrigerated for up to 4 days. After that, it's best to freeze it if you plan to use it later. Refrigeration is key to maintaining the quality of your ham.
4. Freezing: Extending the Life of Your Ham
You can freeze leftover ham for up to 2 months. When freezing, wrap it tightly in plastic wrap and aluminum foil. To thaw, place the ham in the refrigerator overnight. Freezing allows you to enjoy your ham long after the initial feast.
(Part 8) FAQs: The Answers to Your Burning Questions
Let's tackle some of the most common questions you might have about ham, those little things that always pop into your head. I've been there, too!
1. Can I Cook a Ham in a slow cooker? Absolutely!
Absolutely! This is a great option for a hands-off approach. Simply place the ham in the slow cooker and cook on low for 6-8 hours or on high for 3-4 hours. Make sure to use a cooking time chart that's specifically for slow cookers. You can add a cup or two of liquid to the slow cooker to keep the ham moist. The slow cooker will do its magic, creating a tender and flavorful ham with minimal effort.
2. What if My Ham Is Overcooked? Don't Panic!
Don't panic! While overcooked ham can be a bit dry, it's still safe to eat. You can try adding some moisture back by making a sauce or gravy and serving it with the ham. There are ways to salvage the situation!
3. How Can I Keep My Ham Moist? Preventing Dryness
We've already covered some of the basics, but here are a few more tips to make sure your ham stays juicy:
- Use a Roasting Pan with a Lid: This will help trap moisture and prevent the ham from drying out. Think of it as a little sauna for your ham, keeping it moist and flavorful.
- Add Liquid to the Pan: You can add water, broth, or even apple cider to the roasting pan to keep the ham moist. Just be careful not to add too much liquid, as this can make the ham soggy. It's all about finding the perfect balance.
- Wrap the Ham: You can wrap the ham in foil during the last hour of cooking. This will help to keep it moist and prevent it from drying out. Think of it like a cozy blanket, keeping the ham warm and moist.
4. Can I Freeze Cooked Ham? Yes, You Can!
Yes, you can! Wrap the ham tightly in plastic wrap and aluminum foil and freeze it for up to 2 months. To thaw, place the ham in the refrigerator overnight. Freezing is a great way to extend the life of your ham and enjoy it later on.
5. What Can I Do with the Ham Bone? Don't Toss It Out!
Don't toss out that bone! It's perfect for making a delicious ham stock. Simply simmer the bone in water for a few hours, then strain the broth. You can use it to make soup, stew, or gravy. It's a great way to get the most out of your ham and add a layer of flavor to other dishes.
I hope this guide has equipped you with all the knowledge you need to roast a ham like a pro! Remember, it's all about understanding the basics, using a meat thermometer, and not being afraid to get creative. Happy ham roasting!
Everyone is watching

Prime Rib Roast Cooking Time Chart: Per Pound Guide
Cooking TipsPrime rib roast. Just the name conjures images of lavish dinners, crackling fires, and hearty laughter. It’s ...

How Long to Bake Potatoes in the Oven (Perfect Every Time)
Cooking TipsBaked potatoes are a staple in my kitchen. They're incredibly versatile, delicious, and surprisingly easy to m...

Perfect Rice Every Time: The Ultimate Guide to Cooking Rice
Cooking TipsAs a self-proclaimed foodie, I've always been a bit obsessed with rice. It's the foundation of countless cuisi...

The Ultimate Guide to Cooking Asparagus: Tips, Techniques, and Recipes
Cooking TipsAsparagus. The mere mention of this spring delicacy conjures up images of vibrant green spears, crisp and burs...

Ultimate Guide to Cooking the Perfect Thanksgiving Turkey
Cooking TipsThanksgiving. Just the word conjures up images of overflowing tables laden with delicious food, the scent of r...