(Part 1) Choosing the Perfect Ham: It All Starts With the Right Cut
The Big Decision: Bone-In or Bone-Out?
Firstly, you've got to decide between a bone-in ham and a bone-out ham. This is a personal choice, and both have their merits. Bone-in hams are often considered the more flavorful option. The bone acts like a natural heat conductor, ensuring the ham cooks evenly and retains its moisture. Plus, they're a joy to carve, offering beautiful, thick slices. On the other hand, bone-out hams are incredibly convenient. They're easier to handle, cook more quickly, and provide perfectly even slices, ideal for sandwiches or slicing for a crowd.
Curing: The Difference Between a Simple Ham and a culinary gem
Now, let's talk about curing. This is where the real flavor magic happens. You'll find two main types of cured hams: dry-cured and wet-cured. dry-cured hams are a real treat – they're aged for a long time, developing a rich, complex, and intensely salty flavor that's simply divine. They tend to be pricier, but they're perfect for special occasions. wet-cured hams are a bit more accessible. They're cured in a brine, giving them a milder flavor that's still incredibly delicious. They're a great everyday option, and you can easily find them at most grocery stores.
Personally, I'm a big fan of dry-cured hams. There's something about that complex, salty depth of flavor that just elevates the entire dish. But hey, to each their own! You might prefer the milder, more accessible flavor of a wet-cured ham.
The Fresh Option: fresh ham
And then there's fresh ham, which isn't technically cured at all. It's often used for roasting and has a more delicate flavor. It's certainly a good option, but I'm not personally a huge fan of fresh ham. But hey, if you're looking for a lighter, more subtle flavor, it's worth exploring.
(Part 2) Prepping the Ham: Getting Ready to Cook
The Rinse: A Clean Slate for Deliciousness
Okay, so you've chosen your ham. Now it's time to prep it for cooking. Start by giving it a good rinse under cold water. This removes any residual packaging and prepares it for the next steps. Be sure to pat it dry with paper towels afterwards. A dry ham helps the glaze stick and prevents the ham from steaming instead of browning.
Scoring for Flavor: A Simple Technique for Better Taste
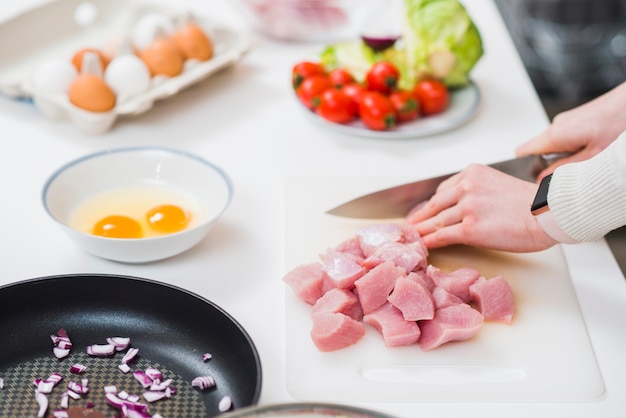
Now, here's where things get a bit more fun – scoring. This simple technique helps the ham cook evenly and allows the flavors to penetrate deeper. It also gives the ham a beautiful presentation. Use a sharp knife to make diagonal cuts across the fat layer, about half an inch deep. You can create fancy patterns if you like, but a simple grid pattern works just as well. Don't worry about being perfect – a little unevenness adds to the charm.
Now, if you're using a bone-in ham, it's a good idea to trim any excess fat that might be blocking the glaze from penetrating. You can keep this fat for rendering later, or discard it.
(Part 3) Cooking the Ham: Choosing the Right Method
The oven method: A Classic Approach for Tender and Delicious Results
For me, oven-baking is the classic way to cook a ham. It's simple, reliable, and consistently delivers delicious results. Preheat your oven to 325 degrees Fahrenheit (160 degrees Celsius) and place the ham in a roasting pan. Add a cup of water to the bottom of the pan to create steam and help keep the ham moist. I like to add a few slices of onion and some sprigs of rosemary for extra flavor, but feel free to experiment with your own favorites.
The Ham's Cooking Time: A Guide to Perfect Doneness
The cooking time will depend on the size of your ham. As a general rule of thumb, allow about 15-20 minutes per pound of ham for a bone-in ham, and 12-15 minutes per pound for a bone-out ham. But the most accurate way to check for doneness is with a meat thermometer. Insert the thermometer into the thickest part of the ham, making sure to avoid the bone. The ham is cooked when the internal temperature reaches 145 degrees Fahrenheit (63 degrees Celsius). Don't overcook it – you want it to be tender, not dry.
The slow cooker method: Hands-Off Cooking for a Stress-Free Dinner
If you're looking for a more hands-off approach, the slow cooker is your best friend. It's perfect for busy days or entertaining. Just place the ham in the slow cooker, add a cup of water, and set it on low for 6-8 hours. The slow cooker does all the work, and you'll come home to a perfectly cooked ham. It's truly a set-it-and-forget-it method, perfect for stress-free cooking.
The instant pot Method: Quick and Convenient for Those Short on Time
For a truly speedy option, the Instant Pot is a game-changer. It can cook a ham in a fraction of the time, making it perfect for last-minute meals. Just follow the instructions that came with your Instant Pot, and you'll be enjoying a delicious ham in no time. I love this method when I'm short on time, but be warned: It can sometimes make the ham a little bit dry. To compensate, you can try adding a bit of broth or apple cider to the Instant Pot before cooking.
(Part 4) Glazing the Ham: The Finishing Touch for a Culinary Masterpiece
The Glaze: A Symphony of Flavors to Take Your Ham to the Next Level
Now for the fun part – the glaze! This is where you get to unleash your creativity and transform your ham into a culinary masterpiece. There are endless variations, but here are a few of my favorites to inspire you:
- honey mustard glaze: This is a classic for a reason. Simply combine honey, Dijon mustard, and a splash of apple cider vinegar for a sweet and tangy delight.
- brown sugar glaze: This is a crowd-pleasing choice. Combine brown sugar, Dijon mustard, and a touch of ginger for a beautifully balanced glaze.
- pineapple glaze: Add a tropical twist with a pineapple glaze. Mix crushed pineapple, brown sugar, and a bit of orange juice for a sweet and tangy treat.
- cherry glaze: For a festive flair, try a cherry glaze. Combine cherry preserves, brown sugar, and a pinch of cinnamon for a rich and fruity glaze.
Remember, you can always customize these glazes to your taste. Want more spice? Add a pinch of cayenne pepper to the honey mustard glaze. Prefer a bit more sweetness? Add a little extra brown sugar to the pineapple glaze. Don't be afraid to experiment!
The Glazing Technique: Bringing Out the Best in Your Ham
When you're ready to glaze, brush the ham generously with your chosen glaze and return it to the oven. Continue to baste the ham every 15-20 minutes for the last 30 minutes of cooking. This creates a beautiful, glossy finish and locks in moisture, making the ham even more tender and delicious.
A helpful tip: If you're using a bone-in ham, be sure to baste the sides and underside of the ham as well. This ensures even browning and delicious flavor penetration.
(Part 5) Carving the Ham: A Skillful Art for a Beautiful Presentation
The Right Tools for the Job: Essential Gear for Effortless Carving
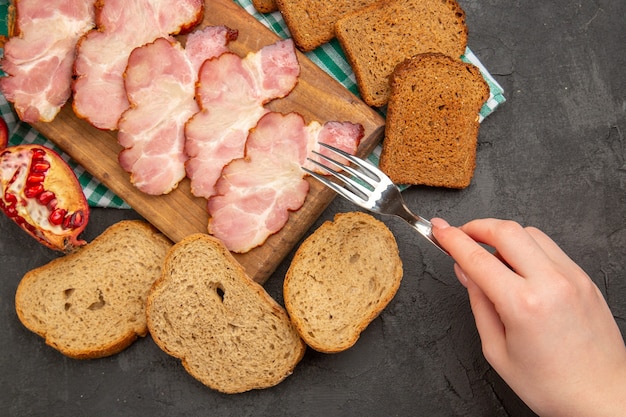
Now that the ham is cooked and glazed to perfection, it's time to carve. A good, sharp carving knife is essential for clean, even slices. You can also use a carving fork to help keep the ham in place while you're slicing. And if you're using a bone-in ham, a carving board with a built-in groove for catching the juices is a great addition. It's perfect for capturing those flavorful juices that you can use to make a delicious gravy.
The Carving Technique: A Step-by-Step Guide for a Professional Finish
Alright, let's get to the carving! It's all about taking your time and making smooth, even slices. Start by slicing around the bone of the ham, if there is one. Then, cut thin slices down the length of the ham, working your way around the bone. You can also cut the ham into smaller pieces, which is great for serving. Remember, patience is key! Nobody wants a piece of ham with a bone in it, so take your time and you'll be fine.
A helpful tip: If you're carving a bone-in ham, try to keep the bone intact. This adds a touch of rustic charm to the presentation and can be used to create a beautiful carving board centerpiece.
(Part 6) Serving the Ham: A Celebration of Flavor and Creativity
The Sides: A Culinary Symphony of Flavors to Complement Your Ham
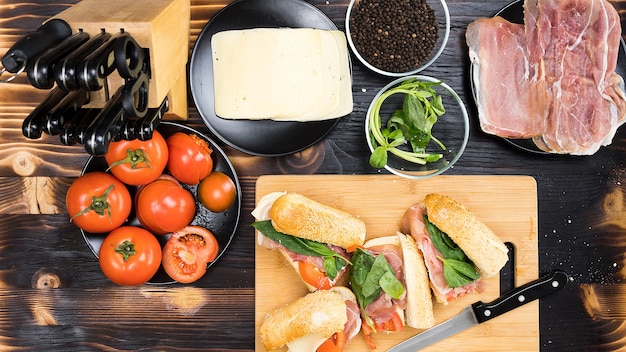
Now, let's talk sides! Ham goes well with a wide variety of dishes, but I'm partial to classics like mashed potatoes, green beans, and sweet potato casserole. A basket of fresh bread rolls is always a welcome addition. And if you're feeling really fancy, you can serve a fruit salad or some deviled eggs. The possibilities are endless!
Don't be afraid to get creative with your sides. A roasted vegetable medley, a vibrant green salad, or a creamy coleslaw can all add a delicious contrast to the richness of the ham.
The Gravy: A Delicious Finish for a Perfect ham dinner
No ham dinner is complete without a good gravy. You can use the pan juices from the ham to make a simple gravy, or get a bit more elaborate with a homemade gravy. Personally, I love using the pan juices because they add so much flavor. I usually just add a little bit of flour, salt, pepper, and water to the pan juices and whisk until it's thickened. The key is to add the flour slowly and don't let it clump together.
If you're using a bone-in ham, remember those juices that collected in the carving board groove? Add them to your gravy for an extra boost of flavor. It's a simple trick that makes a big difference.
(Part 7) leftover ham: A Second Chance at Deliciousness
Ham Salad: A Classic comfort food for Sandwiches and More
Oh, those delicious leftovers! They're a real bonus of a good ham dinner. There are so many delicious ways to use leftover ham. My personal favorite is ham salad. Simply chop up some of the leftover ham, mix it with mayonnaise, chopped celery, and onions, and season it with salt and pepper. It's a quick and easy snack or light meal. You can use it on sandwiches, crackers, or even as a dip.
Ham and bean soup: A Hearty Comfort Food for a Cold Day
Another classic way to use leftover ham is in a hearty soup. You can use ham bones to make a stock, or just add the leftover meat to a pot of beans and vegetables. It's the perfect way to warm up on a cold day. Personally, I love a good ham and bean soup with a dollop of sour cream on top. It's the ultimate comfort food.
Ham and Potato Hash: A Delicious and Easy Breakfast
If you're looking for a quick and easy breakfast, try a ham and potato hash. Simply dice up some leftover ham and potatoes and fry them in a pan with some onions and peppers. It's a great way to use up leftovers and make a satisfying breakfast. I like to add a fried egg on top for a little extra protein.
ham and cheese quiche: A Savory Delight for Brunch or Potlucks
For a more elegant way to use leftover ham, try a ham and cheese quiche. It's a great dish for a brunch or potluck. Just combine leftover ham, cheese, and eggs in a pie crust and bake until golden brown. You can add any vegetables you like, or keep it simple with just ham and cheese.
(Part 8) FAQs: Your Ham-Cooking Queries Answered
Q: How long can I keep leftover ham in the fridge?
A: Leftover ham can be kept in the refrigerator for 3-4 days. Make sure to store it in an airtight container to prevent it from drying out.
Q: Can I freeze leftover ham?
A: Yes, you can freeze leftover ham for up to 2 months. Wrap the ham tightly in plastic wrap and aluminum foil to prevent freezer burn.
Q: How do I tell if a ham is spoiled?
A: A spoiled ham will have an off smell and taste. It may also have a slimy or sticky texture. If you notice any of these signs, it's best to throw the ham away.
Q: Can I use a ham that's already been cooked?
A: Yes, you can use a pre-cooked ham, but you'll need to cook it differently. Just follow the instructions on the package. You can also warm it in the oven, or in a slow cooker.
Q: What's the best way to reheat leftover ham?
A: The best way to reheat leftover ham is in the oven. Preheat your oven to 325 degrees Fahrenheit (160 degrees Celsius) and place the ham in a roasting pan. Bake for 15-20 minutes, or until heated through. You can also reheat ham in a slow cooker or in the microwave. Just be sure to heat it thoroughly before serving.
(Part 9) Conclusion: Your Ultimate Guide to Ham Perfection
There you have it, folks! The ultimate guide to perfect ham. Now, go forth and conquer the ham-cooking world! With a little bit of practice, you'll be whipping up delicious ham dinners like a pro. And remember, the most important thing is to have fun with it. Experiment with different glazes, sides, and cooking methods until you find what you love.
Happy ham cooking!
| Type of Ham | Cooking Time | Internal Temperature |
|---|---|---|
| Bone-in Ham | 15-20 minutes per pound | 145 degrees Fahrenheit (63 degrees Celsius) |
| Bone-out Ham | 12-15 minutes per pound | 145 degrees Fahrenheit (63 degrees Celsius) |
Everyone is watching

Prime Rib Roast Cooking Time Chart: Per Pound Guide
Cooking TipsPrime rib roast. Just the name conjures images of lavish dinners, crackling fires, and hearty laughter. It’s ...

How Long to Bake Potatoes in the Oven (Perfect Every Time)
Cooking TipsBaked potatoes are a staple in my kitchen. They're incredibly versatile, delicious, and surprisingly easy to m...

Perfect Rice Every Time: The Ultimate Guide to Cooking Rice
Cooking TipsAs a self-proclaimed foodie, I've always been a bit obsessed with rice. It's the foundation of countless cuisi...

The Ultimate Guide to Cooking Asparagus: Tips, Techniques, and Recipes
Cooking TipsAsparagus. The mere mention of this spring delicacy conjures up images of vibrant green spears, crisp and burs...

Ultimate Guide to Cooking the Perfect Thanksgiving Turkey
Cooking TipsThanksgiving. Just the word conjures up images of overflowing tables laden with delicious food, the scent of r...