A beautifully cooked ham is a centerpiece for countless gatherings, from casual Sunday dinners to festive holiday meals. It’s a dish that evokes warmth, comfort, and family traditions. But let's be honest, tackling a large piece of meat like a ham can feel a bit intimidating.
Don't fret! I'm here to walk you through the process, step by step. We'll cover everything from choosing the right ham to mastering the perfect cooking time and even some tips for creating a mouthwatering glaze. By the end of this article, you'll be confident in your ham-cooking skills, ready to impress your family and friends with a truly delicious spread.
(Part 1) Picking the perfect ham: Navigating the Options
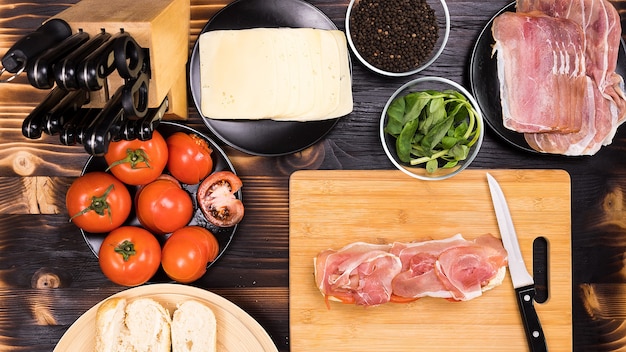
First things first, you need the right ham. Just like choosing the perfect ingredient for a recipe, selecting the right ham sets the stage for a successful meal. There are many types of ham available, and understanding the differences can help you make the best choice for your needs.
Bone-in vs. Boneless: A Matter of Convenience and Flavor
The most fundamental choice is between bone-in and boneless ham. Both have their pros and cons.
- bone-in hams: These are the traditional hams, retaining the bone, which adds a depth of flavor. The bone marrow contributes to a richer taste, while the bone acts as a natural "roasting rack," promoting even cooking. However, they can be a little trickier to carve and require more space in the oven or slow cooker.
- Boneless Hams: These hams have had the bone removed, making them easier to handle, slice, and serve. They are also more convenient for smaller ovens and slow cookers. While boneless hams are easier to work with, you might miss a little of the intense flavor that comes from the bone marrow.
Ultimately, the decision is yours, based on your preferences and cooking style. I personally love the flavor of bone-in ham, but I understand the appeal of boneless for its convenience.
Fresh or Cured: A Tale of Two Treatments
Now, let's talk about the curing process, a key difference in ham types. Curing involves preserving the meat using salt and often other ingredients like sugar, nitrates, and spices. This process gives ham its distinctive flavor and extends its shelf life.
- fresh ham: This is the least processed ham, typically smoked and then cooked. You'll often find fresh ham at butcher shops or specialty markets. It boasts a more natural flavor and a shorter shelf life.
- cured ham: These hams have been cured in a brine or with salt and other ingredients. This process preserves the meat, adding flavor and making it safe to eat raw or cooked.
- dry-cured ham: These hams are cured with salt and air-dried, resulting in a denser, more intense flavor. Think prosciutto or Jamón Ibérico, which are best enjoyed raw or very lightly cooked.
- wet-cured ham: These hams are cured in a brine or a mixture of water and salt, resulting in a more moist and milder flavor. Most pre-cooked hams you find in the supermarket are wet-cured.
For a traditional ham flavor and a longer shelf life, opt for a cured ham. Fresh ham is great for those who prefer a more natural flavor and are willing to use it sooner.
(Part 2) Unlocking the Mystery of Cooking Time: A Guide to ham temperature
Now, the moment of truth: figuring out how long to cook your ham. This might seem daunting at first, but it's actually quite straightforward. We'll break it down into two scenarios: cooking a pre-cooked ham and cooking a raw ham.
The Pre-cooked Ham: A Simple Reheating Process
Let's face it, most hams we buy are pre-cooked. They are already safe to eat, and the cooking process is mainly about reheating them to achieve optimal tenderness and flavor.
General rule of thumb: For pre-cooked hams, you'll cook them for about 15-20 minutes per pound at 325°F (165°C). However, always refer to the specific instructions on the ham packaging for the most accurate cooking times and temperatures.
Here's a little insider tip: Many pre-cooked hams have a "glaze packet" included. I find it's best to add this glaze during the last 30 minutes of cooking. This allows the glaze to caramelize beautifully and create a delicious, sticky crust.
The Raw Ham: A Commitment to Longer Cooking
Cooking a raw ham is a less common occurrence, but it does happen. If you're fortunate enough to find a fresh, raw ham, you'll need to cook it to a safe internal temperature.
A raw ham needs to be cooked to an internal temperature of 155°F (68°C). However, cooking a ham from raw takes much longer, typically around 20-30 minutes per pound.
Here's a table to give you a clearer idea:
| Ham Type | Weight (lbs) | Cooking Time (Minutes) | Internal Temperature (°F) |
|---|---|---|---|
| Bone-in Ham (pre-cooked) | 8-10 | 120-150 | 140-160 |
| Boneless Ham (pre-cooked) | 6-8 | 90-120 | 140-160 |
| whole ham (raw) | 12-15 | 240-450 | 155 |
| half ham (raw) | 6-8 | 120-240 | 155 |
Remember, these are just general guidelines. Always refer to the specific instructions on the ham packaging for the most accurate cooking times and temperatures.
(Part 3) Cooking Methods: Oven, Slow Cooker, and Beyond
Now that you've got a grasp on cooking times, let's explore the different ways you can cook your ham. Each method brings its own advantages, allowing you to choose the one that best suits your preferences and kitchen setup.
Oven Cooking: The Traditional Approach
Oven cooking is the classic method, offering a reliable and straightforward way to cook a ham. It allows for a crispy skin and a juicy interior, making it a favorite for many.
Here's how to cook a ham in the oven:
- Preheat your oven to 325°F (165°C).
- Place the ham in a large roasting pan. For bone-in hams, use a rack to allow for even cooking and air circulation.
- Add a cup of water or apple juice to the bottom of the pan. This helps keep the ham moist and prevents it from drying out.
- Cook the ham according to the instructions on the packaging, or use the guidelines from the table in Part 2.
- About 30 minutes before the ham is done, glaze it with your favorite glaze. This will give the glaze time to caramelize and create a beautiful finish.
- Remove the ham from the oven and let it rest for 10-15 minutes before carving. This allows the juices to redistribute, resulting in a more tender and flavorful ham.
Slow Cooker: Easy and Effortless
The slow cooker is your best friend for hands-off cooking. It's perfect for busy days or when you want to prepare the ham ahead of time. Simply set it and forget it, letting the slow cooker do its magic.
Here's how to cook a ham in a slow cooker:
- Place the ham in the slow cooker, ensuring it fits comfortably.
- Add a cup of water or apple juice to the slow cooker, to keep the ham moist.
- Cook the ham on low for 6-8 hours, or on high for 3-4 hours.
- About 30 minutes before the ham is done, glaze it with your favorite glaze.
- Remove the ham from the slow cooker and let it rest for 10-15 minutes before carving.
The slow cooker method is fantastic for tenderizing a ham, particularly if it’s on the dry side. It's a great way to ensure a juicy and flavorful ham without a lot of fuss.
Exploring Other Options: Grill and instant pot
If you're feeling adventurous, try grilling or using an instant pot for a unique twist on ham cooking.
- Grilling: Grilling a ham adds a smoky flavor, perfect for summer barbecues. Use a grill pan or a grill rack that's large enough to hold the ham. Cook the ham over medium heat for about 15-20 minutes per pound, or until it reaches an internal temperature of 140°F (60°C) for a pre-cooked ham.
- Instant Pot: The instant pot is a great option for smaller hams, providing a faster cooking time. Cook the ham on high pressure for 40-60 minutes, or until it reaches an internal temperature of 140°F (60°C).
Experiment with these methods to find your favorite way to cook a ham, based on your preferences and the occasion.
(Part 4) The Art of Glazing: Adding a Touch of Sweetness and Shine
Glazing a ham is the finishing touch, adding a burst of flavor and a beautiful sheen to your masterpiece. It’s a simple step that makes a big difference in the overall presentation and taste.
Classic Glaze Recipes for Ham: Sweet, Tangy, and Savory
Here are a few classic ham glaze recipes that are sure to impress:
- brown sugar glaze: This simple and classic glaze complements any ham. Just combine brown sugar, honey, and mustard in a saucepan and simmer until it thickens, creating a rich and flavorful glaze.
- honey mustard glaze: This glaze offers a tangy and sweet flavor with a delightful kick of mustard. Combine honey, Dijon mustard, and apple cider vinegar in a saucepan and simmer until it thickens, creating a perfect balance of sweet and tart.
- maple glaze: This glaze is sweet and smoky with a hint of maple flavor. Combine maple syrup, brown sugar, and bourbon in a saucepan and simmer until it thickens. The bourbon adds a touch of depth and complexity to the glaze.
Feel free to get creative with your glaze! Experiment with different combinations of ingredients and find your personal favorite.
Glazing Tips for Success
Here are a few tips for glazing your ham like a pro:
- Glaze Early: Glaze the ham about 30 minutes before it's done. This gives the glaze time to caramelize and create a beautiful finish.
- Baste Regularly: Baste the ham with the glaze every 15 minutes or so to keep it moist and flavorful.
- Don't Overcook: Be careful not to overcook the glaze. It should be thick enough to coat the ham but not so thick that it burns.
(Part 5) Serving Your Ham with Pride: A Celebration of Flavor
Your ham is cooked to perfection, glazed to a beautiful sheen, and ready to be served! Now, let's talk about how to make the most of this culinary achievement.
Serving Suggestions: From Classic to Creative
Ham is a versatile dish that lends itself to various serving styles. Here are a few ideas to inspire you:
- Classic Roast: Slice the ham and serve it with traditional accompaniments like mashed potatoes, gravy, and green beans. It's a timeless combination that never fails to please.
- Sandwiches: Slice the ham and make sandwiches with bread, cheese, and your favorite toppings. A simple ham and cheese sandwich can be elevated with a touch of mustard or a creamy spread.
- Salads: Dice the ham and add it to salads for a salty and savory flavor. A ham and potato salad or a mixed green salad with ham, apples, and walnuts are delightful options.
- Soups and Stews: Add ham to soups and stews for a rich and flavorful base. A ham and bean soup or a hearty vegetable stew with ham are both satisfying and comforting.
Storing Leftovers: Preserving the Flavor
If you have any leftover ham, store it in an airtight container in the refrigerator for up to 4 days. You can also freeze leftover ham for up to 3 months. Just wrap it tightly in plastic wrap and aluminum foil before freezing.
Leftover ham can be used in a variety of dishes, such as sandwiches, salads, quiches, or even added to a stir-fry for a flavorful twist. Don't let any of that delicious ham go to waste!
(Part 6) side dish Symphony: Perfecting the Ham Ensemble
No ham is complete without a fantastic array of side dishes. These culinary companions add variety, texture, and flavor to your meal, creating a well-rounded dining experience.
Starchy Sides: Comfort and Indulgence
- Mashed Potatoes: Classic and comforting, mashed potatoes are a perfect pairing for ham. The creamy texture and buttery flavor complement the savory ham beautifully.
- roasted sweet potatoes: Add a touch of sweetness and earthiness with roasted sweet potatoes. Their caramelized exterior and soft, fluffy interior provide a delicious contrast to the ham.
- baked potato: A simple and satisfying side that's perfect for topping with butter, sour cream, or cheese. A baked potato offers a hearty and comforting option alongside your ham.
Green Sides: Freshness and Vibrancy
- Green Beans: Steamed or sautéed green beans offer a fresh and vibrant contrast to the richness of ham. Their crisp texture and bright flavor add a refreshing touch to the meal.
- Asparagus: Roasted or grilled asparagus adds a touch of elegance and a delicate flavour. Its slightly bitter flavor and tender texture complement the ham well.
- Broccoli: Steamed or roasted broccoli is a healthy and satisfying side dish. Its florets offer a vibrant color and a crisp texture that complement the ham perfectly.
Other Side Dish Ideas: Expanding the Culinary Landscape
- Macaroni and Cheese: A creamy and comforting side that's always a crowd-pleaser. Macaroni and cheese adds a touch of decadence and complements the savory ham beautifully.
- Cornbread: A sweet and crumbly side dish that pairs perfectly with ham. Cornbread adds a hint of sweetness and a satisfying texture, making it a perfect pairing for ham.
- fruit salad: Add a touch of freshness and sweetness with a fruit salad. Fruit salad offers a delightful contrast to the savory ham and provides a refreshing palate cleanser.
(Part 7) Tips and Tricks: Mastering the Art of Ham Cooking
With practice and a few key tips, you can become a ham-cooking expert. These little tricks and techniques can elevate your ham-making game, ensuring a delicious and memorable meal.
Tips for Juicy Ham: Achieving Tenderness
Let's talk about keeping your ham juicy and tender. Here are a few things to keep in mind:
- Score the Fat: Scoring the fat on the ham allows for better heat penetration and helps prevent the ham from drying out. Use a sharp knife to make diagonal cuts across the fat layer, creating a lattice pattern.
- Add Moisture: Adding a cup of water or apple juice to the bottom of the pan will help keep the ham moist. The steam created by the liquid helps to tenderize the ham and prevent it from drying out.
- Basting: Basting the ham regularly with juices or glaze will help to keep it moist and flavorful. Use a basting brush or a spoon to pour the juices over the ham every 15-20 minutes during cooking.
- Resting Time: Allowing the ham to rest for 10-15 minutes after cooking will allow the juices to redistribute, ensuring a juicy and tender final product. Cover the ham loosely with foil and let it rest before carving.
Tips for Flavorful Ham: Elevating the Taste
Let's boost those flavor levels. Here are a few tricks to add a touch of extra deliciousness:
- Add Aromatics: Adding aromatics like onions, garlic, or herbs to the pan while cooking can infuse the ham with extra flavor. Simply place the aromatics around the ham in the roasting pan or slow cooker.
- Glazing: A glaze adds a beautiful sheen and a burst of flavor to the ham. Experiment with different glaze recipes and find your personal favorite.
- Carving: Carve the ham thinly to ensure that each slice is flavorful and moist. Use a sharp carving knife and cut against the grain of the meat for the best results.
(Part 8) FAQs: Your Ham Cooking Questions Answered
You've got questions, I've got answers. Let's tackle some common questions about ham cooking.
1. Can I cook ham in a pressure cooker?
Yes, you can cook a ham in a pressure cooker. However, it's best for smaller hams. Cooking time will vary depending on the size of the ham and the pressure cooker model. Refer to your pressure cooker's manual for specific instructions.
While pressure cooking is a faster method, it's important to note that it might not result in the same level of tenderness as oven or slow cooker methods.
2. Can I Cook Ham on the Stovetop?
While it's not as common, you can cook a ham on the stovetop in a large pot or dutch oven. The process is similar to oven cooking, but you'll need to monitor the ham closely and adjust the heat as needed to prevent burning.
This method is a good option if you don't have a large enough oven or if you prefer a more hands-on approach to cooking.
3. How Do I Know When the Ham is Done?
The best way to determine if a ham is done is to use a meat thermometer. The internal temperature should reach 140°F (60°C) for a pre-cooked ham, or 155°F (68°C) for a raw ham.
Insert the thermometer into the thickest part of the ham, making sure it doesn't touch bone. The thermometer should be inserted deep enough to ensure an accurate reading.
4. What Happens if I Overcook the Ham?
Overcooking a ham can dry it out, making it tough and less flavorful. Always check the internal temperature and follow the instructions on the packaging to avoid overcooking.
If you do overcook the ham, you can try to remedy it by adding a little bit of moisture and letting it rest for a longer time. However, it's best to avoid overcooking in the first place.
5. Can I Eat Ham Cold?
Yes, ham can be eaten cold. In fact, it's often served cold in sandwiches and salads. However, it's important to ensure that the ham has been properly cooked and cooled before serving it cold.
To cool the ham safely, let it cool on the counter for a few hours, then refrigerate it in an airtight container.
I hope this article has helped you demystify the art of cooking a perfect ham. Now, go forth and create ham-tastic feasts that will impress your guests and leave them wanting more!
Everyone is watching

Prime Rib Roast Cooking Time Chart: Per Pound Guide
Cooking TipsPrime rib roast. Just the name conjures images of lavish dinners, crackling fires, and hearty laughter. It’s ...

How Long to Bake Potatoes in the Oven (Perfect Every Time)
Cooking TipsBaked potatoes are a staple in my kitchen. They're incredibly versatile, delicious, and surprisingly easy to m...

Perfect Rice Every Time: The Ultimate Guide to Cooking Rice
Cooking TipsAs a self-proclaimed foodie, I've always been a bit obsessed with rice. It's the foundation of countless cuisi...

The Ultimate Guide to Cooking Asparagus: Tips, Techniques, and Recipes
Cooking TipsAsparagus. The mere mention of this spring delicacy conjures up images of vibrant green spears, crisp and burs...

Ultimate Guide to Cooking the Perfect Thanksgiving Turkey
Cooking TipsThanksgiving. Just the word conjures up images of overflowing tables laden with delicious food, the scent of r...