There's a certain satisfaction that comes with grilling the perfect meal, isn't there? The sizzle of the grill, the aroma of smoke and spices, the joy of sharing delicious food with loved ones. But for many grill masters, there's one culinary challenge that can be a bit of a head-scratcher: corn on the cob. It can be a real fickle thing, one minute looking promising, the next a charred mess or sadly undercooked. But fret not, my fellow grill aficionados, because I'm about to spill all my secrets for achieving that perfectly golden, sweet, and tender corn on the cob, every single time.
We're going to journey through the process, from choosing the right corn to prepping it for the grill, to mastering the art of grilling and adding some delicious flavour twists. I'll walk you through everything, sharing my tried-and-true methods, tips, and tricks. By the end of this, you'll be a bona fide corn on the cob grilling guru, ready to impress your friends and family with the perfect summer side dish. So, let's get started, shall we?
(Part 1) The Foundation: Picking the perfect corn

It all begins with the corn itself, right? Choosing the right corn is the foundation of a delicious grilled corn on the cob experience. Just like you wouldn't throw any old steak on the grill, you want to make sure you're starting with the best possible corn.
Selecting Your Corn: The Insider's Guide
Ideally, you'd be grabbing fresh corn straight from the field, still warm from the sun. But, for most of us, that's not always possible. So, head to your local farmers market or a reputable supermarket. Keep an eye out for corn with vibrant green husks that are slightly damp – this is a sign of freshness and moisture. Steer clear of corn with dry husks, any signs of damage, or discoloration.
Here's a handy checklist to ensure you're picking the perfect corn:
- Fresh, Bright Green Husks: The greener, the better. It's a signal of freshness and a good indication of moisture content.
- Moist Husks: Avoid corn with dry husks, as it might be a bit older and less flavorful.
- Plump and Firm Kernels: Gently press on the ear of corn. If the kernels are firm and plump, you're on the right track.
- No Signs of Damage: Look for any signs of mold, insects, or cracks on the husks. You want a healthy, blemish-free ear.
Here's a little secret from a seasoned grill master: if you can get your hands on heirloom corn, do it! It often has a more intense flavour and a slightly different texture compared to standard varieties. It's worth the extra effort to find it, trust me.
(Part 2) Preparing for Grill Time: The Right Prep Makes All the Difference

You've got your prime corn, now it's time to give it the proper pre-game treatment. This part is key for getting those perfect grill marks, that beautiful golden hue, and a tender, flavorful result.
1. Removing the Husks and Silk: A Gentle Approach
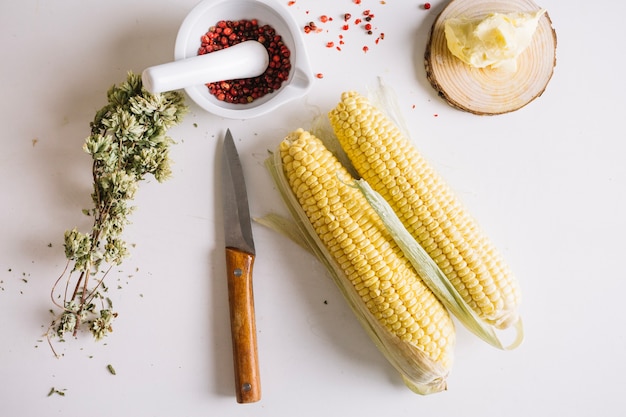
This is where a light touch is essential. Gently peel back the husks, revealing the ear of corn. You don't want to rip them off completely, just enough to expose the corn. Now, using your fingers or a sharp knife, carefully remove all the silk. You want a clean, silk-free ear of corn for the best results.
2. Soaking Secrets: Keeping Your Corn Moist
This is a game-changer. Soaking your corn in cold water for at least 30 minutes, or even an hour, is crucial for preventing it from drying out on the grill. It keeps the corn moist and helps to prevent burning. It's a simple step that yields a big difference in taste and texture.
3. Seasoning Strategies: From Simple to Spectacular
Now, this is where you get to inject your personality into the process. I like to keep things simple, using just salt and pepper, but feel free to get creative and experiment with different seasonings. Here are some flavour-boosting ideas to get you started:
- Herbs: Freshly chopped herbs like rosemary, thyme, oregano, or parsley add a fragrant, herbaceous touch.
- Spices: Paprika, cumin, chili powder, garlic powder – the possibilities are endless!
- Butter or Olive Oil: They not only add flavour but also help prevent the corn from sticking to the grill.
- Citrus Zest: Lemon, lime, or orange zest bring a refreshing, tangy touch.
Coat the corn with your chosen seasonings evenly. I find that applying them after the soaking helps them to stick better.
(Part 3) The Grilling Masterclass: Achieving Perfection

Finally, the moment we've all been waiting for – grilling time! You've got the perfect corn, you've prepped it with care, now it's time to turn up the heat and get those irresistible grill marks happening.
1. Preheating Your Grill: Setting the Stage for Success
Make sure your grill is clean and preheated to medium-high heat (around 400°F/200°C). If you're using a gas grill, ensure even heat distribution across the grill surface. If you're using a charcoal grill, make sure the coals are hot and glowing, ready to impart their smoky flavor.
2. Grilling Techniques: Direct vs. Indirect
Now, you've got two main approaches to grilling corn:
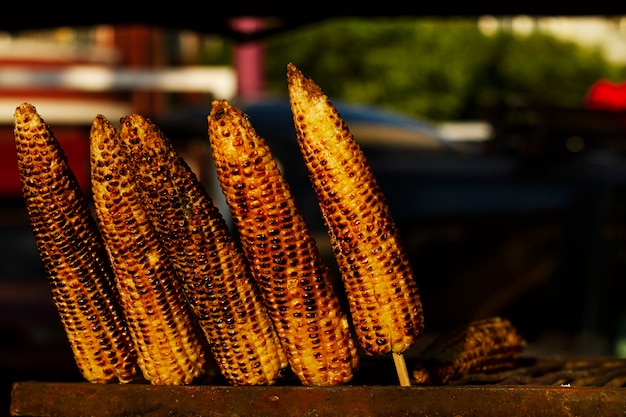
- Direct Grilling: Place the corn directly over the heat for a quick cook. This is the way to go for those coveted charred grill marks. You'll need to rotate the corn every few minutes to ensure even cooking and prevent burning.
- Indirect Grilling: This method involves placing the corn on a cooler part of the grill, away from direct heat. It's a gentler approach that results in more evenly cooked corn, without the intense char. Just remember to rotate the corn periodically for consistent cooking.
My personal preference is a combination of both. I start with a quick sear over direct heat to get those grill marks, then move to indirect heat for the final cook, resulting in a balance of flavour and texture. But, ultimately, it comes down to what you enjoy most. Experiment and find what works best for you!
3. Recognising the Signs of Perfection: The Telltale Clues
You'll know your corn is done when the kernels are plumped up, the husks have turned a deep golden brown, and a sweet aroma fills the air. It should take anywhere from 10 to 15 minutes, depending on your grill and the thickness of your corn.
(Part 4) Showcasing Your Mastery: Serving Up Your Grilled Corn
Congratulations! You've successfully grilled perfect, juicy, golden-brown corn on the cob. Now, it's time to serve it up and enjoy the fruits of your grilling labour.
1. The Final Touches: Elevate Your Corn with Flavour
Before serving, add a touch of magic with a final flourish of flavour. A pat of butter, a squeeze of lemon, or a sprinkle of fresh herbs can really elevate your corn to the next level. It's that little bit of love that takes it from good to extraordinary.
2. Perfect Pairings: Corn on the Cob's Versatile Charm
Corn on the cob is a true chameleon, pairing beautifully with a wide array of dishes. I love serving it alongside grilled meats, fish, or vegetables. It's also fantastic for picnics, barbecues, or potlucks. And don't forget the napkins! It's messy, but oh so delicious.
3. Enjoy!
Take a moment to savour your success. Sink your teeth into that sweet, juicy corn, and remember the joy of a perfectly grilled meal. And keep in mind, there's always room for improvement. Experiment, try new things, and you'll be a true corn on the cob grilling master in no time.
(Part 5) Beyond the Basics: Variations and Flavour Twists
Now, let's spice things up a bit, shall we? We've covered the essentials, but there's a whole world of flavour waiting to be explored. Here are some variations and flavour twists to take your corn on the cob game to the next level.
1. Spicy Corn on the Cob: A Fiery Delight
For those who like a bit of heat, try adding a sprinkle of cayenne pepper or chili powder to your seasoning blend. You could also brush the corn with a spicy marinade or sauce before grilling for a truly fiery experience.
2. Sweet and Savoury Corn on the Cob: A Delicious Harmony
Combine the best of both worlds with a blend of sweet and savoury flavours. Try adding brown sugar, honey, or maple syrup to your seasoning. For a savoury touch, add a pinch of smoked paprika or a sprinkle of parmesan cheese. This combination creates a delightful contrast of flavours.
3. Herbed Corn on the Cob: The Power of Fresh Herbs
Embrace the magic of herbs with a vibrant blend of fresh parsley, chives, thyme, and oregano. You can also use herb-infused butter or oil for an extra punch of flavour.
4. Citrus Corn on the Cob: A Zesty Touch
Add a touch of zest and freshness with citrus. Use lemon, lime, or orange zest for a refreshing, tangy flavour. You can also brush the corn with a citrus marinade or glaze before grilling.
5. Creamy Corn on the Cob: An Indulgent Treat
For a truly indulgent treat, try a creamy corn on the cob. After grilling, simply brush the corn with melted butter and sprinkle with grated Parmesan cheese. For an even creamier experience, add a dollop of sour cream or Greek yogurt.
(Part 6) Expanding Your Horizons: Corn on the Cob Beyond the Grill
Let's be honest, not everyone has access to a grill, or maybe you just want to explore different cooking methods. Well, good news! Corn on the cob isn't just for grilling. Here are some alternative methods to try:
1. oven roasting: A Versatile Option
Preheat your oven to 400°F (200°C). Wrap the corn in foil with a drizzle of olive oil and your desired seasonings. Roast for 30-40 minutes, or until the kernels are tender. This is a great option for a large batch of corn, and it's easy to control the cooking process.
2. Boiling: A Classic Method
A classic method that's always reliable. Bring a large pot of salted water to a boil. Add the corn and cook for 5-7 minutes, or until the kernels are tender. This is a quick and simple way to cook corn, and it's perfect for a side dish.
3. Microwaving: For a Quick Fix
For a quick and easy fix, you can microwave corn on the cob. Wrap the corn in a damp paper towel and microwave on high for 3-5 minutes, or until the kernels are tender. This is a great option for a quick snack or side dish, but keep in mind that it won't have the same smoky flavour as grilled corn.
(Part 7) Corn on the Cob: Beyond the Side Dish
Don't limit yourself to just serving corn on the cob as a side dish. It's a versatile ingredient that can be used in a variety of dishes. Here are a few ideas:
1. corn salad: A Refreshing Delight
Combine grilled corn kernels with fresh tomatoes, red onion, cilantro, and a tangy vinaigrette for a refreshing salad. You can also add grilled chicken or shrimp for a complete meal.
2. Corn Chowder: A Hearty and Delicious Soup
Use grilled corn kernels to add a smoky flavour to your favourite corn chowder. Combine with potatoes, onions, and milk or cream for a hearty and delicious soup.
3. Corn Fritters: Crispy and Delicious
Mix grilled corn kernels with flour, eggs, and cheese for crispy and delicious corn fritters. Serve as a snack or appetizer with your favourite dipping sauce.
4. Cornbread: A Classic with a Twist
Add a touch of sweetness and flavour to your cornbread by incorporating grilled corn kernels. The smoky flavour of the corn will add a unique twist to this classic recipe.
5. Corn Relish: A Vibrant and Refreshing Topping
Chop grilled corn kernels and combine with other fresh vegetables, such as bell peppers, onions, and cucumbers, for a vibrant and refreshing corn relish. Serve as a topping for burgers, hot dogs, or tacos.
(Part 8) FAQs: Your Corn on the Cob Queries Answered
You've got questions, and I've got answers. Here are some frequently asked questions about grilling corn on the cob:
1. What if the corn is a bit tough?
If your corn is a bit tough, you can try soaking it in cold water for a longer period of time before grilling. This will help to soften the kernels and make them more tender. You can also try grilling it for a longer time, but keep a close eye on it so it doesn't burn.
2. How long can I keep corn on the cob?
fresh corn on the cob is best enjoyed as soon as possible, but you can store it in the refrigerator for up to 3-4 days. To store corn, remove the husks and silk, wrap the ears in plastic wrap, and place them in the refrigerator. You can also freeze corn on the cob for later use. To freeze, blanch the corn in boiling water for 5 minutes, then plunge it into ice water. Drain the corn, wrap it in plastic wrap, and store it in the freezer for up to 12 months.
3. What's the best way to remove corn kernels from the cob?
A sharp knife is your best friend here! Cut the kernels off the cob by holding the cob upright and running the knife along the side. This will detach the kernels cleanly and efficiently. Alternatively, you can use a corn cob cutter, which is a kitchen tool specifically designed for this purpose.
4. Can I grill corn on the cob in its husk?
Yes, you can grill corn on the cob in its husk. This method will result in a slightly smoky flavour and a more moist corn. Simply remove the silk from the husks, wrap the ears in foil, and grill for 20-30 minutes, or until the kernels are tender. Just be careful when removing the husk, as it will be hot!
5. What if my corn is burned?
Don't worry, it happens to the best of us! If you've accidentally burned your corn, try scraping off the charred parts before serving. You can also try adding a generous amount of butter or a creamy sauce to help mask the burnt flavour. Just remember to taste test before you serve!
Now, go forth and grill, my fellow corn on the cob enthusiasts. With these tips and tricks, you're sure to become a grill master in no time. And who knows, maybe you'll even invent your own flavour twist that will become the envy of all your neighbours. Happy grilling!
Everyone is watching

Prime Rib Roast Cooking Time Chart: Per Pound Guide
Cooking TipsPrime rib roast. Just the name conjures images of lavish dinners, crackling fires, and hearty laughter. It’s ...

How Long to Bake Potatoes in the Oven (Perfect Every Time)
Cooking TipsBaked potatoes are a staple in my kitchen. They're incredibly versatile, delicious, and surprisingly easy to m...

Perfect Rice Every Time: The Ultimate Guide to Cooking Rice
Cooking TipsAs a self-proclaimed foodie, I've always been a bit obsessed with rice. It's the foundation of countless cuisi...

The Ultimate Guide to Cooking Asparagus: Tips, Techniques, and Recipes
Cooking TipsAsparagus. The mere mention of this spring delicacy conjures up images of vibrant green spears, crisp and burs...

Ultimate Guide to Cooking the Perfect Thanksgiving Turkey
Cooking TipsThanksgiving. Just the word conjures up images of overflowing tables laden with delicious food, the scent of r...
