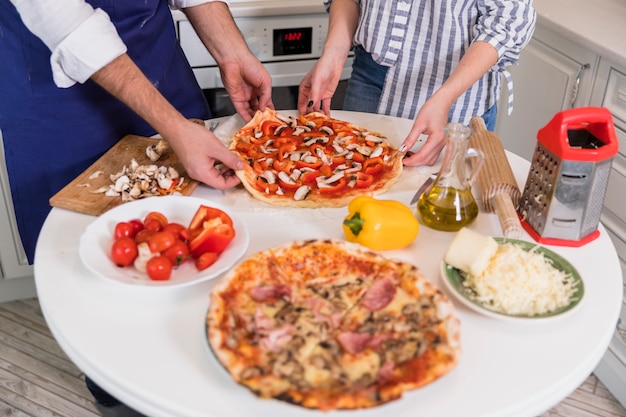
Let's face it, nothing beats the smoky, charred flavour of a perfectly grilled pizza. It’s that irresistible combination of crisp crust, melted cheese, and those smoky notes that makes every bite a symphony of deliciousness. But getting that pizza perfection on the grill can be a bit of a learning curve. I've been there, experimented with different techniques, and let's just say there have been a few “pizza disasters” along the way! But through trial and error, I've finally cracked the code for grilling pizzas like a pro. And guess what? It's not as daunting as it seems. So grab a chilled drink, settle in, and let's embark on this pizza-making journey together!
(Part 1) The Right Tools for the Job

Just like you wouldn't try to build a house without the right tools, you can't expect to grill a fantastic pizza without the proper equipment. So let's gather our arsenal, shall we?
Your Grill: The Foundation of Your Pizza Empire
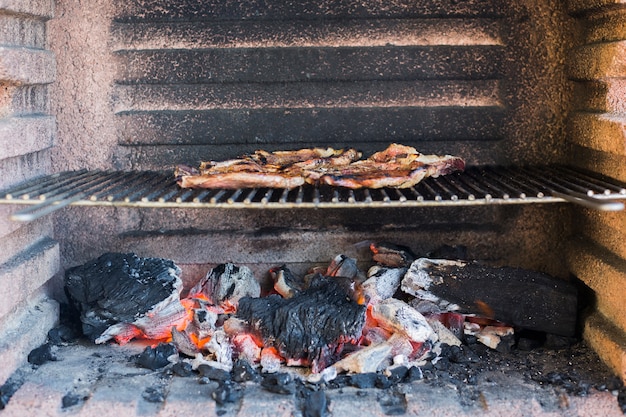
The first thing you need is a reliable grill. While any grill can technically do the job, a gas grill reigns supreme. Why? Because you have greater control over the heat, allowing you to achieve that perfectly crisp crust. charcoal grills can also work, but you'll need to master the art of controlling the coals for even cooking and avoid those dreaded burnt patches.
Pizza Stone: Your Crust's Secret Weapon
This is where the magic happens. A pizza stone is a must-have for achieving that crispy, evenly cooked crust. It absorbs heat from the grill, distributes it evenly, and prevents your pizza from sticking. If you’re feeling adventurous, a steel pizza peel can also be used, but be warned, it will heat up quickly!
Pizza Peel: Your Pizza's Loyal Companion
You’ll need a trusty pizza peel to safely transfer your pizza onto the grill and back off again. There are two main types:
- Wooden Peel: This flat, sturdy companion is ideal for moving your pizza from your work surface to the hot stone. It's gentle on your dough and helps prevent sticking.
- Metal Peel: This peel with a handle and a flat or slightly concave surface is your go-to for sliding your pizza onto the grill and retrieving it once it’s cooked. The flat surface ensures smooth movement, while the handle keeps your hands safe from the heat.
Thermometer: Your Pizza's Personal Temperature Guardian
You can't have a perfect pizza without the perfect temperature, and a thermometer is your key to grilling success. Aim for a scorching hot 500°F (260°C) for that irresistible, crispy crust.
Other Essential Accessories: Your Pizza-Making Toolkit
There are a few more helpful tools that will elevate your pizza game:
- Grill Brush: This trusty cleaning tool will keep your grill grate clean and free of any leftover debris, ensuring a smooth and even cooking surface.
- Basting Brush: This brush is handy for applying oil or sauce to your pizza crust or even for adding a touch of flavour to your toppings.
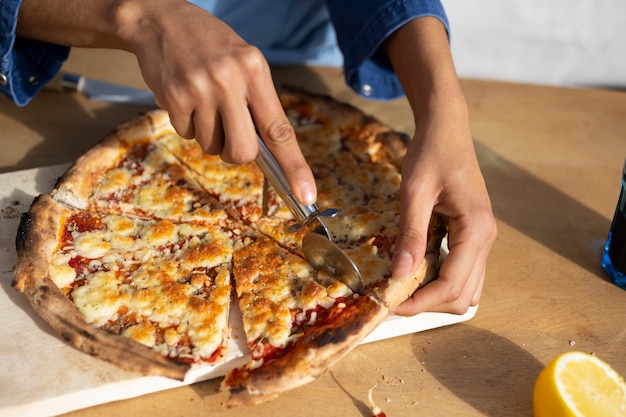
- Small Wooden Board: This is your pizza's final resting place, a sturdy surface to cut your masterpiece into slices and enjoy.
(Part 2) The Dough: The Foundation of a Great Pizza

Now, we're getting to the heart of the matter - the dough. You can certainly buy pre-made dough, but let me tell you, making your own from scratch is an experience like no other. It's not as intimidating as it seems, and the satisfaction of creating your own dough is truly rewarding.
Homemade pizza dough recipe: A Simple Yet Delicious Adventure
Here's a recipe that will get you started on your dough-making journey:
Ingredients:
- 1 cup (240 ml) warm water (105-115°F/40-46°C)
- 1 tablespoon (15 ml) olive oil
- 1 teaspoon (5 ml) sugar
- 1 teaspoon (5 ml) active dry yeast
- 3 cups (360g) all-purpose flour, plus more for dusting
- 1 teaspoon (5 ml) salt
Instructions:
- In a large bowl, combine the warm water, olive oil, sugar, and yeast. Let this mixture sit for 5 minutes, giving the yeast time to activate and become foamy.
- Add the flour and salt to the yeast mixture. Stir with a wooden spoon until a shaggy dough forms. This is where the dough starts to come together, but it will still be a bit rough.
- Now, it's time for kneading! Turn the dough out onto a lightly floured surface and knead for 5-7 minutes. Kneading is like giving the dough a good workout, making it smooth, elastic, and ready to rise. You'll know it's ready when it feels smooth and springy to the touch.
- Place the dough in a lightly oiled bowl, cover it with a clean kitchen towel, and let it rise in a warm place for 1-2 hours, or until doubled in size. This is where the magic of yeast happens, making your dough rise and become light and airy.
- Once the dough has risen, give it a gentle punch-down to deflate it. Now, divide the dough into two balls. Shape each ball into a disc and gently use your fingers to stretch the dough out into a thin circle or rectangle. If you prefer a thicker crust, don't stretch it as much.
- Let the dough rest for 10-15 minutes before you top it with your favourite ingredients. This will allow the dough to relax and become even more pliable for shaping.
This is just a starting point. Experiment with different types of flour, add herbs or spices for a flavour boost, and discover what works best for your pizza preferences.
Pro Tip: A Secret for a Spectacular Rise
To give your dough a super boost, try using your oven with the light turned on. The gentle warmth provides the perfect environment for a beautiful rise. It's a bit of a cheat, but it works wonders!
(Part 3) The Art of Toppings: Unleashing Your Inner Pizza Maestro

Here we are, the moment of truth - the toppings. This is where you can truly express your creativity and craft your pizza masterpiece. There are no strict rules, just let your imagination run wild!
While I'm a sucker for classics like mozzarella cheese, tomato sauce, and pepperoni, I also love venturing into uncharted territory. My current favourite combination is a pizza with roasted garlic, artichoke hearts, and feta cheese. It's simply divine!
Here are some key guidelines for topping your pizza:
Less is More: The Key to a Balanced Pizza
Overloading your pizza with toppings can make it soggy and heavy. Remember, the star of the show is your delicious crust! So stick to a few key ingredients that complement each other and allow their flavours to shine.
Play with Textures: A Symphony of Taste and Sensation
Varying the textures of your toppings adds a whole new dimension to your pizza. Think creamy mozzarella with crunchy pepperoni, juicy mushrooms, and a sprinkle of fresh herbs.
Don't Forget the Sauce: The Foundation of Flavour
A good sauce elevates your pizza to new heights. Experiment with different flavours, from classic tomato sauce to creamy pesto, spicy sriracha, or even a unique bbq sauce. Let your taste buds be your guide!
Pro Tip: Fresh Ingredients = Epic Pizza
Use fresh, high-quality ingredients for the best results. The taste difference is remarkable, and your taste buds will thank you for it!
(Part 4) Getting Ready for the Grill: A Pizza Preparation Checklist
Before you even think about flipping those pizzas onto the grill, there are a few steps you need to take to ensure a smooth and successful grilling experience. Here's a checklist to help you stay on track:
Preheating Your Grill: A Crucial Step for a Crispy Crust
This is non-negotiable. Preheat your grill to high heat, around 500°F (260°C). If you're using a gas grill, ensure all the burners are lit and running smoothly. For charcoal grills, let those coals burn until they are white-hot. This intense heat is the secret to a perfectly cooked crust.
Oiling the Grill Grate: Preventing Sticking and Ensuring Smooth Release
Prevent your pizza from sticking to the grill grate by giving it a light coat of oil. Use a clean grill brush to scrub the grate, removing any leftover debris, and then rub it with a piece of kitchen paper dipped in a little olive oil.
Preheating Your Pizza Stone: A Quick Step for Even Cooking
Place your pizza stone on the preheated grill and let it heat up for 10-15 minutes. This ensures the stone is piping hot and ready to cook your pizza evenly.
Preparing Your Pizza: Laying the Foundation for a Delicious Masterpiece
While the grill and your pizza stone are preheating, prepare your pizza. Stretch out your dough, add your carefully chosen toppings, and place it on a lightly floured pizza peel. If you are using a wooden peel, gently slide the pizza onto the preheated stone.
(Part 5) The Moment of Truth: Grilling Your Pizza
Okay, you're all prepped and ready to go. Let's fire up that grill!
Grilling Technique: Mastering the Art of Pizza Grilling
Carefully slide the pizza peel with your pizza onto the preheated pizza stone or steel. Let it cook for 3-5 minutes, or until the bottom of the crust is golden brown and slightly charred. If you are using a metal peel, you can directly place the pizza on the grill grate. Use a long spatula or pizza peel to gently slide the pizza off the peel onto the grill.
After a few minutes, use your pizza peel to gently lift the pizza and check the bottom. If it’s not yet golden brown, give it another minute or two on each side.
Pro Tip: Rotation is Key to Even Cooking
To ensure your pizza cooks evenly, rotate it a quarter turn every couple of minutes. This way, every part of your pizza gets a chance to bask in the glorious heat of the grill.
Checking for Doneness: Spotting Pizza Perfection
Once the bottom of the crust is golden brown and slightly charred, it's time for the cheese! Sprinkle your cheese and other toppings over the pizza. Close the lid of the grill and let it cook for another 2-3 minutes, or until the cheese is melted and bubbly.
When the cheese is melted and bubbly, your pizza is ready! Use your trusty pizza peel to slide the pizza off the hot stone or the grill and onto a cutting board.
Pro Tip: Handling Hot Metal with Care
If you are using a metal peel, use a large spatula or pizza peel to slide the pizza onto the cutting board. The metal peel can be incredibly hot, so it's best to avoid handling it directly.
(Part 6) The Final Touches: Adding That Extra “Wow” Factor
You've created a perfectly grilled pizza, but there’s always room for those extra touches that make it truly extraordinary. Here are some ideas to take your pizza to the next level:
A Drizzle of Oil: A Flavour Boost in Every Drop
A drizzle of olive oil, truffle oil, or even a spicy chili oil can add a burst of flavour and a touch of indulgence.
Sprinkle with Fresh Herbs: A Burst of Freshness and Aroma
Fresh basil, oregano, or parsley will add a touch of freshness and a vibrant aroma that tantalises the senses.
Adding a Finishing Touch: A Final Flourish of Flavour
A sprinkle of parmesan cheese, a drizzle of balsamic glaze, or a few slices of fresh mozzarella can really elevate your pizza to new heights. These final touches add a touch of elegance and complexity to your masterpiece.
(Part 7) Handling Those Grill Master Mishaps: Troubleshooting Tips
We've all been there - the dreaded pizza meltdown. But don't panic! Here’s how to handle some common grilling mishaps:
The Dough Sticks to the Peel: A Case of the "Sticky Situation"
If the dough sticks to the peel, it's likely because the peel isn't hot enough. Try sprinkling a little more flour on the peel before you place the pizza on it. You can also use a cornmeal-based flour which helps prevent sticking.
The Crust Burns Before the cheese melts: Too Hot to Handle
This usually happens if the grill is too hot. Try reducing the heat to medium-high. You can also use a pizza stone to help distribute the heat more evenly.
The Pizza Isn’t Cooking Evenly: The Case of the Uneven Grill
This can happen if the grill is uneven or if the pizza isn’t rotated frequently. Make sure to rotate the pizza every few minutes to ensure it cooks evenly. It might also be helpful to use a grill with more than one burner and turn off some of the burners to ensure the heat is distributed evenly.
The Pizza Falls Apart When You Try to Remove it: A Sign of Undercooked Dough
This is likely because the crust isn’t cooked through. Cook it for a few more minutes and try again.
Pro Tip: Gentle Removal for a Perfect Release
If you are having trouble getting the pizza off the peel, try using a long spatula or pizza peel to gently lift it off. Be patient and work slowly to avoid tearing the crust.
(Part 8) Unleashing Your Creativity: Beyond the Basics
You've mastered the basics, but let's get creative! Here are some ideas to expand your pizza horizons and explore new culinary adventures:
Grilled Pizza Flatbread: A Quick and Easy Pizza Experience
Try using a flatbread instead of pizza dough. It's a quicker and easier option, and it can still be grilled to perfection. You can even add a touch of olive oil or herbs to the flatbread for an extra layer of flavour.
Grilled Calzones: A Pizza with a Fold
Get creative with your fillings and shape your dough into a calzone. It's a delicious way to enjoy a grilled pizza with a twist. You can fill it with classic combinations like pepperoni and cheese or try something more adventurous, like roasted vegetables and pesto.
Grilled Pizza Wraps: A Lighter and More Versatile Pizza Option
If you’re looking for something a little lighter, try grilling a pizza wrap. Simply spread a layer of sauce on a tortilla, add your favourite toppings, and then grill it until the cheese is melted and bubbly. It's a great way to enjoy pizza on the go or as a lighter meal.
(Part 9) The Grill Master Pizza Party: Sharing the Joy
You’ve got the skills, the knowledge, and a mouthwatering pizza. Now, it’s time to share the love with your friends and family!
Gather Your Crew: Spread the Pizza Love
Invite your friends and family over for a pizza party. It’s a great way to enjoy a casual and fun evening, sharing your culinary creations and enjoying each other’s company.
Set the Scene: Create a Festive Atmosphere
Create a fun and festive atmosphere to make your pizza party unforgettable. Put on some lively music, set up a table with drinks and snacks, and let the good times roll!
Let the Good Times Roll: Embrace the Joy of Pizza
Relax, enjoy the process, and have fun with it! Grilling pizza is supposed to be fun and rewarding. So embrace the experience, share the laughter, and create memories that will last a lifetime.
FAQs
1. What kind of flour should I use for pizza dough?
While all-purpose flour works fine, you can achieve a chewier, more flavorful crust by using bread flour. It has a higher protein content, resulting in a dough with more structure and a delightful chewiness.
2. What is the best way to preheat a pizza stone?
Place the pizza stone on the grill and let it preheat for at least 10-15 minutes at high heat. This ensures the stone is hot enough to cook the pizza evenly, resulting in a perfectly crisp crust.
3. How do I know if my grill is hot enough?
You can use a grill thermometer to check the temperature. Aim for a scorching hot 500°F (260°C). If you don't have a thermometer, you can hold your hand a few inches above the grill grate. If you can only hold it there for a couple of seconds, your grill is ready for pizza action.
4. What are some creative toppings for pizza?
Let your imagination run wild! Try a pizza with roasted vegetables, goat cheese, and caramelized onions, or a pizza with spicy chorizo, peppers, and a drizzle of honey. The possibilities are endless!
5. What should I do if my pizza dough is too sticky?
If your pizza dough is too sticky, simply add a little more flour, a tablespoon at a time, until it’s no longer sticky. Be careful not to add too much flour, as it can make the dough dry and crumbly.
Everyone is watching

Perfect Rice Every Time: The Ultimate Guide to Cooking Rice
Cooking TipsAs a self-proclaimed foodie, I've always been a bit obsessed with rice. It's the foundation of countless cuisi...

Ultimate Guide to Cooking the Perfect Thanksgiving Turkey
Cooking TipsThanksgiving. Just the word conjures up images of overflowing tables laden with delicious food, the scent of r...

The Ultimate Guide to Cooking Asparagus: Tips, Techniques, and Recipes
Cooking TipsAsparagus. The mere mention of this spring delicacy conjures up images of vibrant green spears, crisp and burs...

Can You Cook Spaghetti with Gasoline? (The Shocking Truth)
Cooking TipsWe've all seen those crazy internet trends. You know, the ones that make you wonder, "Did someone actually try...

Chorizo and Eggs Recipe: The Ultimate Guide
Cooking TipsRight, let’s talk about chorizo and eggs. You know, that classic Spanish dish that's always a winner. It's th...
