Ever heard of tortillas? You know, those thin, pliable flatbreads that are the heart and soul of Mexican cuisine? Well, imagine a tortilla, but thicker, fluffier, and bursting with even more flavour. That, my friends, is a gordita.
Now, I know what you're thinking: "Gorditas? Sounds fancy, but how do I even pronounce that?" Don't worry, it's not as complicated as it seems. You basically say "gor-DEE-tas" – simple as that. And trust me, once you've tasted these little gems, you'll be saying it with gusto.
I've been a die-hard fan of gorditas for years. Their versatility is mind-blowing – you can load them up with anything from classic Mexican fillings like beans, cheese, and carnitas, to more adventurous options like pulled pork, grilled chicken, or even avocado and salsa. They're like a blank canvas for your culinary imagination.
So, without further ado, let's dive into the wonderful world of gorditas. This guide will take you through everything you need to know, from the perfect recipe to the tastiest toppings. Get ready to tantalize your taste buds and impress your friends.
(Part 1) A Brief History of Gorditas
Before we get our hands dirty, let's take a quick trip back in time. Gorditas have a long and fascinating history, dating back centuries in Mexican cuisine. Some even believe they were enjoyed as far back as the Aztec Empire, a testament to their enduring popularity.
The name "gordita" actually means "little fat one" in Spanish, which is a pretty accurate description. These flatbreads are known for their satisfyingly fluffy texture, achieved by using lard or shortening in the dough. It's that extra bit of fat that gives them their unique pillowy softness.
Traditionally, gorditas were cooked on a flat griddle or comal over an open fire, a method that imparted a smoky, rustic flavour. But today, you can find them prepared in various ways, from using a cast iron skillet to baking them in the oven. The methods might differ, but the delicious results remain the same.
(Part 2) The Gordita Dough: Mastering the Base
Right, let's get down to the nitty-gritty. The foundation of any good gordita is the dough. Don't worry, it's not as intimidating as it sounds. We'll break it down into easy, manageable steps.
The Ingredients You'll Need:
- Flour: I always reach for all-purpose flour for my gorditas. It gives them a good texture and keeps them nice and pliable, so they're easy to work with.
- Lard or Shortening: This is the secret ingredient that unlocks that signature fluffy texture. I'm a huge fan of lard, as it adds a rich, almost buttery flavour. However, if you're looking for a vegan option, shortening works perfectly fine.
- Salt: A pinch of salt is essential – it enhances the flavour and balances out the richness of the lard or shortening, preventing the gorditas from being overly greasy.
- Warm Water: Warm water is key – it helps to activate the yeast and ensures the dough rises beautifully, creating those airy, fluffy gorditas.
Mixing the Dough:
1. In a large bowl, combine the flour and salt. Give it a good mix to ensure the salt is evenly distributed throughout the flour.
2. Add the lard or shortening and start incorporating it into the flour using your fingers or a pastry cutter. You're aiming for a crumbly texture, like coarse sand.
3. Gradually add the warm water, one tablespoon at a time, mixing well after each addition. Don't add it all at once; you want to avoid a watery dough. You're looking for a soft, slightly sticky dough, which is a sign it's properly hydrated.
4. Turn the dough out onto a lightly floured surface and knead it for about 5-7 minutes. The aim here is to develop the gluten in the flour, resulting in a smooth and elastic dough. It should feel soft and pliable, not stiff or dry.
5. Place the dough in a lightly greased bowl, cover it with plastic wrap, and let it rise in a warm place for about 1 hour, or until doubled in size. This is where the magic happens – the yeast gets to work, creating those lovely air pockets that give gorditas their texture.
(Part 3) Shaping and Cooking the Gorditas
Now that our dough has risen, it's time to transform it into those delectable gorditas.
Dividing and Shaping:
1. Once the dough has risen, punch it down to release any trapped air. This helps to even out the texture and ensures the gorditas rise evenly. Divide the dough into 8-10 equal pieces, depending on how big you want your gorditas.
2. Roll each piece of dough into a ball. Then, flatten it into a disc, about 1/4 inch thick. You can use a rolling pin for a more even thickness, or simply press it down with your hand, adding a bit of rustic charm.
3. To create those signature indentations on the gorditas, take a small, round object like a jar lid or the bottom of a glass, and gently press it down in the centre of each disc. This creates a little well for your fillings, ensuring they stay put when you fold the gorditas.
Cooking Methods:
There are a few different ways to cook gorditas, and each method has its own unique charm.
On a Griddle or Comal:
This is the most traditional method, capturing the essence of Mexican home cooking.
1. Heat a flat griddle or comal over medium heat. Make sure it's nice and hot, but not smoking.
2. Gently place the gorditas on the hot griddle, making sure there's enough space between them so they cook evenly.
3. Cook for about 2-3 minutes per side, or until they’re golden brown and slightly puffed up. You'll know they're ready when you see those lovely brown spots and they start to puff up slightly, indicating they're cooked through.
In a Cast Iron Skillet:
This is another great option for cooking gorditas. cast iron skillets retain heat beautifully, ensuring even cooking.
1. Heat a cast iron skillet over medium heat. Again, make sure it's nice and hot.
2. Place the gorditas in the hot skillet.
3. Cook for about 2-3 minutes per side, or until they're golden brown and slightly puffed up. The cast iron skillet will create a lovely crust on the gorditas.
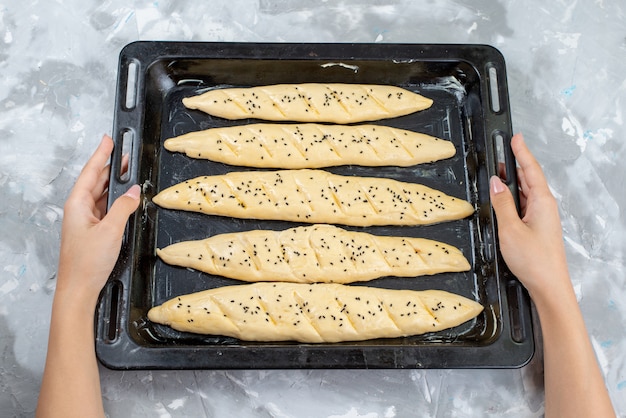
In the Oven:
If you prefer a hands-off approach, you can bake your gorditas. This method works well if you're making a large batch.
1. Preheat the oven to 350°F (175°C).
2. Line a baking sheet with parchment paper. This prevents sticking and ensures easy cleanup.
3. Place the gorditas on the prepared baking sheet. Make sure they're not overcrowded, so they bake evenly.
4. Bake for about 10-12 minutes, or until they are golden brown and slightly puffed up. You can check for doneness by gently pressing on the gorditas – they should spring back.
(Part 4) Gorditas: The Ultimate Fillings
Now we're getting to the fun part! The beauty of gorditas lies in their incredible versatility. You can fill them with pretty much anything your heart desires.
Traditional Mexican Fillings:
Let's start with the classics, the fillings that have stood the test of time:
- Beans: Refried beans are a quintessential filling for gorditas. They add a creamy, savory flavour and a satisfyingly hearty texture. They provide a base of comfort and warmth.
- Cheese: A generous amount of queso fresco or Oaxaca cheese is a must-have for any good gordita. They melt beautifully, adding a lovely tangy flavour and a touch of decadence.
- Carnitas: These slow-cooked, tender pork chunks are absolutely divine in gorditas. They're rich, flavourful, and melt in your mouth, delivering a satisfyingly meaty experience.
- Chicharrones: Crispy, salty pork rinds add a delightful crunch and a burst of flavour. They provide a contrasting texture and a savory kick.
- Suadero: This tender, melt-in-your-mouth beef is another classic filling that's packed with flavour. It adds a richness and depth that's hard to resist.
Beyond the Traditional:
But hey, don't be afraid to get creative! Gorditas can handle anything you throw at them. Here are some of my favourite non-traditional fillings:
- Grilled Chicken: Marinated and grilled chicken adds a juicy and flavourful element. It's a light and refreshing option, especially when paired with a tangy salsa.
- Pulled Pork: Slow-cooked pulled pork with a tangy bbq sauce is a taste sensation in a gordita. The smoky BBQ flavour and the tender pulled pork are a match made in heaven.
- Avocado and Salsa: For a lighter and more refreshing option, try a filling of mashed avocado and your favourite salsa. It's a perfect balance of creaminess and acidity.
- Black Bean and corn salad: A colourful and flavourful mix of black beans, corn, tomatoes, onions, and cilantro. It's a vegetarian delight, packed with flavour and texture.
- Mushrooms and Spinach: Sautéed mushrooms and spinach with a touch of garlic is a delicious vegetarian option. It's earthy, satisfying, and surprisingly versatile.
Pro Tip:
When filling your gorditas, don’t go overboard! Too much filling will make them difficult to fold and eat. A little goes a long way, ensuring a perfectly balanced bite. Think of it as a delicate dance of flavours and textures.
(Part 5) Toppings That Take it to the Next Level
Let's face it: a good topping can transform any dish, and gorditas are no exception. They add a finishing touch that elevates the flavour profile to new heights.
Classic Toppings:
- Salsa: You can’t go wrong with a good salsa. Try a fiery salsa roja, a tangy salsa verde, or a mild pico de gallo. Each salsa brings its own unique flavour and heat level to the party.
- Crema: This creamy, slightly sour topping is like a Mexican sour cream. It adds a lovely richness to the gorditas, balancing out the savory flavours and providing a smooth, creamy texture.
- Cilantro: A handful of chopped cilantro adds a fresh, herbaceous flavour and a lovely green touch. It's a burst of freshness that brightens up the entire dish.
- Lime Wedges: A squeeze of lime juice brightens up the flavours and adds a refreshing acidity. It's a simple yet effective way to enhance the overall flavour profile.
Get Creative With Toppings:
Beyond the classics, you can experiment with all sorts of toppings. Here are some of my favourites:
- Guacamole: A dollop of creamy guacamole adds a rich, earthy flavour and a touch of elegance. It's a classic combination, perfect for any occasion.
- pickled onions: The tangy flavour of pickled onions cuts through the richness of the fillings and adds a nice textural element. They add a surprising punch of flavour and a welcome acidity.
- Queso Fundido: This melted cheese dip is perfect for adding a gooey, cheesy goodness to your gorditas. It's a cheesy delight that's sure to please.
- Sliced Jalape??os: For a touch of heat, add some sliced jalape??os. They provide a fiery kick that adds an extra layer of complexity to the dish.
(Part 6) The Ultimate Gordita Experience: Serving Suggestions
Now that you’ve mastered the art of making gorditas, it’s time to think about how you’ll serve them. Here are a few ideas to elevate your gordita experience.
Gordita Fiesta:
Get ready to impress your friends with a gordita feast. Here’s how to create a memorable experience:
- The Spread: Lay out a buffet-style spread with a variety of fillings and toppings. Let your guests choose their own combinations, creating their own personalized gorditas.
- Warm and Ready: Keep the cooked gorditas warm in a low oven or on a warming tray. This ensures they stay soft and delicious.
- Visual Appeal: Arrange your fillings and toppings in colourful and appealing ways. It's all about presenting a feast for the eyes as well as the stomach.
- Drinks and Sides: Serve your gorditas with a selection of Mexican beers, margaritas, or agua fresca. You could also offer sides like Mexican rice or refried beans to complete the experience.
Casual Gordita Night:
For a more casual gathering, you can make a few different types of gorditas and let everyone choose their favourite. This allows for a more intimate and personalized experience.
Gorditas on the Go:
Gorditas are a great option for a quick and easy lunch or dinner. Fill them with your favourite ingredients and take them to work or school. They’re also perfect for picnics or beach days, offering a convenient and delicious meal option.
(Part 7) Gordita Variations: Exploring Different Flavours
We've talked about the traditional gorditas, but there are a ton of variations out there. Get ready to explore some exciting new flavours!
Gorditas de Chicharrón:
These gorditas are filled with crispy chicharrones (pork rinds) and often topped with salsa verde. They're a classic Mexican street food favourite, offering a satisfying combination of textures and flavours.
Gorditas de Puerco:
These gorditas are filled with tender, slow-cooked pork. They're often seasoned with achiote paste, which gives them a unique red colour and a slightly spicy flavour. The achiote paste adds a depth of flavour and a vibrant visual appeal.
Gorditas de Birria:
These gorditas are filled with a rich, stewed meat called birria. They're often served with a dipping broth that adds an extra layer of flavour. The broth adds a savory element and a delicious dipping sauce.
Gorditas de Frijoles:
These gorditas are filled with refried beans and topped with cheese, salsa, and crema. They're a simple yet satisfying vegetarian option. A comforting and flavorful choice for those looking for a lighter option.
(Part 8) FAQs
I’m sure you have a few questions about gorditas. Let’s answer some of the most common ones:
1. Can I use store-bought tortillas instead of making my own dough?
You absolutely can! If you're short on time or don't feel like making the dough from scratch, you can use store-bought tortillas. Just look for thicker tortillas that are labeled as "gorditas."
2. What kind of cheese is best for gorditas?
Queso fresco and Oaxaca cheese are both great options. They melt beautifully and add a lovely tangy flavour. They also provide a satisfyingly creamy texture.
3. Can I freeze gorditas?
Yes, you can freeze gorditas! They're best frozen after they've been cooked. Just wrap them individually in plastic wrap and then place them in a freezer-safe bag. To reheat, simply microwave them for a few seconds, or bake them in a preheated oven until warmed through.
4. How do I store leftover gorditas?
Leftover gorditas can be stored in an airtight container in the refrigerator for up to 3-4 days. They'll retain their freshness and flavour for a few days.
5. What can I do with extra gordita dough?
If you have leftover gordita dough, you can use it to make other delicious treats. Try making small tortillas, empanadas, or even a simple bread. It's a versatile dough that can be used for various baked goods.
(Part 9) Embrace the Gordita Adventure!
Well, there you have it, the ultimate guide to gorditas! I hope you’ve found this journey both informative and inspiring.
Remember, gorditas are a blank canvas for culinary creativity. Don’t be afraid to experiment with different fillings, toppings, and variations. Let your imagination run wild and have fun!
Get ready to impress your friends and family with your newfound gordita expertise. And most importantly, enjoy the deliciousness! Happy gordita-making!
Everyone is watching

Prime Rib Roast Cooking Time Chart: Per Pound Guide
Cooking TipsPrime rib roast. Just the name conjures images of lavish dinners, crackling fires, and hearty laughter. It’s ...

Perfect Rice Every Time: The Ultimate Guide to Cooking Rice
Cooking TipsAs a self-proclaimed foodie, I've always been a bit obsessed with rice. It's the foundation of countless cuisi...

How Long to Bake Potatoes in the Oven (Perfect Every Time)
Cooking TipsBaked potatoes are a staple in my kitchen. They're incredibly versatile, delicious, and surprisingly easy to m...

The Ultimate Guide to Cooking Asparagus: Tips, Techniques, and Recipes
Cooking TipsAsparagus. The mere mention of this spring delicacy conjures up images of vibrant green spears, crisp and burs...

Ultimate Guide to Cooking the Perfect Thanksgiving Turkey
Cooking TipsThanksgiving. Just the word conjures up images of overflowing tables laden with delicious food, the scent of r...