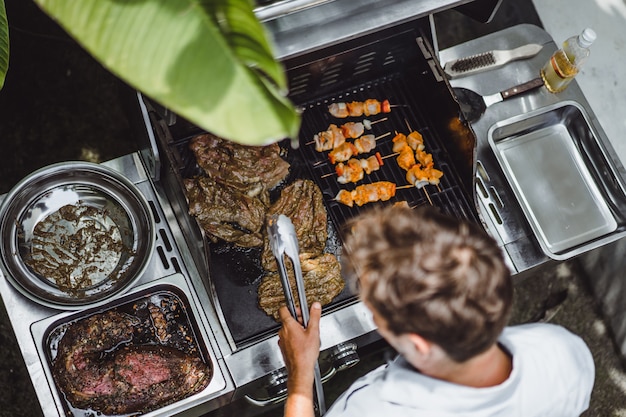
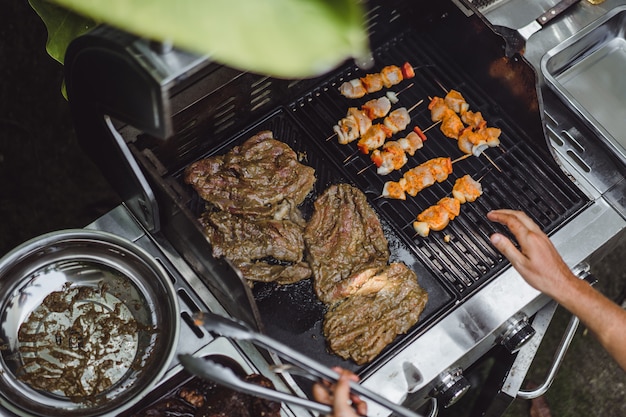
Right, let's talk brisket. For those of you who haven't experienced the pure joy of perfectly cooked brisket, you're in for a treat. I'm not talking about the dry, tough stuff you might have had at a BBQ joint. I'm talking about melt-in-your-mouth, juicy, smoky brisket that practically falls apart at the touch. And the best part? You can achieve this culinary masterpiece right in your own backyard, on your gas grill.
This guide isn't just a collection of recipes; it's a journey into the world of brisket mastery, filled with tips, tricks, and a whole lot of passion. I'll share my own personal experiences and insights, along with some tried-and-true methods I've picked up over the years. So, grab your favourite beverage, settle in, and let's get started!
(Part 1) The Brisket: Understanding Your Canvas

choosing the right cut: Point vs. Flat
Before you even think about firing up the grill, you need to choose the right brisket. There are two main cuts:
Point: This is the thicker, fattier end of the brisket. It's known for its rich flavour and tenderness, but it can be a bit tougher to cook evenly. Think of it as the ultimate flavour bomb, but it requires a bit more attention.
Flat: This is the leaner, thinner end. It's easier to cook evenly, but it might not be as flavourful as the point. This is the beginner-friendly option, with a more predictable outcome.
For my money, the point is the way to go, especially if you're a seasoned griller who enjoys the challenge of achieving a perfect balance of tenderness and flavour. But if you're a beginner, the flat might be a more manageable option, providing you with a solid foundation to build your brisket skills.
Prepping for Perfection: Trimming, Seasoning, and Injecting
Once you've got your brisket, it's time to prep it for grilling.
Trimming the Fat: Don't get rid of all the fat – it's crucial for flavour and moisture. Think of it as a natural basting system that keeps the brisket succulent. However, you do want to trim away any excess fat, especially the thick layer on top. This helps to prevent uneven cooking and ensures a clean, crisp bark on the finished product.
Seasoning: Now, this is where your creativity comes in. You can go simple with salt and pepper, or get fancy with rubs that include garlic, onion, paprika, or even coffee. Experiment with different blends to find your favourite, but remember, a good seasoning should enhance the natural flavour of the brisket, not mask it.
Injecting: This is optional, but injecting your brisket with a marinade can add extra flavour and moisture. Injecting is particularly helpful for leaner cuts like the flat, boosting its tenderness and depth of flavour. Just be careful not to over-inject – you don't want it to burst!
The Importance of Rest: Patience Pays Off
Don't be tempted to rush this process! A well-rested brisket will cook more evenly and be more tender. Aim for at least 2-3 hours in the fridge before grilling. This allows the meat to relax, absorb the flavours of your chosen rub, and ensures a more consistent cook.
(Part 2) The Gas Grill: Your Weapon of Choice

Choosing the Right Grill: Size and Features Matter
You'll need a gas grill with at least two burners. Ideally, it should have a large cooking surface, but a small grill can work in a pinch if you're working with a smaller brisket. I recommend a grill with a built-in thermometer, but if you don't have one, you can always use a separate thermometer.
Setting Up the Grill: Mastering Indirect Heat
Now, here's the trick to getting a perfect brisket on the gas grill: indirect heat.
Turn on One Burner: Only light one burner on your grill, leaving the other side off. This creates a "hot" side and a "cold" side. The "cold" side will be used for cooking the brisket, while the "hot" side is used for adding smoke.
The Smoking Trick: To add smoke flavour, you can use wood chips or chunks soaked in water. Place them on the hot burner to create smoke. This is where the magic of flavour happens.
(Part 3) The Cooking Process: The Art of Patience

The Low and Slow Method: A Journey of Transformation
The secret to melt-in-your-mouth brisket is low and slow cooking. This means cooking the brisket at a low temperature for a long time, allowing the fat to render and the meat to break down. This is a true test of patience, but the results are well worth the wait.
Temperature Control: Aim for an internal grill temperature of around 225-250°F (107-121°C). Maintaining this temperature is crucial for achieving consistent cooking and preventing the brisket from drying out.
Initial Cook: Place the brisket on the "cold" side of the grill, fat side up. This allows the fat cap to render down slowly, naturally basting the brisket and providing incredible flavour.
The Stall: Don't panic if the internal temperature of the brisket stalls for a while. This is normal and part of the process. The stall occurs when the brisket reaches a certain temperature, and the moisture starts evaporating, causing the internal temperature to plateau. Just keep cooking low and slow, and eventually, the stall will break, and the brisket will continue to cook through.
The Wrap: A Critical Step in Achieving Tenderness
After a few hours, you'll notice the brisket starting to soften. Now is the time to wrap it up. This is a crucial step in ensuring a tender, juicy brisket.
Butcher Paper: I prefer butcher paper for wrapping. It's breathable and allows the steam to circulate, helping to create that melt-in-your-mouth texture. It allows the brisket to cook in its own juices, steaming it to perfection.
Foil: You can also use foil, but it tends to trap too much moisture, potentially making the brisket soggy. Foil can be a good option if you want a more moist brisket, but it can also lead to a less desirable texture.
Checking for Doneness: The Thermometer Tells the Tale
The brisket is done when it reaches an internal temperature of 195-205°F (91-96°C). Use a meat thermometer to check the internal temperature in the thickest part of the brisket. The thermometer is your best friend in this process, ensuring that the brisket is cooked to perfection and safe to eat.
The Rest: The Final Touch for Unparalleled Tenderness
Once the brisket is done, it's important to let it rest for at least an hour, wrapped in butcher paper. This allows the juices to redistribute throughout the meat, making it even more tender. This resting period is essential for allowing the fibres to relax, resulting in a brisket that practically melts in your mouth.
(Part 4) The Finishing Touches: The Proof is in the Eating
Slicing Perfection: The Key to Achieving Even Tenderness
After resting, you're ready to slice the brisket.
Against the Grain: Slice the brisket against the grain, which means cutting across the direction of the muscle fibers. This will make the meat more tender and easier to chew. Think of it as releasing the tension in the meat, allowing it to fall apart easily.
Serving with Style: Pairings for a Delicious Feast
Now you can serve your masterpiece!
Classic Sides: Brisket pairs perfectly with classic BBQ sides like coleslaw, baked beans, mac and cheese, and potato salad. These sides complement the richness of the brisket, offering a balanced and satisfying meal.
Creative Options: Get creative with your sides! Try roasted vegetables, cornbread, or even a fresh salad. These options provide a contrast in textures and flavours, making for a more exciting dining experience.
(Part 5) Common Mistakes to Avoid: Lessons Learned from Experience
Overcooked Brisket: Dry and Tough
One of the biggest mistakes people make is overcooking the brisket. If you cook it too long, it will become dry and tough.
Solution: Use a meat thermometer to check the internal temperature and take the brisket off the grill when it reaches 195-205°F (91-96°C). Don't be afraid to trust the thermometer, as it's your guide to achieving that perfect balance of tenderness and flavour.
Undercooked Brisket: Not Safe to Eat
On the other hand, undercooked brisket is not safe to eat. It's important to ensure that the brisket is cooked to a safe internal temperature to prevent foodborne illness.
Solution: Use a meat thermometer to check the internal temperature and make sure it reaches at least 195°F (91°C). Don't compromise on safety, always ensure that your brisket is cooked thoroughly.
Uneven Cooking: Tough and Dry Spots
If you don't cook the brisket evenly, you'll end up with tough and dry spots.
Solution: Make sure the grill is set up correctly with indirect heat. Rotate the brisket every hour to ensure even cooking. Pay attention to the positioning of the brisket and rotate it regularly to ensure that all sides are exposed to the heat evenly.
No Smoke: Lack of Flavour
If you don't use wood chips or chunks to create smoke, your brisket will lack flavour. Smoke is what gives brisket its signature aroma and flavour, adding a depth that elevates the dish to new heights.
Solution: Soak wood chips or chunks in water for 30 minutes and then place them on the hot burner of your grill to create smoke. Experiment with different wood types to find your favourite flavours.
(Part 6) Master Brisket: Tips and Tricks for Ultimate Tenderness
The Secret to Juicy Brisket: Fat Cap Management
The fat cap on the brisket is your friend. It renders down and provides moisture and flavour.
Leave it On: Don't trim all the fat off. Leave a layer of fat on top to help keep the brisket moist. This fat cap acts like a natural basting system, keeping the brisket juicy and flavourful.
Don't Trim Too Much: Just trim off any thick chunks of fat that might burn. Trimming excess fat ensures a cleaner cook and prevents flare-ups.
Keep it Moist: Using a Water Pan
Using a water pan on your grill can help to keep the brisket moist.
Place it Below: Place the water pan below the brisket on the "cold" side of the grill. This helps to create a humid environment that prevents the brisket from drying out. The water pan adds moisture to the air, creating a steamy environment that helps to keep the brisket tender.
The Power of Spritzing: Keep it Moist and Flavorful
Spritzing the brisket during cooking helps to keep it moist and adds flavour.
Apple Cider Vinegar Spritz: I love using a simple spritz of apple cider vinegar and water. It adds a subtle tang to the brisket. The acidity of the apple cider vinegar helps to break down the proteins, making the brisket more tender.
Other Spritz Options: You can also use other liquids like beer, apple juice, or even a simple water spray. Experiment to find what works best for you.
The "texas crutch": A Controversial Technique
The "Texas Crutch" is a technique that involves wrapping the brisket in foil after the initial cook.
Pros: It can help to speed up the cooking process and make the brisket more tender. The foil creates a steamy environment that speeds up cooking and helps to break down the tough connective tissues.
Cons: It can trap too much moisture and make the brisket soggy. The foil can trap moisture, making the brisket less crisp and potentially affecting the texture.
My Opinion: I prefer to wrap the brisket in butcher paper, which is more breathable and allows the steam to circulate. Butcher paper allows for a more controlled steam release, resulting in a brisket that is tender without being soggy.
(Part 7) Mastering the Art of Smoking: Adding that Unique Depth of Flavor
The Science of Smoke: Understanding the Process
Smoking is the process of adding flavour to food by exposing it to smoke. This is the art of infusing the brisket with a unique smoky aroma and flavour.
Wood Choice: The type of wood you use will affect the flavour of the smoke. Some popular woods for smoking brisket include hickory, mesquite, pecan, and oak. Each wood type has its own distinct flavour profile, influencing the final taste of the brisket.
smoke rings: A "smoke ring" is a pinkish-red layer that forms under the brisket's surface. It's not necessarily an indicator of flavour, but it's a cool visual effect. The smoke ring is a result of the smoke reacting with the meat's proteins.
Smoking Techniques: Tips and Tricks
Soaking Wood: Soak the wood chips or chunks in water for 30 minutes before adding them to the grill. This will help to create more smoke. Soaking the wood allows for a more controlled and consistent smoke output.
Placement: Place the wood chips or chunks on the hot side of the grill. This ensures that the wood chips or chunks are burning hot, producing a steady stream of smoke.
Avoid Over-Smoking: Too much smoke can overpower the flavour of the brisket. You want a delicate smoky flavour that enhances the natural flavour of the brisket, not overpower it.
Smoke-Flavored Rubs and Marinades: Enhancing the Smoky Profile
You can also enhance the smoky flavour by using rubs and marinades that contain smoke-flavored ingredients.
Liquid Smoke: A good option for adding smoke flavour without actually smoking the brisket. Liquid smoke provides a concentrated smoky flavour that can be used in rubs and marinades.
Smoked Paprika: A popular ingredient in rubs for adding smoky depth. Smoked paprika provides a rich, smoky flavour that enhances the overall profile of the brisket.
Smoked Garlic Powder: Adds a subtle smoky flavour to rubs and marinades. Smoked garlic powder adds a complex smoky flavour to the brisket, complementing the other spices in the rub.
(Part 8) The Brisket's Tale: Sharing My Personal Journey
My First Brisket: A Lesson in Patience
I remember my first brisket. It was a disaster. I cooked it too fast, it was dry and tough, and I almost gave up on brisket altogether. I learned that brisket cooking is a marathon, not a sprint, and requires patience and attention to detail.
The Turning Point: But I learned from my mistakes. I started researching, practicing, and experimenting with different techniques. Through trial and error, I discovered the secrets to achieving brisket perfection.
The "Aha" Moment: The Joy of Perfection
Finally, I cracked the code. I cooked a brisket that was so tender and flavorful, it changed my life. I realized that brisket wasn't just about grilling; it was about patience, dedication, and a love for the art of cooking. This was the moment I truly fell in love with brisket, realizing that it's not just a dish, but a culinary adventure.
Sharing the Love: Passing on the Knowledge
I've been sharing my passion for brisket ever since. I've taught my friends, my family, and even complete strangers how to cook the perfect brisket. And now, I'm sharing my knowledge with you. This journey of learning and sharing has been one of the most rewarding experiences of my life, and I'm excited to help you become a brisket master.
FAQs
1. How long does it take to cook a brisket on a gas grill?
This depends on the size of the brisket and the temperature you're cooking at. A typical brisket will take anywhere from 8 to 12 hours to cook. It's a long process, but the results are worth the wait.
2. Can I use a smoker instead of a gas grill?
Absolutely! A smoker is a great option for cooking brisket. The smoke flavour is incredible, and you'll get a beautiful smoke ring on your brisket. A smoker provides an intense smoke flavour, ideal for those who love that smoky character in their brisket.
3. What happens if the brisket stalls?
Don't panic! It's normal for the brisket to stall during cooking. Just keep the grill at a low temperature, and the brisket will eventually continue cooking. The stall is a natural part of the process, and it's essential to maintain patience and consistency.
4. What are some good sides to serve with brisket?
Brisket pairs perfectly with classic BBQ sides like coleslaw, baked beans, mac and cheese, and potato salad. These sides complement the richness of the brisket, offering a balanced and satisfying meal. You can also get creative with other sides like roasted vegetables, cornbread, or a fresh salad.
5. Can I freeze leftover brisket?
Yes, you can freeze leftover brisket. Simply wrap it tightly in plastic wrap and foil and freeze for up to 3 months. Freezing leftover brisket allows you to enjoy it later, making it a versatile dish that can be enjoyed over time.
This is your masterclass for achieving brisket perfection. Embrace the journey, experiment, and most importantly, have fun! Remember, the best brisket is the one you enjoy with your loved ones. So gather your friends and family, fire up the grill, and get ready to experience the joy of a perfectly cooked brisket.
Everyone is watching

Prime Rib Roast Cooking Time Chart: Per Pound Guide
Cooking TipsPrime rib roast. Just the name conjures images of lavish dinners, crackling fires, and hearty laughter. It’s ...

How Long to Bake Potatoes in the Oven (Perfect Every Time)
Cooking TipsBaked potatoes are a staple in my kitchen. They're incredibly versatile, delicious, and surprisingly easy to m...

Perfect Rice Every Time: The Ultimate Guide to Cooking Rice
Cooking TipsAs a self-proclaimed foodie, I've always been a bit obsessed with rice. It's the foundation of countless cuisi...

The Ultimate Guide to Cooking Asparagus: Tips, Techniques, and Recipes
Cooking TipsAsparagus. The mere mention of this spring delicacy conjures up images of vibrant green spears, crisp and burs...

Ultimate Guide to Cooking the Perfect Thanksgiving Turkey
Cooking TipsThanksgiving. Just the word conjures up images of overflowing tables laden with delicious food, the scent of r...
