(Part 1) Choosing the Right Ribs: Your Rib-Picking Journey Begins
The Cut: Baby Backs vs. spare ribs
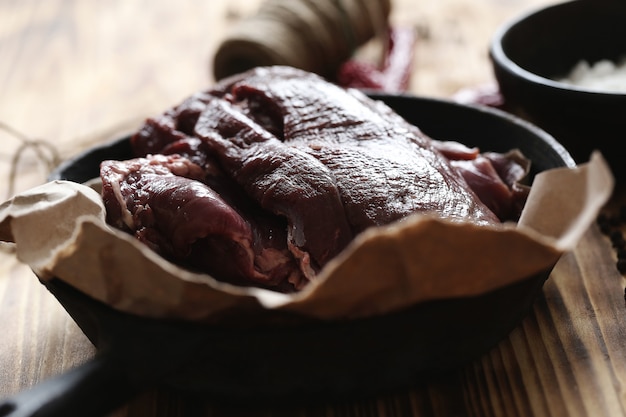
First things first, we need to talk about the stars of the show: the ribs themselves. You've got two main players in this rib game:- Baby back ribs: Think of them as the petite, delicate dancers of the rib world. These beauties are shorter and more tender than their spare rib cousins, boasting a lovely layer of fat that renders down beautifully. They're often the crowd-pleaser, but they can also be a bit pricier.
- Spare Ribs: These are the robust, full-bodied singers. They're larger and meatier than baby backs, with a more pronounced, rustic flavour. They're also the budget-friendly choice, making them perfect for large gatherings or when you're wanting to stretch your culinary wings. They do have a thicker membrane, which can be a bit tough, but don't worry, we'll conquer that membrane together.
The Meat: Picking the Right Ribs
Once you've decided on your cut, it's time to choose the meat itself. Look for ribs with a good amount of marbling. This fat intermingling with the meat is like a secret ingredient, keeping your ribs moist and flavorful. You also want those ribs to be fresh, with a vibrant colour and a pleasant aroma. If you're unsure, ask your butcher for advice. They're the experts, and they'll be happy to point you in the right direction.(Part 2) Prepping the Ribs: Unleashing the Flavour
Removing the Membrane: The First Step to Tenderness
We've got our ribs, but there's one little obstacle we need to tackle before we get cooking: the membrane. This tough, silvery skin on the back of the ribs can make them tough and chewy, a real downer when you're craving melt-in-your-mouth goodness. So, let's conquer it!Here's how to slay the membrane:
- Place the rib rack bone-side down on a cutting board. With a sharp knife, carefully loosen the membrane at one end.
- Grab the membrane with a paper towel and pull it back, peeling it off in one piece. It might take a bit of effort, but trust me, it's worth it. Think of it as a little exercise for your biceps and a big step towards rib perfection.
Applying the Rub: The Foundation of Deliciousness
Now that the membrane is gone, it's time to give our ribs a good rub – the flavour foundation that will transform them into something truly special.You can buy pre-made rubs, but I'm a firm believer in crafting your own. It's incredibly easy and allows you to tailor the flavour profile to your heart's content. Here's a basic rib rub recipe that's always a hit:
- 1/2 cup brown sugar (for a touch of sweetness)
- 1/4 cup paprika (for a smoky, earthy flavour)
- 1/4 cup salt (to enhance the flavour of the meat)
- 1 tablespoon black pepper (for a bit of spice)
- 1 tablespoon garlic powder (for a pungent, earthy note)
- 1 tablespoon onion powder (for a touch of sweetness and depth)
- 1 teaspoon dried thyme (for a warm, herbal flavour)
- 1 teaspoon dried oregano (for a slightly tangy, earthy flavour)
Simply combine all the ingredients in a bowl and mix well. Then, rub the mixture all over the ribs, getting it into every nook and cranny. Cover the ribs and let them chill in the fridge for at least 4 hours, or even overnight. This gives the rub time to work its magic, infusing the meat with flavour and creating a beautiful, crispy bark.
(Part 3) The Oven-Roasted Method: A Symphony of Heat and Time

Getting Ready: The Oven's Warm Embrace
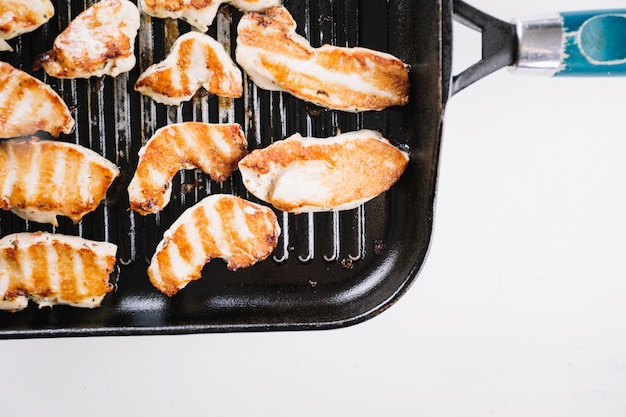
The moment has arrived: it's time to cook those ribs! Preheat your oven to 300 degrees Fahrenheit (150 degrees Celsius). We're going for a low and slow cook, the key to achieving that melt-in-your-mouth texture.The Cooking Process: The Magic of Low and Slow
There are a few ways to cook your ribs in the oven, but I've found a method that delivers consistently juicy and flavorful results. Here's my approach:
Place your ribs in a roasting pan and pour a cup of water into the bottom of the pan. This creates steam, keeping the ribs moist and preventing them from drying out. Cook the ribs uncovered for 2 hours, allowing them to develop a crispy bark on the outside.
After 2 hours, take the ribs out of the oven and wrap them tightly in aluminum foil. Pour the delicious juices from the pan over the ribs before wrapping, adding an extra layer of flavour. Return the ribs to the oven and cook for another 2 hours. During this time, the ribs will tenderize and absorb all the flavour.
The Final Touch: Checking for Tenderness
After 4 hours, carefully unwrap the ribs and check for tenderness. If you can easily pull the meat off the bone with minimal effort, they're ready to be devoured. If not, give them another 30 minutes or so in the oven.For an extra layer of deliciousness, brush the ribs with your favourite barbecue sauce during the last 30 minutes of cooking. This will give them a beautiful, glossy glaze. But remember, a little goes a long way; you don't want to drown your rib masterpiece in sauce.
(Part 4) The Secrets to Success: Unveiling the Rib Mastery
Temperature Is Key: A Gentle Touch for Tenderness
One of the most crucial elements for perfect ribs is maintaining a low and slow oven temperature. This allows the fat to render down beautifully, resulting in super tender, juicy meat. If you crank up the heat, you risk drying out your ribs and creating a tough, chewy experience – something we want to avoid at all costs!Patience Is a Virtue: The Art of Waiting
Cooking ribs is a journey, not a race. Patience is key! Don't rush the process. Give those ribs ample time to cook through. The longer they simmer in the oven, the more tender and flavourful they'll become. It's a bit of a test of character, but the reward is worth every minute.Timing Is Everything: Knowing When to Stop
Keep a close eye on your ribs as they cook. You want to check on them regularly to ensure they're cooking evenly and haven't dried out. Once those ribs are cooked to your liking, give them a rest for 10-15 minutes before slicing. This allows the juices to redistribute throughout the meat, making every bite a juicy, flavorful symphony.(Part 5) Serving Your Rib Masterpiece: A Feast for the Senses
The Ultimate side dish: The Perfect Complement
Your oven-roasted ribs are the stars of the show, but they need a good supporting cast. When it comes to side dishes, I like to keep it simple and let the ribs shine.Some classics that pair perfectly with ribs include:
- Creamy Coleslaw: The tanginess and crispness of coleslaw provide a beautiful contrast to the richness of the ribs.
- Baked Beans: Sweet, smoky baked beans are a classic rib companion, adding a touch of sweetness and a comforting touch to your meal.
- crispy fries: Nothing beats the satisfying crunch of golden fries to accompany your tender ribs.
- potato salad: A simple, creamy potato salad is another classic side dish that complements the ribs perfectly.
The Presentation Matters: Making it a Visual Treat
Don't underestimate the power of presentation. A well-presented meal is more enjoyable, a feast for the eyes as well as the palate. Serve your ribs on a platter, with generous portions of your chosen side dishes.Here are a few tips for elevating the presentation:
- Fresh Herbs: A sprig of rosemary or a few sprigs of thyme add a touch of visual interest and a subtle herbal aroma to your platter.
- Arrange the Ribs: Arrange the ribs in a visually appealing way, perhaps in a fan shape, or in a single row, creating a sense of order and beauty.
- Add Colour: Use colourful side dishes to create visual contrast and a more inviting presentation.
(Part 6) The Art of Barbecue Sauce: The Final Flourish
The Perfect Glaze: Elevating the Flavour
Now, we've got the ribs, we've got the sides, but what about that final touch of magic – the sauce? A good barbecue sauce is like a symphony of flavour, adding a layer of sweetness, tanginess, and smokiness that elevates the whole experience.There are countless barbecue sauce recipes out there, but here's one of my go-to recipes that always hits the spot:
- 1 cup ketchup (for that classic tangy base)
- 1/2 cup apple cider vinegar (for a touch of brightness)
- 1/4 cup brown sugar (for a subtle sweetness)
- 1 tablespoon Worcestershire sauce (for a hint of savory umami)
- 1 teaspoon garlic powder (for an earthy, pungent note)
- 1 teaspoon onion powder (for depth and a touch of sweetness)
- 1/2 teaspoon black pepper (for a touch of spice)
Combine all the ingredients in a saucepan and simmer over medium heat for 10 minutes, stirring occasionally. The sauce will thicken as it cooks, creating a beautiful glaze. You can brush this sauce onto your ribs during the last 30 minutes of cooking, or even just before serving.
A World of Flavour: Exploring Different Sauce Styles
The world of barbecue sauce is vast and varied, with endless possibilities for flavour. You've got your sweet sauces, your tangy sauces, your smoky sauces, and everything in between.Here are a few popular sauce styles to explore:
- Kansas City Style: Sweet and smoky, with a balance of brown sugar, molasses, and vinegar.
- Carolina Style: Tangy and vinegar-based, with a distinct mustard flavour.
- Texas Style: Thick and smoky, often with a tomato base and a hint of chili powder.
- Memphis Style: A sweet, tangy blend of tomato, vinegar, and spices, often with a hint of mustard.
Experiment, discover your favourite, and make it your own. There's no right or wrong answer when it comes to sauce.
(Part 7) Beyond the Basics: Taking Your Rib Game to the Next Level
A Touch of Smoke: The Magic of the Smoker
If you're looking to add a truly authentic, smoky flavour to your ribs, a smoker is your secret weapon. It's an investment worth considering if you're a serious rib enthusiast.Here's why a smoker is a game-changer:
- Authentic Flavour: It delivers that signature smoky taste that's hard to replicate in the oven.
- Tenderness: The slow, gentle heat of a smoker helps to break down the tough collagen in the meat, resulting in incredibly tender ribs.
- Control: You have more control over the temperature and smoke levels, allowing you to tailor the cooking process to your preferences.
The Power of Marinades: Infusing Flavour and Tenderness
Another way to enhance the flavour and tenderness of your ribs is to marinate them before cooking.Here's a basic marinade you can start with:
- 1 cup soy sauce (for a savory umami base)
- 1/2 cup honey (for a touch of sweetness)
- 2 cloves garlic, minced (for a pungent, earthy flavour)
Combine the ingredients in a bowl and whisk until well combined. Pour the marinade over the ribs, making sure to coat them evenly. Cover and refrigerate for at least 4 hours, or even overnight. The longer the marinade sits, the more flavour it will infuse into the meat.
(Part 8) FAQs: Your Rib-Related Questions Answered
1. Can I cook ribs in the slow cooker?
Absolutely! Slow cookers are fantastic for cooking ribs. They provide a gentle, even heat that results in tender, fall-off-the-bone ribs. Simply follow the same steps as the oven method, but use a low setting and cook for 6-8 hours.2. How do I know when ribs are done?
You can use a meat thermometer to check the internal temperature. Ribs are done when they reach an internal temperature of 190 degrees Fahrenheit (90 degrees Celsius). But a good rule of thumb is to check for tenderness. If you can easily pull the meat off the bone with minimal effort, they're ready.3. Can I freeze ribs?
Yes, you can freeze ribs for up to 3 months. Wrap them tightly in plastic wrap and then in aluminum foil. To thaw frozen ribs, place them in the refrigerator overnight.4. What if my ribs are tough?
If your ribs are tough, it's likely they weren't cooked long enough. Try cooking them for another 30 minutes or so. If that doesn't do the trick, you can shred the ribs and use them in a dish like a chili or a pulled pork sandwich.5. How do I reheat ribs?
The best way to reheat ribs is to wrap them in aluminum foil and bake them in a preheated oven at 300 degrees Fahrenheit (150 degrees Celsius) for 30 minutes. This will keep the ribs moist and tender.(Part 9) The Rib Journey Continues: A Lifelong culinary adventure
Cooking ribs is a journey, not a destination. There's always something new to learn, a new technique to try, a new flavour to explore. It's an ongoing adventure, a quest for the perfect rib. I'm constantly experimenting, trying new rubs, sauces, and cooking methods, always striving to improve my rib game. And I encourage you to do the same. The more you cook ribs, the more you'll learn, the better you'll become, and the more delicious your rib creations will be. So, go forth and conquer those ribs! Experiment, explore, and most importantly, enjoy the journey. Happy cooking!Everyone is watching

Prime Rib Roast Cooking Time Chart: Per Pound Guide
Cooking TipsPrime rib roast. Just the name conjures images of lavish dinners, crackling fires, and hearty laughter. It’s ...

How Long to Bake Potatoes in the Oven (Perfect Every Time)
Cooking TipsBaked potatoes are a staple in my kitchen. They're incredibly versatile, delicious, and surprisingly easy to m...

Perfect Rice Every Time: The Ultimate Guide to Cooking Rice
Cooking TipsAs a self-proclaimed foodie, I've always been a bit obsessed with rice. It's the foundation of countless cuisi...

The Ultimate Guide to Cooking Asparagus: Tips, Techniques, and Recipes
Cooking TipsAsparagus. The mere mention of this spring delicacy conjures up images of vibrant green spears, crisp and burs...

Ultimate Guide to Cooking the Perfect Thanksgiving Turkey
Cooking TipsThanksgiving. Just the word conjures up images of overflowing tables laden with delicious food, the scent of r...