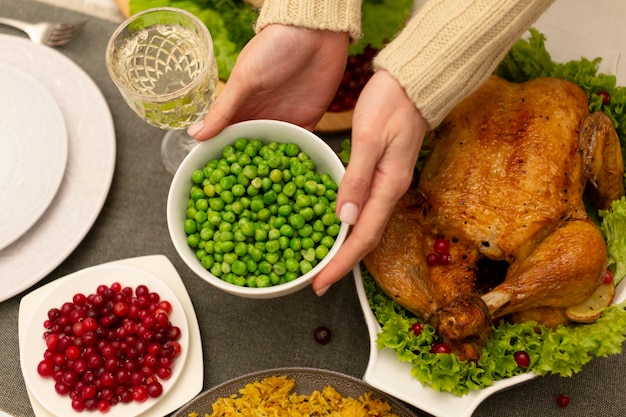
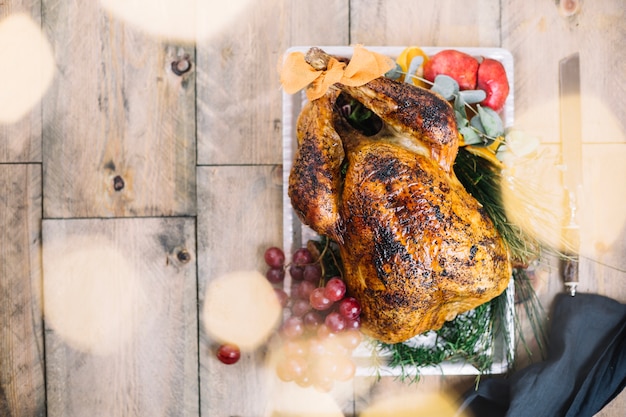
Let's be honest, the thought of cooking a turkey can be daunting. But I'm here to tell you, it doesn't have to be! With a little help from a trusty roasting bag, you can whip up a juicy, flavourful turkey that'll have your guests singing your praises. I've been using this method for years, and it's become my go-to for a stress-free, delicious holiday feast. So, put on your comfy cooking clothes, grab a glass of something festive, and let's get started!
Part 1: Choosing Your Perfect Bird

First things first, you need to choose the right turkey. Now, it's tempting to go for the biggest bird you can find, thinking it'll be enough for everyone and then some. But trust me, bigger isn't always better. A smaller turkey will cook more evenly, meaning you'll end up with a juicy, flavourful bird throughout. Plus, you'll have less leftovers (unless you're a big fan of turkey sandwiches, in which case, go for it!).
Sizing Up the Situation
A good rule of thumb is to aim for about 1.5 pounds of turkey per person. So, if you're feeding 8 people, you'll want a 12-pound bird. Don't forget to factor in any side dishes you're planning, as you'll need a bit more turkey if you're serving a feast of sides. And if you're a leftover lover, then go ahead and size up a bit!
Fresh vs. Frozen: The Big Debate
This is where personal preference comes in. Fresh turkey is definitely more convenient, as you can pop it straight into the oven. But frozen turkeys are usually cheaper and easier to store. If you go for frozen, just make sure you give it plenty of time to defrost in the fridge, at least 24 hours for every 5 pounds. You can also speed up the process by submerging the turkey in cold water, but make sure to change the water every 30 minutes. It's always a good idea to give it a quick wash under cold water when it's fully thawed, too.
Part 2: Gather Your Supplies

Now, let's get everything organised. It's a good idea to have all your supplies prepped and ready to go, just like a well-oiled cooking machine! Here's what you'll need:
Your Essential Cooking Crew
- A large roasting bag: This is the heart of our operation. Look for a bag that's big enough to hold your turkey comfortably, with plenty of room to spare. You can find these at most supermarkets.
- A sharp knife: You'll need this for removing the giblets and neck, and for prepping the turkey for its flavour bath.
- A basting brush: This comes in handy for spreading the butter and seasoning all over the turkey. You can even use a clean kitchen brush if you don't have a dedicated basting brush.
- A roasting pan (optional): A roasting pan isn't strictly necessary for bag turkey, but it's a good idea if you want to catch any drippings and make a delicious gravy later. Plus, it provides a stable surface for the bag.
- Some kitchen twine: You'll need this to tie up the bag securely and prevent any leaks.
And, of course, don't forget the most important part - the ingredients for your seasoning! I'll share my favourite recipe later, but feel free to get creative and add your own personal touches.
Part 3: The Turkey's Pre-Flight Inspection

Alright, let's get our turkey prepped for its oven adventure. This part is like a little pre-flight check-up, making sure everything is in order before we send our bird soaring into the heat!
Inside Job: Removing the Unnecessary
Start by giving your turkey a good look over. Make sure you've removed any giblets and neck, as these won't be needed for roasting. You can always save them for a delicious gravy or stuffing, but for now, they're just extra baggage. Next, pat the turkey dry with paper towels. This will help the skin crisp up nicely, giving you a beautiful golden brown finish.
Under the Skin: A Butter Bash
Now, here's where things get a little messy (but oh-so-worth it!). I always like to give my turkey a good "butter-bash". It's a bit of a fun tradition, and it's the secret to a juicy, flavorful turkey. Just loosen the skin from the breast and legs using your fingers, and slip in some softened butter. This will keep the meat moist during cooking. Don't forget to rub some butter under the skin on the back, too. It's like giving your turkey a full-body massage! Trust me, your bird will thank you for it.
Part 4: The Seasoning Showdown
Right, now for the fun part: the seasoning! This is where you can really add your own personality to your turkey. I've been using the same recipe for years, and it's never let me down. It's simple, but it's packed with flavour. But remember, this is just a starting point. Feel free to experiment with your favourite herbs and spices, or even try a pre-made seasoning blend.
My Tried-and-True Recipe
Here's what you'll need for my classic blend:
- 1 tablespoon paprika (adds a smoky, sweet depth of flavour)
- 1 tablespoon garlic powder (for a fragrant, pungent kick)
- 1 tablespoon onion powder (for a touch of sweetness and complexity)
- 1 teaspoon salt (balances the flavours and enhances everything else)
- 1 teaspoon black pepper (for a little bit of heat)
- 1 teaspoon dried thyme (adds an earthy, herbaceous aroma)
Mix all the ingredients together in a small bowl and rub the seasoning generously all over the turkey, both inside and out. You can also add other herbs and spices, like rosemary, sage, or even a pinch of cayenne pepper for a little extra heat. Just be sure to season liberally, as the flavour will penetrate the meat as it cooks, creating a delicious, aromatic turkey.
Part 5: The Bagging Ceremony
With the turkey seasoned and prepped, it's time to get it into its protective bag. Now, this might seem a little odd at first, but trust me, it's the secret to achieving that perfect, moist turkey. It's like a culinary hug for your bird, keeping all the flavour and moisture locked in.
The Bag's the Thing: A Secure Shelter
Place the turkey in the roasting bag, ensuring the opening is facing upwards. If you're using a pre-seasoned bag, you can skip the extra seasoning step. Otherwise, go ahead and add your favourite herbs and spices to the bag. You can never have too much flavour, right?
The Tie-Down: Sealing in the Goodness
Now, grab your kitchen twine and tie the opening of the bag securely. Don't worry about making it perfect, just make sure it's tight enough to prevent any leaks. If you're using a roasting pan, place the bag in the pan, then lift the edges of the bag and fold them over the lip of the pan. This will create a sealed environment that will help to trap the moisture and create a delicious, flavourful broth that you can later use for gravy.
Part 6: The Oven's Embrace: Letting the Magic Happen
With the turkey safely tucked away in its bag, it's time to let the oven do its magic. This is the easiest part, I promise! Just set the oven to the right temperature and let it work its magic.
Temperature Matters: Finding the Right Heat
Preheat your oven to 325°F (160°C). You'll want to roast your turkey for about 15 minutes per pound. So, for a 12-pound turkey, you'd cook it for 3 hours. Keep an eye on the temperature, though. You want the internal temperature of the turkey to reach 165°F (74°C) in the thickest part of the thigh. This ensures that the turkey is cooked through and safe to eat. Use a meat thermometer to check the temperature in the thickest part of the thigh, making sure to avoid touching any bones.
The Final Touch: Browning and Crispness
About 30 minutes before the turkey is done, carefully lift the bag and pour any accumulated juices into a saucepan. This will be the base for your gravy later. You can also remove the bag completely during the last half hour to allow the skin to brown and crisp up. This will give you a beautifully golden brown turkey with a crispy, delicious skin. If you want to make sure the skin is really crispy, you can even brush it with a little bit of melted butter or oil before putting it back in the oven.
Part 7: Resting is Key: Letting the Juices Settle
Once the turkey is cooked, don't rush to carve it. Give it a good rest for at least 30 minutes before carving. This will allow the juices to redistribute and prevent the meat from becoming dry. It's like a little post-flight recovery for your bird. The juices will settle back into the meat, creating a tender, juicy turkey.
Part 8: Carving Your Masterpiece: Unveiling the Flavours
After the resting period, you're finally ready to carve your masterpiece. Take your time and carefully carve the turkey, separating the breast, legs, and thighs. This is your moment to reveal the beautiful, flavorful turkey you've created.
Tips for Carving: A Smooth Operation
Use a sharp carving knife and a cutting board. Start by carving the breast, working from the middle of the breastbone to the wing joint. Then carve the legs and thighs, separating them at the joint. You can also carve the wings separately, but they're often quite small. If you're feeling adventurous, you can also try carving the turkey into thin slices. This makes it easier to serve and can also be a beautiful presentation.
Part 9: The Gravy Finale: Bringing it All Together
With the turkey carved, it's time to make the gravy. Remember those juices we saved earlier? That's where the magic happens. This is the finishing touch that ties everything together and elevates your meal to the next level.
Making the Gravy: From Juices to Deliciousness
Strain the juices into a saucepan and bring them to a simmer. Whisk in 2 tablespoons of cornstarch and 1/2 cup of cold water until smooth. Gradually whisk this mixture into the simmering juices until it thickens. You can add salt and pepper to taste, and even a little bit of your favourite herbs for extra flavour. If you want a richer gravy, you can also add a tablespoon of butter or a splash of cream.
Part 10: The Final Feast: Enjoying Your Creation
And there you have it, a delicious, juicy, and easy-to-cook bag turkey! Serve it up with all your favourite sides, like mashed potatoes, stuffing, and cranberry sauce. And don't forget your gravy! Pour it over your turkey, your sides, or just enjoy it on its own. This is your moment to relax and enjoy the fruits of your labour. Enjoy!
FAQs: Answering Your Turkey Questions
1. Can I reuse a roasting bag?
It's not recommended. Roasting bags are designed for single use and can deteriorate after being heated. It's safer and more hygienic to use a new bag each time. You wouldn't want to risk a tear or leak during cooking, so it's best to err on the side of caution and use a fresh bag.
2. Can I add vegetables to the bag with the turkey?
Yes, you can! You can add root vegetables like potatoes, carrots, and onions to the bag with the turkey. Just make sure they're cut into similar sizes so they cook evenly. Avoid adding delicate vegetables like green beans or asparagus, as they may overcook in the bag. If you're adding vegetables, try adding them during the last hour of cooking, so they don't become mushy.
3. What if the turkey is not fully cooked after the suggested time?
If the turkey's internal temperature isn't at 165°F (74°C), cook it for another 15 minutes and check again. It's crucial to ensure the turkey is fully cooked. It's always better to err on the side of caution when it comes to food safety. If you're unsure, check the temperature again after an extra 15 minutes.
4. Can I add a little wine or broth to the bag?
Absolutely! Adding a splash of wine or broth to the bag can enhance the flavour and create a lovely, moist environment for the turkey. I often use a mixture of white wine and chicken broth for a rich, aromatic flavour. Just make sure to add it to the bag before you seal it up, and let the flavour infuse as the turkey cooks.
5. What can I do with leftover turkey?
The possibilities are endless! You can make sandwiches, salads, soups, stews, and even turkey pot pie. Just remember to store any leftovers in the fridge within two hours of cooking. And if you're feeling creative, you can also try using leftover turkey in a stir-fry, or even in a pasta dish. The possibilities are endless!
Everyone is watching

Perfect Rice Every Time: The Ultimate Guide to Cooking Rice
Cooking TipsAs a self-proclaimed foodie, I've always been a bit obsessed with rice. It's the foundation of countless cuisi...

Prime Rib Roast Cooking Time Chart: Per Pound Guide
Cooking TipsPrime rib roast. Just the name conjures images of lavish dinners, crackling fires, and hearty laughter. It’s ...

The Ultimate Guide to Cooking Asparagus: Tips, Techniques, and Recipes
Cooking TipsAsparagus. The mere mention of this spring delicacy conjures up images of vibrant green spears, crisp and burs...

Ultimate Guide to Cooking the Perfect Thanksgiving Turkey
Cooking TipsThanksgiving. Just the word conjures up images of overflowing tables laden with delicious food, the scent of r...

How Long to Bake Potatoes in the Oven (Perfect Every Time)
Cooking TipsBaked potatoes are a staple in my kitchen. They're incredibly versatile, delicious, and surprisingly easy to m...
