Duck legs. Just the thought of them conjures up images of crispy skin, tender meat, and rich, savory flavors. They're the perfect centerpiece for a satisfying Sunday roast, a decadent weeknight dinner, or even a luxurious gourmet meal. But let's be honest, cooking duck legs can feel a little daunting, especially for beginners. You might be wondering, "Where do I even start?"
Fear not, my fellow food enthusiasts! I'm here to guide you through the process, sharing my years of experience and offering tips to ensure you achieve the perfect duck leg every time. Get ready to unlock the secrets of this delicious bird and create culinary magic in your kitchen!
(Part 1) Getting Started: Choosing Your Duck Legs
The First Step: Selecting the Right Duck Legs
It all starts with the right ingredients, and choosing the perfect duck legs is crucial for a successful dish. Don't just grab the first ones you see at the butcher's! Pay attention to these key factors:
Size Matters: Look for legs that are plump and substantial, with a generous amount of meat. A good size ensures you'll have plenty to enjoy. If you're unsure, ask your butcher for recommendations.
Skin Check: The skin should be smooth, taut, and slightly reddish in color. This indicates freshness and a good indication of the quality.
The Smell Test: This is an absolute must! A fresh duck leg will have a pleasant, almost nutty aroma. If you detect any hint of a foul or off-putting smell, it's best to choose another leg.
Duck Leg Varieties: Exploring Different Breeds
Once you've chosen your duck legs, you'll want to consider the breed. Each type brings its own unique flavor profile and texture:
Mallard: The quintessential duck, renowned for its rich, deep flavor and slightly gamey notes. It's a classic choice for those who appreciate a bold taste.
Pekin: A milder and more tender option, often favored for its delicate flavor. Perfect for those who prefer a more subtle taste.
Muscovy: A leaner breed with a more pronounced ducky flavor. Muscovy duck legs offer a unique and flavorful experience.
My personal preference is Mallard, but the best breed ultimately comes down to your own taste preferences. Experiment with different breeds to find your favorite!
(Part 2) Prepping for Perfection: Getting Ready to Cook
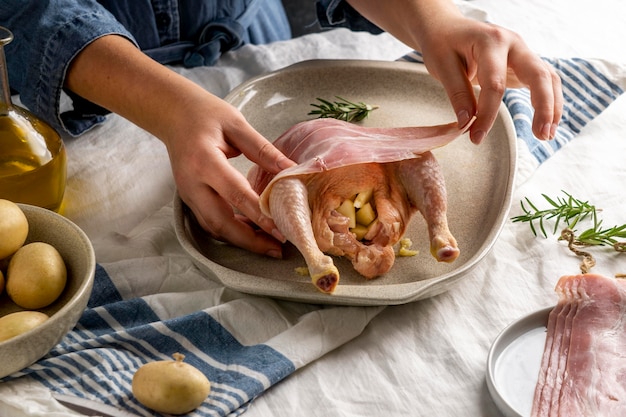
The Importance of Patting Dry: A Crucial First Step
You've got your duck legs, now it's time to prep them for cooking. This step might seem insignificant, but trust me, it makes a huge difference in the final outcome. Patting those duck legs dry with kitchen paper is essential for achieving that glorious crispy skin. Moisture on the skin will hinder browning, leading to a soggy, unappetizing texture.
Seasoning Secrets: Salt, Pepper, and Beyond
Don't underestimate the power of salt and pepper. Seasoning your duck legs generously, both the skin and the meat, right before cooking will enhance the natural flavors and contribute to that irresistible golden brown color.
But don't stop there! Elevate your duck legs to new heights with a symphony of herbs and spices. Here are a few combinations that I find particularly delicious:
Rosemary and Thyme: A classic pairing that complements the rich flavor of duck beautifully.
Garlic and Ginger: A bold and aromatic blend that adds a punch of flavor.
Smoked Paprika: A touch of smoked paprika adds a smoky depth that will tantalize your taste buds.
Star Anise and Cinnamon: A unique and unexpected combination that introduces a touch of sweetness to your dish.
(Part 3) Mastering the Roast: Baking for Tender and Juicy Duck Legs
Setting the Stage: Preheat Your Oven for Success
Roasting is a classic and foolproof method for achieving perfectly cooked duck legs. Start by preheating your oven to 180°C (350°F). This ensures even cooking and helps the duck legs develop that beautiful golden brown color.
The Art of Scoring: Allowing Flavor to Penetrate
Now, here's a little trick that makes a big difference: Scoring the duck skin. It might seem intimidating, but it's surprisingly easy. Use a sharp knife to make a few shallow cuts across the skin, taking care not to cut into the meat. This helps the fat render out, resulting in crispy skin and allowing the flavors to penetrate more deeply.
Creating a Flavorful Base: A Bed for Your Duck
Before you place the duck legs in the oven, let's create a flavorful base for them to rest on. I like to use a roasting pan and line it with a bed of vegetables like onions, carrots, and potatoes. They'll absorb the delicious duck fat and create a symphony of flavors. Plus, they make a fantastic side dish.
Time for a Roast: Setting the Timer for Perfection
Now, it's time to roast! Place the duck legs on a rack in the roasting pan, ensuring they're not touching each other. Roast for approximately 45 minutes to an hour, or until the internal temperature reaches 82°C (180°F).
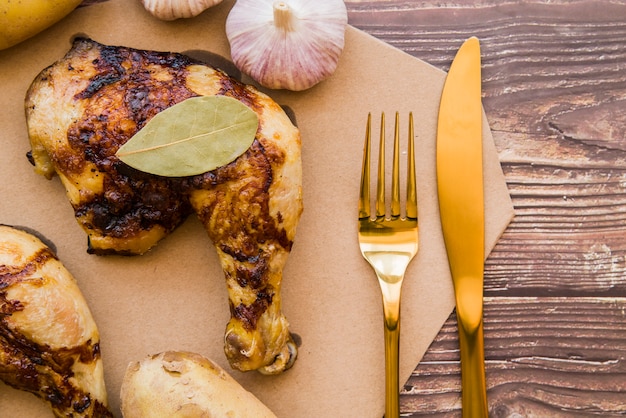
Checking for Doneness: The Fork Test and the Thermometer
How do you know when your duck legs are cooked to perfection? There are a couple of reliable methods:
The Fork Test: Insert a fork into the thickest part of the leg. If it slides in easily, the meat is cooked through.
The Thermometer: The most accurate method. Insert a meat thermometer into the thickest part of the leg, and it should read 82°C (180°F).
Resting is Key: Allowing the Duck to Relax and Retain Juices
Once your duck legs are cooked, don't rush to carve them. Allow them to rest for 10-15 minutes before carving. This allows the juices to redistribute, resulting in even more tender and flavorful meat.
(Part 4) Beyond the Roast: Exploring Other Cooking Methods
Pan-Frying for Crispy Skin and Tender Meat
While roasting is a classic, pan-frying offers a different level of flavor. Here's how to achieve that perfect balance of crispy skin and juicy meat:
1. Heat a heavy-bottomed pan over medium-high heat.
2. Add a tablespoon or two of oil to the pan and sear the duck legs skin-side down for about 5-7 minutes, or until the skin is golden brown and crispy.
3. Flip the legs over and cook for another 5-7 minutes, or until the meat is cooked through.
The Sizzle of the Grill: Adding a Smoky Flavour
Grilling is a fantastic way to add a smoky dimension to your duck legs. Here's how to do it:
1. Preheat your grill to medium-high heat.
2. Season the duck legs with salt, pepper, and your favorite herbs and spices.
3. Grill the legs skin-side down for about 8-10 minutes, or until the skin is golden brown and crispy.
4. Flip the legs over and grill for another 8-10 minutes, or until the meat is cooked through.
The slow cooker's Magic: Tenderness at its Finest
If you're looking for the ultimate in tenderness, the slow cooker is your best friend. Here's how to use it for duck legs:
1. Place the duck legs in the slow cooker.
2. Add your favourite herbs, spices, and vegetables.
3. Cook on low for 6-8 hours, or until the meat is incredibly tender and falls off the bone.
(Part 5) Serving Up Your Duck Legs: Creating a Feast for the Senses
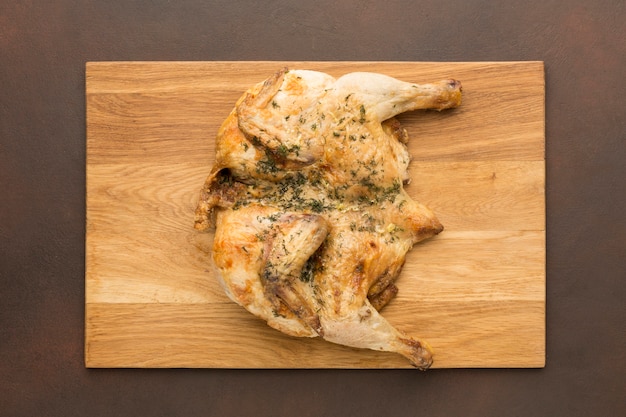
A Feast for the Eyes: Beautifully Plated Duck Legs
Once your duck legs are cooked, it's time to plate them up for a feast that's as visually appealing as it is delicious. Arrange them on a platter, alongside roasted vegetables and a side of creamy mashed potatoes or a vibrant salad. You can even add a sprig of fresh herbs for a finishing touch.
A Symphony of Flavors: Pairing Sides with Your Duck
The right sides can elevate your duck leg dish to new heights. Here are some of my go-to combinations:
Roasted Vegetables: A classic pairing that complements the rich flavor of duck beautifully. Try roasting root vegetables like carrots, potatoes, and parsnips for a hearty accompaniment.
Mashed Potatoes: Creamy and comforting, mashed potatoes are a perfect way to soak up the delicious juices from the duck.
Salad: A refreshing contrast to the richness of the duck. A simple green salad with a vinaigrette dressing or a colorful fruit salad with a tangy dressing will provide a delightful balance.
rice pilaf: A flavorful and aromatic accompaniment that adds another layer of complexity to your meal.
Fruit Compote: A sweet and tangy addition that cuts through the richness of the duck and adds a vibrant burst of flavor.
A Splash of Sauce: Completing the Flavor Profile
No duck leg meal is complete without a delicious sauce. Here are some options to consider:
Orange Sauce: A classic and refreshing pairing that adds a bright citrus note to the dish.
Cherry Sauce: Sweet and tangy, with a hint of spice, cherry sauce offers a unique and delicious twist.
Plum Sauce: A rich and complex flavor with a hint of sweetness, plum sauce adds a sophisticated touch.
Gravy: A hearty and comforting sauce that enhances the flavor of the duck. Try making a simple gravy from the pan drippings for a classic touch.
(Part 6) Beyond the Plate: Using Leftover Duck Legs
Transforming Leftovers into Delicious Dishes
Don't let those leftover duck legs go to waste! They're incredibly versatile and can be used in a variety of dishes. Here are a few ideas to get you started:
Duck Leg Salad: Shred the leftover duck meat and toss it with your favorite salad ingredients. Add a tangy dressing for a delicious and satisfying meal.
Duck Leg Soup: Add the leftover duck meat to a hearty soup for extra flavor and protein. The richness of the duck will elevate any soup recipe.
Duck Leg Quesadillas: Slice the duck meat and add it to quesadillas for a delicious and satisfying meal. The duck adds a savory and sophisticated touch.
Duck Leg Pasta: Toss the leftover duck meat with your favorite pasta sauce and pasta for a quick and easy dinner.
(Part 7) FAQs: Answering Your Duck Leg Questions
1. Can I Freeze Duck Legs?
Yes, you can freeze duck legs! Simply wrap them tightly in plastic wrap or aluminum foil and place them in a freezer-safe bag. They will stay fresh for up to 3 months.
2. How Do I Tell if Duck Legs Are Spoiled?
Duck legs that have gone bad will have a sour or off smell. The meat may also feel slimy and have a greenish discoloration. If you notice any of these signs, it's best to discard the duck legs.
3. Can I Cook Duck Legs without Scoring the Skin?
You can, but scoring the skin helps the fat render out and makes for a crispier result. If you don't score the skin, you may find that the fat doesn't render out properly and the skin remains tough.
4. What is the Best Way to Cook Duck Legs for a Crowd?
For a crowd, roasting is the best method. It's easy to cook a large quantity of duck legs at once, and the results are consistently delicious.
5. What Can I Do to Make My Duck Legs Extra Crispy?
For extra-crispy skin, try this technique: After cooking the duck legs, broil them for a few minutes under high heat. This will crisp up the skin even more.
(Part 8) Final Thoughts: Embrace the Deliciousness
Cooking duck legs may seem intimidating at first, but with a little practice and these tips, you'll be able to master this culinary feat. Remember to choose fresh duck legs, pat them dry, and season them generously. Experiment with different cooking methods and flavor combinations to find your favorites. Most importantly, enjoy the process and savor the deliciousness!
Now, tell me, what's your favourite way to cook duck legs? Share your tips and recipes in the comments below! Let's celebrate this delectable bird and unlock its full potential together!
Everyone is watching

Perfect Rice Every Time: The Ultimate Guide to Cooking Rice
Cooking TipsAs a self-proclaimed foodie, I've always been a bit obsessed with rice. It's the foundation of countless cuisi...

Prime Rib Roast Cooking Time Chart: Per Pound Guide
Cooking TipsPrime rib roast. Just the name conjures images of lavish dinners, crackling fires, and hearty laughter. It’s ...

How Long to Bake Potatoes in the Oven (Perfect Every Time)
Cooking TipsBaked potatoes are a staple in my kitchen. They're incredibly versatile, delicious, and surprisingly easy to m...

The Ultimate Guide to Cooking Asparagus: Tips, Techniques, and Recipes
Cooking TipsAsparagus. The mere mention of this spring delicacy conjures up images of vibrant green spears, crisp and burs...

Ultimate Guide to Cooking the Perfect Thanksgiving Turkey
Cooking TipsThanksgiving. Just the word conjures up images of overflowing tables laden with delicious food, the scent of r...