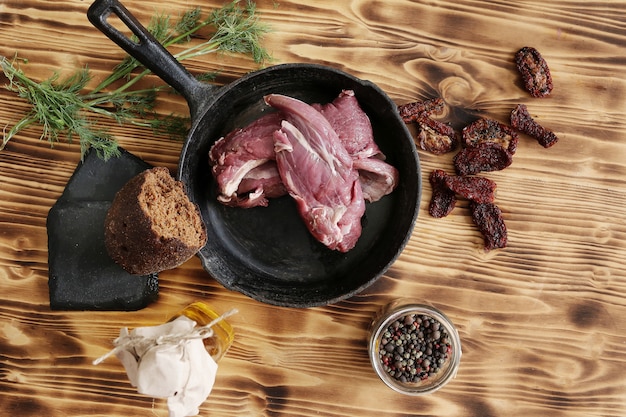
Right, let's get down to business and talk about pork ears. Now, I know what you're thinking: "Pork ears? Really?" But hear me out. This is one of those things that's a bit of a Marmite situation – you either love it or you hate it. But if you're one of those folks who's curious about giving it a go, or you're already a fan and want to take your pork ear game to the next level, then this is the guide for you. It's been a bit of a journey for me, from being a complete newbie to discovering the magic of crispy pork ears, and I’m here to share all the wisdom I've picked up along the way.
Part 1: A Journey of Discovery

My first encounter with pork ears was at a street food market in Thailand. I was there with a mate, and he ordered a plate of these strange, glistening, crunchy things. I'd never seen anything like it, and I was a bit hesitant to try it. I mean, pork ears? That sounded a bit...odd, right? But he assured me it was delicious, and being the adventurous soul that I am, I gave it a go. And let me tell you, it was an absolute game-changer! It had this amazing crunch, a fantastic chewiness, and a flavour that was both savory and a little bit sweet. It was like a whole new world of deliciousness had opened up to me.
From that moment on, I was hooked. I started researching pork ears, trying different recipes, and experimenting with different flavours. I discovered that pork ears are incredibly versatile, and they can be cooked in a variety of ways, from deep-fried to braised to roasted. They’re also surprisingly healthy, being a good source of protein and collagen, which is great for your skin and joints. Who knew, right?
Part 2: The Importance of Sourcing

The first step to making amazing crispy pork ears is getting hold of the right ingredients. And let me tell you, it’s all about the pork ears themselves. You want to choose ears that are fresh and clean, with no signs of discoloration or damage. Think of it like choosing the freshest ingredients for any other dish you'd cook.
You can usually find them at your local butcher shop or Asian supermarket. And here's a little tip: If you’re feeling adventurous, ask your butcher for the whole ear. It’s a bit more work, but it’s well worth it for the extra flavour and texture. Plus, it gives you a sense of accomplishment when you’ve prepped it yourself.
Choosing the Right Pork Ear
Now, there’s a bit of an art to picking the perfect ear. You want one that’s a good size, neither too thin nor too thick, as this will impact the cooking time and texture. Imagine a thin ear turning into a crispy, crunchy chip, and a thick ear becoming a chewy, meaty delight. Look for ears that are firm to the touch, not overly soft or limp. A good sign is a slightly pink hue, which indicates freshness. You want to make sure you're starting with the best possible base for your culinary masterpiece.
- Freshness: Look for ears that are firm and springy to the touch. Avoid those that are soft, limp, or have a strong smell. Think of it like a fresh, ripe fruit – it should bounce back when you press it.
- Color: A fresh ear should be a light pink colour. If it's brown or grey, it might be old or have been frozen for too long. It's like the difference between a perfectly ripe strawberry and one that's gone a bit mushy.
- Size: Choose ears that are neither too thin nor too thick. A good rule of thumb is to go for ears that are about an inch wide. Think of it like finding the sweet spot for your desired crunch and chewiness.
Part 3: The Cleaning Process

Okay, so you've got your ears. Now it’s time for the cleaning process. Don't worry, it's not as complicated as it sounds. You just need to get rid of any excess hair, dirt, and debris. It’s a bit like getting ready for a fancy dinner party, but for pork ears. Let's get those ears looking pristine!
Getting Rid of the Hair
The first step is to get rid of any remaining hair. There are two main ways to do this:
- Using a Flame: This is a traditional method that many people swear by. You hold the ear over a gas flame, gently rotating it to burn off the hair. Be careful not to burn the ear itself! This might sound a bit intense, but it’s actually a very effective way to remove hair. Just make sure you do it in a well-ventilated area and be extra cautious. It's like a mini-torch session, but for your pork ears.
- Using a Razor: If you prefer a more gentle approach, you can use a razor blade to scrape off the hair. Be careful not to cut yourself! This method can be a bit time-consuming, but it gets the job done. Think of it like giving your ears a little shave, but be extra careful.
The Importance of Cleaning
Once the hair is removed, it’s time for a good scrub. Rinse the ear thoroughly under cold water to remove any remaining hair or debris. You want to make sure it’s sparkling clean. If you have stubborn bits, you can use a small brush to help loosen them. Be sure to check all the crevices and nooks to make sure the ear is really clean. We want to make sure it's spotless before we move on to the next step. Imagine you're prepping your favourite vegetable for a fancy salad – you wouldn't want any dirt or debris left on it, would you? This is no different.
Part 4: The Cooking Prep
Now that your ears are all scrubbed and sparkling, it’s time to prep them for cooking. This step is all about giving them the best chance to become those crispy, delicious bites of heaven we’re aiming for. It’s like prepping your ingredients for a perfect roast – it all starts with the right foundation.
The Simmer
First things first, we want to simmer the ears to make them tender and juicy. This is where the magic truly begins. You’re going to fill a large pot with water, add some salt, and bring it to a boil. Once it’s boiling, add your pork ears and let them simmer for about 2-3 hours, or until they're tender enough to pierce with a fork. It's a bit of a waiting game, but trust me, it’s worth it. This is the crucial step where the ears soften and absorb the flavours you're going to add.
The Flavor Boost
While the ears are simmering, you can add some aromatics to give them extra flavour. Think about what you'd like to taste in your final dish. Here's a list of some favourites:
- Ginger and Garlic: A classic combo that gives a nice, warm flavour. Imagine a comforting Asian-inspired dish with a touch of heat.
- Onion and Peppercorns: A great way to add a bit of depth and complexity. Think of a hearty stew with a hint of spice.
- Star Anise and Cinnamon: These spices add a touch of sweetness and warmth. Imagine a comforting dessert with a hint of spice.
- Soy Sauce: Adds a salty, umami flavour. Think of a savoury dish with a rich, complex flavour.
Part 5: The Deep Frying Technique
Here comes the exciting part – the deep frying! This is where we transform those tender, simmered ears into the crispy, golden gems we crave. It's like turning a simple potato into a delicious, crispy French fry.
The Right Oil and Temperature
The key to perfect deep-frying is using the right oil and temperature. Think of it like baking a cake – the right temperature is crucial. You'll want to use a neutral-tasting oil with a high smoke point, like vegetable oil or peanut oil. Heat the oil to 350-375°F (175-190°C). This will ensure that the ears cook evenly and achieve that irresistible crispy texture. Imagine the ears turning golden brown and crispy, just like a perfect piece of fried chicken.
The Technique
Now, carefully lower the ears into the hot oil. You might want to use a slotted spoon or a spider to avoid splashing. Fry them for about 5-7 minutes per side, or until they’re golden brown and crispy. Keep an eye on them, as they can go from golden brown to burnt in a matter of seconds! This is where you need to be vigilant and patient – you don’t want to overcook them and end up with burnt ears. Once they're cooked, remove them from the oil and place them on a wire rack to drain. Let them cool for a few minutes before digging in. Resist the temptation to eat them straight out of the oil – let them cool a bit for the best crunch and flavour.
Part 6: The Crispy Pork Ear Flavour Explosion
Okay, so your ears are crispy and ready to be devoured, but the fun doesn’t stop there. Now’s the time to add your own personal touch and create a flavour explosion. It’s like adding a finishing touch to a culinary masterpiece.
Classic Sauce Pairings
Here are some classic sauce pairings that go wonderfully with crispy pork ears:
- Soy Sauce and Chilli: This is a classic Chinese pairing that adds a salty, spicy kick. Think of a bold and flavourful dip that enhances the crunch of the ears.
- Sweet Chili Sauce: A sweet and tangy sauce that complements the crunch of the ears. Imagine a sweet and tangy sauce that balances the savory flavour of the ears.
- Sriracha: For those who like a bit of heat, sriracha sauce is a great option. Think of a fiery kick that adds a touch of heat to the dish.
Beyond the Basics
If you’re feeling adventurous, why not try these unique flavour combinations? Remember, it’s all about personal preference and trying new things!
- Honey Garlic: A sweet and savory sauce that’s perfect for those who like a bit of tang. Imagine a sweet and savory glaze that adds a touch of sweetness and tang.
- bbq sauce: A smoky, sweet sauce that adds a touch of American flair. Think of a classic BBQ sauce with a smoky, sweet flavour.
- Lime and Chilli: A bright and refreshing sauce that’s perfect for a summery snack. Imagine a bright and tangy sauce that adds a touch of zest and heat.
Part 7: Serving Suggestions
Right, so you've got your crispy pork ears and your sauces sorted. Now, let’s think about how to present them beautifully and make them the star of the show. Think of it like creating a culinary masterpiece that’s both delicious and visually appealing.
You can serve them on their own as a snack or appetizer, or you can add them to your favourite dishes, like:
- Salads: They add a fun and unexpected crunch to salads. Imagine a salad with a crunchy, savory topping that adds a touch of texture.
- rice bowls: Toss them into rice bowls for a flavour and texture boost. Imagine a rice bowl with a delicious, crispy topping that adds a touch of flavour and crunch.
- Noodles: Pair them with noodles for a hearty and satisfying meal. Imagine a noodle dish with a crispy, savory topping that adds a touch of flavour and texture.
- Tacos: Get creative and use them as a crunchy topping for your tacos. Imagine a taco with a crispy, savory topping that adds a touch of flavour and crunch.
Part 8: Storage Tips
Let’s be honest, sometimes you just can't resist making a big batch of crispy pork ears. That’s why it’s important to know how to store them properly so they stay delicious for a bit longer. Think of it like storing any other delicious snack you want to enjoy later.
The best way to store crispy pork ears is to let them cool completely and then store them in an airtight container at room temperature for up to 2 days. If you want to store them for longer, you can freeze them for up to 3 months. Just remember to let them thaw overnight in the refrigerator before serving.
Part 9: FAQs
Let's get some of the frequently asked questions answered.
1. Can I Use Frozen Pork Ears?
Yes, you can use frozen pork ears. Just make sure to defrost them completely before cooking. You can defrost them in the refrigerator overnight, or you can defrost them in a bowl of cold water for a few hours. Think of it like defrosting any other frozen meat – just make sure it's thawed completely before you start cooking.
2. Can I Cook Pork Ears in the Oven?
You can certainly cook pork ears in the oven, but they won't be as crispy as they are deep-fried. If you're looking for a less messy option, you can roast the ears in the oven at 400°F (200°C) for about 1 hour, or until they're crispy. Just make sure to turn them over halfway through cooking. Think of it like roasting any other meat – just make sure it's cooked evenly on both sides.
3. How Can I Make Pork Ears Less Greasy?
Deep-frying can make pork ears a bit greasy, but there are a few things you can do to reduce the grease. First, make sure you drain the ears thoroughly on a wire rack after frying. You can also blot them with paper towels. Finally, you can bake the ears for a few minutes after frying to help crisp them up and remove some of the excess grease. Think of it like draining any other fried food – the key is to remove as much excess oil as possible.
4. What If My Pork Ears Are Too Tough?
If your pork ears are too tough, it's likely that they weren't simmered long enough. You can try simmering them for a little longer, or you can braise them in the oven. Braising involves cooking the ears in a liquid, like broth or stock, which helps to make them tender and flavorful. Think of it like braising any other tough cut of meat – the key is to cook it slowly and in liquid to make it tender.
5. How Can I Make Pork Ears More Flavourful?
There are many ways to make pork ears more flavorful. You can use a marinade before cooking, add aromatics to the simmering water, or add spices to the oil when deep-frying. You can also try using a flavored sauce or glaze after cooking. Think of it like adding flavour to any other dish – you can use marinades, sauces, spices, and other ingredients to enhance the flavour.
Part 10: The Final Word
So there you have it, a complete guide to the wonderful world of crispy pork ears. This journey might seem a bit intimidating at first, but trust me, it’s totally worth it. With a little patience and the right technique, you’ll be able to create the most amazing crispy pork ears that will impress your friends and family. So go on, get out there and give it a try! And if you have any questions or tips to share, feel free to leave a comment below. Happy munching!
Everyone is watching

Prime Rib Roast Cooking Time Chart: Per Pound Guide
Cooking TipsPrime rib roast. Just the name conjures images of lavish dinners, crackling fires, and hearty laughter. It’s ...

How Long to Bake Potatoes in the Oven (Perfect Every Time)
Cooking TipsBaked potatoes are a staple in my kitchen. They're incredibly versatile, delicious, and surprisingly easy to m...

Perfect Rice Every Time: The Ultimate Guide to Cooking Rice
Cooking TipsAs a self-proclaimed foodie, I've always been a bit obsessed with rice. It's the foundation of countless cuisi...

The Ultimate Guide to Cooking Asparagus: Tips, Techniques, and Recipes
Cooking TipsAsparagus. The mere mention of this spring delicacy conjures up images of vibrant green spears, crisp and burs...

Ultimate Guide to Cooking the Perfect Thanksgiving Turkey
Cooking TipsThanksgiving. Just the word conjures up images of overflowing tables laden with delicious food, the scent of r...
