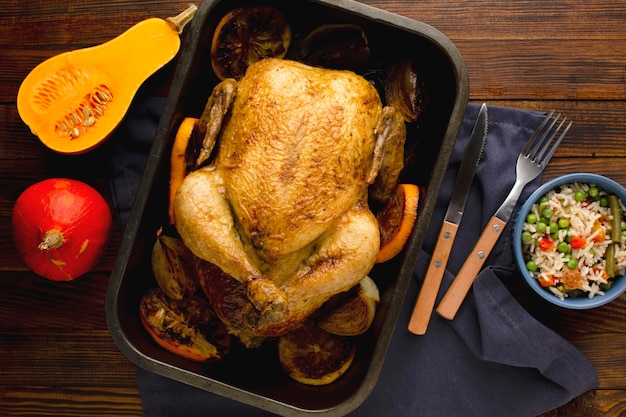
Right, let’s be honest, there’s nothing quite like the satisfaction of biting into a perfectly cooked, crispy chicken drumstick. You know, the kind that’s got that golden-brown, crackling skin that gives way to tender, juicy meat. It’s a tastebud symphony!
But let’s face it, mastering the art of crispy oven-baked chicken drumsticks can be a bit tricky. I’ve been there, spent countless hours in the kitchen experimenting, trying different techniques, and learning from my mistakes (oh, the burnt, dry drumsticks!). But I'm here to tell you, after all those trials, I've finally cracked the code.
This is your complete guide, your cheat sheet to achieving the ultimate crispy oven-baked chicken drumstick, bursting with flavor and guaranteed to be a crowd-pleaser. So grab your apron, gather your ingredients, and let’s get cooking!
(Part 1) The Foundation: Choosing the Right Chicken
First things first, you need to start with the right ingredients. This isn’t a time for settling for subpar chicken drumsticks! The quality of your chicken will make a huge difference in the final result.
1. Finding the Perfect Drumsticks
Forget those flimsy, pale drumsticks you sometimes see in the supermarket. You want plump, well-marbled drumsticks with good skin integrity. Look for drumsticks that have a bit of fat marbling, it’ll add flavor and help keep the meat juicy during cooking. And make sure the skin is smooth and intact, you want those drumsticks to hold their shape and keep those delicious juices locked in.
2. Choosing Quality over Quantity
Listen, it's tempting to go for the cheapest option, but trust me, investing in good quality chicken is worth it. You’ll taste the difference. Don’t be afraid to spend a little more for a better quality chicken, it’ll make a world of difference.
3. Fresh or Frozen?
Now, fresh or frozen? That’s a matter of personal preference. Fresh chicken is ideal, but if you’re working with frozen drumsticks, make sure you defrost them properly before you start cooking. Thaw them in the fridge overnight for best results. Never defrost chicken at room temperature, it can lead to bacteria growth.
(Part 2) Preparation: It’s All About the Details
You've got your perfect chicken drumsticks, but we’re not ready to throw them straight into the oven just yet. A little bit of prep goes a long way.
1. Washing and Drying
First, give your chicken drumsticks a good rinse under cold water. You want to remove any impurities or debris. Then, pat them dry thoroughly using paper towels. You want those drumsticks to be nice and dry before seasoning. Wet chicken means soggy chicken, and that’s the opposite of what we’re aiming for!
2. The Art of Seasoning
Now, this is where the real magic happens. Get ready to unleash your inner culinary wizard! Seasoning your chicken drumsticks correctly is key to unlocking that burst of flavor.
3. A Classic Seasoning Blend
I’m a big fan of a simple blend of salt, pepper, paprika, and garlic powder. It's a classic combination that never fails to deliver. The salt brings out the natural flavors, pepper adds a touch of heat, paprika brings a vibrant color and a smoky aroma, and garlic powder adds a subtle depth of flavor.
4. Don’t Be Afraid to Experiment
But feel free to experiment and add your own personal touches. You can incorporate herbs like rosemary, thyme, oregano, or even a dash of cayenne pepper for a touch of heat. You can also use a pre-made spice rub for convenience, just make sure it's one that's designed for chicken.
5. Rub It In
Don’t just sprinkle the seasoning on top, get your hands dirty! Rub that seasoning into the chicken skin, getting right into those little nooks and crannies. That’s how you get that beautiful, even flavor that will have your tastebuds singing.
(Part 3) The Oven: Your Culinary Crucible
Alright, your chicken drumsticks are prepped and ready for their oven-baking adventure. Let’s talk about the oven, because it plays a crucial role in transforming those drumsticks into crispy, golden-brown perfection.
1. Preheat to Perfection
You need to get your oven nice and hot, so preheat it to 220°C (425°F). This high heat is essential for achieving that beautiful, golden-brown crust.
2. The Importance of Baking Sheets
You're going to need a baking pan, and a large, rimmed baking sheet is ideal. This is where your chicken drumsticks will call home while they undergo their transformation.
3. Greasing the Baking Sheet
Before you toss those chicken drumsticks in the pan, give it a good grease. A little bit of oil will prevent sticking and ensure that those beautiful, crisp skins don’t end up stuck to the pan. I like to use a good quality olive oil, it adds a subtle flavor that complements the chicken perfectly. You can also use cooking spray if that’s more convenient.
4. Spacing for Air Circulation
Now, let’s talk about placement. You don’t want to overcrowd your chicken drumsticks. They need space to breathe and cook evenly. So, spread them out in a single layer, ensuring there's enough room for air to circulate. This will also help with getting those beautiful, crispy skins.
(Part 4) Baking: The Transformation Begins
Finally, it’s time to get those chicken drumsticks into the oven. They're ready for their transformation!
1. Bake for Crispy Perfection
You’re going to bake them for 30 minutes, or until they’re golden brown and cooked through. But remember, every oven is a little different, so keep an eye on those drumsticks.
2. The Flipping Trick
Here's a little trick for even crispier drumsticks: halfway through the baking time, flip them over. This will ensure that both sides get that beautiful golden-brown colour and that delicious crispy skin.
3. The internal temperature Test
Now, how do you know when those chicken drumsticks are cooked through? You use a meat thermometer, of course! You need to make sure the internal temperature reaches at least 74°C (165°F). That’s how you know it’s safe to eat. Don’t rely solely on visual cues, use a meat thermometer to ensure food safety.
4. Avoiding Overbaking
Now, here’s another important tip: don’t overbake! Overbaked chicken drumsticks can become dry and tough, and no one wants that. So, keep a close eye on them and take them out of the oven when they’re done. If you're unsure, it’s better to underbake slightly and add a few more minutes later if needed.
(Part 5) Resting: The Key to Tenderness
Once you’ve taken those chicken drumsticks out of the oven, resist the urge to dig in right away. Let them rest for 5 minutes before you serve them. This is a crucial step that many people skip, but it’s essential for achieving tender, juicy chicken.
1. Releasing the Juices
Why does resting matter? Well, as those hot chicken drumsticks rest, the juices have a chance to redistribute throughout the meat, resulting in a more tender and juicy drumstick.
2. Tenting with Foil
While those chicken drumsticks are resting, tent them with a piece of aluminium foil. This will help keep them warm and moist. You don’t want those beautiful, crispy skins to become soggy.
3. Sauce it Up
While your chicken drumsticks are resting, it’s the perfect time to whip up a delicious sauce to complement your creation. I like to make a simple honey-mustard sauce, but you can use whatever sauce you like. The possibilities are endless!
(Part 6) Serving Time: The Grand Finale
And now, the moment you’ve been waiting for. Your crispy oven-baked chicken drumsticks are ready to be served! This is where you get to showcase your culinary masterpiece.
1. Presentation is Key
Remember, presentation is everything. Arrange those chicken drumsticks on a platter and garnish them with some fresh herbs. It’s a simple touch that adds a touch of elegance to your meal. A few sprigs of parsley or thyme, or even some chopped chives, can really elevate the visual appeal.
2. side dishes that Compliment
Now, what to serve with these beauties? I like to keep it simple and classic. A side of creamy mashed potatoes, a green salad, and a drizzle of your favourite sauce make for a satisfying and delicious meal. But don’t be afraid to get creative! You can serve your chicken drumsticks with rice, roasted vegetables, or a couscous salad.
(Part 7) Variations: Beyond the Basic
Okay, now let’s talk about variations. These crispy oven-baked chicken drumsticks are a blank canvas for your culinary creativity. You can experiment with different seasonings, sauces, and sides to create your own unique dish.
1. Spicing Things Up
For a spicy kick, add some cayenne pepper, chilli flakes, or hot paprika to your seasoning blend. You can also serve your chicken drumsticks with a fiery hot sauce or a jalapeno-based dip.
2. Sweet and Savoury
If you’re feeling adventurous, try adding a touch of sweetness to your chicken drumsticks. A sprinkle of brown sugar or a drizzle of maple syrup will give them a unique flavour. You can also serve them with a sweet and savoury sauce, like a honey-ginger sauce or a mango chutney.
3. Vegetarian Alternatives
And for my vegetarian friends, don’t worry, you can still enjoy this dish. You can use vegetables like portobello mushrooms or large eggplant slices to mimic the chicken drumstick shape and texture. Just follow the same baking instructions, adjusting the baking time as needed.
(Part 8) Storage and Reheating
You’ve got a batch of delicious, crispy chicken drumsticks, and you want to make sure they stay that way. Let’s talk about storage and reheating.
1. Storing Leftovers
If you have any leftovers, store them in an airtight container in the fridge for up to 3 days.
2. Reheating for Maximum Crispiness
Now, reheating those chicken drumsticks is a delicate process. You want to ensure they stay crispy and juicy. The best way to do this is to reheat them in a preheated oven at 180°C (350°F) for 10-15 minutes. This will help re-crisp the skin while ensuring the meat stays moist.
(Part 9) FAQs: Answering Your Questions
Here are some common questions you might have about crispy oven-baked chicken drumsticks:
1. What if my chicken drumsticks are not cooked through?
If your chicken drumsticks are not cooked through, bake them for a few more minutes. Make sure the internal temperature reaches at least 74°C (165°F).
2. Can I use other cuts of chicken?
Absolutely! You can use chicken thighs, chicken legs, or even chicken wings. Just adjust the baking time accordingly. For thighs and legs, you’ll likely need a bit more time, while wings will cook faster.
3. What if my chicken drumsticks are too dry?
If your chicken drumsticks are too dry, add a little bit of chicken broth or water to the bottom of the baking pan before you bake them. This will help keep them moist. You can also try covering the drumsticks loosely with foil for the first half of the baking time to prevent them from drying out.
4. Can I bake chicken drumsticks in advance?
You can bake chicken drumsticks in advance and then reheat them later. Just let them cool completely before storing them in the fridge. This is a great option for meal prepping or preparing ahead of time for busy weeknights.
5. What are some other ways to make crispy chicken drumsticks?
You can also make crispy chicken drumsticks in a skillet or on the grill. Just make sure you cook them over medium heat and flip them often to ensure they are cooked evenly and get that beautiful crispy skin.
(Part 10) Conclusion: Your culinary journey Begins
There you have it, the ultimate guide to crispy oven-baked chicken drumsticks. Now you have all the knowledge you need to create a truly delicious meal that will impress your family and friends. So go out there and get cooking! Remember, the key to success is in the preparation, the seasoning, and the attention to detail. And don’t forget to enjoy the process! Happy cooking!
Everyone is watching

Perfect Rice Every Time: The Ultimate Guide to Cooking Rice
Cooking TipsAs a self-proclaimed foodie, I've always been a bit obsessed with rice. It's the foundation of countless cuisi...

Prime Rib Roast Cooking Time Chart: Per Pound Guide
Cooking TipsPrime rib roast. Just the name conjures images of lavish dinners, crackling fires, and hearty laughter. It’s ...

The Ultimate Guide to Cooking Asparagus: Tips, Techniques, and Recipes
Cooking TipsAsparagus. The mere mention of this spring delicacy conjures up images of vibrant green spears, crisp and burs...

Ultimate Guide to Cooking the Perfect Thanksgiving Turkey
Cooking TipsThanksgiving. Just the word conjures up images of overflowing tables laden with delicious food, the scent of r...

How Long to Bake Potatoes in the Oven (Perfect Every Time)
Cooking TipsBaked potatoes are a staple in my kitchen. They're incredibly versatile, delicious, and surprisingly easy to m...