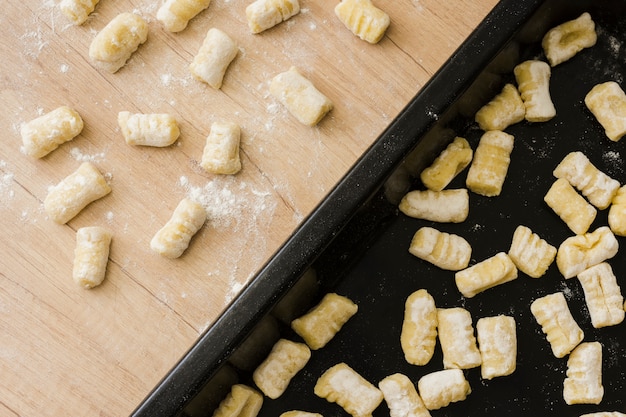
Let's be honest, there's nothing quite like a perfectly crispy hash brown. That golden-brown exterior, the fluffy, potato-y interior – it's pure breakfast (or brunch, or even dinner) bliss. But achieving that level of perfection isn't always a simple feat, especially when you're working with frozen hash browns. I've had my fair share of soggy, sad attempts, but I've learned a thing or two over the years, and I'm here to share my secrets to consistently getting crispy, delicious hash browns every single time.
Get ready to ditch the soggy disappointment and say hello to a world of hash brown perfection. We're going to cover everything, from selecting the right hash browns to mastering the best cooking methods and even diving into some delicious topping ideas. So, grab your favorite frozen hash browns, a spatula (and maybe a fork for tasting), and let's get cooking!
Part 1: Choosing the Right Hash Browns: A Foundation for Success
The Perfect Hash Brown: What to Look For
First things first, let's talk about choosing the right frozen hash browns. It's the foundation of your crispy hash brown journey. Don't just grab the first bag you see – take a minute to peruse the freezer aisle and pick the perfect candidates.
Here are a few key things to keep in mind when choosing your hash browns:
- Thickness: Think "Goldilocks" – not too thin, not too thick. Too thin, and they might dry out before crisping up nicely. Too thick, and the inside might not cook through properly. Look for a medium thickness that allows for even cooking.
- Ingredients: The simpler the ingredient list, the better. Aim for hash browns that are primarily potatoes and potato starch. Avoid those with lots of added flavors or preservatives, as they can often compromise the overall texture.
- Potato Starch: This is your secret weapon for crispy hash browns. Potato starch helps create that lovely, crunchy exterior. Look for hash browns with a good amount of potato starch listed in the ingredients.
- Shape: You can find hash browns in various shapes – diced, shredded, or even in patties. Choose whichever shape you prefer. I personally find diced or shredded hash browns work best for achieving that crispy texture.
My Personal Hash Brown Preferences
I'm a huge fan of hash browns with a good amount of potato starch. They seem to hold their shape better during cooking and come out beautifully crispy. And for a little extra flavor, I always add a pinch of salt and pepper to the frozen hash browns before cooking. It's a simple trick that makes a big difference!
Part 2: The Prepping Phase: A Crucial Step
Preparing for Perfection
The pre-cooking prep is just as important as the actual cooking itself. It's all about ensuring your hash browns are ready to absorb heat effectively and brown beautifully.
Thaw or No Thaw?
The answer? No thaw! Using frozen hash browns straight from the freezer is generally the best way to achieve that crispy texture. Thawing them can make them more prone to sogginess. But, if you find yourself in a hurry, a few minutes of gentle thawing at room temperature can help.
The Key to Crispness: Drying the Hash Browns
This is where a lot of people go wrong. The secret to achieving that satisfyingly crispy exterior is to dry out your hash browns as much as possible before cooking. It might seem like a small detail, but it makes a huge difference.
How to Dry Hash Browns: Two Methods
- Paper Towel Method: Spread your frozen hash browns out on a few layers of paper towels. Gently press down to remove any excess moisture. Let them sit for a few minutes while you get the rest of your meal prep underway.
- Air-Drying Method: If you have a bit more time, spread your hash browns on a baking sheet and let them air dry for about 30 minutes. This allows them to lose some moisture naturally.
Part 3: The Pan-Frying Method: The Classic for a Reason
Pan-Frying: The Traditional Way to Crispy Perfection
Pan-frying is my go-to method for hash browns. It's the classic way to cook them, and for good reason – it delivers that signature crispy exterior and beautiful golden-brown color. Plus, it's surprisingly easy to master.
Tools of the Trade: Essential Equipment
- cast iron skillet or non-stick pan: This is crucial for achieving even heat distribution and those perfect crispy edges. I have a soft spot for cast iron skillets because they retain heat so well and add a touch of extra flavor to the hash browns.
- Spatula: You'll need a sturdy spatula for flipping the hash browns without breaking them. A wide, flexible spatula is ideal.
- Tongs: Tongs are helpful for transferring the cooked hash browns from the pan to a plate without a mess.
The Pan-Frying Process: Step by Step
Step 1: Heat the Oil
Add a generous amount of oil to your pan, ensuring it's evenly coated. I like to use a mix of oil and butter for extra flavor. Heat the oil over medium-high heat until it shimmers.
Step 2: Add the Hash Browns
Carefully add the dried hash browns to the hot oil, spreading them out in a single layer. Don't overcrowd the pan – the hash browns need space to brown evenly.
Step 3: Cook Until Golden Brown
Cook the hash browns for about 5-7 minutes on each side, or until they're beautifully golden brown and crispy. Don't be afraid to gently lift them with a spatula to check for browning.
Step 4: Adjust Heat and Time
If the hash browns are browning too quickly, reduce the heat to medium. If they're taking longer to brown, increase the heat slightly. Adjust the cooking time according to your preference and the thickness of the hash browns.
Step 5: Season and Serve
Once the hash browns are cooked to your liking, season them with salt and pepper to taste. Serve them immediately and enjoy that satisfying crunch!
Part 4: The oven method: Perfect for Big Batches
Baking for a Crowd: Easy and Delicious
The oven method is ideal for cooking large batches of hash browns. It's perfect for feeding a crowd or for meal prepping. While it might not achieve the same level of crispness as pan-frying, it delivers a tasty and slightly softer texture.
Essential Equipment for Oven-Baked Hash Browns
- Baking Sheet: You'll need a large baking sheet to spread the hash browns out in a single layer.
- Wire Rack: Using a wire rack elevates the hash browns, allowing for more even cooking and crisping on all sides.
- Parchment Paper: Line your baking sheet with parchment paper to prevent sticking and make cleanup a breeze.
The Oven Baking Process: Simple and Straightforward
Step 1: Preheat the Oven
Preheat your oven to 400 degrees Fahrenheit (200 degrees Celsius).
Step 2: Prepare the Baking Sheet
Line your baking sheet with parchment paper and place the wire rack on top.
Step 3: Coat the Hash Browns
Place the dried hash browns in a bowl and toss them with a tablespoon or two of oil. You can also add any desired seasonings at this stage.
Step 4: Bake Until Crispy
Spread the coated hash browns in a single layer on the wire rack. Bake for about 20-25 minutes, turning them halfway through, until they're golden brown and crispy.
Step 5: Serve and Enjoy
Remove the hash browns from the oven and let them cool for a few minutes before serving. Season them with salt and pepper to taste and enjoy!
Part 5: The Air Fryer Method: Quick, Crispy, and Convenient
Air Fryer: A Modern Marvel for Crispy Hash Browns
The air fryer has become a kitchen superstar, and for good reason – it can create amazingly crispy food in a fraction of the time. For hash browns, it's a game-changer.
Essential Air Fryer Tools
- Air Fryer: Make sure your air fryer is large enough to accommodate the amount of hash browns you want to cook.
- Tongs: Tongs are useful for shaking the hash browns in the air fryer and removing them once they're cooked.
The Air Fryer Process: Quick and Easy
Step 1: Preheat the Air Fryer
Preheat your air fryer to 400 degrees Fahrenheit (200 degrees Celsius).
Step 2: Spray with Oil
Lightly spray the air fryer basket with cooking spray. This helps prevent sticking and ensures even cooking.
Step 3: Add the Hash Browns
Add the dried hash browns to the air fryer basket, spreading them out in a single layer.
Step 4: Air Fry Until Crispy
Air fry the hash browns for about 10-12 minutes, shaking the basket halfway through, until they're golden brown and crispy.
Step 5: Season and Serve
Remove the hash browns from the air fryer and season them with salt and pepper to taste. Serve immediately and enjoy that satisfying crunch!
Part 6: Beyond the Basics: Elevating Your Hash Browns
Taking Your Hash Browns to the Next Level
Sometimes, you want more than just simple, perfectly cooked hash browns. You want to elevate them, to transform them into something truly special. Here are a few ideas to get those creative juices flowing:
Adding Flavor: From Simple to Spectacular
- Herbs and Spices: Experiment with different herbs and spices like garlic powder, onion powder, paprika, rosemary, thyme, or even a touch of cayenne pepper for a bit of heat.
- Cheese: Add a sprinkle of shredded cheese to the hash browns before cooking for a cheesy twist. Cheddar, Monterey Jack, or even a blend of cheeses work well.
- Bacon Bits: For a salty and savory touch, sprinkle bacon bits on top of your hash browns. You can also add them during cooking for a more integrated flavor.
- Onions and Peppers: Sauté some diced onions and peppers with the hash browns for a delightful flavor combination. You can add them towards the end of cooking for a bit of freshness or sauté them beforehand for a more caramelized flavor.
- Spicy Kick: For those who love a bit of heat, try adding a dash of hot sauce or a sprinkle of chili flakes to your hash browns.
Adding Texture: Creating a Multi-Sensory Experience
- Toasted Breadcrumbs: Add a crunchy texture by topping your hash browns with toasted breadcrumbs.
- Chopped Nuts: For a nutty crunch, sprinkle chopped pecans, walnuts, or even almonds on top of your hash browns.
Part 7: Serving Suggestions: From Breakfast to Dinner
Hash Browns: A Versatile side dish
The beauty of hash browns lies in their versatility. They can be enjoyed on their own or as a side dish for a multitude of meals. Here are a few ideas to get you started:
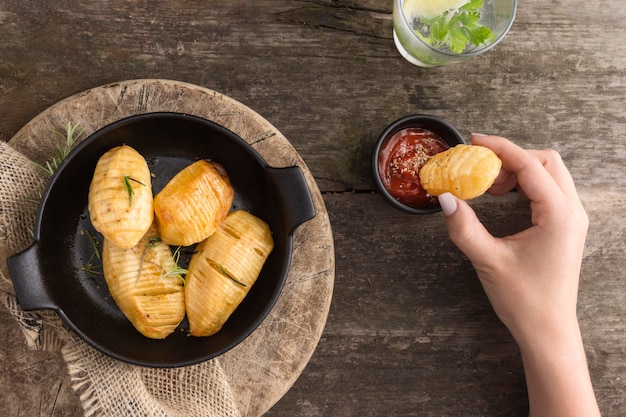
- Breakfast: Serve your crispy hash browns alongside eggs, bacon, sausage, or pancakes for a hearty breakfast.
- Brunch: Hash browns are a perfect addition to any brunch spread. Serve them with omelets, frittatas, or bagels.
- Lunch: Pair your hash browns with a salad, sandwich, or burger for a satisfying lunch.
- Dinner: Serve hash browns as a side dish with grilled meats, fish, or roasted vegetables.
- Snack: Who says hash browns can't be a snack? Enjoy them on their own or with a dip like sour cream or salsa.
Part 8: Storage and Leftovers: Keeping Those Hash Browns Delicious
Storing Your Hash Browns: Keeping them Fresh
Leftover hash browns can be stored in an airtight container in the refrigerator for up to 3 days.
Reheating Leftovers: Achieving That Crispy Texture Again
You can reheat leftover hash browns in the oven, air fryer, or microwave. I prefer the oven method because it helps to achieve that crispy texture again.
Part 9: FAQ: Your Hash Brown Questions Answered
Frequently Asked Questions: Common Hash Brown Dilemmas
1. What can I do if my hash browns are turning out soggy?
If your hash browns are turning out soggy, it's likely because they weren't dry enough before cooking. Make sure to dry them thoroughly using one of the methods mentioned earlier. You can also try adding a bit more oil to the pan to help them crisp up.
2. How can I make my hash browns extra crispy?
For extra crispy hash browns, try using a cast iron skillet or a non-stick pan with high heat. Don't overcrowd the pan and ensure the hash browns have enough space to brown evenly. You can also add a pinch of salt to the oil before cooking, as this helps draw moisture out of the hash browns.
3. Can I cook hash browns in advance and reheat them later?
Yes, you can definitely cook hash browns in advance and reheat them later. For the best results, cool them completely before storing them in an airtight container in the refrigerator. When reheating, I recommend using the oven or air fryer for a crispy texture.
4. What are some other ways to cook hash browns besides pan-frying, baking, and air frying?
You can also cook hash browns in a deep fryer or even on the stovetop in a skillet with a little oil. Experiment with different methods to find your favorite!
5. What are some creative topping ideas for hash browns?
For a truly unique touch, try topping your hash browns with sriracha mayo, salsa, avocado, a fried egg, or even a sprinkle of crumbled cheese. Get creative and have fun with it!
I hope this guide has armed you with all the knowledge you need to create the perfect crispy frozen hash browns. Remember, practice makes perfect! Don't be afraid to experiment with different techniques and flavors to discover what you enjoy most. Happy cooking!
Everyone is watching

Prime Rib Roast Cooking Time Chart: Per Pound Guide
Cooking TipsPrime rib roast. Just the name conjures images of lavish dinners, crackling fires, and hearty laughter. It’s ...

How Long to Bake Potatoes in the Oven (Perfect Every Time)
Cooking TipsBaked potatoes are a staple in my kitchen. They're incredibly versatile, delicious, and surprisingly easy to m...

Perfect Rice Every Time: The Ultimate Guide to Cooking Rice
Cooking TipsAs a self-proclaimed foodie, I've always been a bit obsessed with rice. It's the foundation of countless cuisi...

The Ultimate Guide to Cooking Asparagus: Tips, Techniques, and Recipes
Cooking TipsAsparagus. The mere mention of this spring delicacy conjures up images of vibrant green spears, crisp and burs...

Ultimate Guide to Cooking the Perfect Thanksgiving Turkey
Cooking TipsThanksgiving. Just the word conjures up images of overflowing tables laden with delicious food, the scent of r...