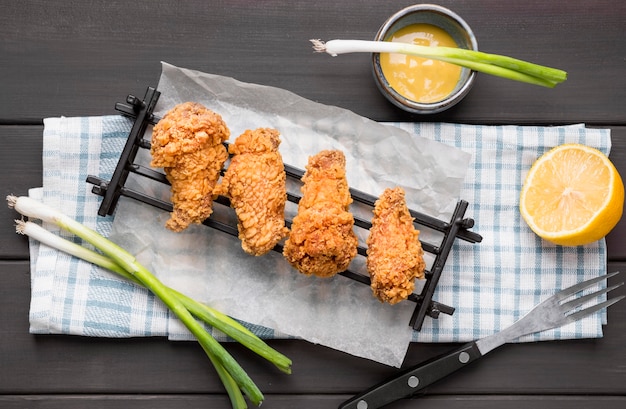
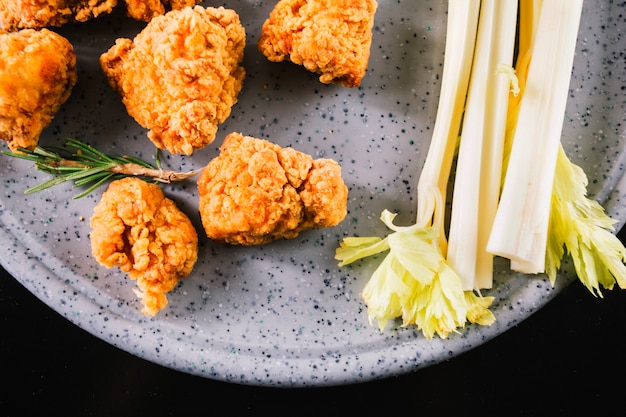
Let's face it, chicken wings are a culinary masterpiece. Whether you're hosting a game day bash, a casual get-together, or simply craving a satisfying snack, these little bundles of joy are always a crowd-pleaser. But let's be honest, achieving that perfect crispy, golden-brown exterior while keeping the meat juicy and flavorful can feel like a culinary quest. Well, my friends, I've been on a mission to find the holy grail of crispy chicken wings, and I'm ready to share my secrets with you. This is your guide to crafting the most delectable, finger-licking good chicken wings you've ever tasted.
(Part 1) The Anatomy of a Chicken Wing: A Tale of Two Parts

Before we dive into the nitty-gritty, let's talk about the star of the show: the chicken wing itself. It's not just a single piece of chicken, but a delicious anatomical marvel with distinct sections that offer unique textures and flavors. Get ready to unlock the secrets of each part:
The Drumette: A Bite of Bone-in Goodness
First up, we have the drumette, that thick, drum-stick-like piece that's all about the bone-in experience. It's like a mini drumstick, offering a tender, juicy bite with every chew. It's the perfect choice for those who love a little bit of a challenge, a bit of a bone-in adventure, if you will. Think of it as a mini-drumstick, with a satisfyingly meaty texture.
The Wingette: Where the Crunch Meets the Flavor
Now, let's move on to the wingette, also known as the flat. This is where the real magic happens. It's a flatter, wider piece, boasting a generous amount of skin and a delightful crunch. The meat is still tender and juicy, but it's leaner than the drumette, offering a more concentrated, meaty flavor. For me, the wingette is the ultimate wing, offering a perfect balance of crunch and flavor. It's a real treat!
So, which part reigns supreme? It all boils down to personal preference. I love both, but I have to admit, I have a soft spot for the wingette. It's that perfect combination of crunch and flavor that sends my taste buds into overdrive. But hey, you do you! Experiment and find your own chicken wing soulmate.
(Part 2) Unleashing the Secrets of Crispy Wings: Brine, Rub, and Rest

Now, let's get down to the heart of crafting those perfect crispy wings. It's not about complicated techniques, but mastering a few key steps that will elevate your wings from ordinary to extraordinary.
The Brine: A Spa Day for Your Wings
Picture this: your chicken wings are about to embark on a luxurious spa day. That's what brining is all about! It's like a magical potion that infuses your wings with moisture and flavor, ensuring they stay juicy and tender even after they're cooked to a crispy perfection. The secret? A simple blend of salt, sugar, and water. The salt draws out moisture from the chicken, then re-infuses it with the brine, creating plump, juicy wings that will melt in your mouth. And don't forget, brining also helps tenderize the meat, ensuring even the toughest pieces become deliciously tender.
For the ultimate spa experience, let your wings soak in the brine for a couple of hours. I usually go for at least 2 hours, but you can even let them hang out in the brine for up to 4 hours. The longer you let them soak, the more delicious they'll be! Trust me, your wings will thank you.
The dry rub: A Symphony of Spice
Next up, it's time to unleash your inner spice enthusiast. The dry rub is your chance to add a burst of flavor, color, and that irresistible crispy texture to your wings. It's like painting a masterpiece on the surface of your wings, with a blend of spices that will tantalize your taste buds.
There's no shortage of dry rub recipes out there, but I've found that a simple blend of paprika, garlic powder, onion powder, black pepper, and cayenne pepper works wonders. Feel free to adjust the spices to your liking, adding in cumin, oregano, or even a touch of brown sugar for a hint of sweetness. The possibilities are endless! Go wild and create your own signature spice blend.
The key is to ensure the rub is evenly distributed. No one wants a wing with just a tiny patch of flavor. Use your hands, gently patting the rub onto the wings, making sure to coat them thoroughly. Remember, the more you rub, the more flavor you'll get!
The Resting Period: Patience is a Virtue
Don't underestimate the power of a good rest. Once you've rubbed your wings with that delicious spice blend, let them chill out in the fridge for at least 30 minutes. This allows the flavors to meld and the spices to absorb, creating a beautiful, flavorful symphony on your wings. It's like letting a fine wine breathe before enjoying it.
Think of it as marinating, but with dry spices. The longer you let the flavors meld, the tastier your wings will be. So, be patient, my friends. The wait is worth it! Your taste buds will thank you for the extra time spent creating a symphony of flavors.
(Part 3) Cooking Methods: Oven vs. Frying - A Tale of Two Textures

Alright, the moment of truth. It's time to cook those beauties to perfection. Now, there are two main methods for achieving that crispy, golden-brown exterior: baking and frying. Both have their pros and cons, and ultimately, the best method comes down to your preferences and equipment. Let's break down the battle of the crispy wings:
Oven-baked chicken wings: Healthier and Easier
For those seeking a healthier, less messy option, oven-baking is a fantastic choice. It's also incredibly easy, requiring minimal effort. Simply arrange your wings on a baking sheet, bake them in a preheated oven at a high temperature, and voila! Crispy wings, ready to be devoured. However, oven-baking does have its limitations. While it produces crispy wings, the level of crispiness might not be as intense as frying. Additionally, the wings might not be as evenly browned on all sides.
Frying Chicken Wings: The Ultimate Crispy Experience
On the other hand, frying delivers that ultimate crispy texture everyone craves. The hot oil creates a beautiful, golden-brown crust, making the wings incredibly crispy and flavorful. Plus, there's that satisfying sizzling sound that just makes your mouth water. But frying isn't without its drawbacks. It can be messy and requires a bit more attention. You need to watch the wings carefully, ensuring they don't burn, and pay attention to the oil temperature. And of course, fried wings aren't exactly the healthiest option. It's a trade-off between flavor and health.
(Part 4) Oven-Baked Chicken Wings: A Step-by-Step Guide to Crispy Perfection
Ready to get those oven-baked chicken wings cooking? Here's a step-by-step guide that will guarantee crispy, delicious wings every time. Get ready to impress your taste buds!
Ingredients:
- 1.5 kg chicken wings, separated into drumettes and wingettes
- 1 cup salt
- 1/2 cup sugar
- 1 gallon water
- 1 tablespoon paprika
- 1 tablespoon garlic powder
- 1 tablespoon onion powder
- 1 teaspoon black pepper
- 1/2 teaspoon cayenne pepper
Instructions:
1. Preheat your oven to 230°C (450°F). Line a baking sheet with parchment paper. This will prevent your wings from sticking and ensure easy cleanup.
2. Combine the salt, sugar, and water in a large bowl or container. Stir until the salt and sugar dissolve completely. Add the chicken wings to the brine and ensure they are fully submerged in the liquid. Make sure to cover the container with plastic wrap and refrigerate for at least 2 hours, or up to 4 hours. The longer they soak, the more flavorful and tender they'll be.
3. After brining, remove the wings from the brine and pat them dry with paper towels. This step is crucial for achieving that crispy texture. Excess moisture will make your wings steam instead of crisp.
4. In a small bowl, combine the paprika, garlic powder, onion powder, black pepper, and cayenne pepper. Rub this spice blend all over the chicken wings, ensuring they are evenly coated. The more you rub, the more flavorful your wings will be. Embrace the spice!
5. Place the wings on the prepared baking sheet, ensuring they are not overcrowded. This will allow for even cooking and prevent steaming. Bake for 20-25 minutes, flipping them halfway through to ensure even cooking. Keep an eye on them! You want that beautiful golden-brown color.
6. Once the wings are golden brown and crispy, remove them from the oven and let them rest for 5 minutes before serving. This allows the wings to cool slightly and retain their moisture.
There you have it! Crispy, flavorful chicken wings straight from your oven. Enjoy!
(Part 5) Frying Chicken Wings: A Guide to Achieving that Ultimate Crispy Texture
Now, let's dive into the world of frying, the method that delivers that ultimate crispy texture. Get ready to embrace the sizzling sounds and aromas of perfect fried chicken wings. Here's a step-by-step guide to ensure crispy, golden-brown perfection.
Ingredients:
- 1.5 kg chicken wings, separated into drumettes and wingettes
- 1 cup salt
- 1/2 cup sugar
- 1 gallon water
- 1 tablespoon paprika
- 1 tablespoon garlic powder
- 1 tablespoon onion powder
- 1 teaspoon black pepper
- 1/2 teaspoon cayenne pepper
- vegetable oil, for frying
Instructions:
1. Preheat your fryer to 175°C (350°F). If you don't have a fryer, fill a large pot with vegetable oil and heat it to the same temperature. Use a thermometer to ensure the oil is at the correct temperature. Safety first! Hot oil can be dangerous. Always handle with care.
2. Follow the same brining and dry rub steps as for the oven-baked wings. Make sure the wings are completely dry before frying. Excess moisture can cause the oil to splatter, so pat them dry thoroughly.
3. Carefully add the wings to the hot oil, ensuring not to overcrowd the fryer or pot. Overcrowding can lower the oil temperature and prevent proper cooking. Fry for 8-10 minutes, flipping them halfway through to ensure even cooking. The wings should be golden brown and crispy. Keep an eye on the wings and adjust the cooking time depending on their size and desired level of crispness.
4. Remove the wings from the oil and place them on a wire rack to drain excess oil. This will help to prevent them from becoming soggy. Let them rest for 5 minutes before serving. Allowing them to cool slightly will help retain their moisture and ensure the crispiness stays perfect.
And there you have it! Crispy, golden-brown fried chicken wings. Enjoy! You've earned it.
(Part 6) The Art of the Sauce: Elevating the Chicken Wing Experience
No chicken wing experience is complete without a delicious sauce to dip them in. It's like adding the finishing touches to a masterpiece. The sauce complements the crispy texture and enhances the flavor, creating a symphony of tastes that will leave you craving for more.
The world of sauces is your oyster! From classic buffalo to sweet and tangy BBQ, spicy sriracha, creamy ranch, or even a tangy lemon pepper sauce, the possibilities are endless. But for the ultimate chicken wing experience, you need a sauce that complements the crispy texture and enhances the flavor.
My personal favorite is a simple honey garlic sauce. It's sweet, tangy, and has a hint of garlic that just adds a little extra kick. But feel free to experiment with different flavors, incorporating sriracha for a fiery kick, or a touch of ginger for a more complex taste. The possibilities are endless!
A Simple Honey Garlic Sauce Recipe:
- 1/2 cup honey
- 1/4 cup soy sauce
- 2 tablespoons garlic, minced
- 1 tablespoon rice vinegar
- 1 teaspoon sesame oil
Combine all the ingredients in a saucepan and bring to a simmer over low heat. Stir constantly until the sauce thickens slightly. Let it cool for a few minutes before serving. This sauce is perfect for dipping, drizzling, or even tossing your wings in. It's a versatile sauce that elevates the flavor of any chicken wing.
(Part 7) The Ultimate Chicken Wing Experience: A Symphony of Flavors and Sensations
Now, it's time to bring everything together. It's time to create that ultimate chicken wing experience that will tantalize your taste buds and leave you craving for more. Imagine a symphony of flavors and textures.
Picture the crispy, golden-brown exterior, the juicy and tender meat, and the perfect sauce that complements the entire experience. But it's not just about the taste; it's about the entire sensory experience. Imagine the aroma of those crispy wings wafting through the air, the satisfying crunch as you bite into them, the warmth and juiciness in your mouth, and the incredible flavor that lingers on your tongue. It's a symphony of sensations that will make you forget all your worries and enjoy the moment. It's a culinary masterpiece that you can create in your own kitchen.
(Part 8) Serving Suggestions: Taking Your Wings to the Next Level
Now, let's talk about how to serve these delicious wings and make them even more irresistible. Here are a few serving suggestions to elevate your chicken wing game:
The Classic: Buffalo Wings with Blue Cheese Dip
This is a classic for a reason. The spicy buffalo sauce, the tangy blue cheese dip, and the crispy wings are a match made in heaven. It's the ultimate combination of flavors that will never disappoint. It's a classic for a reason!
The Fancy: Honey Garlic Wings with Sesame Seeds
For a more sophisticated touch, try serving your honey garlic wings with a sprinkle of sesame seeds. The sesame seeds add a nutty flavor and texture, complementing the sweet and tangy sauce perfectly. It's a simple addition that elevates the dish to new heights.
The Comforting: BBQ Wings with Coleslaw
Sometimes, you just crave that classic BBQ flavor. Serve your BBQ wings with a side of coleslaw for a refreshing and comforting meal. It's a classic combination that never fails to satisfy.
(Part 9) FAQs: Your Chicken Wing Queries Answered
You've got questions, I've got answers. Here are some of the most common questions about crispy chicken wings:
1. Can I freeze chicken wings?
Absolutely! You can freeze chicken wings to save them for later. Just make sure they are well-wrapped in plastic wrap or aluminum foil and stored in a freezer-safe bag. They will stay fresh for up to 3 months. Remember to thaw them completely in the refrigerator before cooking. Thawing in the refrigerator ensures even thawing and prevents bacteria growth.
2. How can I make my wings extra crispy?
If you're looking for that extra-crispy crunch, try adding a tablespoon of cornstarch to your dry rub. The cornstarch will absorb excess moisture and help create a crispier crust. You can also use a cooking spray to coat the wings before baking or frying. This will help prevent them from sticking to the pan and create a crispier surface. Experiment and find what works best for you.
3. What other sauces can I use with chicken wings?
The world of chicken wing sauces is vast and delicious! From classic buffalo to sweet and tangy BBQ, spicy sriracha, creamy ranch, or even a tangy lemon pepper sauce, the possibilities are endless. Get creative and experiment with different flavors to find your perfect combination. You can even get adventurous and make your own sauces using different combinations of herbs, spices, and sauces. The kitchen is your oyster!
4. What's the best way to reheat chicken wings?
The best way to reheat chicken wings is in the oven. Preheat your oven to 175°C (350°F), place the wings on a baking sheet, and bake for 10-15 minutes, or until heated through. This method helps retain the crispy texture and ensures the wings are heated evenly. You can also reheat them in a frying pan on low heat, or in the microwave. However, these methods might not produce the same crispy texture.
5. Can I use chicken drumsticks instead of chicken wings?
Absolutely! Chicken drumsticks are a great alternative to chicken wings. You can follow the same recipe and cooking techniques, but you might need to adjust the cooking time slightly depending on the size of the drumsticks. They offer a similar flavor and texture and are a great option if you can't find chicken wings.
There you have it! My ultimate guide to perfect crispy chicken wings. Now, go forth and conquer the world of chicken wings, one crispy bite at a time. Remember, the key is to experiment, find what you love, and have fun creating your own delicious chicken wing masterpiece.
Everyone is watching

Perfect Rice Every Time: The Ultimate Guide to Cooking Rice
Cooking TipsAs a self-proclaimed foodie, I've always been a bit obsessed with rice. It's the foundation of countless cuisi...

Ultimate Guide to Cooking the Perfect Thanksgiving Turkey
Cooking TipsThanksgiving. Just the word conjures up images of overflowing tables laden with delicious food, the scent of r...

The Ultimate Guide to Cooking Asparagus: Tips, Techniques, and Recipes
Cooking TipsAsparagus. The mere mention of this spring delicacy conjures up images of vibrant green spears, crisp and burs...

Can You Cook Spaghetti with Gasoline? (The Shocking Truth)
Cooking TipsWe've all seen those crazy internet trends. You know, the ones that make you wonder, "Did someone actually try...

Chorizo and Eggs Recipe: The Ultimate Guide
Cooking TipsRight, let’s talk about chorizo and eggs. You know, that classic Spanish dish that's always a winner. It's th...
