As a seasoned grill master, I’ve spent countless hours perfecting my technique for grilling corn on the cob. From the perfect char to the tender, juicy kernels, there’s nothing quite like sinking your teeth into a freshly grilled cob of sweet corn. And let me tell you, it’s not as simple as tossing it on the grill and hoping for the best! It takes a bit of know-how to get that truly spectacular result.
So, grab a cold drink and settle in. We're about to embark on a journey to discover the secrets of achieving the ultimate grilled corn on the cob.
Part 1: Choosing the perfect corn
You know the saying, "You can't make a silk purse out of a sow's ear?" Well, the same goes for grilling corn. If you want a truly amazing result, you need to start with the best corn possible.
Understanding corn varieties
Believe it or not, there are tons of different corn varieties out there, each with its own unique flavor and characteristics. Some are sweeter, some are starchy, and some have a more pronounced corn flavor.
For grilling, I prefer sweet corn varieties, like Silver Queen, Golden Bantam, or Butter & Sugar. These varieties are known for their tender texture and naturally sweet flavor, which is perfect for grilling.
If you're feeling adventurous, you can also try specialty corn varieties like blue corn, popcorn, or flint corn. These varieties might have a slightly different flavor or texture, but they can add a fun twist to your grilled corn.
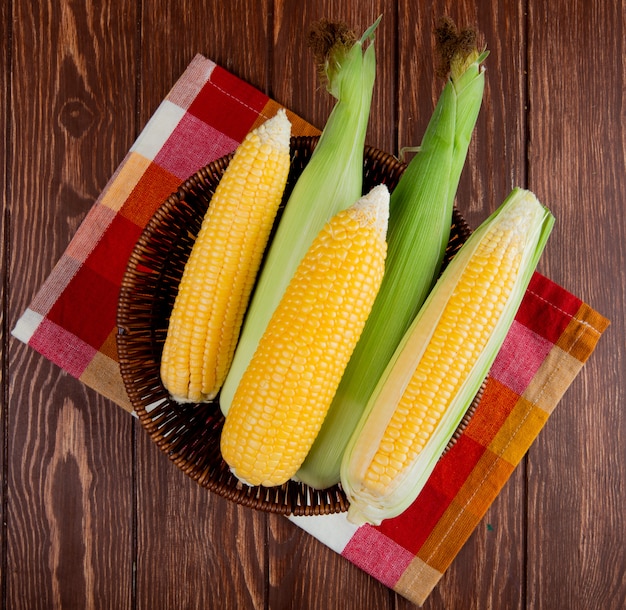
Picking the Freshest Corn
Freshness is key when it comes to corn. You want your corn to be as close to its peak as possible, bursting with flavor and sweetness.
Here's how to pick the best corn:
- Check the husk: The husk should be bright green and moist, with no brown or dried-out spots. It should feel firm, not wilted.
- Give it a squeeze: The kernels should be plump and full, and the cob should feel firm. You should be able to feel the kernels "give" slightly when you press on them.
- Check the silk: The silk at the top of the cob should be fresh and dry, not discoloured or mouldy. It should also feel a bit rough to the touch.
- Look at the kernels: If you can see the kernels, they should be a bright, milky white, with a slightly translucent appearance.
If you’re buying pre-husked corn, make sure the kernels are a bright, milky white and the cob is moist. The kernels should also have a slight sheen.
Storing Your Corn for Optimal Freshness
Once you've got your corn, you need to store it properly to preserve its freshness. fresh corn is best kept in the refrigerator, with the husks still on. This helps to keep the corn hydrated and prevents it from drying out.
If you’ve bought pre-husked corn, wrap it tightly in plastic wrap and store it in the fridge. This will help to prevent the corn from drying out and losing its flavor.
Ideally, grill your corn within a day or two of buying it, but you can keep it fresh for up to three days in the fridge.
Part 2: Prepping Your Corn for Grilling

Now that you’ve got the perfect corn, it's time to prep it for grilling. This is where the fun begins!
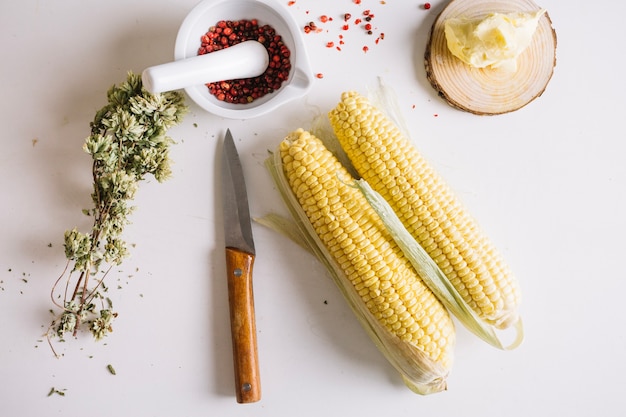
Shucking and Cleaning
First, you’ll need to shuck your corn. There are a few different methods you can use, each with its pros and cons.
Traditional Shucking: The classic method involves peeling back the husks and removing the silk threads. It's a simple technique, but be warned, the silk can get stuck in your fingers, and it's surprisingly messy!
Boiling for Easier Shucking: My preferred method is to boil the corn for a few minutes first, and then shuck it. The boiling loosens the husks and the silk, making it much easier to remove. It's less messy and helps to prevent the silk from getting stuck in your fingers.
Shucking with a Knife: Another option is to use a sharp knife to cut the husks off the cob. This method is quicker and cleaner, but it requires a bit more skill.
Once you've shucked your corn, rinse it thoroughly under cold water to remove any remaining silk or debris.
Seasoning Your Corn for Flavor
After your corn is shucked and cleaned, it's time to get creative with seasonings. You can keep it simple with a sprinkle of salt and pepper, or go wild with more complex flavors.
Here are some of my favorite corn seasonings:
- Garlic Butter: A classic for a reason! Combine softened butter with minced garlic, salt, and pepper. You can also add a pinch of dried herbs like parsley or thyme for extra flavor.
- Spicy Chipotle: For a smoky kick, combine smoked paprika, chili powder, cumin, garlic powder, and a touch of cayenne pepper. You can also add a pinch of brown sugar for a hint of sweetness.
- Lime and Cilantro: A refreshing and zesty combination. Mix lime juice, cilantro, salt, and pepper. You can also add a pinch of cumin or chili powder for a bit of warmth.
- Herbs de Provence: For a touch of elegance, use a blend of dried herbs, including thyme, rosemary, oregano, and marjoram. This combination adds a complex, earthy flavor to your corn.
- Cheesy Parmesan: For a rich and savory flavor, sprinkle your corn with grated Parmesan cheese. You can also add a pinch of black pepper for extra depth.
- Cajun Spice: A mix of paprika, cayenne pepper, garlic powder, onion powder, and other spices, Cajun spice adds a spicy kick to your corn.
These are just a few starting points. The possibilities are endless! Experiment with different combinations of herbs, spices, cheeses, and even citrus fruits for a truly unique flavour experience.
Part 3: Master Grilling Techniques
It's time for the main event – grilling the corn! This is where you need to be careful and patient to achieve that perfect char and juicy flavor.
Choosing the Right Grill
While you can grill corn on any type of grill, I prefer using a gas grill for more precise temperature control. But charcoal grills can also produce great results if you can maintain a consistent temperature.
Setting the Ideal Temperature
The perfect grilling temperature for corn is medium heat. You want the grill hot enough to char the corn without burning it. I typically aim for around 350°F (175°C).
Grilling Time and Techniques
Grilling time depends on the size of your corn and how charred you like it. Generally, it takes about 10-15 minutes per cob, turning every few minutes to ensure even cooking.
There are a few different techniques for grilling corn on the cob, and each one has its own merits.
- Direct Grilling: This involves grilling the corn directly over the heat source. It's a quick and easy method, but it can be tricky to get an even char. You'll need to keep a close eye on your corn and rotate it frequently to prevent burning.
- Indirect Grilling: This technique involves placing the corn on the cooler side of the grill, away from the direct heat. It results in a more even cook, but it takes a little longer. The corn will cook more gently and have a milder char.
- Foil-Wrapped Grilling: This method involves wrapping the corn in foil before grilling. It helps to steam the corn and prevent it from drying out, resulting in tender, juicy kernels. You can also add butter and seasonings to the foil packet for added flavor.
For a perfectly charred and juicy corn, I recommend a combination of direct and indirect grilling. Start by grilling the corn directly over the heat for a few minutes to get a good char. Then, move it to the cooler side of the grill to finish cooking through. This method allows you to achieve that delicious char without overcooking the corn.
Part 4: Adding the Finishing Touches
The corn is cooked, but there are a few finishing touches that will take your grilled corn from good to phenomenal!
Enhancing Flavors with Butter and Seasonings
Once your corn is cooked, brush it with a generous amount of butter. This will add moisture and richness, enhancing the natural sweetness of the corn.
Add your chosen seasonings, whether it's a simple sprinkle of salt and pepper or a more elaborate blend of herbs and spices.
Creating a Showstopping Presentation
You can serve your grilled corn on the cob directly from the grill, or you can cut the kernels off the cob and serve them in a bowl.
If you're serving the corn on the cob, consider adding a decorative touch by placing a sprig of fresh herbs or a wedge of lime on top. You can also serve the corn with a small bowl of melted butter or your chosen seasonings on the side for dipping.
Pairing Grilled Corn with Your Favorite Dishes
Grilled corn on the cob is a delicious and versatile side dish that pairs perfectly with almost any summer meal. Here are some serving suggestions:
- Barbecued Ribs and Pulled Pork: The sweet and smoky flavors of corn complement these classic barbecue dishes perfectly.
- grilled burgers and Hot Dogs: A quintessential summer pairing!
- Fish Tacos: Add a touch of sweetness and crunch to your tacos with grilled corn on the cob.
- Salads: Cut the corn off the cob and toss it into your favourite summer salads for a burst of flavour and texture.
- pasta dishes: Add grilled corn kernels to your pasta dishes for a burst of summer flavor.
- Soup and Stews: Add grilled corn to your favorite soups and stews for a touch of sweetness and texture.
And don't forget the most important element – a cold drink! A refreshing lemonade, iced tea, or a craft beer is the perfect accompaniment to your grilled corn feast.
Part 5: Beyond the Basics: corn recipes
Grilled corn on the cob is a classic, but there are so many other delicious ways to enjoy this summer favourite! Here are a few of my favourite corn recipes:
corn salad
This vibrant salad is a great way to showcase the freshness of summer corn. Combine grilled corn kernels with bell peppers, red onion, cilantro, and a tangy lime dressing.
Ingredients:
- 2 cups grilled corn kernels
- 1 red bell pepper, chopped
- 1/2 red onion, chopped
- 1/2 cup fresh cilantro, chopped
- 1/4 cup lime juice
- 2 tablespoons olive oil
- Salt and pepper to taste
Instructions:
- Combine all ingredients in a large bowl and toss to coat.
- Serve chilled.
Corn Chowder
For a hearty and comforting meal, try making corn chowder. Combine sweet corn, potatoes, cream, and bacon for a creamy and satisfying soup.
Ingredients:
- 1 tablespoon olive oil
- 1/2 cup chopped bacon
- 1 cup chopped onion
- 2 cloves garlic, minced
- 4 cups chicken broth
- 2 cups diced potatoes
- 2 cups frozen corn kernels
- 1 cup heavy cream
- Salt and pepper to taste
Instructions:
- In a large pot or dutch oven, heat olive oil over medium heat.
- Add bacon and cook until crispy. Remove bacon from pot and set aside.
- Add onion and garlic to pot and cook until softened, about 5 minutes.
- Stir in chicken broth, potatoes, and corn. Bring to a boil, then reduce heat and simmer for 15-20 minutes, or until potatoes are tender.
- Add heavy cream and return to a simmer.
- Crumble bacon and add to soup. Season with salt and pepper to taste.
- Serve warm.
Corn Fritters
These crispy and flavorful fritters are perfect for a light lunch or appetizer. Combine corn kernels, flour, herbs, and spices to create bite-sized fritters that are delicious on their own or with a dipping sauce.
Ingredients:
- 1 cup grilled corn kernels
- 1/2 cup all-purpose flour
- 1/4 cup grated Parmesan cheese
- 1 teaspoon baking powder
- 1/2 teaspoon salt
- 1/4 teaspoon black pepper
- 1 egg, beaten
- 1/4 cup milk
- vegetable oil for frying
Instructions:
- In a large bowl, combine corn kernels, flour, Parmesan cheese, baking powder, salt, and pepper.
- In a separate bowl, whisk together egg and milk.
- Pour egg mixture into corn mixture and stir until combined.
- Heat vegetable oil in a large skillet over medium heat.
- Drop batter by rounded tablespoons into hot oil. Cook for 2-3 minutes per side, or until golden brown and cooked through.
- Remove fritters from skillet and drain on paper towels.
- Serve warm with your favorite dipping sauce.
Grilled Corn with Mexican Street Corn Topping
This recipe combines the classic flavors of Mexican street corn with the smoky goodness of grilled corn. Top your grilled corn with a mixture of crumbled cotija cheese, mayo, chili powder, and lime juice for a taste sensation.
Ingredients:
- 4 ears grilled corn
- 1/4 cup mayonnaise
- 1/4 cup crumbled cotija cheese
- 2 tablespoons chili powder
- 1 tablespoon lime juice
- Salt and pepper to taste
- Fresh cilantro for garnish (optional)
Instructions:
- In a small bowl, combine mayonnaise, cotija cheese, chili powder, and lime juice. Season with salt and pepper to taste.
- Spread the topping mixture evenly over the grilled corn.
- Garnish with fresh cilantro, if desired.
- Serve immediately.
Part 6: FAQs
Here are some frequently asked questions about grilling corn on the cob:
Q1: What if my corn is a little dry?
Don't worry! If your corn is a bit dry, you can always add a little more butter or drizzle some melted cheese on top. You can also try wrapping the corn in foil with a little bit of water before grilling to help prevent it from drying out.
Q2: Can I grill corn in the husk?
Absolutely! Grilling corn in the husk is a great way to add a smoky flavor. Just make sure to soak the corn in water for at least 30 minutes before grilling. This helps to keep the husks moist and prevents them from burning. Once the corn is cooked, you can peel back the husks and enjoy the smoky, flavorful corn.
Q3: What's the best way to clean corn after grilling?
The easiest way is to run the corn under cold water to remove any excess char. You can also use a damp paper towel to wipe off any leftover bits. If you've grilled corn in the husk, the husks will usually peel off easily once the corn is cooled.
Q4: Can I grill frozen corn?
You can, but it's not ideal. Frozen corn will be more likely to become mushy. If you must grill frozen corn, thaw it completely first. This will help to prevent the corn from becoming soggy and overcooked.
Q5: How long can I store leftover grilled corn?
Store leftover grilled corn in the refrigerator for up to 3 days. You can reheat it by microwaving or grilling it. If you're reheating in the microwave, wrap the corn in a damp paper towel to help prevent it from drying out.
Part 7: My Favourite grilling tips
Here are a few of my favourite grilling tips for perfect corn on the cob:
- Use a grill brush to clean the grill grates before you start cooking. This will prevent any stuck-on food from burning and sticking to your corn.
- Always use a pair of tongs to turn the corn while it’s grilling. This will prevent your fingers from getting burned.
- Don't overcrowd the grill. Give the corn plenty of space to cook evenly. If the grill is too crowded, the corn will steam instead of grill, resulting in a less desirable texture.
- Keep an eye on the grill temperature. Adjust the heat as needed to ensure the corn cooks evenly and doesn’t burn. Use a grill thermometer to monitor the temperature.
- Consider using a corn cob holder. These handy tools make it easier to grill corn on the cob, especially if you're grilling multiple cobs. They also prevent the corn from rolling around on the grill grates.
Part 8: A Final Word
Grilling corn on the cob is a truly rewarding experience. It's a simple dish that can be enjoyed by everyone. With a little practice and the right techniques, you can create a truly delicious and memorable meal.
So get out there, fire up the grill, and enjoy the sweet and smoky goodness of perfectly grilled corn on the cob!
Everyone is watching

Prime Rib Roast Cooking Time Chart: Per Pound Guide
Cooking TipsPrime rib roast. Just the name conjures images of lavish dinners, crackling fires, and hearty laughter. It’s ...

How Long to Bake Potatoes in the Oven (Perfect Every Time)
Cooking TipsBaked potatoes are a staple in my kitchen. They're incredibly versatile, delicious, and surprisingly easy to m...

Perfect Rice Every Time: The Ultimate Guide to Cooking Rice
Cooking TipsAs a self-proclaimed foodie, I've always been a bit obsessed with rice. It's the foundation of countless cuisi...

The Ultimate Guide to Cooking Asparagus: Tips, Techniques, and Recipes
Cooking TipsAsparagus. The mere mention of this spring delicacy conjures up images of vibrant green spears, crisp and burs...

Ultimate Guide to Cooking the Perfect Thanksgiving Turkey
Cooking TipsThanksgiving. Just the word conjures up images of overflowing tables laden with delicious food, the scent of r...