I'm a self-proclaimed coffee enthusiast, and I've always believed that a good cup of joe is an essential part of a great day. But what happens when you're stuck without your trusty coffee machine? Perhaps you're on a camping trip, staying in a vacation rental with limited amenities, or simply feeling adventurous. Fear not, dear coffee lovers, for there are numerous ways to brew delicious coffee without relying on a fancy machine.
My coffee journey has taken me through various stages, from relying heavily on my trusty coffee maker to embracing the simplicity and charm of manual brewing methods. This guide is a compilation of my experiences, insights, and tips, designed to help you unlock the world of coffee brewing without the need for a machine. Let's embark on this caffeine-fueled adventure together, one delicious cup at a time!
(Part 1) The Classic Charm of the French Press
If you're looking for a simple yet satisfying way to brew coffee, the French Press is a timeless classic that should be in every coffee lover's arsenal. It's incredibly user-friendly, offers a robust brew, and requires minimal equipment.
The French Press: A Time-Honored Ritual
My personal journey with the French Press began during my university days. I lived in a tiny apartment with limited kitchen space and no coffee maker. Desperately craving a decent cup of coffee, I stumbled upon a French Press at a local market and was immediately captivated by its simplicity.
Using a French Press is almost a meditative experience, with each step contributing to the final flavor profile. You start by heating your water – I usually prefer a stovetop kettle for this, but a microwave works in a pinch. Then, you grind your coffee beans – a medium grind is ideal for French Press brewing. The next step involves adding the grounds to the carafe, pouring in the hot water, and allowing it to steep. The aroma that fills the air during this process is absolutely intoxicating! Finally, you press down the plunger, separating the grounds from the brew, leaving you with a rich, flavorful cup.
Tips for French Press Perfection
While the French Press is incredibly user-friendly, there are a few tricks I've learned over the years that can take your French Press coffee to the next level.
- The Art of the Grind: Choosing the right grind size is crucial for French Press brewing. A medium grind ensures optimal extraction, allowing the coffee flavors to fully develop.
- Respect the Ratio: Sticking to the recommended ratio of coffee grounds to water is essential. Too much coffee can result in a bitter brew, while too little may leave you with a weak cup.
- Steeping Time: Allow the coffee to steep for 3-4 minutes before pressing down the plunger. This gives the flavors time to fully infuse into the water.
- Water Quality Matters: Always use fresh, filtered water for brewing. Impurities in the water can negatively impact the flavor of your coffee.
- A Gentle Press: A gentle press is all you need to separate the grounds from the brew. Too much pressure can create a muddy brew, so be patient and apply a steady force.
- Cleanliness is Key: Wash your French Press immediately after use to avoid any build-up of coffee oils. This will ensure that your French Press stays sparkling clean and ready for your next brewing session.
The French Press is a fantastic option for making a large pot of coffee for sharing with friends or enjoying a single serving for a quiet moment of relaxation. It's also a great choice for camping trips, as it's compact, lightweight, and requires minimal equipment.
(Part 2) The Art and Science of Pour-Over
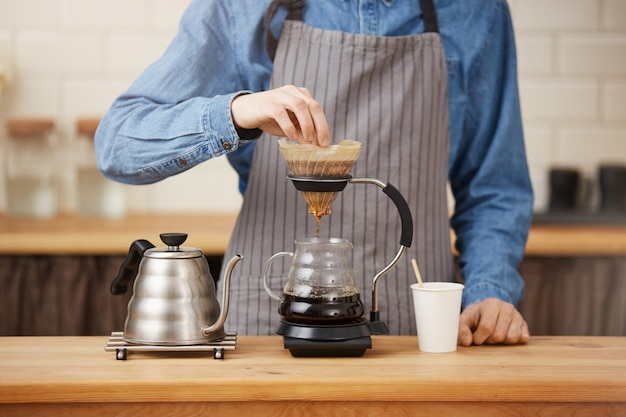
If you're looking for a brewing method that combines precision and artistry, then Pour-Over is an excellent choice. It's a more hands-on approach to brewing, requiring patience and attention to detail, but the results are truly exceptional.
Pour-Over: A Controlled Brew
The Pour-Over method involves carefully pouring hot water over coffee grounds, allowing the water to filter through a cone-shaped filter into a carafe. It's like a mini coffee ceremony, where you control every aspect of the brewing process, resulting in a clean and flavorful cup of coffee.
Tools of the Trade: Essential Gear for Pour-Over Brewing
You'll need a few essential tools to embrace the Pour-Over method:
- Pour-Over Cone: There's a world of Pour-Over cones available, each with its unique characteristics. Popular choices include the Hario V60 and the Chemex.
- Filters: You'll need paper filters specifically designed for Pour-Over brewing.
- Kettle: A gooseneck kettle is highly recommended for Pour-Over, as it allows for precise pouring.
- Carafe: A carafe is essential for collecting the brewed coffee.
- Scale: A scale is incredibly helpful for measuring the coffee grounds and water accurately.
- Timer: A timer is crucial for tracking the brewing time and ensuring consistent results.
These tools are readily available online, at specialty coffee shops, and even at some mainstream retailers. If you're feeling fancy, you can even find beautiful, handcrafted Pour-Over sets that enhance the entire coffee brewing experience.
Tips for a Stellar Pour-Over Brew
Now, let's dive into the art of Pour-Over brewing. Here's a step-by-step guide to help you create a truly exceptional cup of coffee:
- Grinding Your Beans: Start with freshly ground coffee beans, using a medium-fine grind size.
- water temperature Matters: Heat your water to the ideal temperature for brewing, usually around 200°F (93°C).
- Pre-Heating the Cone: Rinse the paper filter with hot water before adding the coffee grounds. This removes any papery taste and preheats the cone, ensuring optimal extraction.
- Pouring with Precision: Pour the coffee grounds into the cone, using a circular motion to evenly saturate the grounds.
- The Art of the Pour: Pour the hot water in stages, using a circular motion to ensure even extraction. Let the water drain between pours.
- Savor Your Creation: Once the brewing is complete, carefully remove the cone and enjoy your flavorful Pour-Over creation.
It may seem like a complicated process, but once you get the hang of it, Pour-Over brewing becomes a wonderfully satisfying ritual. It's a fantastic method for coffee enthusiasts who appreciate the delicate nuances of different coffee beans and crave a clean, flavorful cup.
(Part 3) The Refreshing Allure of Cold Brew
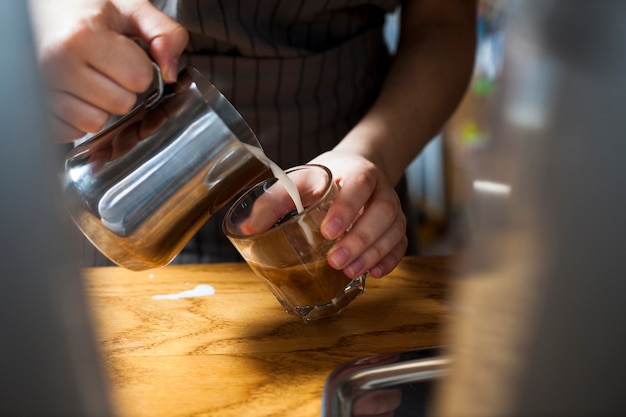
For a refreshing and invigorating coffee experience, Cold Brew is an excellent choice, especially during those hot summer days. It's a simple method that produces a smooth, concentrated coffee that's perfect for sipping on its own or using to make delicious iced coffee.
Cold Brew: A Slow and Steady Brew
Cold Brew, as the name suggests, involves brewing coffee with cold water. The slow extraction process creates a brew that's lower in acidity and boasts a smoother, less bitter taste compared to traditional hot coffee brewing methods. The best part? It's incredibly easy to make!
Essentials for Cold Brew
You don't need fancy equipment to create a delicious Cold Brew. Here's what you'll need:
- A Jar: Use a mason jar, a pitcher, or any airtight container with a lid.
- Coffee Grounds: Use coarsely ground coffee beans for Cold Brew.
- Cold Water: You'll need cold, filtered water for the brewing process.
- Cheesecloth or Fine-Mesh Strainer: You'll need a cheesecloth or a fine-mesh strainer to filter the coffee after steeping.
Tips for Perfect Cold Brew
Creating a fantastic Cold Brew is straightforward, but these tips can elevate your brew to new heights:
- Grind Coarsely: Use a coarse grind for Cold Brew, as finer grinds can lead to a muddy brew.
- Embrace the Steep: Let the coffee steep in the cold water for 12-24 hours. The longer it steeps, the stronger the flavor will be.
- Filter for Smoothness: After steeping, carefully filter the coffee through cheesecloth or a fine-mesh strainer to remove the grounds.
- Dilute or Enjoy As-Is: You can enjoy the Cold Brew straight or dilute it with water, milk, or your favorite flavorings.
- Refrigerate for Freshness: Store the Cold Brew in the refrigerator for up to a week, enjoying its refreshing taste for days.
Cold Brew is a great option for those who prefer a less acidic coffee experience, and it's a fantastic choice for making iced coffee. The concentrated brew is ideal for adding milk, cream, or syrups. It's a versatile and refreshing way to enjoy coffee, and it's easy enough to make even on a busy weekday.
(Part 4) The AeroPress: A Compact Powerhouse
The AeroPress is a unique and versatile brewing device that's gaining popularity in the coffee world. It's a compact, portable brewer that produces a clean and flavorful cup of coffee using a combination of pressure and immersion.
The AeroPress: Pressing for Flavor
The AeroPress is basically a small cylinder with a plunger that forces hot water through coffee grounds, resulting in a concentrated brew. It's incredibly simple to use, and it's ideal for making a single serving or two. I've found it to be an excellent option for camping trips or when I don't have a lot of space.
Tools for AeroPress Brewing
Here's what you'll need to get started with AeroPress brewing:
- AeroPress: You'll need an AeroPress device, which is widely available online and at most coffee shops.
- Filters: The AeroPress uses paper filters, similar to those used in a drip coffee maker.
- Kettle: A kettle is needed to heat the water for brewing.
- Mug or Cup: You'll need a mug or cup to collect the brewed coffee.
AeroPress Brewing Tips
The AeroPress is known for its versatility, and there are countless ways to use it. Here are a few tips to help you create a delicious AeroPress brew:
- Grind Selection: Use a medium grind for a standard AeroPress brew.
- Water Temperature: Heat the water to the ideal temperature for brewing.
- Preparing the Chamber: Place the filter in the chamber and add the coffee grounds.
- Saturated Grounds: Slowly pour the hot water over the coffee grounds, ensuring they are fully saturated.
- Steeping and Pressing: Let the coffee steep for 1-2 minutes, then gently press the plunger down, forcing the brewed coffee through the filter.
- Enjoy Your Brew: Pour the coffee into your mug and savor the rich, flavorful brew.
The AeroPress is a fantastic option for those who enjoy experimenting with different brewing methods. You can even use it to make cold brew, espresso, and even iced coffee. It's a versatile and compact brewing device that's perfect for anyone who loves a good cup of coffee on the go.
(Part 5) The Timeless Charm of Boiling Coffee
Let's take a step back in time and explore a traditional method that's been used for centuries – boiling coffee. It's a simple and efficient way to brew coffee, requiring minimal equipment and producing a surprisingly delicious brew.
Boiling Coffee: A Nostalgic Brew
Boiling coffee is a classic method that's been used for ages. It's a straightforward and efficient way to brew coffee, requiring little more than a pot and a stove. I find it to be a charming and nostalgic way to enjoy coffee, reminiscent of simpler times.
Tools for Boiling Coffee
You only need a few basic tools to boil coffee:
- A Pot: Use a saucepan, a kettle, or even a coffee pot.
- Coffee Grounds: Use coarsely ground coffee beans.
- Water: You'll need water for the brewing process.
Tips for Perfect Boiled Coffee
Boiling coffee is a simple process, but a few tips can help you create a delicious brew:
- Grind Size: Use coarsely ground coffee beans, as finer grinds can create a bitter brew.
- Boiling Point: Bring the water to a full boil.
- Adding the Grounds: Add the coffee grounds to the boiling water.
- Steeping and Straining: Let the coffee steep for 3-5 minutes, then strain the coffee through cheesecloth or a coffee filter.
- Enjoy Your Brew: Pour the coffee into your mug and enjoy.
Boiled coffee is a strong and flavorful brew, perfect for those who like their coffee bold. It's a timeless method that's perfect for camping trips, picnics, or simply for enjoying a cup of coffee in a traditional way.
(Part 6) The Refreshing Simplicity of Cold Water Extraction
Let's explore a method that's becoming increasingly popular – cold water extraction. It's a simple and refreshing way to brew coffee, producing a smooth and flavorful brew.
Cold Water Extraction: A Hands-Off Brew
Cold water extraction is similar to Cold Brew, but even simpler, requiring no steeping. You simply add coffee grounds to cold water, let it sit for a few hours, and then strain the coffee. The result is a smooth, refreshing brew that's perfect for a hot day or for those who prefer a less acidic coffee experience.
Tools for Cold Water Extraction
You'll need a few basic tools for cold water extraction coffee:
- A Jar: Use a mason jar, a pitcher, or any airtight container.
- Coffee Grounds: Use coarsely ground coffee beans.
- Cold Water: You'll need cold water for the brewing process.
- Cheesecloth or Fine-Mesh Strainer: You'll need a cheesecloth or a fine-mesh strainer to filter the coffee.
Tips for Cold Water Extraction Coffee
Cold water extraction is a simple process, but here are a few tips to ensure a flavorful brew:
- Grind Size: Use coarsely ground coffee beans, as finer grinds can create a bitter brew.
- Letting It Sit: Let the coffee grounds sit in cold water for 4-6 hours. The longer it sits, the stronger the flavor.
- Filtering for Clarity: After the coffee has sat, filter the coffee through cheesecloth or a fine-mesh strainer to remove the grounds.
- Enjoy Cold or Dilute: You can enjoy the cold water extraction coffee straight or dilute it with water or milk.
- Refrigerate for Freshness: Store the cold water extraction coffee in the refrigerator for up to a week.
Cold water extraction is a refreshing and convenient way to enjoy coffee. It's a great option for those looking for a simple and flavorful way to brew coffee, and it's perfect for those who prefer a less acidic coffee experience.
(Part 7) The Percolator: A Blast from the Past
Let's take a trip down memory lane and explore a method that's been a staple in many kitchens for decades – the Percolator. It's a simple and reliable way to brew coffee, known for its robust flavor.
The Percolator: A Classic Brewing Method
The Percolator is a coffee maker that uses a process called percolation to brew coffee. It's basically a pot with a tube that circulates hot water through coffee grounds, resulting in a strong and flavorful brew. I have fond memories of my grandma using a Percolator, and it always seemed to fill the house with the aroma of freshly brewed coffee.
Tools for Percolating Coffee
You'll need a few basic tools to use a Percolator:
- Percolator: A Percolator is a coffee maker that uses a process called percolation to brew coffee.
- Coffee Grounds: Use coarsely ground coffee beans.
- Water: You'll need water for the brewing process.
Tips for Perfect Percolated Coffee
Percolating coffee is a simple process, but here are a few tips to ensure a delicious brew:
- Grind Size: Use coarsely ground coffee beans, as finer grinds can create a bitter brew.
- Filling with Water: Fill the Percolator with water, but don't overfill it.
- Adding the Grounds: Add the coffee grounds to the basket of the Percolator.
- Percolating Time: Turn on the Percolator and let it brew for 5-8 minutes.
- Enjoy Your Brew: Pour the coffee into your mug and enjoy.
Percolated coffee is known for its robust flavor and strong aroma. It's a great option for those who enjoy a strong cup of coffee, and it's a nostalgic reminder of a bygone era.
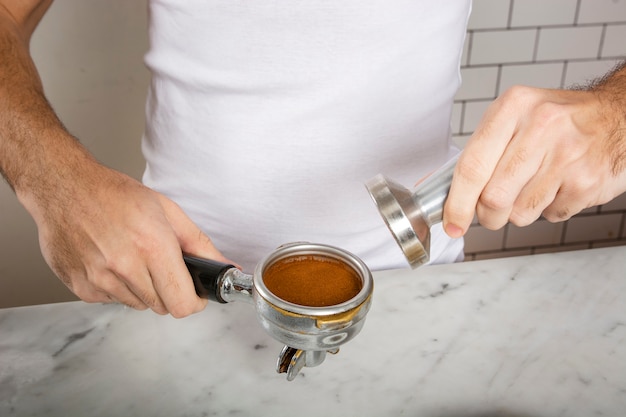
(Part 8) The Moka Pot: A Little Bit of Italian Flair
Now, let's add a touch of Italian flair to our coffee brewing repertoire – the Moka Pot. It's a stovetop espresso maker that produces a rich and flavorful brew.
The Moka Pot: A Stovetop Espresso Experience
The Moka Pot is a classic Italian design that's been used for decades. It's a stovetop espresso maker that uses steam pressure to extract coffee from finely ground beans. I love the simplicity and the ritual of using a Moka Pot. It's a great way to enjoy a strong and flavorful coffee, and it's perfect for those who don't want to invest in a fancy espresso machine.
Tools Needed for Moka Pot Brewing
You'll need a few basic tools to use a Moka Pot:
- Moka Pot: A Moka Pot is a stovetop espresso maker that uses steam pressure to extract coffee from finely ground beans.
- Finely Ground Coffee: You'll need finely ground coffee beans for Moka Pot brewing.
- Water: You'll need water for the brewing process.
Tips for Perfect Moka Pot Coffee
Moka Pot brewing is a delicate process, and it takes a little practice to get it right. Here are a few tips to help you achieve a perfect brew:
- Grind Size: Use finely ground coffee beans, as coarser grinds can result in a weak brew.
- Filling with Water: Fill the bottom chamber of the Moka Pot with water, but don't overfill it.
- Adding the Grounds: Add the coffee grounds to the filter basket, making sure it's evenly distributed.
- Securing the Pot: Screw the top and bottom chambers of the Moka Pot together.
- Slow and Steady Heating: Place the Moka Pot on low heat and let it heat slowly.
- Monitoring the Brew: Watch the Moka Pot carefully, and remove it from the heat as soon as the coffee starts to come out of the spout.
- Enjoy Your Espresso: Pour the coffee into your cup and enjoy the rich, flavorful espresso.
Moka Pot coffee is a strong and flavorful brew, and it's perfect for those who enjoy a rich espresso experience. It's a classic Italian method that's simple to use and produces a delicious cup of coffee.
FAQs
1. What's the Best Way to Brew Coffee Without a Maker?
There's no one "best" way to brew coffee without a maker, as it really comes down to personal preference. If you're looking for a simple and straightforward method, the French Press is a great option. For those who enjoy a more controlled brewing experience, Pour-Over might be the way to go. Cold Brew is a fantastic option for those who prefer a smooth and refreshing brew. And if you're looking for a strong and flavorful cup, try the Moka Pot or the Percolator. Ultimately, the best method is the one that you enjoy the most.
2. What Kind of Coffee Beans Should I Use?
The type of coffee beans you use will depend on your personal preference. If you enjoy a bold and strong coffee, try dark roast beans. For a milder and more balanced cup, try medium roast beans. And if you're looking for a sweeter and more complex flavor, try light roast beans. It's always a good idea to experiment with different types of coffee beans to find your favorites.
3. How Important is Water Quality for Coffee Brewing?
Water quality plays a crucial role in coffee brewing, as it can greatly affect the taste of your brew. Use fresh, filtered water for the best results, as impurities in the water can affect the flavor of the coffee. Avoid using hard water, as it can leave mineral deposits in your coffee maker.
4. What's the Best Grind Size for Each Brewing Method?
The grind size of your coffee beans is essential for achieving optimal extraction. Here's a general guideline:
| Brewing Method | Grind Size |
|---|---|
| French Press | Medium Grind |
| Pour-Over | Medium-Fine Grind |
| Cold Brew | Coarse Grind |
| AeroPress | Medium Grind |
| Boiling Coffee | Coarse Grind |
| Cold Water Extraction | Coarse Grind |
| Percolator | Coarse Grind |
| Moka Pot | Fine Grind |
5. How Do I Make Cold Brew Coffee Without a Machine?
Making cold brew coffee without a machine is super easy! All you need is a jar, coarsely ground coffee beans, cold water, and a cheesecloth or fine-mesh strainer. Simply add the coffee grounds to the jar, pour in cold water, and let it steep for 12-24 hours. After steeping, filter the coffee through the cheesecloth or strainer, and you're ready to enjoy a smooth and refreshing cup of cold brew coffee.
There you have it! A comprehensive guide to brewing delicious coffee without a maker. So, next time you find yourself without a coffee machine, don't fret! Embrace the simplicity and ingenuity of these methods and enjoy a fantastic cup of coffee, any time, anywhere.
Everyone is watching

Perfect Rice Every Time: The Ultimate Guide to Cooking Rice
Cooking TipsAs a self-proclaimed foodie, I've always been a bit obsessed with rice. It's the foundation of countless cuisi...

Prime Rib Roast Cooking Time Chart: Per Pound Guide
Cooking TipsPrime rib roast. Just the name conjures images of lavish dinners, crackling fires, and hearty laughter. It’s ...

How Long to Bake Potatoes in the Oven (Perfect Every Time)
Cooking TipsBaked potatoes are a staple in my kitchen. They're incredibly versatile, delicious, and surprisingly easy to m...

The Ultimate Guide to Cooking Asparagus: Tips, Techniques, and Recipes
Cooking TipsAsparagus. The mere mention of this spring delicacy conjures up images of vibrant green spears, crisp and burs...

Ultimate Guide to Cooking the Perfect Thanksgiving Turkey
Cooking TipsThanksgiving. Just the word conjures up images of overflowing tables laden with delicious food, the scent of r...