Ah, chitterlings. Just the word conjures up images of smoky kitchens, lively gatherings, and the comforting aroma of a Southern culinary tradition. Now, I know some folks shy away from these little pig intestines, but for me, they're a taste of home, a link to my family's history, and a dish that brings a smile to my face. But let's be real, cooking chitterlings isn't a walk in the park. From the initial cleaning to nailing the perfect cooking time, there's a bit of a learning curve. But fear not! I'm here to guide you through every step, sharing all the tips and tricks I've picked up over the years. So, grab your apron, let's get our hands dirty, and embark on this chitterling adventure together.
(Part 1) Cleaning Chitterlings: A Necessary Ritual

Let's tackle the elephant in the room – cleaning chitterlings. Now, I'll admit, this part isn't exactly a spa day, but it's a vital step. You've got to get rid of all that gunk, and I'm talking about a thorough cleanse. Think of it as a ritual, a preparation for the delicious journey ahead.
1. The Essential Supplies: Your Cleaning Arsenal
First things first, gather your weapons. You'll need a large bowl, a colander (that trusty strainer), a cutting board, a sharp knife (for those stubborn bits), a good supply of cold water, and a pair of trusty rubber gloves. You can use a hose for rinsing, but I find it can get a bit messy. I'm a firm believer in controlled cleaning!
2. The Cleaning Process: A Step-by-Step Guide
Now, let's get down to business. Here's the cleaning process in all its glory:
- Rinse those chitterlings thoroughly under cold running water. Think of it like a baptism for your culinary journey.
- Inspect them closely. Look for any bits of fat or membrane that need to be removed. Use your sharp knife to carefully cut them away.
- If you encounter a particularly stubborn membrane, try scraping it off with the back of your knife. Gentle persuasion is key!
- Give the chitterlings another good rinse, and then place them in a large bowl filled with cold water. Let them soak in the cool embrace of the water.
- Now for a touch of magic! Add a generous amount of salt, or baking soda. This helps break down any lingering impurities and gets rid of those unpleasant odors.
- Let the chitterlings soak in this salt/baking soda solution for about 30 minutes, stirring occasionally. Let the salt work its magic!
- After 30 minutes, drain the water and give the chitterlings another thorough rinse. You'll be amazed at how much cleaner they look.
- Finally, give each piece a final inspection, making sure you've removed all those unwanted bits.
3. The Aroma: A Telltale Sign
Now, let's talk about the smell. Cleaning chitterlings isn't exactly a fragrant experience. The first time I helped my grandmother clean them, I thought I was going to pass out! But trust me, the smell fades away once they're cooked. You'll be left with a mouthwatering aroma. If you're cooking outside, it's not a big deal. But if you're cooking inside, make sure you open some windows and get a fan going. It's all part of the chitterling adventure!
4. A Word of Caution: Keeping Clean
Remember, after you've cleaned the chitterlings, wash your hands thoroughly with soap and water. I'm talking about a good scrub! You don't want to carry those "chitterling vibes" with you throughout your day.
(Part 2) Chitterlings Cooking Methods: Finding Your Perfect Technique
Alright, your chitterlings are clean and ready for their culinary transformation. Now, there are several methods for cooking chitterlings. Each one offers a unique flavor and texture. Let's explore the options and discover your ideal cooking style.
1. The slow cooker method: Low and Slow for Tender Perfection
This is my personal favorite, and for good reason. The slow cooker is all about low and slow, creating a tender, melt-in-your-mouth texture. Think of it as a long, gentle embrace for your chitterlings. Here's how to do it:
- In your slow cooker, add a few cups of water, a chopped onion (for that sweet flavor), some garlic (for that pungent kick), and a bay leaf (for a touch of earthy aroma). You can also add a sprinkle of salt and pepper.
- Gently add your chitterlings to the slow cooker, making sure they're submerged in the liquid.
- Set your slow cooker to low heat and let those chitterlings simmer for about 6-8 hours. Patience is key!
The slow cooker allows the flavors to meld beautifully, creating a symphony of taste. It's like letting a delicious story unfold, one simmering hour at a time.
2. The pressure cooker Method: Quick and Efficient Results
If you're short on time and crave a quick meal, the pressure cooker is your best friend. It cooks chitterlings in a fraction of the time while maintaining that tenderness you desire. Here's how it works:
- Put your cleaned chitterlings, water, onion, garlic, bay leaf, salt, and pepper into the pressure cooker.
- Secure the lid, making sure it's properly sealed. Cook on high pressure for about 45 minutes to an hour, depending on the thickness of the chitterlings.
Just be cautious when releasing the pressure, as the steam can be very hot! I always recommend using a thick towel for extra protection.
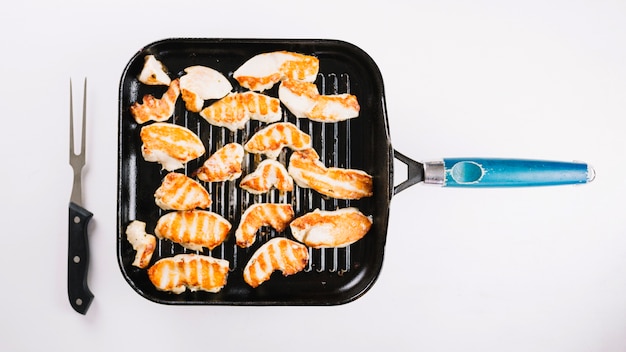
3. The Stovetop Method: Classic and Reliable
The stovetop is a classic chitterling cooking method, a tried-and-true approach. It's a bit more hands-on, but it's a reliable method. Here's how to do it:
- Place your chitterlings in a large pot with water, onion, garlic, bay leaf, salt, and pepper. You can add other herbs and spices depending on your preferences.
- Bring the pot to a boil over medium heat, then reduce the heat to low and simmer for about 2-3 hours, or until the chitterlings are tender.
Keep an eye on the pot, adding more water as needed. You don't want those chitterlings to dry out!
4. The oven method: An Unexpected Option
You might be surprised, but you can actually cook chitterlings in the oven! It's not the most common method, but it's a great option for those who prefer to avoid the stovetop. Here's the oven method breakdown:
- Place your chitterlings in a baking dish with water, onion, garlic, bay leaf, salt, and pepper.
- Cover the dish tightly with aluminum foil, creating a steamy environment. Bake in a preheated oven at 350°F (175°C) for about 2 hours, or until the chitterlings are tender.
You can remove the foil for the last 30 minutes of cooking to let the chitterlings brown a bit. This adds a touch of crispy goodness.
(Part 3) Chitterling Cooking Time: Navigating the Tenderness

Now, here's the thing about chitterling cooking time: it's not a one-size-fits-all approach. It depends on several factors, such as the thickness of the chitterlings, the amount of water you use, the temperature of your cooking method, and even the specific recipe. That's why relying on a fixed timeline isn't always reliable. Instead, focus on testing for tenderness.
1. How To Test for Tenderness: A Culinary Touch Test
There are a few ways to test for tenderness and ensure your chitterlings are perfectly cooked:
- Grab a fork. If it easily pierces through the chitterling without any resistance, it's cooked.
- You can also test by gently pinching a piece. If it feels tender and not chewy or rubbery, it's ready to go.
If the chitterlings are still a bit tough, give them a bit more time.
2. The Signs of Overcooked Chitterlings: The Culinary Nightmare
Let's face it, overcooked chitterlings are a culinary nightmare. They become chewy, rubbery, and frankly, unappealing. They can also have a slightly burnt taste, which is definitely not what you're looking for.
3. What to Do with Overcooked Chitterlings: A Hopeful Remedy
Unfortunately, if you've overcooked your chitterlings, there's not much you can do. They're likely a lost cause. The only thing I can suggest is adding more broth or water and trying to simmer them for a bit longer. But, it's a long shot.
(Part 4) Chitterling Seasoning: A Symphony of Flavor
Your chitterlings are cooked, and now it's time to add a touch of flavor magic. Seasoning is where you can really personalize your dish and create a masterpiece.
1. Classic Seasonings: The Foundation of Flavor
The most basic seasonings include salt, pepper, onion, garlic, bay leaf, and a touch of cayenne pepper for a little heat. These ingredients create a harmonious base for your chitterling symphony.
2. The Flavor Boost: Elevating Your Chitterlings
If you want to take your chitterlings to the next level, here are some flavor-enhancing ideas:
- Add some smoked paprika for a smoky, earthy flavor. It adds depth and a hint of mystery.
- A pinch of thyme or rosemary brings a fresh, herby note, making your chitterlings sing with a bright, aromatic melody.
- A dash of hot sauce or chili flakes brings the heat, adding a fiery element to your dish.
- For a sweeter twist, try a little brown sugar or molasses. It creates a harmonious balance between sweet and savory.
3. flavor combinations: Creating Your Own Culinary Signature
Don't be afraid to experiment and find what you like! I love a good combo of smoked paprika, a little garlic, and a touch of cayenne pepper. It's a symphony of smoky, spicy, and garlicky notes.
(Part 5) Chitterling Serving Options: Delicious Possibilities
Your chitterlings are cooked, seasoned, and ready to be enjoyed. Now, let's explore the different ways to serve this culinary treasure.
1. Chitterling Stew: A Hearty and Satisfying Classic
Chitterling stew is a classic way to enjoy chitterlings. Simply add some broth, veggies (like potatoes, carrots, or celery), and maybe some corn for a hearty and satisfying meal. It's perfect for a cold winter evening.
2. Chitterlings and Grits: A Southern Staple
This is a Southern staple, a dish that's been enjoyed for generations. The creamy grits provide a perfect counterpoint to the savory chitterlings, creating a delicious harmony of textures and flavors.
3. Chitterling Tacos: A Modern Twist
If you're looking for a more modern take on chitterlings, try chitterling tacos. It's a fusion of flavors and textures, perfect for a fun and casual meal.
4. Chitterling Salad: An Unexpected Delight
It might sound unusual, but a chitterling salad is actually really delicious. Just toss the chitterlings with some chopped veggies, fresh herbs, and a light vinaigrette. It's a refreshing and surprisingly light way to enjoy this traditional dish.
(Part 6) Chitterlings and Health: A Balanced Approach
Let's be honest, chitterlings aren't exactly known for being a health food. They're high in fat and cholesterol. But, that doesn't mean you can't enjoy them in moderation. The key is to find a balance.
1. Choose Lean Cuts: Making Smart Choices
If you're buying chitterlings, try to choose lean cuts. This will help reduce the fat content.
2. Limit Your Portions: Moderation is Key
Don't eat a whole plate of chitterlings in one sitting. Enjoy them in moderation as part of a balanced diet.
3. Focus on Balance: Combining Flavor with Health
Pair your chitterlings with plenty of fresh veggies and whole grains. This creates a balanced and satisfying meal.
4. Consider the Frequency: Enjoying in Moderation
If you're concerned about cholesterol, you might want to limit how often you eat chitterlings. Enjoy them as a special treat.
(Part 7) Chitterlings: A Cultural Legacy
Chitterlings are more than just a dish. They're part of a rich cultural heritage, especially in the African American community. They've been a staple food for generations, passed down through families and enjoyed at gatherings and celebrations.
1. A Symbol of Resilience: Overcoming Challenges
For many, chitterlings represent resilience and resourcefulness. They're a reminder that even humble ingredients can be transformed into delicious meals.
2. A Culinary Tradition: Preserving Heritage
They're a reminder of a long-standing culinary tradition, passed down through generations. The art of cooking chitterlings is a testament to the enduring spirit of a community.
(Part 8) Chitterlings: A Personal Connection
For me, chitterlings are more than just food. They're a reminder of my family, my childhood, and the special moments we shared around the table. I remember my grandmother's chitterlings, cooked to perfection in her big cast iron pot. They were always the highlight of our family gatherings. They brought us together, creating a sense of warmth, love, and shared history.
FAQs
Now, you're probably wondering about a few things.
1. Where can I buy chitterlings?
Chitterlings are usually sold in butcher shops or specialty grocery stores. You can also find them online.
2. How long can I store chitterlings?
Fresh chitterlings should be stored in the refrigerator for no more than 2-3 days. You can also freeze them for up to 3 months.
3. What are chitterlings made of?
Chitterlings are the intestines of a pig. They're usually cleaned and cooked before being eaten.
4. Do chitterlings taste like anything specific?
Chitterlings have a unique taste that some people describe as earthy or meaty. The taste can vary depending on how they are cooked and seasoned.
5. How much chitterlings do I need for a meal?
The amount of chitterlings you need will depend on how many people you're serving and how much you want to eat. A good rule of thumb is about 1 pound of chitterlings per 2-3 people.
There you have it! Your ultimate guide to cooking chitterlings. Remember, it's all about practice and experimentation. You'll find your own perfect method, and you'll be whipping up chitterling masterpieces in no time.
Everyone is watching

Perfect Rice Every Time: The Ultimate Guide to Cooking Rice
Cooking TipsAs a self-proclaimed foodie, I've always been a bit obsessed with rice. It's the foundation of countless cuisi...

Ultimate Guide to Cooking the Perfect Thanksgiving Turkey
Cooking TipsThanksgiving. Just the word conjures up images of overflowing tables laden with delicious food, the scent of r...

The Ultimate Guide to Cooking Asparagus: Tips, Techniques, and Recipes
Cooking TipsAsparagus. The mere mention of this spring delicacy conjures up images of vibrant green spears, crisp and burs...

Can You Cook Spaghetti with Gasoline? (The Shocking Truth)
Cooking TipsWe've all seen those crazy internet trends. You know, the ones that make you wonder, "Did someone actually try...

Chorizo and Eggs Recipe: The Ultimate Guide
Cooking TipsRight, let’s talk about chorizo and eggs. You know, that classic Spanish dish that's always a winner. It's th...