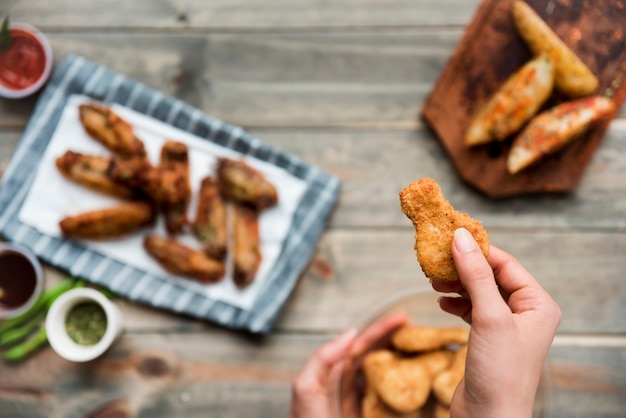
Let’s face it, we all love chicken tenders, right? They're the ultimate comfort food, the perfect snack, and a delicious addition to any meal. But let’s be honest, not all chicken tenders are created equal. Some are limp, dry, and disappointingly pale. Others are the stuff of culinary dreams - crispy on the outside, juicy on the inside, and bursting with flavor. That’s what we’re aiming for here – the ultimate guide to achieving chicken tender perfection, a guide born from years of experimentation, countless taste tests, and a whole lot of love for this classic dish.
(Part 1) Choosing the Right Chicken
The Chicken Cut
First things first, you need to choose the right cut of chicken. For tender, juicy chicken tenders, we need to start with a cut that’s naturally tender and cooks quickly. My go-to is chicken breast. I find that it delivers the perfect balance of flavour and texture, and it’s easy to cut into strips.
However, if you’re looking for a slightly richer flavour, boneless, skinless chicken thighs are a great alternative. Just make sure you cut both breast and thigh into strips about 1-2 inches thick and 3-4 inches long.
Chicken Quality: Don’t Settle for Second Best
Remember, when it comes to chicken, quality matters. Don’t just grab the cheapest option you can find. You want to choose a reputable brand that uses high-quality chicken raised in good conditions. This will make a noticeable difference in flavour and tenderness. I personally favour organic chicken, but it’s not a necessity. Just make sure the chicken is fresh and not overly dry.
Prepping Your Chicken for Success
Once you've got your chicken, it's time to prep it for breading. Pat it dry with paper towels to ensure the breading adheres perfectly. Now, if you’re feeling fancy, you can use a meat mallet to pound the chicken strips slightly. This helps to tenderize the meat and prevents it from becoming tough during cooking. However, it’s not a necessary step, especially if you’re using chicken breast.
(Part 2) The Art of Breading: Creating a Crispy Barrier
Why Breading Matters
Breading is the crucial step that transforms your humble chicken strips into crispy, golden-brown delights. It acts as a protective shield, preventing the chicken from drying out and allowing it to cook evenly. It’s also the key to that irresistible crunchy texture we all crave.
The Basic Breading Formula
There are endless variations, but the basic breading formula remains the same: a flour coating, a wet coating, and a final breadcrumb coating.
- Flour Coating: This forms the foundation for your breading. It acts as a base for the wet coating to adhere to, ensuring that the breadcrumb coating sticks properly. Plain all-purpose flour works wonders, but you can add a pinch of seasoning, like garlic powder or paprika, to infuse your chicken with extra flavour.
- Wet Coating: This is where you get to play around with flavours and textures. Milk, buttermilk, and even an egg wash are popular choices. I’m a big fan of buttermilk. Its tangy flavour adds a subtle complexity, and it also helps create a crispier crust. Just make sure it’s well-chilled for the best results.
- Breadcrumb Coating: This is the final touch, the ingredient that gives your chicken tenders their signature crispy texture. You can use store-bought breadcrumbs, but homemade breadcrumbs made from crusty bread offer a more authentic flavour and a satisfyingly coarse texture. For an extra boost of flavour and crunch, I like to add a bit of grated Parmesan cheese to my breadcrumbs.
Breading Tips for Success
Even Coating is Key: Ensure each piece of chicken is completely coated in flour, dipped in the wet coating, and then rolled in breadcrumbs.
Don’t Overcrowd the Pan: Give your chicken tenders plenty of space in the pan to cook evenly and achieve that beautiful crispy exterior.
Heat is Your Friend: Make sure the oil is hot enough. If it's not, your chicken will absorb too much oil and become greasy, and the breading won’t crisp up properly.
(Part 3) Frying for Perfection: A Hot Oil Transformation
Choosing the Right Oil: The Foundation for Crispness
Choosing the right oil is crucial for achieving the perfect fry. You want an oil that has a high smoke point, meaning it won’t break down and burn easily at high temperatures. My top choice is canola oil. It’s neutral in flavour, has a high smoke point, and won’t impart any unwanted flavours to your chicken. Peanut oil is another great option, as it adds a slightly nutty flavour.
Temperature Control: The Key to Even Cooking
Don’t just throw your breaded chicken into the oil and hope for the best. Temperature control is key. The oil needs to be hot enough to create a crispy crust without burning the chicken, but not so hot that it cooks the chicken before the breading has a chance to crisp up. Aim for a temperature of 350-375 degrees Fahrenheit (175-190 degrees Celsius). You can use a thermometer to check the temperature, or you can do the classic “drop of water” test. If the water sizzles and dances on the surface, the oil is ready.
Frying Time: The Golden-Brown Goal
Once the oil is hot, carefully add the chicken tenders to the pan, making sure not to overcrowd it. Let them cook undisturbed for about 3-4 minutes on each side, until they turn a beautiful golden-brown and develop a satisfyingly crispy crust. Use a slotted spoon to remove the chicken from the oil and place it on a wire rack lined with paper towels. This helps to drain any excess oil and ensures the chicken tenders remain crispy.
(Part 4) The Baking Alternative: Oven-Baked Goodness
For Those Who Prefer to Bake
Not everyone has a deep fryer or enjoys the mess involved in frying. But that doesn’t mean you have to sacrifice crispy, juicy chicken tenders. Baking is a great alternative that produces equally delicious results.
Baking Instructions: Oven-Baked Perfection
Preheat your oven to 400 degrees Fahrenheit (200 degrees Celsius). Line a baking sheet with parchment paper and place your breaded chicken tenders on it, making sure they’re not touching. Bake for about 20-25 minutes, flipping them halfway through. For an extra layer of flavour, brush the chicken tenders with melted butter before baking.
Broiler Boost for Extra Crispness
If you’re craving an extra crispy crust, you can try broiling your chicken tenders after baking. After baking for 15-20 minutes, turn on the broiler and broil for a few minutes until the top is golden brown and crispy. Keep a close eye on them as they can burn quickly.
(Part 5) Sauce it Up! Elevating Your Chicken Tenders
Dipping Sauce Essentials: The Finishing Touch
Let’s be honest, chicken tenders are even better with a delicious dipping sauce. It adds an extra layer of flavour and brings the whole experience to another level.
Sweet and Tangy Honey Mustard: A Classic Choice
My go-to dipping sauce is a classic honey mustard. Combine honey, Dijon mustard, and a splash of apple cider vinegar, and you’ve got yourself a sweet and tangy masterpiece. For an extra touch, add a pinch of paprika or a sprinkle of garlic powder.
Spicy Buffalo Sauce: For Heat Seekers
If you like things spicy, a buffalo sauce is a must-have. You can find pre-made buffalo sauce at most grocery stores, or make your own by combining hot sauce, butter, and a touch of vinegar. I like to add a touch of honey for a sweet and spicy kick.
The Creamy Comfort of Ranch Dressing: A Classic Favourite
A classic ranch dressing is always a winner. It’s creamy, tangy, and complements the crispy chicken tenders perfectly. You can make your own ranch dressing from scratch, or use a pre-made ranch dressing mix.
Other Sauce Options to Explore
- bbq sauce: A classic for a reason, BBQ sauce is sweet, smoky, and goes perfectly with the crispy chicken tenders.
- Sriracha Mayo: For a spicy and creamy dipping sauce, combine sriracha sauce with mayonnaise.
- Teriyaki Sauce: This is a great option if you’re looking for a more Asian-inspired sauce.
(Part 6) Serving Your Masterpieces: Presentation Matters
A Feast for the Eyes: Making Your Chicken Tenders Shine
Now that you’ve created your crispy, juicy chicken tenders, it’s time to serve them up. Presentation matters, after all! I like to arrange my chicken tenders on a platter lined with lettuce or a bed of fresh spinach. Adding some sliced tomatoes, cucumbers, and a sprinkle of chopped parsley for colour and freshness makes the whole dish more appealing.
side dishes Galore: Completing the Meal
Chicken tenders go well with a variety of side dishes. Some classics include:
- french fries: Crispy on the outside, fluffy on the inside, the perfect partner for chicken tenders.
- Mac and Cheese: Creamy, cheesy, and comforting, a classic side dish that always hits the spot.
- Coleslaw: A refreshing and crunchy side that cuts through the richness of the chicken tenders.
- potato salad: A classic summer side dish that’s always a crowd-pleaser.
- Baked Beans: A hearty and filling side dish that goes well with the sweet and smoky flavour of barbecue sauce.
(Part 7) Storing and Reheating: Keeping Your Chicken Tenders Delicious
Storing for Later: Keeping Your Tenders Fresh
If you have leftover chicken tenders, store them in an airtight container in the refrigerator for up to 3 days.
Reheating Tips: Ensuring Crispy Perfection
Oven: Preheat your oven to 350 degrees fahrenheit (175 degrees Celsius) and bake the chicken tenders for 10-15 minutes, or until heated through.
Air Fryer: Preheat your air fryer to 350 degrees Fahrenheit (175 degrees Celsius) and air fry the chicken tenders for 3-5 minutes, or until heated through and crispy.
Microwave: If you’re in a pinch, you can microwave the chicken tenders. Wrap them in a damp paper towel and microwave for 30-60 seconds. This will help to prevent them from drying out.
(Part 8) Variations and Experimentation: Beyond the Basics
Get Creative: Explore New Flavours and Textures
Don’t be afraid to get creative with your chicken tenders! Experiment with different flavours and breading techniques to find your perfect combination.
- Spice it Up: Add a touch of cayenne pepper, paprika, or chili powder to your breadcrumb mixture for a spicy kick.
- Go Italian: Add some Italian seasoning and grated Parmesan cheese to your breadcrumbs.
- Get Crunchy: Add some crushed nuts, like almonds or pecans, to your breadcrumb mixture for extra crunch.
- Go Sweet: Coat your chicken tenders in a mixture of brown sugar and cinnamon for a sweet and savory treat.
(Part 9) The Importance of Temperature: chicken safety
Chicken Safety: Cooking to the Right Temperature
Chicken tenders can be a delicious treat, but they can also be a food safety risk if not cooked properly. Make sure your chicken tenders are cooked to an internal temperature of 165 degrees Fahrenheit (74 degrees Celsius). You can use a meat thermometer to check the temperature.
Avoiding Overcooking: Maintaining Juiciness
Overcooked chicken can become dry and tough, so it’s important to ensure your chicken tenders are cooked through without overdoing it. Aim for a golden-brown exterior and a juicy, tender interior.
Understanding Doneness: perfect chicken Tender Texture
When you bite into a perfectly cooked chicken tender, it will have a slight give to it, but not be mushy. The juices will run clear, and the inside will be white, not pink.
(Part 10) FAQs
1. Can I use frozen chicken?
Yes, you can use frozen chicken for your chicken tenders. Just make sure to thaw it completely before you bread it. You can thaw it in the refrigerator overnight or in a bowl of cold water for about 30 minutes.
2. How long do I need to let the chicken rest after breading?
You don’t need to let the chicken rest after breading. In fact, it's best to fry or bake it right away. This will help to prevent the breading from getting soggy.
3. Can I use other types of breading?
Absolutely! You can use panko breadcrumbs for a lighter, crispier crust. You can also use crushed crackers or even crushed tortilla chips for a unique flavour and texture.
4. What if my chicken tenders aren't crispy?
If your chicken tenders aren’t crispy enough, you may need to cook them for a bit longer. Make sure the oil is hot enough, and don’t overcrowd the pan. You can also try using a different breading recipe.
5. How do I make sure my chicken tenders are juicy?
To ensure your chicken tenders are juicy, you can try brining them before breading. Brining involves soaking the chicken in a salt solution, which helps to retain moisture. You can also make sure the chicken is not overcooked. Cook it to an internal temperature of 165 degrees Fahrenheit (74 degrees Celsius), and remove it from the heat as soon as it reaches that temperature.
(Part 11) Beyond the Guide
I hope this guide has equipped you with the knowledge and confidence to create the best chicken tenders you’ve ever tasted. Remember, the key is to use quality ingredients, follow the steps carefully, and experiment with different flavours and breading techniques. Don't be afraid to try new things and find what works best for you. After all, the best way to learn is to get in the kitchen and get cooking!
Enjoy!
Everyone is watching

Prime Rib Roast Cooking Time Chart: Per Pound Guide
Cooking TipsPrime rib roast. Just the name conjures images of lavish dinners, crackling fires, and hearty laughter. It’s ...

How Long to Bake Potatoes in the Oven (Perfect Every Time)
Cooking TipsBaked potatoes are a staple in my kitchen. They're incredibly versatile, delicious, and surprisingly easy to m...

Perfect Rice Every Time: The Ultimate Guide to Cooking Rice
Cooking TipsAs a self-proclaimed foodie, I've always been a bit obsessed with rice. It's the foundation of countless cuisi...

The Ultimate Guide to Cooking Asparagus: Tips, Techniques, and Recipes
Cooking TipsAsparagus. The mere mention of this spring delicacy conjures up images of vibrant green spears, crisp and burs...

Ultimate Guide to Cooking the Perfect Thanksgiving Turkey
Cooking TipsThanksgiving. Just the word conjures up images of overflowing tables laden with delicious food, the scent of r...