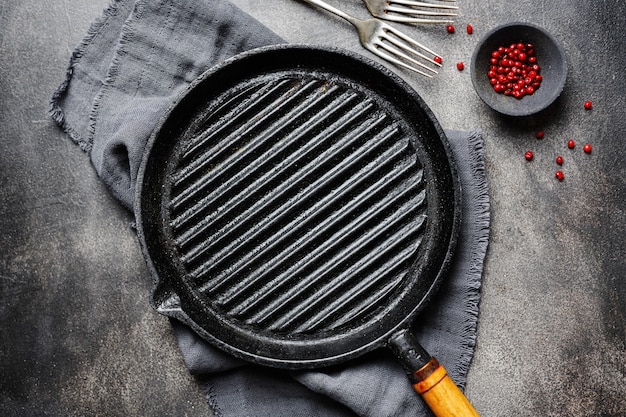
Let's talk about cast iron cookware – those heavy, sturdy pans that your granny probably used and that have been passed down through generations. They're more than just a bit of kitchen nostalgia; they're actually incredible tools that can transform your cooking. It’s all about that beautiful, even heat distribution, the way they sear a steak to absolute perfection, and the delicious, seasoned patina that builds up over time. Yes, they require a little more TLC than your average non-stick pan, but trust me, it's worth it.
Over the years, I've learned a thing or two about cast iron, and I'm here to share all my wisdom (and a few of my favourite recipes) with you. Get ready to delve into the world of seasoned surfaces, rust-busting techniques, and the joy of cooking with a piece of history in your kitchen.
(Part 1) The Cast Iron Basics: Why It's So Special
Why Use Cast Iron?
Let's start with the basics. Why are cast iron pans so great? Well, they're essentially a piece of metal, pure and simple. No fancy coatings or non-stick surfaces. That means they're incredibly durable. I'm talking about generations of use, even if they're handed down from your great-grandparents. They're also ridiculously good at heat retention. They heat up evenly and stay hot, which is a game-changer for searing steaks, baking bread, and making that perfect crispy crust on your pizza.
Now, let's talk about seasoning. It's the process of creating a protective layer of polymerized oil on the surface of the pan. This layer prevents rusting, makes the pan incredibly non-stick (think: perfectly fried eggs!), and gives it that gorgeous, dark, almost black finish. The beauty of seasoning is that it gets better over time. The more you use your pan, the more layers build up, and the better it performs. It's like building a delicious shield on the surface.
The Downside: Cast Iron Does Require Some Work
Okay, so there's a bit of a catch. Cast iron isn't entirely carefree. You can't just pop it in the dishwasher and expect it to be ready for the next meal. It needs some love. Hand washing is a must, and you need to pay attention to rust prevention. But, honestly, it's not as big a deal as it sounds. Once you get the hang of it, caring for your cast iron is as simple as making a cuppa.
(Part 2) Seasoning Your Cast Iron: A Love-Hate Relationship
Seasoning your cast iron is an art form, a little bit of alchemy in the kitchen. It’s the process of building up layers of polymerized oil on the surface, making it non-stick and rust-resistant. It's not just about the result; it's about the process. It's almost meditative, the gentle heat, the smell of oil, the anticipation of the final, smooth, dark finish.
Getting Started with Seasoning: Your First Time
Before we get into the actual seasoning process, let's talk about prepping your pan. You'll need to give it a good scrub with warm, soapy water. You can use a non-abrasive sponge or a gentle scrub brush. After that, pat it dry with a kitchen towel. Once it’s dry, you're ready for the magic!
Here’s a simple, time-tested method:
- Preheat your oven to 350°F (175°C).
- Use a paper towel to apply a thin layer of high-heat cooking oil to the entire surface of the pan, both inside and out. Don't overdo it. You want just a light coat. I prefer flaxseed oil or canola oil, but any high-heat oil will do.
- Place the pan upside down on a rack in the oven, making sure the rack is high enough to allow air to circulate freely.
- Bake for an hour, then turn off the oven and leave the pan inside until it cools completely. This slow cooling process allows the oil to polymerize, creating that non-stick finish.
- Hand wash only: Please, no dishwashers! The high heat and detergents will strip away your seasoning.
- Dry it immediately: After washing, dry your pan thoroughly with a kitchen towel. Any lingering water can lead to rust.
- Oil it after each use: Even if you're not using it for the next meal, give it a quick rub with a little oil. This helps maintain the seasoning and prevent rust.
- Don't use soap all the time: For light cleaning, a simple rinse with hot water is often enough. Soap can be harsh on the seasoning.
- Pre-heat the pan: A hot pan is essential. Heat it over medium-high heat for a few minutes before adding your food.
- Don't overcrowd: Make sure you have enough space in the pan for your food to sear properly.
- Let it sit: Once you add your food, let it sit undisturbed for a few minutes to form a nice crust. Don’t move it around too much, or it will stick.
- Use high-heat oil: Choose an oil with a high smoke point, such as avocado oil, canola oil, or peanut oil.
- Ingredients: 1 pound boneless, skinless chicken thighs, 1 tablespoon olive oil, 1 onion, chopped, 2 cloves garlic, minced, 1 cup chopped carrots, 1 cup chopped broccoli florets, 1/2 cup chicken broth, 1/4 cup chopped fresh parsley, salt and pepper to taste
- Instructions:
- Heat the olive oil in your cast iron skillet over medium heat.
- Add the chicken thighs and cook for about 5 minutes per side, or until browned.
- Add the onion and garlic to the skillet and cook for about 5 minutes, or until softened.
- Stir in the carrots and broccoli, and cook for another 5 minutes, or until the vegetables are tender-crisp.
- Add the chicken broth, parsley, salt, and pepper to the skillet.
- Bring the mixture to a simmer, then cover and cook for another 5 minutes, or until the chicken is cooked through.
- Serve immediately, garnished with extra parsley if desired.
- Ingredients: 1 cup (2 sticks) unsalted butter, softened, 3/4 cup granulated sugar, 3/4 cup packed light brown sugar, 2 large eggs, 1 teaspoon vanilla extract, 2 1/4 cups all-purpose flour, 1 teaspoon baking soda, 1/2 teaspoon salt, 1 cup semisweet chocolate chips
- Instructions:
- Preheat oven to 375°F (190°C). Grease a 10-inch cast iron skillet with butter.
- In a large bowl, cream together the butter and sugars until light and fluffy. Beat in the eggs one at a time, then stir in the vanilla.
- In a separate bowl, whisk together the flour, baking soda, and salt. Gradually add the dry ingredients to the wet ingredients, mixing until just combined. Fold in the chocolate chips.
- Spread the cookie dough evenly in the prepared skillet. Bake for 20-25 minutes, or until golden brown. Let the cookies cool in the skillet for 10 minutes before transferring to a wire rack to cool completely.
- Ingredients: 1 cup all-purpose flour, 1 cup yellow cornmeal, 1 tablespoon sugar, 1 teaspoon baking powder, 1/2 teaspoon salt, 1 cup buttermilk, 1/4 cup melted unsalted butter, 1 large egg
- Instructions:
- Preheat oven to 400°F (200°C). Heat a 10-inch cast iron skillet over medium heat. Pour in the melted butter and swirl to coat the bottom and sides of the skillet.
- In a large bowl, whisk together the flour, cornmeal, sugar, baking powder, and salt.
- In a separate bowl, whisk together the buttermilk, melted butter, and egg. Gradually add the wet ingredients to the dry ingredients, mixing until just combined.
- Pour the batter into the hot skillet and bake for 20-25 minutes, or until golden brown and a toothpick inserted in the center comes out clean.
- Let the cornbread cool in the skillet for 10 minutes before serving.
- Avoid using harsh detergents or steel wool. These can strip away your seasoning.
- Never soak your cast iron for extended periods, as this can lead to rust.
- Rinse the pan thoroughly with hot water and dry it completely with a kitchen towel.
- You can store it in a cool, dry place.
- If you're concerned about rust, lightly oil the surface of the pan before storing. This will help protect the seasoning.
- You can also wrap the pan in a clean tea towel or store it in a cast iron rack designed for this purpose.
- Wash your pan with warm, soapy water and scrub off any loose seasoning.
- Dry the pan thoroughly.
- Apply a thin layer of oil to the entire surface of the pan.
- Bake the pan upside down in a preheated oven at 350°F (175°C) for an hour.
- Let the pan cool completely in the oven before removing it.
- Cast Iron Cookware Forums: Online forums are a great place to ask questions, share your experiences, and learn from other cast iron enthusiasts.
- Cast Iron Cookbooks: There are countless cookbooks dedicated to cast iron cooking, with recipes for everything from simple weeknight meals to gourmet dishes.
- Cast Iron Instagram Accounts: Social media is a great way to get inspired by other cast iron cooks and discover new recipes.
Repeat this process 3-4 times for an even more robust seasoning. The more layers you build, the better!
Maintaining Your Seasoning: Keeping It in Top Shape
Now, you’ve got a beautifully seasoned cast iron pan. How do you keep it that way? Well, the key is consistency. Just like any good relationship, it takes a little effort to keep it going strong. Here are my top tips:
(Part 3) Troubleshooting: When Things Go Wrong
Now, cast iron is pretty forgiving, but sometimes things happen. Maybe you forgot to dry it properly, or maybe you used a metal spatula a little too enthusiastically. No worries, it's all fixable!
Rust Removal: Getting Rid of the Red Menace
Let’s be honest, we've all been there. You go to use your trusty cast iron and... rust! It's not the end of the world, I promise. For light rust, a quick scrub with a fine-steel wool pad (or a dedicated cast iron cleaning tool) should do the trick. Just be sure to scrub in the direction of the iron’s grain.
For more stubborn rust, you can try soaking the pan in a mixture of vinegar and water (about half and half) for a few hours. After soaking, scrub the rust with a steel wool pad, and then wash and season the pan as usual.
Stuck Food: The Ultimate Cast Iron Challenge
You've got a burnt-on crust that won't budge. Don't worry, it happens to the best of us! If it’s a light crust, you can often remove it with a gentle scrub using a plastic or wooden scraper. For more stubborn food, you can try the good old-fashioned salt scrub. Simply sprinkle a layer of coarse salt over the pan, add a few drops of water, and use a crumpled-up piece of aluminum foil to scrub away the burnt food.
If these methods don’t work, you can always resort to a boil-and-scrub. Add water to the pan, bring it to a boil, and then let it simmer for a few minutes. This helps to loosen any stuck-on food. After that, scrub with your preferred method, wash, and season as usual.
(Part 4) Cast Iron Cooking: From Steaks to Soups
Alright, the seasoning is perfect, the rust is gone, and you're ready to cook! Cast iron is unbelievably versatile. It's great for everything from searing steaks and roasting vegetables to making hearty soups and baking delicious bread.
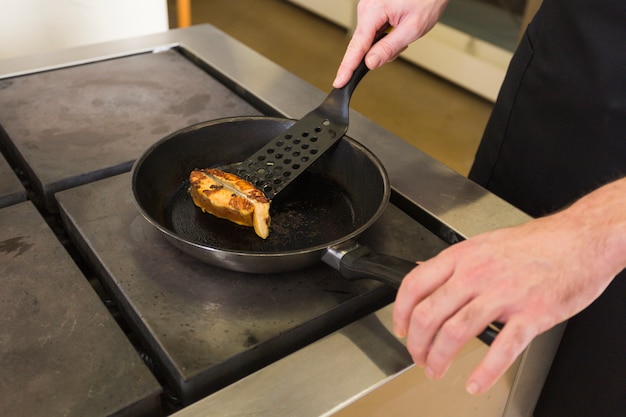
Searing and Browning: Unlocking Flavor
Cast iron is a true champion when it comes to searing. That incredible heat retention makes for a beautiful, crispy crust on meats and fish. It’s all about the Maillard reaction, the magic that happens when you heat up proteins and sugars.
Here are a few tips for perfect searing:
Cooking Vegetables: Roasted Perfection
Cast iron is a wonderful choice for roasting vegetables. The oven-safe design means you can go straight from stovetop to oven, and the even heat distribution ensures everything cooks evenly.
To get started, preheat your oven to 400°F (200°C). Toss your vegetables with a little oil, salt, and pepper, and then spread them out in a single layer in the hot pan. Roast for 20-30 minutes, or until tender and slightly caramelized.
Soup Making: slow cooking Goodness
Cast iron is also ideal for slow-cooking soups. It's heavy enough to hold heat well, so you can simmer your soup gently for hours on end.
To make a delicious soup in your cast iron, sauté your vegetables in the pan over medium heat. Then, add your liquid (stock, broth, water), your protein (if using), and any spices or herbs. Bring the soup to a simmer, then cover and cook for 2-3 hours, stirring occasionally.
Bread Baking: A Cast Iron Surprise
Yep, you can even bake bread in your cast iron! The heavy pan creates a beautiful, crusty loaf with a soft and chewy interior.
To bake bread in your cast iron, preheat the pan in your oven to 450°F (230°C). Grease the pan with oil, and then place your shaped dough in the hot pan. Bake for 30-40 minutes, or until golden brown and cooked through. You can even use the cast iron for sourdough!
(Part 5) Recipes: From Everyday Meals to Gourmet Treats
I've got a whole arsenal of cast iron recipes, from simple weeknight dinners to show-stopping dishes. Let me share a few of my favourites that are perfect for showcasing the magic of cast iron.
cast iron skillet Chicken and Vegetables
This is my go-to weeknight meal. It's super simple and incredibly delicious. It’s an easy one to adapt with what’s in your fridge.
Cast Iron Skillet Chocolate Chip Cookies
Who doesn't love a warm chocolate chip cookie right out of the oven? This recipe uses your cast iron skillet to create a deliciously chewy, crispy-edged cookie.
Cast Iron Skillet Cornbread
This is a classic comfort food that's perfect for any occasion. The cast iron skillet gives the cornbread a crispy crust and a moist, tender interior.
(Part 6) Care and Maintenance: Keeping Your Cast Iron Happy
Remember, cast iron is a bit like a well-loved pet. It needs a little attention, but the rewards are definitely worth it.
Washing: Simple and Effective
Washing your cast iron is a breeze. Just use warm, soapy water and a non-abrasive sponge or scrub brush.
Storing: Keeping Your Cast Iron Safe
When you're not using your cast iron, it's best to store it in a way that prevents rust.
Restoring Seasoning: Bringing It Back to Life
If your cast iron seasoning is starting to look a bit rough, don't worry, it's easy to restore. Just follow the seasoning process again:
(Part 7) Cast Iron in the Oven: Beyond the Stovetop
You know your cast iron can go from stovetop to oven, but did you know it can handle a lot more?
dutch oven: From Soups to Bread
A cast iron Dutch oven is a real multi-tasker. It's like a superhero in the kitchen, perfect for braising meats, making soups and stews, baking bread, and even roasting vegetables. It can do it all!
Skillet: A Versatile Baking Tool
Don't forget about your trusty cast iron skillet! It's not just for frying and searing. You can also use it to bake delicious cobblers, cakes, and even pizza. The heavy pan helps to create a crispy crust and a perfectly golden brown top.
(Part 8) FAQ: Common Cast Iron Questions
Now, let's tackle some of the most common questions people have about cast iron.
What kind of oil is best for seasoning?
I recommend using a high-heat cooking oil with a neutral flavor, such as flaxseed oil, canola oil, or grapeseed oil. You can also use avocado oil or peanut oil. Avoid using olive oil or other oils with a strong flavor, as they can impart a taste to your food.
Can I use my cast iron on a glass-top stove?
Yes, you can use cast iron on a glass-top stove, but be careful not to drag the pan across the surface. The rough bottom of the pan can scratch the glass. Always lift the pan to move it around.
Can I put my cast iron in the dishwasher?
Absolutely not! The high heat and harsh detergents in the dishwasher will strip away your seasoning, making the pan more prone to rust.
Is it okay to use metal utensils on my cast iron?
It's best to use wooden or silicone utensils on your cast iron. Metal utensils can scratch the seasoning, making the pan less non-stick.
How do I get rid of a burnt-on crust in my cast iron?
As mentioned earlier, you can try a salt scrub or a boil-and-scrub method. For stubborn crusts, try soaking the pan in a mixture of vinegar and water for a few hours, then scrub with a steel wool pad.
(Part 9) Beyond the Basics: Exploring Cast Iron's Versatility
Now that you've got the basics down, let's dive into some of the more unique ways to use cast iron.
Cast Iron Camp Cooking: Bringing the Outdoors In
Cast iron is a true camping classic. Its durability and heat retention make it perfect for cooking over a campfire. You can use a cast iron skillet to fry up bacon, cook pancakes, or even bake a Dutch oven pizza.
Cast Iron in the Smoker: Adding a Smoky Twist
For the ultimate smoky flavor, try cooking your food in a smoker using a cast iron Dutch oven. You can create slow-cooked barbecue masterpieces, tender pulled pork, or even smoked vegetables.
Cast Iron for Grilling: A Different Kind of Heat
You might think cast iron is just for indoor cooking, but you can also use it on your grill! It's great for searing steaks, grilling vegetables, or even making a cast iron grilled pizza. The even heat distribution and the ability to retain heat make it an ideal grilling companion.
(Part 10) Cast Iron: More Than Just a Pan
Cast iron isn't just about cookware; it's a whole culture, a community of passionate cooks who appreciate the timeless quality of these tools. From vintage cast iron collectors to modern culinary enthusiasts, the cast iron community is vibrant and supportive, always eager to share tips, tricks, and recipes.
Here are some resources to get you started on your cast iron journey:
Final Thoughts: The Cast Iron Journey
Using cast iron cookware is a journey. It's about learning, experimenting, and appreciating the unique character of these durable, versatile tools. It's a bit like building a relationship; the more you care for it, the better it gets. With a little time and attention, your cast iron will become a cherished part of your kitchen, passed down through generations to come.
Everyone is watching

Perfect Rice Every Time: The Ultimate Guide to Cooking Rice
Cooking TipsAs a self-proclaimed foodie, I've always been a bit obsessed with rice. It's the foundation of countless cuisi...

Ultimate Guide to Cooking the Perfect Thanksgiving Turkey
Cooking TipsThanksgiving. Just the word conjures up images of overflowing tables laden with delicious food, the scent of r...

The Ultimate Guide to Cooking Asparagus: Tips, Techniques, and Recipes
Cooking TipsAsparagus. The mere mention of this spring delicacy conjures up images of vibrant green spears, crisp and burs...

Can You Cook Spaghetti with Gasoline? (The Shocking Truth)
Cooking TipsWe've all seen those crazy internet trends. You know, the ones that make you wonder, "Did someone actually try...

Chorizo and Eggs Recipe: The Ultimate Guide
Cooking TipsRight, let’s talk about chorizo and eggs. You know, that classic Spanish dish that's always a winner. It's th...