butternut squash. It's one of those things that pops up everywhere these days, isn't it? From trendy cafes serving up roasted squash salads to those fancy recipe blogs with all the perfect photos, it seems like everyone's gone butternut squash crazy. And I get it. The flavour is just fantastic! It's got this sweet, nutty thing going on, and it's so versatile. You can roast it, mash it, soup it, you name it.
But here's the thing, roasting butternut squash is something that's always felt a bit intimidating to me. Have you ever tried to peel and cut one of these bad boys? It's like a mission impossible. And then there's the whole roasting business. I'm a bit of a klutz in the kitchen, so I've definitely had my fair share of burnt offerings.
But recently, I decided I had to conquer this butternut squash beast. I was craving a warm, comforting meal that wasn't too complicated, and roasted squash seemed like the perfect answer. So, I put on my chef's hat, gathered my courage, and embarked on a quest to finally roast the perfect butternut squash. And guess what? I actually nailed it!
And that's what I'm going to share with you today: my foolproof, easy-peasy recipe for roasted butternut squash that's sure to impress, even the most discerning palate. I'll walk you through each step, from prepping the squash to getting it perfectly golden brown and bursting with flavour. No more burnt offerings, just pure butternut squash perfection!
(Part 1) Getting Started: Gather Your Supplies
The first step in any culinary adventure is gathering your tools. Don't worry, we're not talking about anything too fancy here. Just a few basic essentials will do the trick.
Your Essential Kitchen Arsenal:
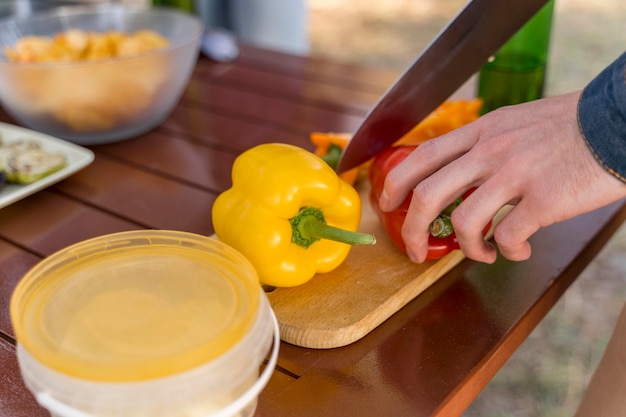
- A good, sharp knife: This is crucial for getting through that tough butternut squash skin. A sharp knife will make the peeling process much smoother and safer.
- A cutting board: You don't want to be chopping on your precious countertops, now do you? A cutting board provides a stable surface for working with the squash and protects your counters from scratches.
- A baking sheet: This is your trusty sidekick for roasting all sorts of delicious things. Choose a baking sheet that's large enough to accommodate the pieces of squash without overcrowding them.
- Parchment paper: This is a lifesaver for easy cleanup. Just line your baking sheet with it, and you're good to go. It also prevents the squash from sticking to the baking sheet, making it easier to remove later.
- A tablespoon and a teaspoon: You'll need these for measuring out the olive oil and seasonings. Don't worry about being overly precise with your measurements; a little eyeballing is perfectly fine for this recipe.
- A small bowl: This is for mixing your seasonings. This is especially helpful if you're using a variety of herbs and spices.
The Star of the Show:
Now, the most important ingredient: the butternut squash itself. Choose a medium-sized one, about 1-2 pounds. Look for one that's firm and has a smooth skin with no blemishes. You want the best possible squash for the best possible flavour, right?
Tip: If you're unsure about how to choose a good butternut squash, ask a produce manager at your local grocery store. They can offer helpful tips for selecting the freshest and most flavorful squash.
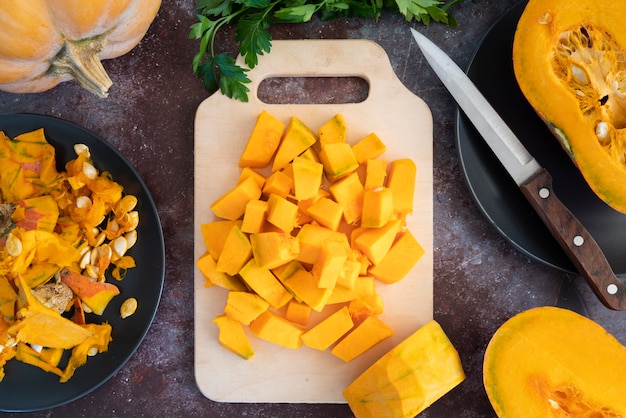
(Part 2) The Prep Work: A Step-by-Step Guide
Okay, so you've got your supplies ready to go. Now, let's tackle the daunting task of prepping the butternut squash. I promise, it's not as scary as it sounds. I've got a foolproof method that will make it a breeze.
1. The Great Peel-Off:
First, you need to get rid of that tough outer shell. Grab your trusty knife and start peeling. I find it easiest to cut off the top and bottom ends of the squash first. This creates a stable base for peeling. Then, start peeling from the bottom, working your way up. You'll notice that the skin comes off in strips. It's a bit like peeling an orange, but with a bit more effort.
Tip: Use a firm grip on the squash when peeling to prevent it from slipping and causing an accidental cut.
2. The Slice and Dice:
Now, it's time for some serious cutting. Cut the peeled squash in half lengthwise. You can then cut each half into smaller pieces, about 1-2 inches thick. Remember, the size of your pieces will determine the cooking time. Smaller pieces cook faster, so if you're short on time, go for those.
Tip: Cut the squash into even-sized pieces to ensure that they cook evenly.
3. The De-Seeding Ceremony:
Now, here comes the fun part! Take your spoon or a small knife and scoop out all the seeds and stringy bits from the centre of the squash. It's a bit messy, but hey, that's part of the fun, right? You can save the seeds to roast or toss them in your compost bin if you're feeling green.
Tip: If you plan on roasting the seeds, spread them out on a baking sheet and toss with a little olive oil and salt. Roast them in the oven at 350°F for about 15-20 minutes, or until they are golden brown and crispy.
4. The Seasoning Game:
Now, it's time to bring out the flavour. Place the chopped squash pieces on your baking sheet lined with parchment paper. Drizzle with olive oil, just enough to coat them nicely. Then, sprinkle with your favourite seasonings. I like to keep it simple with salt, pepper, and a little bit of garlic powder. But feel free to experiment with other herbs and spices like rosemary, thyme, or even a pinch of cinnamon for a touch of sweetness.
Tip: If you prefer a sweeter flavour, consider adding a drizzle of maple syrup or honey to the squash before roasting.
(Part 3) The Roasting Ritual: It's Showtime!
You've prepped your squash, you've seasoned it, now it's time for the grand finale: the roasting. This is where the magic happens!
1. Preheat Your Oven:
Set your oven to 400°F (200°C). It's important to let your oven get nice and toasty before you put your squash in. This ensures even cooking and a delicious golden-brown finish.
Tip: If you don't have a thermometer, you can check if the oven is preheated by holding your hand a few inches from the oven rack. If it feels hot, the oven is preheated.
2. The Great Roast:
Once your oven is preheated, carefully transfer your baking sheet with the seasoned squash to the middle rack. Now, close the oven door and let the magic begin! Roast your squash for about 30-40 minutes, or until it's tender and golden brown. You'll know it's ready when you can easily pierce it with a fork.
Tip: Keep an eye on the squash while it's roasting. If it starts to brown too quickly, you can reduce the oven temperature slightly.
3. The Cooling Down:
Once your squash is roasted to perfection, remove it from the oven and let it cool for a few minutes on the baking sheet. This will allow it to cool down slightly and prevent any accidental burns. Once it's cool enough to handle, you can transfer it to a serving dish.
Tip: While the squash is cooling, you can start prepping your other dishes or make a salad to accompany your roasted squash.
(Part 4) The Ultimate Taste Test: Time to Feast!
Now, this is the part we've all been waiting for: the taste test! Take a bite of your perfectly roasted butternut squash and savour the flavour. It should be tender, slightly sweet, and with a delicious caramelized flavour. If you're happy with the taste, you're good to go!
Tip: If the squash is still a little firm, you can roast it for a few more minutes. But be careful not to overcook it, as it will become dry and mushy.
(Part 5) Serving Suggestions: Making Your Squash Shine
Now, you've got your roasted butternut squash, but what to do with it? Well, the possibilities are endless! Here are a few ideas to get your creative juices flowing:
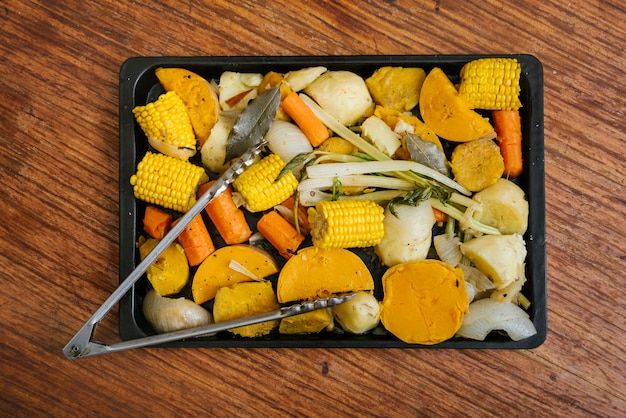
1. The Simple side dish:
Roasted butternut squash is a classic side dish. It pairs perfectly with roasted chicken, pork, or fish. Just serve it up alongside your main course and enjoy the delicious combination.
Tip: For a more flavorful side dish, try adding a tablespoon of chopped fresh herbs like thyme or sage to the squash before roasting.
2. The Hearty Salad:
Add some crunch and flavour to your salad by adding roasted butternut squash. Mix it with some greens, toasted nuts, and a light vinaigrette. It's a delicious and satisfying meal.
Tip: Use a variety of greens in your salad, such as arugula, spinach, or kale, to add different flavors and textures.
3. The Creamy Soup:
Roasted butternut squash is the star ingredient in many delicious soups. Simply blend it with some broth, cream, and spices. You can also add other vegetables like carrots, onions, or apples for extra flavour and texture.
Tip: For a richer soup, add a tablespoon of butter or cream to the blender along with the squash and broth. You can also add a dash of nutmeg or ginger for a more complex flavor profile.
4. The Sweet Treat:
Yes, you read that right! Roasted butternut squash can even be used in desserts. Try adding it to your favourite pie recipe, or use it to make a unique and flavourful bread.
Tip: If you're using roasted butternut squash in a dessert, be sure to adjust the amount of sugar in the recipe, as the squash itself is naturally sweet.
(Part 6) Tips and Tricks for Roasted Squash Perfection
I've learned a few tricks over the years that can help you get the best results with your roasted butternut squash. So, here are some extra tips to help you level up your squash game:
1. The Honey Trick:
For an extra touch of sweetness and a beautiful caramelized finish, drizzle a little honey on your squash before roasting. It's a simple trick, but it makes a big difference.
Tip: Use a high-quality honey for the best flavor. You can also experiment with different types of honey, such as wildflower or buckwheat honey, to add different flavor profiles to your roasted squash.
2. The Salt and Pepper Routine:
Don't be shy with the salt and pepper! It enhances the natural sweetness of the squash and adds depth of flavour. I usually season mine generously.
Tip: Use freshly ground black pepper for the best flavor. If you don't have freshly ground pepper, you can use pre-ground pepper but be sure to use a generous amount.
3. The Herbs and Spices:
Experiment with different herbs and spices to create unique flavour combinations. Thyme, rosemary, sage, and cinnamon all pair well with butternut squash. You can also add a pinch of cayenne pepper for a little kick.
Tip: Use dried herbs for roasting, as they will hold up better to the heat of the oven. Fresh herbs tend to lose their flavor when roasted.
4. The Temperature Control:
Make sure your oven is preheated to the right temperature. If it's too low, your squash will take longer to roast and might not get that nice golden-brown colour.
Tip: Check the oven temperature with an oven thermometer to ensure accuracy. Oven temperatures can vary from oven to oven.
5. The Flip and Toss:
Flip your squash halfway through roasting to ensure even cooking. If you're using large pieces, you may need to flip them a few times.
Tip: Use a spatula or tongs to flip the squash, as this will prevent it from breaking apart.
(Part 7) FAQs: Your Burning Questions Answered
I know you might have a few burning questions about roasted butternut squash. So, here are some FAQs to help you out:
1. How long does it take to roast butternut squash?
The roasting time will depend on the size of your squash pieces. Smaller pieces will cook faster, usually around 30-40 minutes at 400°F (200°C). Larger pieces might take 45-60 minutes.
Tip: You can use a fork to check if the squash is cooked through. If it easily pierces the squash and the flesh is tender, it's ready.
2. Can I roast butternut squash with the skin on?
You can technically roast butternut squash with the skin on, but it's not recommended. The skin will be tough and difficult to eat. Peeling it is the best way to ensure a tender and delicious squash.
Tip: If you are roasting the squash with the skin on, you can use a sharp knife to score the skin in several places to help it cook more evenly.
3. What if my squash is too soft?
If your squash is too soft, it might have been stored for too long. Avoid using it for roasting, as it won't hold its shape and will likely become mushy.
Tip: Store butternut squash in a cool, dry place for up to 2 weeks. For longer storage, you can freeze the squash.
4. Can I freeze roasted butternut squash?
Yes, you can definitely freeze roasted butternut squash. Let it cool completely, then store it in an airtight container in the freezer for up to 3 months. You can use it later in soups, stews, or as a topping for salads.
Tip: When freezing roasted butternut squash, spread it out in a single layer on a baking sheet to help prevent it from clumping together in the freezer.
5. What are some other ways to cook butternut squash?
There are many ways to cook butternut squash besides roasting. You can also try steaming, boiling, or pureeing it. It's also delicious in curries, casseroles, and frittatas.
Tip: For a quick and easy meal, try steaming butternut squash and topping it with a drizzle of olive oil and a sprinkle of salt and pepper.
(Part 8) The Final Word: A Toast to Roasted Butternut Squash!
Well, there you have it! My ultimate guide to roasting butternut squash to perfection. It's a truly versatile and delicious ingredient, and I hope you'll try it out and find new ways to enjoy it. Whether you're looking for a simple side dish, a flavourful salad addition, or the base for a delicious soup, roasted butternut squash is always a good choice.
So, get out there, gather your supplies, and give it a go. You might be surprised by how easy it is to master this simple and delicious dish. And who knows, you might even discover your new favourite way to enjoy butternut squash!
Everyone is watching

Prime Rib Roast Cooking Time Chart: Per Pound Guide
Cooking TipsPrime rib roast. Just the name conjures images of lavish dinners, crackling fires, and hearty laughter. It’s ...

How Long to Bake Potatoes in the Oven (Perfect Every Time)
Cooking TipsBaked potatoes are a staple in my kitchen. They're incredibly versatile, delicious, and surprisingly easy to m...

Perfect Rice Every Time: The Ultimate Guide to Cooking Rice
Cooking TipsAs a self-proclaimed foodie, I've always been a bit obsessed with rice. It's the foundation of countless cuisi...

The Ultimate Guide to Cooking Asparagus: Tips, Techniques, and Recipes
Cooking TipsAsparagus. The mere mention of this spring delicacy conjures up images of vibrant green spears, crisp and burs...

Ultimate Guide to Cooking the Perfect Thanksgiving Turkey
Cooking TipsThanksgiving. Just the word conjures up images of overflowing tables laden with delicious food, the scent of r...