Let’s talk brisket. For years, it’s been a staple in my kitchen, and I’ve learned a thing or two about conquering this slow-cooked masterpiece. Now, I’m not a brisket whisperer or anything, but I’ve had my fair share of successes (and, let's be honest, a few mishaps). But that's part of the fun, right? It's all about experimenting, learning, and eventually achieving that tender, juicy, melt-in-your-mouth brisket we all dream of.
This isn't a quick, 30-minute recipe. This is a commitment to slow cooking, letting flavors mingle and the meat transform into pure bliss. It’s about patience and, dare I say it, a touch of love. So grab a cuppa, get comfortable, and let's dive in.
(Part 1) The Art of Choosing Your Brisket
You need the right brisket to start. It’s the foundation of your whole dish. I usually go for a point brisket, the more flavorful end. But flat briskets work wonders too. If you’re buying from a butcher, ask for a “packer cut,” the entire brisket without the flat cut off. It’s usually a better deal, and you can trim it later if you want. Just remember, you want a brisket with ample marbling—that fat is your friend, keeping it juicy and tender.
1.1 The Look and Feel
Here's what I look for in a good brisket: A good amount of fat, a layer about half an inch thick. It should be evenly spread, with no dry or lean spots. The meat itself should be a vibrant red. Don't hesitate to ask the butcher for a slice. It's a great way to check for any discoloration or anything that might raise a red flag.
1.2 The Weight
Now, the brisket's weight depends on how many people you’re feeding. For a family dinner, a 4-5 pound brisket is perfect. Remember, it shrinks quite a bit when cooked, so go a little bigger if you need to. Better to have leftovers than to run out.
(Part 2) Getting Ready to Cook: Prepping Your Brisket
You've got your brisket. Now, it’s time to prepare it for the oven, and trust me, this is crucial. Proper preparation is key, especially with a cut of meat like brisket.
2.1 Trimming the Fat
First, you need to trim some of that fat. You don't want to get rid of it all—fat is flavor! But you want to remove any thick, uneven parts that could cause uneven cooking or simply aren't your thing. Aim for a fat layer of about ?? inch. Use a sharp knife and trim the excess fat. You can even save it for another time. It's perfect for flavoring soups and stews.
2.2 The Rub: A Symphony of Spices
Now, it’s time for the rub! You can buy a pre-made brisket rub, but I love experimenting with different spices. A classic brisket rub usually includes:
- Salt
- Pepper
- Paprika
- Garlic powder
- Onion powder
- Chili powder
But feel free to add other spices like cumin, thyme, or even a touch of brown sugar. I like to rub it in generously, coating the entire brisket. Get it into all the nooks and crannies!
2.3 The Seasoning: A Matter of Time
Some folks prefer to season the brisket a few hours before cooking, allowing the spices to meld with the meat. But, you don't need to do this if you don't want to. Just be sure to rub it well and refrigerate it until you're ready to cook.
(Part 3) Setting Up Your Oven: The Stage for Brisket Bliss
Let's get this oven ready for our brisket adventure. Here’s a little tip: If you have an oven thermometer, use it! It’s the best way to make sure your oven is at the right temperature. Speaking of temperature…
3.1 The Temperature: Low and Slow
For brisket, you want to cook low and slow. I’m talking 275°F (135°C). This is the secret to that melt-in-your-mouth tenderness. Don’t be tempted to crank up the heat. You'll end up with a dry, disappointing brisket.
3.2 The Rack: A Support System
You’ll need a rack to hold the brisket. It needs to be large enough to accommodate your brisket without touching the bottom of the pan. This allows heat to circulate evenly, ensuring consistent cooking. I love using a roasting rack. If you don’t have one, use a wire cooling rack or even a bed of chopped onions or carrots in the bottom of the pan.
3.3 The Pan: A Home for Your Brisket
And, of course, you need a pan! It needs to be large enough to hold the brisket and any juices that drip out. I usually go for a large roasting pan. But you can also use a dutch oven or a casserole dish.
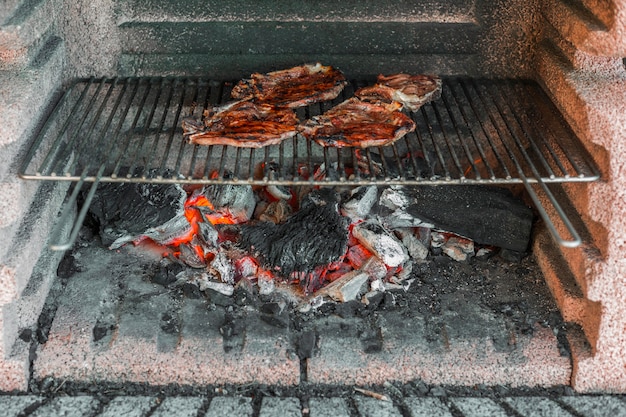
(Part 4) The Brisket in the Oven: The Culinary Dance
Okay, your brisket is prepped, the oven is ready, and your kitchen is filled with the heavenly scent of spices. It's time to put that brisket in the oven! And this is where the real waiting game begins.
4.1 The First Hour: Getting Up to Temperature
The first hour is crucial. It’s about getting the brisket up to temperature. Let it sit in the oven undisturbed. Don’t open the oven door too often, or you’ll lose heat. Remember, slow and steady wins the race.
4.2 The Next Few Hours: Transformation Begins
Now, the fun part begins! The next few hours are where the magic happens. The brisket starts to render its fat, creating that incredible flavor and keeping it moist and tender. This is where you need patience. It's a marathon, not a sprint. Just keep that oven temperature steady.
4.3 Checking the Temperature: The Moment of Truth
The moment you've been waiting for…checking the temperature. You’ll need a meat thermometer for this. Stick it into the thickest part of the brisket, avoiding the bone. You’re aiming for an internal temperature of 190°F (88°C) to 205°F (96°C). At this point, the brisket should be incredibly tender, literally falling apart when poked with a fork.
(Part 5) The Rest: A Moment to Relax
You’ve got a cooked brisket, but we’re not done yet. It’s time for a little rest. Let the brisket cool down in the oven with the door slightly ajar. This helps it retain its juices and become even more tender. Think of it as a well-deserved reward. Let it rest for at least two hours, but you can even leave it in there longer if you want. The longer it rests, the more tender it becomes.
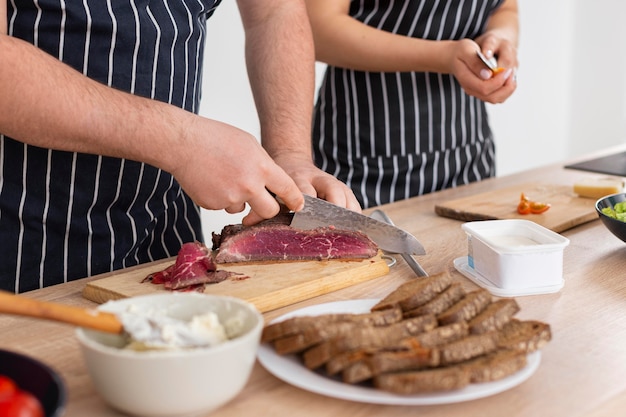
(Part 6) Slicing and Serving: Unveiling the Masterpiece
Your brisket has had its beauty sleep. Now, it’s time to slice and serve! This is the part where all your patience really pays off. You're about to experience that amazing, mouth-watering brisket. This is what we've been waiting for, right?
6.1 Slicing: A Dance with the Grain
Use a sharp knife and be very careful. You need to slice the brisket against the grain. This means slicing perpendicular to the muscle fibers. This will make the brisket super tender. If you slice with the grain, it will be tough.
6.2 Serving: A Culinary Symphony
You're ready to serve! You can serve it on its own, but I like to serve it with sides. It's amazing with mashed potatoes, baked beans, or even mac and cheese. And, of course, you need some sauce. It’s all about personal preference, really. I like a tangy, smoky barbecue sauce, but you can use any sauce you like. Just don’t forget to put some of the juices from the pan on top.
(Part 7) oven brisket Cooking Time Chart: A Rough Guide
Okay, let's look at approximate cooking times, but remember, these are just estimates. Every oven and every brisket is different. So, it's best to check the internal temperature to ensure it's cooked through.
| Brisket Weight (lbs) | Approximate Cooking Time |
|---|---|
| 4-5 lbs | 6-8 hours |
| 6-7 lbs | 8-10 hours |
| 8-10 lbs | 10-12 hours |
If you're aiming for that melt-in-your-mouth tenderness, cook it a little longer. You can't overcook brisket, so don't be afraid to let it sit in the oven for a few extra hours.
(Part 8) FAQs: Answers to Your Brisket Questions
8.1 What if my brisket is too dry?
Okay, so you've been cooking all day and your brisket comes out a bit dry. It happens to the best of us! Here are a few tips:
- Add some liquid to the pan while it's cooking. You can use broth, beer, or even water.
- Wrap the brisket in foil for the last hour or two of cooking. This traps the moisture and helps it stay juicy.
- Make a delicious gravy with the pan juices. Add some flour and whisk it together. It'll add moisture to your brisket.
8.2 How do I know if my brisket is done?
Your best friend in the kitchen: a meat thermometer! It's the most accurate way to know when your brisket is cooked through. You're aiming for an internal temperature of 190°F (88°C) to 205°F (96°C). And, of course, you'll know it's done when it's incredibly tender and falls apart when poked with a fork.
8.3 What can I do with leftover brisket?
Oh, the joys of leftovers! Don't worry. There's a whole world of possibilities with leftover brisket. It's perfect for:
- Sandwiches
- Tacos
- Soup
- Mac and cheese
You can even freeze leftover brisket and use it later. It's a real food win-win!
8.4 Can I cook brisket in a slow cooker?
You certainly can! It's a great way to cook it low and slow without having to watch it all day. But, I'd say the oven is better. It gives you that nice crispy bark on the outside. But, if you're short on time, the slow cooker is a great alternative.
8.5 Is it better to cook brisket fat side up or fat side down?
I always cook my brisket fat side up! It allows the fat to render down and baste the brisket. But, if you want a crispy bark on the bottom, you can cook it fat side down for the first few hours.
So there you have it, your ultimate guide to cooking brisket in the oven. It's a bit of a journey, but it's a journey worth taking. It's a labor of love, and you'll be rewarded with a truly delicious, melt-in-your-mouth brisket. And, don't forget to enjoy the process, experiment, and have fun! It's all about trying new things and finding what works best for you. And, if you have any tips or tricks you’d like to share, I’d love to hear them. Happy brisket-cooking!
Everyone is watching

Prime Rib Roast Cooking Time Chart: Per Pound Guide
Cooking TipsPrime rib roast. Just the name conjures images of lavish dinners, crackling fires, and hearty laughter. It’s ...

How Long to Bake Potatoes in the Oven (Perfect Every Time)
Cooking TipsBaked potatoes are a staple in my kitchen. They're incredibly versatile, delicious, and surprisingly easy to m...

Perfect Rice Every Time: The Ultimate Guide to Cooking Rice
Cooking TipsAs a self-proclaimed foodie, I've always been a bit obsessed with rice. It's the foundation of countless cuisi...

The Ultimate Guide to Cooking Asparagus: Tips, Techniques, and Recipes
Cooking TipsAsparagus. The mere mention of this spring delicacy conjures up images of vibrant green spears, crisp and burs...

Ultimate Guide to Cooking the Perfect Thanksgiving Turkey
Cooking TipsThanksgiving. Just the word conjures up images of overflowing tables laden with delicious food, the scent of r...