Right, let's talk brisket. It's a meaty masterpiece that holds a special place in my heart, and it's always the star of the show at any gathering – be it a family feast, a barbecue with mates, or even just a cosy dinner for one. But we all know brisket isn't exactly a "whip-up-in-a-hurry" kind of dish. It demands time, it demands patience, and it demands a bit of know-how to nail it. But fear not, my fellow meat lovers, I'm here to guide you through the world of brisket cooking, and I'm going to equip you with all the knowledge you need to create a melt-in-your-mouth masterpiece.
This isn't your average run-of-the-mill guide. We're diving deep, exploring different cooking methods, tackling those tricky bits, and sharing some of my favourite tips and tricks – all based on years of experience and a good dose of trial and error. So grab your favourite beverage, get comfy, and let's get this brisket adventure underway!
(Part 1) The Anatomy of a Brisket

Understanding the Cut
First things first, let's get to know the brisket itself. It's a tough cut of meat, coming from the chest of the cow. Now, the brisket is divided into two distinct parts – the point and the flat. The point is the thicker, fattier end, while the flat is leaner and more rectangular. Both have their own unique textures and flavour profiles. The point tends to be more flavorful and tender, but it can also be a bit tougher. The flat is leaner and will cook more evenly, but it might need a bit more moisture.
Personally, I'm a big fan of the point. It's got that rich, fatty flavour that's hard to resist, and the way it melts in your mouth after a long cook is truly divine! But if you're looking for a leaner option, the flat is a great choice too. Ultimately, it all comes down to your own preferences.
The Secret to Brisket's Tenderness
You might be wondering why brisket takes so long to cook. It's all about the connective tissue. Brisket is packed with collagen, a tough protein that needs time and heat to break down into gelatin. This gelatin is what gives the brisket its melt-in-your-mouth texture. The longer you cook it, the more tender and flavorful it becomes.
Think of it like a slow dance between heat and time, where the heat melts away the toughness, and the time allows the flavours to develop. It's a bit of a slow burn, but the results are worth the wait, I promise!
(Part 2) The Cooking Methods: Smoking vs. Roasting

Now that we've got a handle on the brisket itself, let's talk about the different ways to cook it. There are two main methods that are widely popular: smoking and slow roasting. Each has its own unique characteristics and produces different results.
Smoking: The Traditional Approach
This is the traditional way to cook a brisket. It's slow and low, using wood smoke to infuse the meat with flavour and create that beautiful smoky aroma. Smoking takes a fair bit of time, usually around 10-16 hours, but it's worth it for the incredible flavour it develops.
Tips for smoking brisket:
- Choose a smoker that can maintain a consistent low temperature, around 225°F (107°C). You want to cook the brisket slowly and evenly.
- Use a good quality wood like hickory, mesquite, or oak. Avoid woods like cedar or pine, as they can impart a bitter flavour.
- Keep the smoker clean and free of ash build-up. This will help to prevent the brisket from absorbing any unwanted flavors.
- Don't be afraid to experiment with different wood combinations to find your favourite flavours. A blend of woods can add complexity and depth to the flavour profile.
- Don't overcook the brisket. It's better to err on the side of undercooked than overcooked. You can always add a few more minutes if needed.
Slow Roasting: A Faster Alternative
This is a slightly faster method than smoking, and it's a good option if you don't have a smoker. It involves cooking the brisket in a low oven, usually around 300°F (150°C), for several hours. You can use a dutch oven or a roasting pan.
Tips for Slow Roasting Brisket:
- Use a low oven temperature to allow the brisket to cook slowly and evenly. This helps to break down the collagen and create a tender brisket.
- Baste the brisket regularly with pan drippings or a sauce of your choice. This will help to keep the brisket moist and flavorful.
- Wrap the brisket in foil during the last few hours of cooking to help it retain moisture. This will prevent the brisket from drying out.
- Let the brisket rest for at least 30 minutes before carving. This allows the juices to redistribute throughout the meat, resulting in a more tender and flavorful brisket.
(Part 3) The brisket rub: A Flavorful Foundation

No brisket is complete without a good rub. A rub is a blend of spices and herbs that you apply to the brisket before cooking. It adds flavour and creates a delicious crust. A good rub will enhance the natural flavours of the brisket and add a layer of complexity to the taste. It's like a magic spell that transforms the humble brisket into something truly extraordinary.
Basic Brisket Rub: A Starting Point
Here's a basic brisket rub that you can use as a starting point:
- 1 tablespoon paprika
- 1 tablespoon garlic powder
- 1 tablespoon onion powder
- 1 tablespoon brown sugar
- 1 teaspoon salt
- 1 teaspoon black pepper
- 1 teaspoon chili powder (optional)
You can mix it up to your own taste by adding different spices, herbs, or even some mustard powder or smoked paprika.
Tips for Applying the Rub:
- Rub the brisket generously with the spice mixture, making sure to cover all sides.
- You can also use a dry brine, which involves rubbing the brisket with salt and letting it sit in the refrigerator for a few hours or overnight. This helps to draw out moisture and improve the flavour.
- Don't be afraid to experiment with different rub combinations.
(Part 4) The Brisket Cook Time: A Guide to Timing
Now, for the burning question – how long does it take to cook a brisket? Well, it's not a simple answer, mate. It depends on a lot of factors, including the size of the brisket, the cooking method, and the desired level of tenderness.
Here’s a rough guide, but remember that these are just estimates. It’s always better to check the brisket’s internal temperature to make sure it’s cooked properly.
Brisket Cook Times:
| Brisket Weight | Smoking Time (hours) | roasting time (hours) |
|---|---|---|
| 4-6 lbs | 10-12 | 6-8 |
| 6-8 lbs | 12-14 | 8-10 |
| 8-10 lbs | 14-16 | 10-12 |
Temperature and Doneness: The Perfect Internal Temperature
Brisket is done when it reaches an internal temperature of 195°F (90°C). At this temperature, the collagen has broken down completely and the brisket is incredibly tender.
You can use a meat thermometer to check the temperature. Insert the thermometer into the thickest part of the brisket, making sure it doesn't touch any bone.
(Part 5) Wrapping the Brisket: The Secret to Moisture and Tenderness
One of the most important steps in cooking a brisket is wrapping it. Wrapping the brisket in foil or butcher paper during the last part of the cooking process helps to retain moisture and promotes even cooking.
Benefits of Wrapping:
- Moisture retention: Wrapping traps in the steam, preventing the brisket from drying out. This helps to create a juicy and flavorful brisket.
- Even cooking: It helps to distribute heat more evenly, creating a more tender and juicy brisket. This is especially important for larger briskets that can be difficult to cook evenly.
- Faster cooking: The steam created by wrapping speeds up the cooking process, allowing you to achieve a tender brisket in less time.
When to Wrap: The Perfect Timing
The ideal time to wrap the brisket is when it reaches an internal temperature of 160°F (71°C). At this point, the brisket has developed a good bark, and the wrapping process will help to soften the meat and allow the collagen to break down further.
Wrapping Methods: Foil vs. Butcher Paper
You can use either foil or butcher paper for wrapping. Both have their advantages.
- Foil: It creates a tight seal, trapping in the steam and moisture. This is a good option for those who want to ensure maximum moisture retention.
- Butcher paper: It allows some moisture to escape, creating a more tender and flavorful brisket. This is a good option for those who prefer a slightly drier brisket.
Experiment with both methods to see what you prefer.
(Part 6) The Resting Process: Letting the Brisket Relax
Once your brisket is cooked, it’s crucial to let it rest. Resting allows the juices to redistribute throughout the meat, resulting in a more tender and flavorful brisket. It's like giving the brisket a chance to catch its breath after all that hard work!
How Long to Rest: The Importance of Patience
The ideal resting time for a brisket is at least 30 minutes, but you can rest it for up to 2 hours.
How to Rest: The Right Environment
Wrap the brisket tightly in foil or butcher paper and place it in a cooler or insulated container. This will help to keep the brisket warm and allow the juices to redistribute evenly.
(Part 7) Carving the Brisket: An Artful Skill
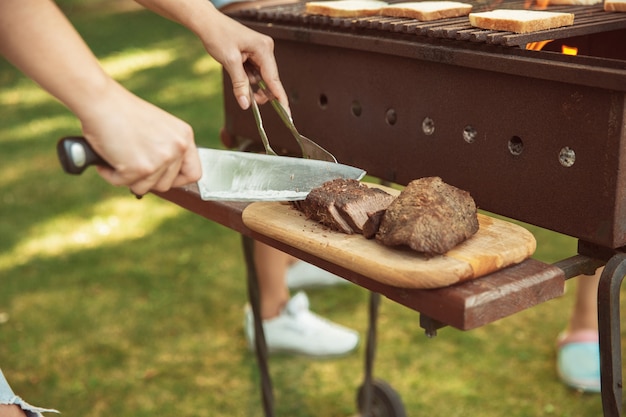
Once the brisket has rested, it's time to carve it! Carving a brisket is a bit of an art form, but it's not as intimidating as it seems.
Tips for Carving:
- Use a sharp carving knife. A dull knife will make the job harder and can tear the meat.
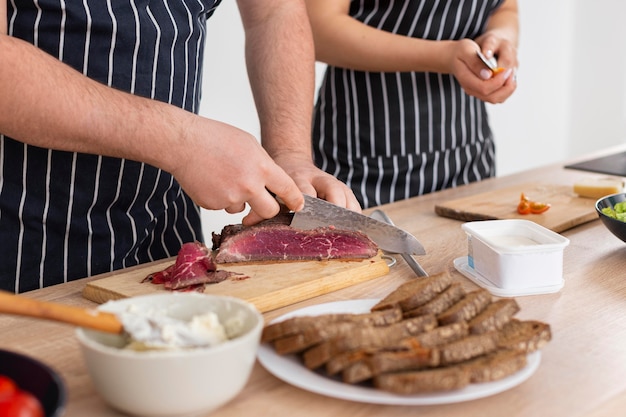
- Carve against the grain. This will help to break down the muscle fibers and make the meat more tender.
- Slice the brisket thinly. This makes it easier to eat and allows the flavours to come through more effectively.
- Remove any excess fat before carving.
(Part 8) Common Brisket Problems and Solutions: Troubleshooting Tips
Let’s face it, sometimes things don’t go according to plan. Even the most seasoned pitmaster can run into a few bumps in the road when it comes to brisket. Here are a few common problems and how to solve them:
Problem: Dry Brisket: A Common Challenge
This is one of the most common problems with brisket. It can happen if the brisket is overcooked or if it’s not wrapped properly.
Solution:
- Wrap the brisket tightly in foil or butcher paper to retain moisture. This will help to create a moist and flavorful brisket.
- Add a little bit of liquid to the bottom of the smoker or roasting pan. This will help to create steam and keep the brisket moist.
- Use a meat thermometer to check the internal temperature of the brisket. It should reach 195°F (90°C) for optimal tenderness.
Problem: Tough Brisket: The Challenge of Collagen
If the brisket is tough, it means that the collagen hasn't broken down completely.
Solution:
- Cook the brisket for a longer period of time. This will give the collagen more time to break down.
- Wrap the brisket tightly in foil or butcher paper to trap in the steam and moisture. This will help to soften the meat.
- Use a slow and low cooking method. This will help to ensure that the brisket cooks evenly and doesn't get overcooked.
Problem: Uneven Cooking: Ensuring Consistent Results
Sometimes the brisket might cook unevenly, with some parts being more tender than others. This can happen if the brisket isn’t trimmed properly or if the cooking temperature isn't consistent.
Solution:
- Trim the brisket evenly, removing any excess fat. This will help to ensure that the brisket cooks evenly.
- Use a smoker or oven that can maintain a consistent low temperature.
(Part 9) brisket sauces: Finishing Touches of Flavor
Once you’ve got your perfectly cooked brisket, it’s time to add some finishing touches. What’s a brisket without a good sauce? A sauce can add another layer of flavour, from sweet and smoky to tangy and spicy.
Here are a few of my favourite brisket sauce recipes:
Classic bbq sauce: A Timeless Favorite
- 1 cup ketchup
- 1/2 cup apple cider vinegar
- 1/4 cup brown sugar
- 1/4 cup molasses
- 2 tablespoons Worcestershire sauce
- 1 tablespoon mustard
- 1 teaspoon onion powder
- 1 teaspoon garlic powder
- 1/2 teaspoon black pepper
Combine all ingredients in a saucepan and bring to a boil. Reduce heat and simmer for 15 minutes, or until thickened.
Spicy BBQ Sauce: A Kick of Heat
- 1 cup ketchup
- 1/2 cup apple cider vinegar
- 1/4 cup brown sugar
- 1/4 cup molasses
- 2 tablespoons Worcestershire sauce
- 1 tablespoon mustard
- 1 teaspoon onion powder
- 1 teaspoon garlic powder
- 1/2 teaspoon black pepper
- 1/4 cup hot sauce
Combine all ingredients in a saucepan and bring to a boil. Reduce heat and simmer for 15 minutes, or until thickened.
Tangy BBQ Sauce: A Bright and Zesty Finish
- 1 cup ketchup
- 1/2 cup apple cider vinegar
- 1/4 cup brown sugar
- 1/4 cup honey
- 2 tablespoons Worcestershire sauce
- 1 tablespoon mustard
- 1 teaspoon onion powder
- 1 teaspoon garlic powder
- 1/2 teaspoon black pepper
- 1/4 cup lemon juice
Combine all ingredients in a saucepan and bring to a boil. Reduce heat and simmer for 15 minutes, or until thickened.
(Part 10) Serving the Brisket: Presentation and Sides
Once your brisket is carved and sauced, it’s time to serve it up! You can serve it with a variety of sides, like baked beans, coleslaw, potato salad, and cornbread.
Here are a few ideas for serving your brisket:
- Sandwiches: Slice the brisket thinly and pile it high on a toasted bun with your favourite toppings, like coleslaw, pickles, and onion rings.
- Tacos: Shred the brisket and serve it in warm tortillas with your favourite taco toppings, like cheese, salsa, guacamole, and sour cream.
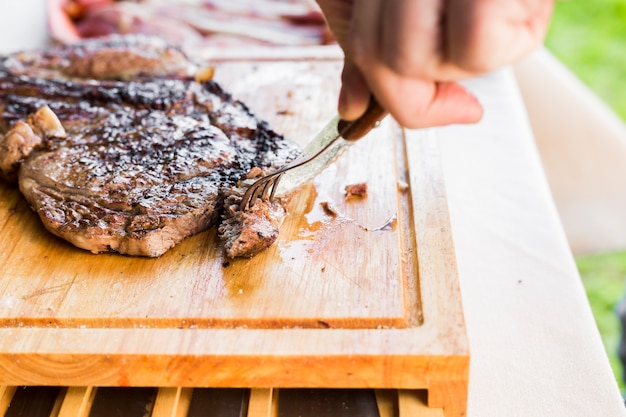
- Plates: Slice the brisket and arrange it on a plate with your favourite sides. You can also use a cutting board for a more rustic presentation.
(Part 11) FAQs: Common Questions Answered
Here are some frequently asked questions about brisket cooking:
Q: What’s the best way to store leftover brisket?
A: Leftover brisket can be stored in the refrigerator for up to 4 days. Wrap it tightly in plastic wrap or foil and place it in a container. You can also freeze leftover brisket for up to 3 months. Thaw it in the refrigerator overnight before reheating.
Q: How can I reheat leftover brisket?
A: You can reheat leftover brisket in the oven, on the stovetop, or in the microwave. If you’re reheating it in the oven, preheat the oven to 300°F (150°C) and heat the brisket for 30 minutes, or until warmed through. If you’re reheating it on the stovetop, place the brisket in a saucepan with a little bit of liquid, like broth or sauce, and heat over low heat until warmed through. If you’re reheating it in the microwave, heat it on low power in 30-second intervals until warmed through.
Q: Can I cook a brisket in an instant pot?
A: Yes, you can cook a brisket in an Instant Pot. It’s a much faster method than smoking or slow roasting. However, you won’t get the same smoky flavour as you would with traditional methods.
Q: What happens if I overcook my brisket?
A: If you overcook your brisket, it will become dry and tough. It's important to use a meat thermometer to check the internal temperature of the brisket and make sure it doesn't get overcooked.
Q: How can I tell if my brisket is done?
A: A brisket is done when it reaches an internal temperature of 195°F (90°C). It should also be tender and easily pulled apart with a fork. You can also check for doneness by pressing on the brisket. If it springs back, it’s still undercooked. If it’s soft and gives easily, it’s done.
Now, there you have it, folks! Your complete guide to brisket cooking. Remember, it’s a journey, not a sprint. Take your time, be patient, and most importantly, have fun!
Everyone is watching

Prime Rib Roast Cooking Time Chart: Per Pound Guide
Cooking TipsPrime rib roast. Just the name conjures images of lavish dinners, crackling fires, and hearty laughter. It’s ...

How Long to Bake Potatoes in the Oven (Perfect Every Time)
Cooking TipsBaked potatoes are a staple in my kitchen. They're incredibly versatile, delicious, and surprisingly easy to m...

Perfect Rice Every Time: The Ultimate Guide to Cooking Rice
Cooking TipsAs a self-proclaimed foodie, I've always been a bit obsessed with rice. It's the foundation of countless cuisi...

The Ultimate Guide to Cooking Asparagus: Tips, Techniques, and Recipes
Cooking TipsAsparagus. The mere mention of this spring delicacy conjures up images of vibrant green spears, crisp and burs...

Ultimate Guide to Cooking the Perfect Thanksgiving Turkey
Cooking TipsThanksgiving. Just the word conjures up images of overflowing tables laden with delicious food, the scent of r...
