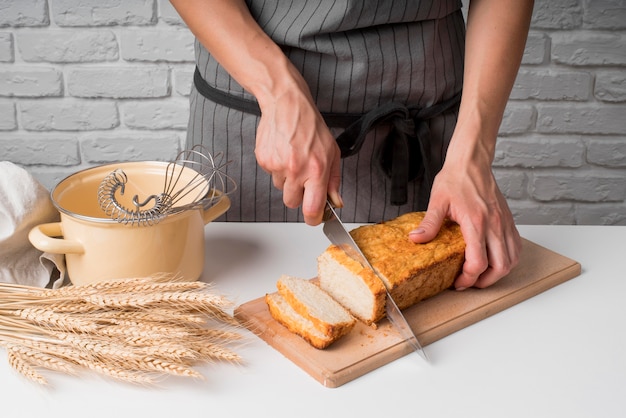
There's nothing quite like the aroma of freshly baked bread wafting through the kitchen, promising a warm, comforting treat. But achieving that perfect crust and fluffy crumb can sometimes feel like a bit of a mystery, especially when it comes to nailing the baking times. Over the years, I've learned that understanding the intricacies of bread baking times is key to unlocking consistently delicious loaves. It’s not just about following recipes blindly - it's about understanding the science behind the process and how each element contributes to the final result.
(Part 1) Unveiling the Secrets of Bread Dough

Think of bread dough as a symphony. Each ingredient plays a crucial role, harmonizing to create the masterpiece that is your loaf. To understand baking times, we first need to grasp the fundamental ingredients and their influence on the dough’s texture and behavior.
Flour: The Backbone of Your Bread
Flour is the foundation upon which your bread is built. But not all flours are created equal. The protein content in flour, which translates to gluten, significantly impacts the final texture and structure of your loaf.
- Strong Flour (High Protein): This flour is the hero of chewy, crusty breads like sourdough and baguettes. High protein means high gluten development, which creates a strong network that traps air bubbles during kneading, resulting in a light, airy texture. Think of it as the scaffolding that gives the loaf its structure.
- Plain Flour (Medium Protein): This versatile flour is the go-to for everyday breads like white bread and milk bread. It offers a more forgiving nature, creating a softer crumb than strong flour. It’s the reliable friend you can always count on for a classic loaf.
- self-raising flour: This flour is pre-equipped with baking powder, making it a perfect shortcut for quick breads and scones. However, it’s best left out of traditional yeast-based breads as the baking powder can interfere with the natural rise.
Yeast: The Tiny Powerhouse
Imagine yeast as the tiny chefs working tirelessly within your dough. They feed on sugar and produce carbon dioxide as a byproduct. This carbon dioxide is what gives bread its rise, creating those delightful air pockets that make the crumb so light and airy.
- Active Dry Yeast: This yeast needs a little TLC. You must rehydrate it in warm water before adding it to the dough. It’s like giving the yeast a little welcome drink before sending it off to work.
- Instant Yeast: This type is more convenient, as it can be added directly to the flour without needing to be rehydrated. Think of it as the ready-to-go, no-fuss chef.
- Fresh Yeast: This yeast comes in a block form, and you need to weigh it carefully. Often used in artisan bakeries, it’s a bit more involved but can offer a unique flavor profile. It’s the meticulous chef who takes their time and brings a special touch to the dish.
Hydration: The Fine Art of Balance
Hydration refers to the amount of water in your dough, expressed as a percentage of the flour weight. It's the secret ingredient that influences the dough's consistency and ultimately, the texture of your bread.
- High Hydration (70-80%): Imagine a dough that’s wet and almost sticky. This is high hydration, resulting in airy, open-crumb loaves with a delightful chewiness. It's the bold, dramatic ingredient that produces loaves with character, like sourdough and baguettes.
- Medium Hydration (60-65%): This is the happy medium, perfect for most breads. It creates a manageable dough that yields a well-structured loaf with a satisfying balance of chewiness and softness. It’s the reliable performer that always delivers.
- Low Hydration (50-55%): Low hydration results in a denser, more compact dough. This produces loaves with a close crumb and a crisp crust. Think of it as the subtle, understated ingredient that produces breads like focaccia and ciabatta.
(Part 2) The Art of Proofing: Letting the Dough Rise

Once you’ve mixed your dough, it’s not ready for the oven yet. It needs time to rise, or proof, a crucial step that allows the yeast to work its magic and develop flavor. Think of it as the dough taking a deep breath before heading into the oven.
Understanding the Proofing Stages
Proofing has two stages, each contributing to the final result.
- Bulk Fermentation: This is the initial rise of the dough, the first phase of the yeast’s magic show. It typically takes 1-3 hours, depending on the temperature and the amount of yeast used. During this stage, the gluten network strengthens and the dough develops complex flavors, like a fine wine aging in the barrel.
- Final Proof: This is the rise of the shaped dough before baking, the final act of the yeast's performance. It usually takes 30-60 minutes, giving the yeast a final chance to produce the carbon dioxide that will create those airy pockets we love so much. It’s the final flourish before the curtain rises on the baking stage.
Factors Influencing Proofing Time
Many factors can influence the rate at which your dough rises, impacting the final bake.
- Temperature: Yeast thrives in warm temperatures, like a cozy blanket on a chilly day. Around 75-80°F is the sweet spot. Colder temperatures slow down the yeast's activity, resulting in a longer proofing time. Think of it as a marathon runner versus a sprinter - the warmer it is, the faster they go!
- Yeast Activity: The amount of yeast used directly impacts the rate of fermentation. More yeast means a faster rise. Think of it as a team of bakers - more bakers, more work gets done!
- Flour Type: Strong flours, with their higher protein content, require longer proofing times as they develop more gluten. It’s like a more complex recipe, needing extra time to come together.
- Hydration: High-hydration doughs tend to proof faster than low-hydration doughs because they have more water for the yeast to work with. Think of it as a fast-flowing river versus a slow stream.
(Part 3) The Crucial Role of Baking Times

Baking time is a critical factor in achieving the perfect bread. It determines the internal temperature of the loaf, the development of the crust, and ultimately, the overall texture. It’s like the conductor of an orchestra, orchestrating the transformation of dough into deliciousness.
Internal Temperature: The Key to Doneness
The internal temperature of your bread is the most reliable indicator of whether it’s fully baked. Aim for an internal temperature of 200-210°F. This ensures the starch granules in the flour are fully gelatinized, resulting in a soft and chewy crumb. It’s like the bread reaching its peak temperature, achieving a harmonious balance of texture and flavor.
Factors Influencing Baking Times
Several factors affect the time your bread spends in the oven, influencing the final result.
- Loaf Size: Larger loaves require longer baking times than smaller ones because the heat needs to penetrate the entire loaf. Think of it as a larger canvas that takes longer to paint.
- Oven Temperature: A hotter oven will result in a faster baking time, but too high a temperature can lead to burning. It’s like a chef adjusting the heat under a pot to ensure even cooking.
- Dough Type: Different doughs, like sourdough or white bread, have different baking times due to their unique compositions. Think of it as different recipes calling for different cooking times.
- Shape: Loaf shapes, such as round, oval, or baguette, influence heat distribution and baking time. Think of it as different shapes needing different amounts of heat to cook evenly.
(Part 4) General Baking Times: A Starting Point
Here’s a general guide to baking times for common bread types. Think of it as a map guiding you through the baking process.
| Bread Type | Loaf Size | Baking Time |
|---|---|---|
| White Bread | 1 lb | 30-40 minutes |
| Sourdough | 1.5 lb | 45-60 minutes |
| Baguette | 1 ft | 20-25 minutes |
| Focaccia | 12 inches | 25-30 minutes |
| Ciabatta | 1 lb | 35-45 minutes |
Remember, these are just general guidelines. Always check the internal temperature of your bread to ensure it’s fully baked, and don't hesitate to adjust the baking time based on your oven and the specific recipe.
(Part 5) Mastering the Art of Checking Doneness
Knowing when your bread is perfectly baked is a skill that comes with practice. These methods will guide you to success, helping you avoid underbaked or overbaked disasters.
1. The Tap Test: A Simple Symphony of Sound
Gently tap the bottom of the loaf. If it sounds hollow, it’s likely baked through. It's a simple technique that can provide valuable insight into the bread's readiness. It's like listening for the final note in a symphony, confirming that the bread has reached its crescendo.
2. The Internal Temperature Test: The Scientific Approach
This is the most accurate way to check doneness. Insert a digital thermometer into the center of the loaf. It should register between 200-210°F. It’s the scientific method applied to baking, providing a precise measurement of the bread's internal temperature.
3. The Visual Test: Observing the Transformations
Look for a golden-brown crust that speaks of caramelization and a slightly springy texture when you gently press the top of the loaf. It’s like observing the artistry of baking, noticing the subtle cues that indicate the bread is ready.
(Part 6) Troubleshooting Baking Time Issues: When Things Don't Go as Planned
Even the most seasoned bakers encounter unexpected twists in their baking journey. Here are common baking time issues and how to address them.
1. Underbaked Bread: A Gentle Reminder to Finish Cooking
Symptoms: The bread is still soft and doughy in the center, and the crust may be pale, lacking the golden hue of a well-baked loaf.
Solution: Return the bread to the oven and bake for an additional 5-10 minutes. Check the internal temperature regularly to ensure it reaches 200-210°F. It's like giving the bread a little extra time to finish cooking, ensuring it reaches its full potential.
2. Overbaked Bread: A Lesson in Patience and Precision
Symptoms: The crust is dark brown and hard, perhaps even burnt, and the bread may be dry and crumbly, lacking the moistness of a well-baked loaf.
Solution: Sadly, there’s not much you can do to salvage an overbaked loaf. It’s a reminder to be patient and to keep a close eye on the baking process. For future bakes, try lowering the oven temperature slightly or reducing the baking time. It's like learning from a mistake and adjusting your approach for the next batch.
3. Soggy Bottom: The Challenge of Maintaining a Crisp Base
Symptoms: The bottom of the bread is soft and wet, lacking the crispness we desire. It’s like a symphony with a dampened bassline.
Solution: This often happens when the oven temperature is too low or the loaf is placed on a cold baking sheet. Preheat your oven thoroughly, use a baking stone, or try placing a baking sheet on the rack below the loaf to create a steamy environment. It's like creating the perfect stage for the bread to perform on, ensuring it bakes evenly and crisps up beautifully.
(Part 7) My Top Tips for Baking Success: Insights from Experience
Over the years, I've learned a few tricks that consistently help me achieve perfect baking times. Think of them as insider tips passed down from a seasoned baker to you, the aspiring bread enthusiast.
1. Embrace the Power of the Oven Thermometer: A Precise Instrument for Success
An oven thermometer is a must-have for every baker. It ensures that your oven is actually heating up to the desired temperature, eliminating guesswork and inconsistency. It's like having a reliable compass, guiding you towards accurate results. I always recommend checking your oven temperature before preheating, and adjust accordingly, ensuring consistency in your baking environment.
2. Invest in a Baking Stone: The Foundation for Even Heat Distribution
A baking stone helps to distribute heat evenly and prevent the bottom of the bread from burning, contributing to a beautifully baked loaf with a crisp base. It's like a solid platform for your bread, ensuring even heat distribution and a perfect bake. I love the way my bread turns out when I use a baking stone - it’s a significant improvement in texture and appearance.
3. Master the Art of the Steam Bake: Creating a Moist Environment for a Soft Crumb
Creating steam during the first part of baking helps to create a soft and chewy crumb. You can do this by placing a shallow pan filled with water on the bottom rack of the oven. The steam helps to trap moisture and prevent the crust from becoming too hard. It's like creating a gentle sauna for your bread, ensuring a soft, fluffy crumb. I love the soft, fluffy texture I get when I use the steam bake method - it’s a game-changer for my bread!
4. Don’t Open the Oven Door Too Early: Resist the Urge to Peek
Opening the oven door too early can release the heat and affect the rise of the bread, potentially disrupting the baking process. Be patient and resist the urge to peek until at least half the baking time has passed. Think of it as respecting the bread's process, allowing it to rise undisturbed.
5. Trust Your Senses: Engaging Your Sight, Smell, and Touch
Don’t rely solely on the timer. Use all your senses – sight, smell, and touch – to assess the doneness of your bread. Look for a golden-brown crust that signals caramelization, a slightly springy texture when you gently press the top of the loaf, and the intoxicating aroma of freshly baked bread. It's like engaging all your senses in the baking process, appreciating the artistry and craft involved.
(Part 8) FAQs: Answering Common Bread Baking Questions
Here are some frequently asked questions about bread baking times, providing insights to guide your baking journey.
1. What if my bread is rising too quickly?
If your bread is rising too quickly, it could be a sign that the yeast is too active, working overtime. Try lowering the temperature in your kitchen or using a less active yeast. It’s like adjusting the pace of a race, ensuring a smooth and controlled rise.
2. Can I freeze my bread dough before baking?
Yes, you can freeze bread dough. It’s a great way to save time and have fresh bread on hand whenever you need it. Just shape the dough and place it in a freezer-safe bag or container. Defrost the dough in the refrigerator overnight before baking. It's like pausing the baking process, allowing you to enjoy fresh bread at your convenience.
3. How do I prevent my bread from sticking to the baking sheet?
To prevent your bread from sticking, line the baking sheet with parchment paper or spray it lightly with cooking oil. It's like providing a non-stick surface, ensuring a smooth release and a perfectly shaped loaf.
4. How long can I leave my bread dough to proof?
The ideal proofing time for bread dough is 30-60 minutes. However, you can leave it to proof for longer if needed. Just be aware that the longer you proof, the more developed the flavor will be, but the loaf may also be more dense. It's like allowing the yeast to continue its magic, creating a more flavorful, but potentially denser, loaf.
5. What should I do if my bread is too dense?
If your bread is too dense, it could be a sign that the yeast wasn’t active enough, resulting in a less airy crumb. Try using a fresh batch of yeast or adjusting the proofing time. You can also try adding a little more sugar to the dough, as this will feed the yeast and encourage it to rise more. It’s like giving the yeast a little boost, encouraging it to work its magic and produce a lighter crumb.
Baking bread is an art form, a journey that requires patience, understanding, and a little bit of magic. Mastering baking times is a crucial step in unlocking consistently delicious loaves. By understanding the factors that influence baking time, practicing different techniques, and trusting your senses, you'll be on your way to enjoying perfect, homemade bread every time, a reward for your efforts and a testament to your baking skills.
Everyone is watching

Prime Rib Roast Cooking Time Chart: Per Pound Guide
Cooking TipsPrime rib roast. Just the name conjures images of lavish dinners, crackling fires, and hearty laughter. It’s ...

How Long to Bake Potatoes in the Oven (Perfect Every Time)
Cooking TipsBaked potatoes are a staple in my kitchen. They're incredibly versatile, delicious, and surprisingly easy to m...

Perfect Rice Every Time: The Ultimate Guide to Cooking Rice
Cooking TipsAs a self-proclaimed foodie, I've always been a bit obsessed with rice. It's the foundation of countless cuisi...

The Ultimate Guide to Cooking Asparagus: Tips, Techniques, and Recipes
Cooking TipsAsparagus. The mere mention of this spring delicacy conjures up images of vibrant green spears, crisp and burs...

Ultimate Guide to Cooking the Perfect Thanksgiving Turkey
Cooking TipsThanksgiving. Just the word conjures up images of overflowing tables laden with delicious food, the scent of r...
