You know those magnificent, crispy, onion-y masterpieces that arrive at the table looking like a giant, edible flower? Blooming onions, right? I used to think they were something only restaurants could pull off, picturing a messy kitchen and a whole lot of chopping. Turns out, I was wrong. It's surprisingly easy to make a blooming onion at home, and it's a guaranteed crowd-pleaser.
Over the years, I've tried various recipes, but this one is my go-to. It's simple, foolproof, and produces the most wonderfully crispy and flavourful onion you've ever tasted. So, if you're ready to impress your friends and treat yourself to a truly satisfying snack, let's get started.
Part 1: Choosing the Perfect Onion

This is where it all begins. You need a large onion, and I'm talking a real whopper here - about 10 inches in diameter. Now, you can get away with a slightly smaller one if you're feeling adventurous, but a good, large onion is definitely going to give you the best results.
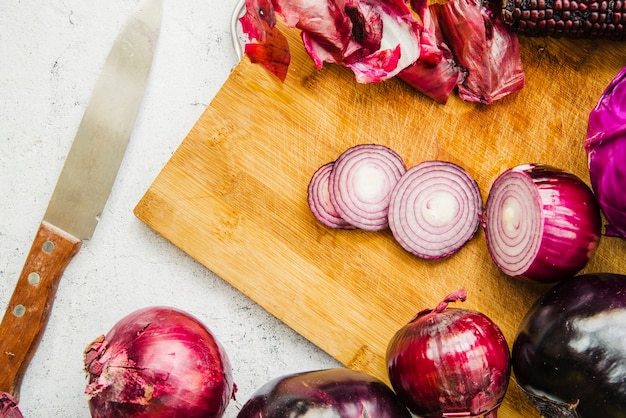
I usually opt for a red onion for its vibrant colour and sweet flavour, but a white onion will also work perfectly well. It's important to pick a firm, blemish-free onion with no soft spots. A good onion will have a solid weight in your hand, and the layers should be nicely separated, but not too loose.
The First Cut: Mastering the Spiral
The key to creating a beautiful bloom is making the first cut precisely. You're aiming for a 'spiral' cut, slicing downwards through the onion without cutting all the way through. There are different methods out there, but here's the one I've found works best:
- Start with a Clean Cut: Place the onion on a chopping board, cut off the root end, and then carefully slice off the top of the onion. You want a flat surface to work with for the next steps.
- Create a Guide: Next, cut a cross shape through the top of the onion, about 1 inch down. This will be your guide for the next stage, helping you keep your cuts consistent.
- Spiral Your Way In: Now, use your sharp knife to make a spiral cut, starting from the centre of the onion and moving outwards in a circular motion. The trick here is to make your cuts deep enough to reach almost to the bottom of the onion, but stop before you go all the way through. Think of it like making a series of thin, parallel slices around the onion.
- Keep It Consistent: Continue spiralling your way around the onion, making sure each cut is adjacent to the previous one. The more consistent your cuts, the better the onion will bloom. If you’re feeling fancy, you can make your spiral cut go all the way around the onion in one go. But, honestly, I find it's easier to do it in sections. It takes a little bit longer but you’ll have a more even bloom in the end.
Once you've cut your spiral, gently pull the layers apart. They should separate easily, revealing the beautiful shape of your onion bloom.
Part 2: The Batter: The Secret to Crispy Perfection

Right, now we need to get that onion coated in a glorious batter. This is where you can really get creative, but here’s a simple recipe that always delivers:
The Ingredients:
- 1 cup plain flour
- 1 tsp garlic powder
- 1 tsp onion powder
- 1 tsp paprika
- 1 tsp salt
- 1/2 tsp black pepper
- 1 egg, beaten
- 1/2 cup milk
- 1/2 cup breadcrumbs
The Method:
Mix it all together!
First, combine the flour, garlic powder, onion powder, paprika, salt and pepper in a large bowl. Whisk it all together to make sure the spices are evenly distributed. Then, in a separate bowl, mix together the egg and milk. Finally, combine the wet ingredients with the dry ingredients and whisk until you have a smooth, thick batter. It should be just thick enough to coat the onion without being too runny.
Now, there are a few things you can do to add extra flavour and texture to your batter:
- Add a Little Heat: For a kick, you can add a pinch of cayenne pepper or red pepper flakes to the batter.
- Go for a Cheesy Batter: For a richer flavour, stir in some grated Parmesan cheese or cheddar cheese.
- Experiment with Herbs: You can add a handful of fresh herbs like parsley, chives, or dill to the batter for a burst of flavour.
Part 3: Coating the Onion: The Art of the Dip

Alright, now comes the fun part. You're going to need a deep pan, and trust me, the bigger the better. Heat some oil in the pan over a medium heat. It should be hot enough to sizzle when you drop a bit of batter in. The best oil for this is vegetable oil, but you can also use canola or peanut oil.
Dip the onion into the batter, making sure it's fully coated. Then, carefully lower it into the hot oil. You can use a pair of tongs or a spider strainer to help lower the onion into the oil without splashing.
Now, be prepared for some splatter! This is where the deep pan comes in handy. You can even use a deep-fat fryer if you have one. The important thing is to make sure the onion has plenty of space to cook and that the oil doesn't overflow.
Fry the onion for about 5-7 minutes, turning it occasionally to ensure it’s cooked evenly. The batter should be golden brown and crispy. Once it's golden brown, carefully remove the onion from the pan and place it on a wire rack to drain off any excess oil.
Part 4: The Dip: A Symphony of Flavour
No blooming onion is complete without a delicious dip. This is where you can really let your imagination run wild. But, here are a few classics to get you started:
The Classic Ranch Dip:
Ranch dressing is the quintessential blooming onion dip. You can buy a pre-made bottle, or whip up your own. This is my go-to ranch recipe, and it’s a real crowd-pleaser:
- 1/2 cup mayonnaise
- 1/2 cup sour cream
- 1/4 cup buttermilk
- 2 tbsp fresh chopped parsley
- 2 tbsp fresh chopped chives
- 1 tsp dried dill
- 1 tsp garlic powder
- 1/2 tsp onion powder
- 1/2 tsp salt
- 1/4 tsp black pepper
Just mix all the ingredients together in a bowl and you're good to go!
The Spicy Blue Cheese Dip:
For something with a bit more punch, try a spicy blue cheese dip. This one's perfect for those who like a bit of heat:
- 4 oz blue cheese, crumbled
- 1/2 cup mayonnaise
- 1/2 cup sour cream
- 1 tbsp hot sauce
- 1 clove garlic, minced
- 1/2 tsp salt
- 1/4 tsp black pepper
Combine all the ingredients in a bowl and mix until smooth. If you want to make it extra spicy, you can add a pinch of cayenne pepper.
The Sweet and Tangy BBQ Dip:
For a taste of the south, go for a sweet and tangy BBQ dip. This one's a real crowd-pleaser:
- 1 cup bbq sauce
- 1/2 cup mayonnaise
- 2 tbsp brown sugar
- 1 tbsp apple cider vinegar
- 1 tsp Dijon mustard
- 1/2 tsp salt
- 1/4 tsp black pepper
Mix all the ingredients in a bowl and you're ready to go!
The Creamy Spinach and artichoke dip:
For a veggie-friendly option, try a creamy spinach and artichoke dip. This one is perfect for dipping your blooming onion into, or even serving it alongside other snacks.
- 1 (14 oz) can artichoke hearts, drained and chopped
- 1 (10 oz) package frozen chopped spinach, thawed and squeezed dry
- 1 cup grated cheddar cheese
- 1/2 cup mayonnaise
- 1/4 cup sour cream
- 2 cloves garlic, minced
- 1/2 tsp salt
- 1/4 tsp black pepper
Combine all the ingredients in a bowl and mix until well combined. You can bake the dip in a small casserole dish for about 15 minutes at 350°F for a warm and bubbly dip.
Part 5: Serving Up Your Blooming Onion Masterpiece
Now, let's talk presentation. This is your moment to shine, so make sure your blooming onion looks as good as it tastes. I like to use a large platter, and I always add a few sprigs of fresh parsley or chives for a touch of colour. The colour contrast adds a touch of elegance to the dish.
Place the onion in the centre of the platter, and then arrange your chosen dip(s) around it. Make sure you have plenty of napkins on hand because this dish is guaranteed to get messy! It's all part of the fun!
Before you serve your blooming onion, let it cool slightly. This allows the batter to crisp up a bit more and prevents it from being too hot to handle.
Part 6: Blooming Onion Secrets
Now, here are a few tips and tricks to help you take your blooming onion game to the next level.
Cutting the Onion Like a Pro:
The key to a beautiful bloom is making even, consistent cuts. I find that a sharp knife makes all the difference. And, don't be afraid to take your time. The more careful you are with your cuts, the better your onion will bloom.
Finding the Right Oil:
Now, I’ve always used vegetable oil for frying my blooming onions. It has a high smoke point and it gives a nice, even crisp. But, if you're looking for a healthier option, you can always use canola oil or peanut oil. Just make sure the oil is hot enough to sizzle when you drop in a bit of batter.
Getting the Batter Just Right:
The batter is what makes your blooming onion so crispy and delicious. A good batter should be thick enough to coat the onion but not so thick that it becomes heavy and greasy. If you find that your batter is too runny, add a little bit more flour. If it's too thick, add a little bit more milk.
The Secret to Perfectly Crispy Batter:
For an extra crispy batter, you can try double-breading the onion. This means dipping it in the batter, then coating it in breadcrumbs, and then dipping it in the batter again. This creates a thicker coating that will result in a beautifully crunchy exterior.
Part 7: FAQs
Right, let’s tackle some of the most common questions about making a blooming onion.
1. Can I Make a Blooming Onion in the Oven?
You can, but you won't get the same crispy results as you would with frying. If you’re determined to bake it, try coating the onion in a light batter and then baking it at 400°F for about 20-25 minutes. You might need to flip it halfway through to ensure it’s evenly cooked. You could also try using a baking spray to help the batter crisp up.
2. Can I Freeze a Blooming Onion?
It’s best not to. The batter will lose its crispness in the freezer. However, you can freeze the cut onion before you batter it. Just make sure it’s tightly wrapped. This way, you can have a blooming onion ready to go whenever you need one.
3. How Long Can I Keep a Blooming Onion in the Fridge?
Once you’ve battered your onion, it's best to fry it straight away. The batter will start to become soggy if it sits in the fridge for too long.
4. What Other Dips Can I Use with a Blooming Onion?
The world is your oyster when it comes to blooming onion dips. Here are a few more suggestions:
- Buffalo Wing Dip: A spicy and tangy dip for those who like their food with a kick.
- Guacamole: A refreshing and flavourful dip that’s perfect for a summer BBQ.
- Honey Mustard Dip: A sweet and tangy dip that pairs well with the onion's natural sweetness.
- Blue Cheese Dressing: A classic pairing for onion rings that also works well with a blooming onion.
5. Is There a Way to Cut an Onion into a Blooming Onion Without a Knife?
Unfortunately, there’s no easy way around the knife. To make a true blooming onion, you'll need to use a sharp knife to make the spiral cuts. But, if you’re not comfortable using a knife, you could try making a different kind of onion dish, like onion rings.
Part 8: Blooming Onion Tips and Tricks
I've been making blooming onions for years, and I've learned a few things along the way that might just come in handy for you.
- Use a Sharp Knife: A sharp knife is essential for making even, consistent cuts. You can use a chef's knife or a paring knife, whichever you feel most comfortable with. A dull knife will make the process more difficult and could result in uneven cuts.
- Be Patient: It takes time to make a blooming onion. Don’t rush the process. If you make even cuts, it will make a huge difference. The slower and more deliberate you are, the more beautiful the bloom will be.
- Don’t Overcrowd the Pan: Make sure you have enough room for the onion to cook evenly. If you overcrowd the pan, the onion will not cook properly and might become greasy.
- Make Sure the Oil Is Hot: The oil needs to be hot enough to sizzle when you drop in a bit of batter. This will help the onion to cook quickly and evenly, and it will prevent the batter from becoming greasy.
- Don’t Be Afraid to Experiment: There’s no right or wrong way to make a blooming onion. Feel free to experiment with different batter recipes, dips, and seasonings to find what you like best. The beauty of this dish is its flexibility, so let your creativity flow!
So there you have it, everything you need to know to make a blooming onion that’s guaranteed to impress your mates. Remember, it’s all about taking your time, making even cuts, and having fun with it. And, if your blooming onion isn’t quite perfect, don't worry. It's all part of the learning process, and even a slightly messy, slightly wonky blooming onion is still delicious!
Everyone is watching

Perfect Rice Every Time: The Ultimate Guide to Cooking Rice
Cooking TipsAs a self-proclaimed foodie, I've always been a bit obsessed with rice. It's the foundation of countless cuisi...

Prime Rib Roast Cooking Time Chart: Per Pound Guide
Cooking TipsPrime rib roast. Just the name conjures images of lavish dinners, crackling fires, and hearty laughter. It’s ...

The Ultimate Guide to Cooking Asparagus: Tips, Techniques, and Recipes
Cooking TipsAsparagus. The mere mention of this spring delicacy conjures up images of vibrant green spears, crisp and burs...

Ultimate Guide to Cooking the Perfect Thanksgiving Turkey
Cooking TipsThanksgiving. Just the word conjures up images of overflowing tables laden with delicious food, the scent of r...

How Long to Bake Potatoes in the Oven (Perfect Every Time)
Cooking TipsBaked potatoes are a staple in my kitchen. They're incredibly versatile, delicious, and surprisingly easy to m...
