Let's be honest, folks, there's nothing quite like a juicy, perfectly cooked steak. And when you've got a blackstone griddle at your disposal, the possibilities are endless. But getting that perfect sear, that melt-in-your-mouth tenderness, and that irresistible char – well, it can feel a bit daunting, especially if you're a Blackstone newbie.
Don't worry, though! I'm here to break down the secrets to Blackstone steak cooking, sharing my personal experiences, tips, and a whole lot of love for this fantastic griddle. We're going to talk about everything from choosing the right cut to mastering the art of the sear, and we'll even delve into some tasty finishing touches and side dish ideas. So grab a cold drink, fire up your Blackstone, and get ready to become a steak-griddling master!
(Part 1) The Blackstone Griddle: A Culinary Powerhouse
Okay, I'll admit it. When I first got my Blackstone, I felt a little overwhelmed. It's this massive flat surface that heats up incredibly fast, and I was worried about making a mess or, worse, burning my masterpiece before it even had a chance to sizzle. But then, something magical happened – I discovered the power of this griddle. It's like having a super-charged, giant frying pan, and it's perfect for everything from breakfast to burgers to, yes, the star of the show: steak.
The Heat Is On:
One of the things that truly makes the Blackstone shine is its incredible heat retention. Once you get it hot, it stays hot – that's crucial for getting that beautiful sear on your steak. The heat is distributed evenly across the surface, ensuring that every part of your steak cooks consistently. No more overcooked edges and undercooked centers – you're in control!
Flat Out Fantastic:
The flat surface is another game-changer. Unlike a grill, you're not dealing with uneven heat distribution or unpredictable flare-ups from dripping fat. The Blackstone provides a consistent, controlled environment, making it so much easier to get that perfect char. It's like having a personal chef, except it doesn't require tipping!
Temperature Control: Your Secret Weapon:
Mastering temperature control is essential for Blackstone steak success. You need to get the griddle screaming hot for that initial sear, and then you'll want to reduce the heat to maintain the perfect cooking temperature. It's a bit of a balancing act, but once you get the hang of it, you'll be amazed at the results.
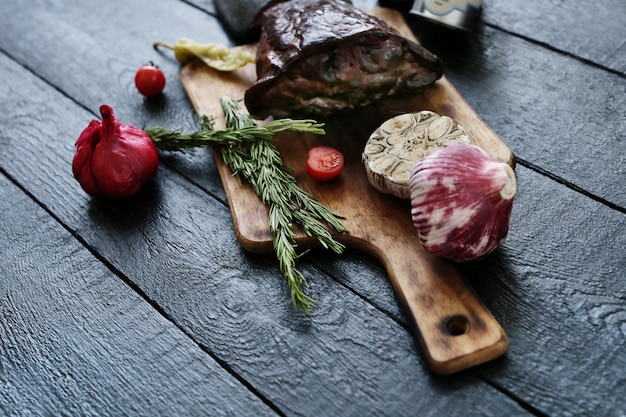
(Part 2) choosing the right steak: The Foundation of a Delicious Meal
Before we jump into the cooking times, let's talk about the steak itself. There are so many different cuts out there, each with its unique flavour and tenderness. Choosing the right cut is crucial for a satisfying culinary experience.
The Top Contenders: A Quick Guide:
- Rib Eye: This is the classic, the king of steaks. It's marbled with fat, which gives it that rich, buttery flavour and incredibly tender texture.
- new york strip: Leaner than the Rib Eye, this steak packs a bold flavour and is a fantastic choice for those who prefer a more robust taste.
- filet mignon: This is the ultimate in tenderness. It's known for its melt-in-your-mouth texture and subtly delicate flavour.
- Sirloin: A versatile choice, Sirloin offers a good balance of flavour and tenderness, making it a popular pick for grilling.
- flank steak: This lean and flavourful cut is perfect for grilling because it cooks quickly and develops a delicious char.
The Thickness Factor:
The thickness of your steak is another important consideration. Thicker cuts will take longer to cook, so you'll want to use a lower heat and adjust the cooking time to ensure that the center is cooked to your liking. Thinner cuts, on the other hand, will cook quickly and are best suited for a high-heat sear.
(Part 3) The Blackstone Steak Cooking Times: A Guide for Every Palate
Now, let's get down to the nitty-gritty: those all-important cooking times. This is where I'm going to unveil my secrets and give you a solid understanding of how to cook the perfect steak on your Blackstone.
Resting is Essential:
Before we dive into the specifics, let's talk about the crucial role of resting your steak. It's tempting to slice into that perfectly seared masterpiece the moment it comes off the griddle, but trust me, a little patience will be rewarded with a more juicy and flavorful steak. The resting time allows the juices to redistribute throughout the meat, resulting in a more tender and flavourful steak. So, resist the urge to dive in right away – your taste buds will thank you for it.
The Golden Rules:
- Preheat Your Blackstone: Always preheat your Blackstone to high heat before you start cooking. This is crucial for achieving that perfect sear.
- Use a meat thermometer: Invest in a meat thermometer. It's the most accurate way to ensure your steak is cooked to your liking.
- Don't Overcook: A rare or medium-rare steak is much more tender and flavorful than a well-done steak. Embrace the deliciousness of a little pink!
Steak Thickness and Cooking Times: A Handy Guide:
Here’s a guide for common steak thicknesses and cooking times based on your desired doneness. Remember, these are just guidelines – the actual cooking time will depend on several factors, including the thickness of your steak, the heat of your griddle, and your personal preference for doneness.
| Steak Thickness (Inches) | Rare (125°F/52°C) | Medium-Rare (130°F/54°C) | Medium (140°F/60°C) | Medium-Well (150°F/65°C) | Well-Done (160°F/71°C) |
|---|---|---|---|---|---|
| 1/2 inch | 2-3 minutes per side | 3-4 minutes per side | 4-5 minutes per side | 5-6 minutes per side | 6-7 minutes per side |
| 1 inch | 3-4 minutes per side | 4-5 minutes per side | 5-6 minutes per side | 6-7 minutes per side | 7-8 minutes per side |
| 1 1/2 inches | 4-5 minutes per side | 5-6 minutes per side | 6-7 minutes per side | 7-8 minutes per side | 8-9 minutes per side |
| 2 inches | 5-6 minutes per side | 6-7 minutes per side | 7-8 minutes per side | 8-9 minutes per side | 9-10 minutes per side |
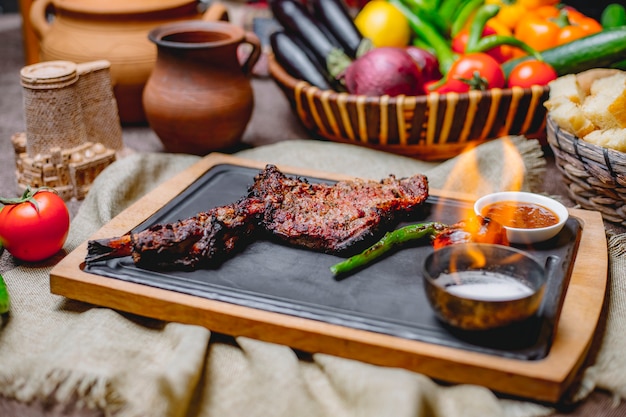
(Part 4) The Art of the Sear: The Key to a Delicious Crust
The sear is what takes a steak from ordinary to extraordinary. It's that beautiful, crispy crust that adds a depth of flavor and a satisfying crunch.
The Blackstone's Edge: Even Heat, Even Sear:
The Blackstone's flat surface allows for a perfectly even sear on all sides of the steak. No more uneven browning or cold spots – it's a beautiful thing! The goal here is to create that crust, which locks in the juices and develops those amazing flavors.
The Technique: Timing is Everything:
The key to a perfect sear is to get the Blackstone screaming hot and then cook the steak for a short period of time on each side. We're not trying to cook the steak through, just to create that delicious crust. Think of it as a quick kiss of heat.
Tips for a Winning Sear:
- Pat It Dry: Pat your steak dry with paper towels before cooking. This will help to prevent the steak from steaming instead of searing.
- High Heat Is Your Friend: Use high heat, around 450°F (232°C). The Blackstone heats up quickly, and you'll be able to get a good sear in just a few minutes.
- Space Is Key: Don’t overcrowd the griddle. If you have multiple steaks, cook them in batches to ensure they all get a good sear.
- Don't Move It Too Much: Avoid moving the steak too much while it’s cooking. This will prevent it from sticking and help to create a nice, even sear.
(Part 5) Finishing Touches: Elevating Your Steak to New Heights
Now that your steak is cooked to perfection, it's time to add those finishing touches that will take it from good to great.
Butter Basted Bliss: A Touch of Luxury:
Adding butter to your steak is a classic finishing touch that elevates the flavour and tenderness. The butter melts and coats the steak, creating a beautiful, rich sauce that enhances the overall taste. It's simple, but it makes all the difference.
How to Butter Basted Your Steak:
- Reduce the Heat: Reduce the heat on your Blackstone to medium-low.
- Add Butter: Add a few pats of butter to the griddle.
- Transfer the Steak: Carefully transfer your cooked steak to the griddle with the butter.
- Baste It Up: Baste the steak with the melted butter for about 1-2 minutes per side.
Herbs and Spices: A Symphony of Flavors:
Adding herbs and spices to your steak is a great way to add another dimension of flavour. Experiment with different combinations to find your favourites.
A Few Favourite herb and spice blends:
- Garlic and Rosemary: A classic combination that adds a savory, earthy flavour.
- Salt, Pepper, and Onion Powder: A simple but effective blend that enhances the steak’s natural flavour.
- Paprika and Chili Powder: A spicy blend that adds a kick to your steak.
(Part 6) Mastering the Technique: Tips and Tricks for Blackstone Steak Success
Cooking a steak on a Blackstone is pretty straightforward, but there are a few little tricks that can take your skills to the next level.
The Power of Patience:
- Take Your Time: Don’t rush the cooking process. Allow the steak to cook slowly and evenly.
- Rest It Up: Let the steak rest for 5-10 minutes before slicing and serving. This allows the juices to redistribute, resulting in a more tender and flavorful steak.
Keeping It Clean:
- Cleaning is Key: Always clean your Blackstone after use. This will help to prevent rust and keep your griddle in tip-top shape.
- Scraping and Spatulas: Use a scraper or spatula to remove any food particles from the surface of the Blackstone.
- Oil It Up: Apply a thin layer of oil to the surface of the Blackstone after cleaning to help protect it from rust.
Beyond the Steak: A World of Culinary Possibilities:
- Versatile Griddle: The Blackstone is a versatile cooking surface. Use it to cook all sorts of things, from burgers and vegetables to breakfast foods.
- Experiment and Explore: Experiment with different recipes and cooking methods. The possibilities are endless with a Blackstone griddle.
(Part 7) The Blackstone Steak Experience: My Personal Journey
I'll be honest, folks, I was a bit skeptical at first. I was used to the traditional grill, but the Blackstone quickly won me over. The consistent heat, the ease of use, and the endless possibilities for creating delicious meals – it's a game-changer.
The Simplicity Factor:
I love how easy it is to cook a perfect steak on the Blackstone. It's not about complicated techniques or fancy gadgets. It's about mastering the basics and letting the Blackstone do its thing.
A Mealtime Ritual:
Cooking on the Blackstone has become a bit of a ritual for me. It's a chance to relax and enjoy the process of cooking a delicious meal. I love the sound of the sizzling steak and the aroma of the cooking food. It's a sensory experience that I truly appreciate.
A Culinary Companion:
The Blackstone is more than just a cooking tool, it's a companion. It's been there for countless meals, from casual weeknight dinners to elaborate gatherings with friends and family. It's always ready to go, and it never disappoints.
(Part 8) FAQs: Your Blackstone Steak Questions Answered
I know you’ve got questions about cooking steak on the Blackstone, so here are some of the most common ones and their answers.
1. How Do I Clean My Blackstone?
Cleaning your Blackstone is pretty straightforward. Once it’s cooled down, use a scraper or spatula to remove any food particles from the surface. Then, wash it with soap and water, and dry it thoroughly. If there are any stubborn burnt-on bits, you can use a baking soda paste to scrub them away.
2. How Do I Prevent My Steak from Sticking to the Blackstone?
The key to preventing sticking is to preheat the Blackstone to high heat and make sure the surface is well-oiled. You can use a high-heat cooking oil, like avocado oil or grapeseed oil. And don’t overcrowd the griddle – give the steaks space to cook evenly.
3. How Do I Know When My Steak Is Done?
The best way to check the doneness of your steak is to use a meat thermometer. But you can also use the touch test:
- Rare: The steak will feel very soft and squishy.
- Medium-Rare: The steak will feel slightly firm and springy.
- Medium: The steak will feel firm and slightly resistant to pressure.
- Medium-Well: The steak will feel firm and resistant to pressure.
- Well-Done: The steak will feel very firm and almost hard.
4. What are Some Good side dishes to Serve with Blackstone Steak?
The beauty of Blackstone steak is that it goes with so many delicious side dishes. Here are a few ideas:
- grilled vegetables: bell peppers, onions, asparagus, zucchini, and eggplant are all great options. You can even grill them directly on the Blackstone alongside your steak for a seamless meal.
- mashed potatoes: A classic comfort food that complements the steak perfectly. You can even add a dollop of butter or a sprinkle of herbs for extra flavour.
- Macaroni and Cheese: A cheesy and indulgent side dish that’s always a crowd-pleaser. Try adding some crumbled bacon or bread crumbs for an extra touch of deliciousness.
- Baked Beans: A sweet and savory side dish that’s perfect for a barbecue. You can find countless variations, from classic to smoky and spicy.
5. What Other Tips Do You Have for Cooking a Perfect Blackstone Steak?
Here are a few more tips to elevate your Blackstone steak game:
- Invest in a Meat Thermometer: It's an essential tool for ensuring your steak is cooked to perfection.
- Embrace Rare or Medium-Rare: Don't be afraid of a little pink! It's the key to a tender, flavourful steak.
- Let It Rest: Give your steak a good rest before slicing and serving. It's worth the wait.
- Have Fun!: Cooking on a Blackstone should be a fun and rewarding experience. Don't be afraid to experiment, try new things, and enjoy the process!
And there you have it, folks! That's my guide to cooking the perfect Blackstone steak. I hope this has given you the confidence to get out there and start grilling like a pro. Remember, the key is to practice, experiment, and most importantly, have fun! So fire up that Blackstone and get ready to enjoy some delicious, juicy steak.
Everyone is watching

Perfect Rice Every Time: The Ultimate Guide to Cooking Rice
Cooking TipsAs a self-proclaimed foodie, I've always been a bit obsessed with rice. It's the foundation of countless cuisi...

The Ultimate Guide to Cooking Asparagus: Tips, Techniques, and Recipes
Cooking TipsAsparagus. The mere mention of this spring delicacy conjures up images of vibrant green spears, crisp and burs...

Ultimate Guide to Cooking the Perfect Thanksgiving Turkey
Cooking TipsThanksgiving. Just the word conjures up images of overflowing tables laden with delicious food, the scent of r...

Prime Rib Roast Cooking Time Chart: Per Pound Guide
Cooking TipsPrime rib roast. Just the name conjures images of lavish dinners, crackling fires, and hearty laughter. It’s ...

Can You Cook Spaghetti with Gasoline? (The Shocking Truth)
Cooking TipsWe've all seen those crazy internet trends. You know, the ones that make you wonder, "Did someone actually try...