Let's be honest, there's nothing quite like a beautifully browned, juicy roast beef. It's a centerpiece that screams "Sunday dinner" and brings people together around the table. But getting that perfect roast can be a bit of a culinary dance. Overcook it, and you're left with a dry, tough hunk of meat. Undercook it, and well, let's just say it's best to err on the side of caution. So, I'm here to share my tried and true methods for achieving that melt-in-your-mouth, picture-perfect roast beef every time.
(Part 1) The Roast Beef Essentials: Setting the Stage for Success
Before we even think about turning on the oven, let's talk about the foundation of our delicious journey – choosing the right cut of beef. I'm a big fan of a good, thick piece of sirloin, but rump and topside are also fantastic options. Don't be shy to ask your butcher for guidance, they're experts in their field and can help you pick the perfect cut for your needs.
Choosing the Right Cut: A Journey Through Beef
The cut of beef is like the foundation of your roast, influencing the cooking time and the final result. It's all about understanding the unique characteristics of each cut:
- Sirloin: This is the classic choice for roast beef, known for its rich flavor and tender texture. It's perfect for roasting whole or in smaller cuts. Just be prepared for a slightly longer cooking time due to its thickness.
- Rump: A leaner cut than sirloin, rump is still flavorful and tender, making it a great choice for those who prefer a less fatty roast. It might be a bit tougher than sirloin, so a slightly longer cooking time might be necessary for optimal tenderness.
- Topside: This versatile cut is lean and perfect for roasting and slicing thinly for sandwiches. It's also a good option for those watching their fat intake. While it can be a bit tougher than sirloin or rump, a longer cooking time and strategic carving techniques can ensure it's still tender and delicious.
Size and Weight: Navigating the Scale
The size and weight of your chosen cut are crucial in determining the cooking time. A larger roast will naturally take longer to cook through. While a meat thermometer is always a good idea, here's a general guide for estimated cooking times:
| Weight (kg) | Cooking Time (hours) |
|---|---|
| 1-1.5kg | 1.5-2 hours |
| 1.5-2kg | 2-2.5 hours |
| 2-2.5kg | 2.5-3 hours |
| 2.5-3kg | 3-3.5 hours |
Remember, these are just general guidelines. Always check the internal temperature of the meat using a meat thermometer to ensure it's cooked to your liking.
(Part 2) Preparing the Roast: Unleashing the Flavor
Now that you've got your star ingredient, it's time to get prepped for the oven. Think of this stage as setting the stage for a delicious performance!
Seasoning: A Symphony of Spices
I usually go with a simple mix of salt, pepper, and a whisper of garlic powder for my roast beef. But let your creativity run wild! Adding herbs like rosemary, thyme, or oregano can add depth and complexity to the flavor profile.
If you're feeling adventurous, try a dry rub. A dry rub is a magical blend of spices and herbs that you rub onto the meat before cooking. It adds an irresistible layer of flavor and creates a wonderfully crispy crust on the outside.
Roasting Technique: The Low and Slow vs. High Heat Debate
There are two primary methods for roasting beef, each with its own set of benefits and flavor profiles.
- High Heat Method: This method involves searing the beef on all sides to achieve a beautiful, crispy crust before transferring it to the oven to finish cooking. This technique is great for achieving a crisp exterior and juicy interior, perfect for those who love a flavorful crust.
- Low and Slow Method: This method involves cooking the beef at a lower temperature for a longer period of time. Think of it as a slow, gentle coaxing of flavor. This results in a tender, melt-in-your-mouth roast, ideal for those who appreciate a more delicate texture.
The choice ultimately depends on your preferences and the type of roast you're preparing. For a thicker cut like sirloin, I tend to lean towards the low and slow method for maximum tenderness.
(Part 3) The Oven: Your Roast's Best Friend

The oven is where the magic truly happens. And it's all about getting the temperature just right!
The Ideal Temperature: A Happy Medium
For most roasts, I recommend cooking at 180°C (350°F). This temperature strikes a perfect balance, ensuring even cooking and a beautifully browned roast. It's the Goldilocks temperature – not too hot, not too cold, just right!
Pre-heating the Oven: Setting the Stage
Always preheat your oven to the desired temperature before you start cooking. This is absolutely essential for achieving the right level of heat for your roast. It prevents the meat from getting chilled in the oven and helps to create an evenly cooked roast. Give it at least 10-15 minutes to heat up properly.
Monitoring the Temperature: A Dance with Heat
Monitoring the temperature is crucial for achieving a perfectly cooked roast. While a meat thermometer is a valuable tool, I like to use a combination of techniques to ensure success:
- Visual Cues: Keep a watchful eye on the roast's color. It should be a deep brown on the outside and a beautiful pink in the center for a medium-rare roast.
- Meat Thermometer: For extra confidence, use a meat thermometer to check the internal temperature. The USDA recommends an internal temperature of 145°F (63°C) for a medium-rare roast.
- Time: Keep track of the cooking time based on the weight of your roast, but remember, these are just estimates. The combination of visual cues and a meat thermometer will give you the most accurate readings.
(Part 4) Resting Time: The Secret to Juiciness
Once your roast is cooked to perfection, don't be tempted to carve it immediately! It needs a little time to rest.
Why Rest? The Science of Juiciness
When you cook a roast, the juices naturally rise to the surface. During the resting period, those delicious juices have a chance to redistribute back into the meat. This results in a remarkably juicy and flavorful roast, with every bite bursting with flavor. Plus, a resting period allows the meat to relax and become even more tender.
How Long to Rest? Patience is Key
I recommend resting a roast for at least 15-20 minutes before carving. For larger roasts, you might want to give it up to 30 minutes. The longer you rest it, the more time those flavorful juices have to redistribute. Cover the roast loosely with aluminum foil to help retain the heat and maintain moisture.
(Part 5) Carving and Serving: The Grand Finale
The moment you've been waiting for – time to carve that gorgeous roast!
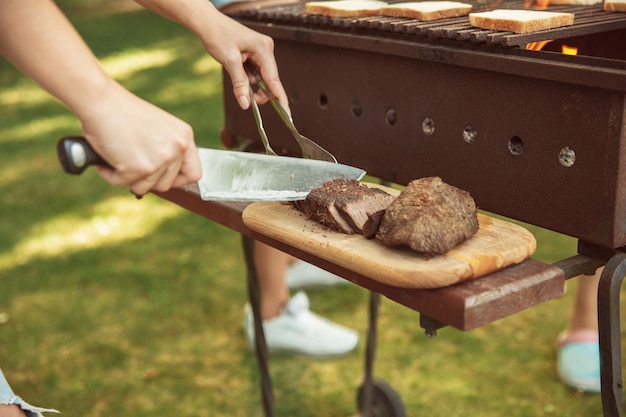
Tools of the Trade: Essential Equipment
You'll need a sharp carving knife for this task. A carving fork is also helpful for holding the roast steady while you carve. If you're feeling extra fancy, a carving board or a cutting board adds a touch of elegance.
Carving Techniques: A Symphony of Slices
Begin by carving the roast into thin slices, going against the grain. This ensures each slice is tender and easy to chew. If you have a bone-in roast, you can remove the bone before carving for a more uniform presentation.
Presentation: A Feast for the Eyes
Once carved, arrange the slices on a platter or serving dish. Add a touch of flair by garnishing with herbs like rosemary or parsley, roasted vegetables, or a drizzle of gravy.
(Part 6) Gravy: The Perfect Complement
No roast beef dinner is truly complete without a generous serving of gravy. It adds a layer of richness and depth of flavor that ties everything together.
homemade gravy: A Labor of Love
If you're feeling adventurous, making your own gravy from the pan drippings is a culinary masterpiece in itself. Simply deglaze the pan with a splash of wine or stock, then whisk in flour or cornstarch to thicken it.
Store-Bought Gravy: A Convenient Option
Not feeling like making your own gravy? No problem! There are fantastic store-bought options available. Just be sure to check the ingredient list and choose one that's free of artificial flavors and preservatives.
(Part 7) side dishes: Rounding Out the Feast
A roast beef dinner is a symphony of flavors, and side dishes are the supporting cast that elevates the main course. Here are some of my favorite companions to a delicious roast beef:
Classic Choices: Timeless Favorites
- Roasted Potatoes: Perfectly roasted potatoes are an essential pairing for roast beef. I like to toss them in olive oil, salt, pepper, and herbs before roasting until they're golden brown and crispy.
- Yorkshire Pudding: A light and fluffy pudding that soaks up the gravy beautifully. It's a true British classic, and it's easier to make than you might think.
- green beans: A simple and healthy side that balances the richness of roast beef. You can steam, roast, or sauté them for a variety of textures and flavors.
More Creative Options: Expanding the Culinary Palette
If you're looking for something a bit more adventurous, try these side dish options:
- Roasted Root Vegetables: A vibrant and flavorful side dish that adds a touch of sweetness. Try carrots, parsnips, and sweet potatoes for a colorful and delicious addition.
- cauliflower mash: A healthy and creamy alternative to mashed potatoes, providing a comforting and delicious side dish.
- Mushroom Gravy: For a more earthy and intense flavor, add sautéed mushrooms to your homemade gravy. It creates a rich and savory depth.
(Part 8) Leftover Magic: Maximizing Deliciousness
Leftover roast beef is a treasure trove of possibilities! It's like a whole new meal waiting to be unleashed. Here are some ways to put those delicious leftovers to good use:
Sandwiches: A Classic Comfort
Classic roast beef sandwiches are a simple and satisfying way to enjoy leftover roast beef. Add some mustard, horseradish, or mayonnaise for extra flavor.
Salads: A Hearty and Protein-Packed Option
Slice up some leftover roast beef and toss it into a salad for a protein-packed and flavorful meal. You can add other vegetables, cheese, and a dressing of your choice.
Beef and barley soup: A Warming and Hearty Dish
Use leftover roast beef to make a comforting and flavorful soup. Combine the beef with barley, vegetables, and broth for a hearty and satisfying meal.
Beef Hash: A Classic comfort food
Chop up the leftover roast beef and combine it with potatoes, onions, and peppers for a delicious and satisfying hash.
(Part 9) FAQs: Your Roast Beef Questions Answered
1. What’s the best way to tell if my roast is cooked to the right temperature?
The best way to determine if your roast is cooked to the desired temperature is to use a meat thermometer. Insert it into the thickest part of the roast, ensuring it doesn’t touch bone. For a medium-rare roast, aim for an internal temperature of 145°F (63°C). But remember, everyone has their own preferences when it comes to doneness.
2. How do I prevent my roast from drying out?
The key to preventing a dry roast is cooking it low and slow. You can also add a bit of fat, like butter or olive oil, to the top of the roast before cooking. This helps to keep the meat moist and flavorful.
3. Can I cook a roast beef in a slow cooker?
You can, but it's not ideal. Slow cookers tend to produce a less flavorful roast, and the lack of browning can result in a less appealing appearance. If you're set on using a slow cooker, try browning the roast first on the stovetop to enhance the flavor.
4. How do I make gravy from pan drippings?
Making gravy from pan drippings is a culinary adventure! Here's how:
- Pour off most of the fat from the pan, leaving behind the delicious bits of flavor.
- Add a tablespoon of flour to the pan and whisk it around to absorb the drippings.
- Add a cup of beef stock to the pan and whisk to create a smooth sauce.
- Simmer the gravy for a few minutes until it thickens to your desired consistency. You can strain the gravy before serving to remove any bits of food.
5. What if my roast beef is overcooked?
Don't panic! While it might be a bit dry, there are ways to salvage an overcooked roast. You can slice it thinly and use it for sandwiches, salads, or even soup. The flavor is still delicious, even if the texture isn't quite what you were hoping for.
There you have it, my complete guide to crafting a perfect roast beef every time. I hope you find these tips helpful and enjoy creating your own delicious roast beef masterpieces. Remember, it's all about confidence and having fun in the kitchen! So, get your aprons on, grab your ingredients, and get roasting!
Everyone is watching

Prime Rib Roast Cooking Time Chart: Per Pound Guide
Cooking TipsPrime rib roast. Just the name conjures images of lavish dinners, crackling fires, and hearty laughter. It’s ...

How Long to Bake Potatoes in the Oven (Perfect Every Time)
Cooking TipsBaked potatoes are a staple in my kitchen. They're incredibly versatile, delicious, and surprisingly easy to m...

Perfect Rice Every Time: The Ultimate Guide to Cooking Rice
Cooking TipsAs a self-proclaimed foodie, I've always been a bit obsessed with rice. It's the foundation of countless cuisi...

The Ultimate Guide to Cooking Asparagus: Tips, Techniques, and Recipes
Cooking TipsAsparagus. The mere mention of this spring delicacy conjures up images of vibrant green spears, crisp and burs...

Ultimate Guide to Cooking the Perfect Thanksgiving Turkey
Cooking TipsThanksgiving. Just the word conjures up images of overflowing tables laden with delicious food, the scent of r...