Alright, you're ready to fire up the BBQ and grill some juicy, smoky bbq chicken breast, eh? I've been there, mate! There's nothing quite like the smell of smoky bbq chicken wafting through the air, and that feeling of satisfaction when you know you've cooked it to absolute perfection. But let's be honest, getting that perfect bbq chicken breast isn't always a walk in the park. You've got to nail the cooking time, avoid dryness, and achieve that beautiful char without burning the outside.
This guide is your one-stop shop for all things BBQ chicken breast. We'll cover everything from the right equipment to choosing the perfect chicken breasts, and, of course, the golden rules for cooking times. We'll even tackle some of those common BBQ chicken breast dilemmas you might be facing. Let's dive in!
(Part 1) Picking Your Chicken Breast: The Foundation of a Great BBQ
Choosing the Right Chicken Breast: Boneless, Skinless, and Ready to Grill
First things first, you need to get your hands on some decent chicken breasts. I always recommend going for boneless, skinless chicken breasts. They're easier to handle and cook evenly. I find that boneless, skinless chicken breasts provide the best combination of flavor and tenderness. Plus, they're a breeze to work with. You can also ask your butcher for a good cut, they'll know the best ones for grilling.
Size Matters: From Small to Large, Find the Right Fit
Now, the size of your chicken breasts will have a big impact on cooking time. Here's a little rule of thumb I use:
- Small chicken breasts (under 6 ounces): These will cook up quicker, perfect for a quick weeknight meal.
- Medium chicken breasts (6-8 ounces): Perfect for a classic grill session, they'll be juicy and flavorful.
- Large chicken breasts (over 8 ounces): These will need a bit longer to cook through, great for feeding a crowd.
It's all about finding the right size for your needs and cooking style.
Checking for Quality: Ensuring Your Chicken is Fresh
Before you chuck those beauties on the BBQ, give them a quick inspection. Make sure the chicken breasts are firm and springy to the touch. Avoid any that have a slimy or off-putting smell. This will ensure you're using fresh, high-quality chicken. It's worth a quick look to ensure the best flavor and safety.
(Part 2) Preparing Your Chicken Breast: Setting the Stage for Flavor
Brining for Juiciness: A Secret Weapon for tender chicken
Brining your chicken breasts before grilling is a game-changer, trust me. It helps to lock in moisture and prevents dryness, resulting in tender and juicy chicken. You can make a simple brine at home using salt, sugar, and water. Just submerge your chicken breasts in the brine for 2-4 hours in the fridge.
Here's a basic brine recipe you can try:
1 cup of water
1/4 cup salt
1/4 cup sugar
Dissolve the salt and sugar in the water and submerge your chicken breasts in the brine for 2-4 hours. You'll be amazed at the difference in tenderness!
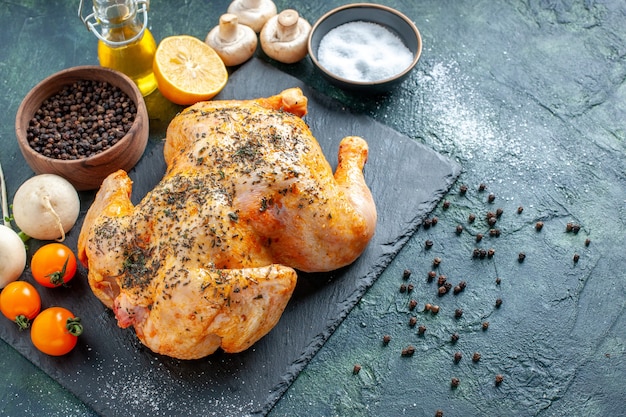
Seasoning Perfection: Simple Flavors for Maximum Impact
Now, it's time to give those chicken breasts some flavor. I like to keep my seasoning simple: salt, black pepper, and a sprinkle of garlic powder. You can also add other spices like paprika, chili powder, or cayenne pepper to kick up the heat.
Don't be afraid to experiment with your spice blend. There's no wrong answer, just find what your taste buds crave!
The Art of Rubbing: Ensuring Flavor Gets In
Once you've seasoned your chicken breasts, give them a good rub to ensure the seasoning sticks. I like to use my hands for this. It's a bit more personal, and you can feel how much seasoning you're using. This ensures the seasoning coats the chicken evenly and gets into all the nooks and crannies.
(Part 3) The BBQ Setup: Creating the Perfect Cooking Environment
Fire Up the BBQ: Charcoal or Gas, It's Your Call
Right, now it's time to get that BBQ fired up. I'm a charcoal grill kind of guy, but a gas grill will do the trick too. Aim for medium heat, around 350-375°F (175-190°C). You want a nice, even heat for consistent cooking. This ensures the chicken cooks evenly and doesn't burn on one side.
Grease Up: Preventing Sticking and Ensuring a Smooth Cook
To avoid sticking, give your grill grates a quick wipe down with a little oil. I use vegetable oil, but you can use any oil you like. This helps the chicken release easily from the grill and ensures a clean cook.
(Part 4) The Grill Master's Guide to BBQ Chicken Breast: Time to Cook!
Direct vs. Indirect: Finding the Right Heat Level
You can grill chicken breast directly over the heat source, or you can use indirect heat. For smaller chicken breasts, direct grilling is a good option. For larger breasts, or if you want a more even cook, I'd recommend indirect heat. This allows for a more gentle cooking process, preventing burning and ensuring a tender chicken.
The Perfect Placement: Finding the Ideal Spot on the Grill
Once your grill is hot and your chicken breasts are prepped, it's time to get grilling. For direct grilling, place the chicken breasts directly over the heat source. For indirect grilling, move the chicken breasts to a cooler area of the grill, away from the direct heat.
The Flip Factor: Knowing When to Turn Your Chicken
Now, here's where things get interesting. You don't want to flip your chicken breast too early or too late. The goal is to sear it nicely on both sides. I usually flip my chicken breast after about 4-5 minutes, or when it's nicely browned on the bottom. This creates those delicious grill marks and ensures a crispy exterior.
The internal temperature Test: Making Sure it's Cooked Through
This is where a meat thermometer comes in handy. You want to make sure your chicken breast is cooked through to an internal temperature of 165°F (74°C). This ensures that the chicken is safe to eat and won't be pink inside.
A meat thermometer is a must-have tool for any grill master. It takes the guesswork out of cooking and guarantees a safe and delicious meal.
Resting Time: Allowing the Juices to Redistribute
Don't rush to slice that chicken breast right away. Let it rest for about 5-10 minutes. This will allow the juices to redistribute and prevent the meat from drying out. This simple step makes a huge difference in the overall texture and juiciness of your BBQ chicken breast.
(Part 5) The BBQ Chicken Breast Cooking Time Chart: A Guide to Timing Perfection
chicken breast size | Cooking Time (Direct Heat) | Cooking Time (Indirect Heat)
------------- | ------------- | -------------
Small (under 6 ounces) | 10-15 minutes | 15-20 minutes
Medium (6-8 ounces) | 15-20 minutes | 20-25 minutes
Large (over 8 ounces) | 20-25 minutes | 25-30 minutes
These times are just a guideline. Remember to use a meat thermometer to ensure your chicken breast is cooked through.
Adjust your cooking time based on your grill and the size of your chicken breast. It's always better to err on the side of caution and cook it a little longer than risk undercooking.
(Part 6) The bbq sauce Secret: Adding that Extra Layer of Flavor
When to Apply the Sauce: Timing is Everything
You can add BBQ sauce to your chicken breast during the last 5-10 minutes of grilling. I like to brush it on generously, making sure the chicken breast is coated evenly. Don't add the sauce too early, or it'll burn.
BBQ Sauce Options: A World of Flavor Awaits
The world of BBQ sauce is vast, my friend. From sweet and smoky to tangy and spicy, there's a sauce out there for everyone. I like to use a homemade BBQ sauce, but store-bought is perfectly fine too. Just choose one that you enjoy and matches your taste preferences.
Don't be afraid to experiment with different BBQ sauces. You might discover a new favorite!
(Part 7) Signs of a Perfectly Cooked BBQ Chicken Breast: Knowing You've Achieved Grill Master Status
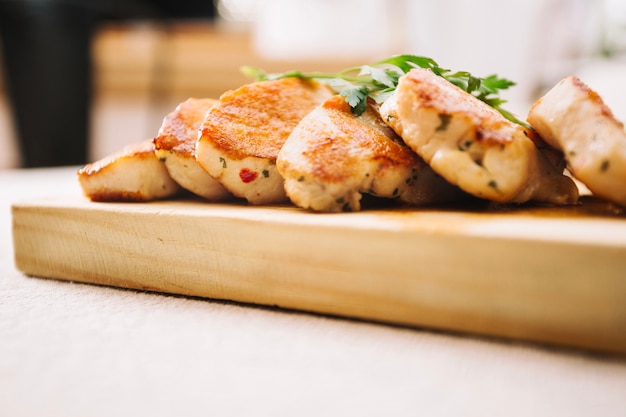
Golden Brown Color: A Visual Cue of Success
A perfectly cooked BBQ chicken breast will have a beautiful golden brown colour, indicating that it's nicely seared on both sides. This is a visual cue that your chicken is cooked to perfection.
Juicy and Tender: The Ultimate Test of Flavor
When you cut into a well-cooked BBQ chicken breast, it should be juicy and tender. The meat should easily pull away from the bone, if you're using bone-in chicken breast. This is the sign of a successful cook, where the chicken is both flavorful and moist.
No Pink Center: Ensuring Safety and Quality
There should be no pink center in the chicken breast. If you see any pink, it means the chicken hasn't cooked through properly. This is a crucial safety point, ensuring the chicken is safe to eat.
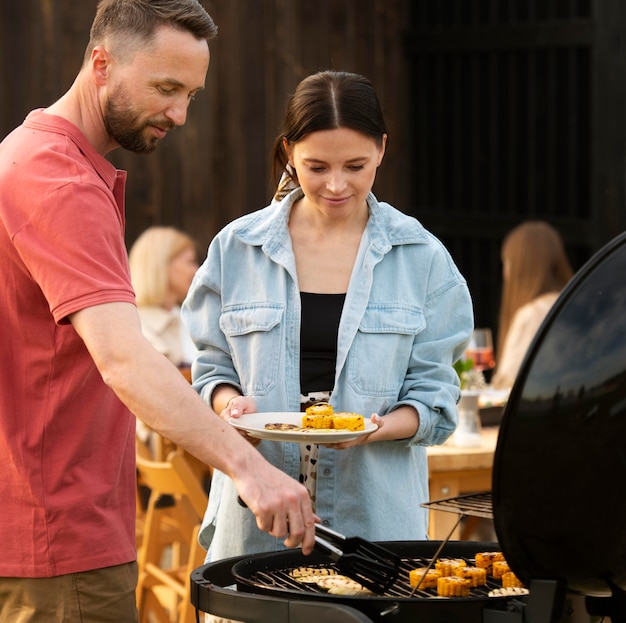
(Part 8) Serving Your BBQ Chicken Breast: Completing the Culinary Experience
side dish Delights: Elevating the Flavors
A delicious BBQ chicken breast deserves some equally delicious side dishes. I'm a big fan of coleslaw, corn on the cob, potato salad, and baked beans.
The Presentation: Making it Look as Good as it Tastes
When it comes to serving, a simple presentation is often best. Place your BBQ chicken breast on a platter, surrounded by your chosen side dishes. This creates a visually appealing and flavorful meal.
Enjoy!: Savor the Fruits of Your Labor
Finally, relax, take a deep breath, and enjoy the fruits of your labour! A perfectly cooked BBQ chicken breast is a true culinary masterpiece.
FAQs
1. Can I Cook BBQ Chicken Breast in the Oven?
Absolutely! Oven-baked BBQ chicken breast is a fantastic alternative to grilling. Preheat your oven to 375°F (190°C), place the chicken breasts on a baking sheet, and bake for 20-25 minutes, or until cooked through. This is a great option for those without a grill or during colder weather.
2. Can I Marinate BBQ Chicken Breast?
Marinating your chicken breast is a great way to add extra flavor and moisture. Choose a marinade that complements your chosen BBQ sauce. You can marinate your chicken for as little as 30 minutes or up to several hours in the refrigerator. This will infuse the chicken with flavor and ensure a tender, juicy result.
3. How Can I Make BBQ Chicken Breast More Moist?
Brining is a great way to keep your chicken breast moist, as we discussed earlier. You can also try cooking your chicken breast at a lower temperature or for a shorter amount of time. It's all about finding the sweet spot for your grill and preference.
4. What Happens If My BBQ Chicken Breast Is Overcooked?
Overcooked BBQ chicken breast will be dry and tough. It's best to cook your chicken breast to the recommended internal temperature and avoid overcooking. Remember, a meat thermometer is your best friend!
5. What Are Some Tips for Grilling BBQ Chicken Breast?
- Use a meat thermometer to ensure your chicken is cooked through. This is essential for safety and ensuring a tender, juicy result.
- Don't flip your chicken breast too often. Aim for a nice sear on both sides. This ensures a beautiful grill mark and crispy exterior.
- Let your chicken breast rest for 5-10 minutes before slicing. This allows the juices to redistribute and prevents dryness.
- Experiment with different BBQ sauces to find your favorites. There's a whole world of flavors waiting to be discovered!
Everyone is watching

Prime Rib Roast Cooking Time Chart: Per Pound Guide
Cooking TipsPrime rib roast. Just the name conjures images of lavish dinners, crackling fires, and hearty laughter. It’s ...

How Long to Bake Potatoes in the Oven (Perfect Every Time)
Cooking TipsBaked potatoes are a staple in my kitchen. They're incredibly versatile, delicious, and surprisingly easy to m...

Perfect Rice Every Time: The Ultimate Guide to Cooking Rice
Cooking TipsAs a self-proclaimed foodie, I've always been a bit obsessed with rice. It's the foundation of countless cuisi...

The Ultimate Guide to Cooking Asparagus: Tips, Techniques, and Recipes
Cooking TipsAsparagus. The mere mention of this spring delicacy conjures up images of vibrant green spears, crisp and burs...

Ultimate Guide to Cooking the Perfect Thanksgiving Turkey
Cooking TipsThanksgiving. Just the word conjures up images of overflowing tables laden with delicious food, the scent of r...