The aroma of a freshly baked apple pie is enough to transport anyone back to childhood. Memories of warm kitchens, loving hands, and the anticipation of that first, golden-brown slice are etched into our collective consciousness. But beyond the nostalgic comfort, there’s a deep satisfaction that comes from baking an apple pie. It’s about mastering the craft, achieving that delicate balance between a crisp, buttery crust and a perfectly spiced, sweet-and-tart filling. It’s about finding the joy in the process, the gentle kneading, the careful layering, and the anticipation of the final, golden-brown masterpiece. This is my guide to baking the perfect apple pie, a guide born from years of trial and error, of burnt bottoms and soggy centers, of moments of frustration and the pure elation of success. Let’s embark on this culinary adventure together, and discover the magic of apple pie perfection!
(Part 1) The Art of the Dough: A Symphony of Texture
1. The Butter Ballet: A Cold Embrace
The foundation of any great apple pie lies in the crust, and that crust hinges on the beautiful, buttery magic that transforms flour into flaky, tender goodness. Think of butter as the protagonist in this culinary drama, a star player in a delicate dance of temperature control. The colder the butter, the less it melts during the mixing process. This results in those tiny, beautiful pockets of air within the dough, the key ingredient to a truly flaky, melt-in-your-mouth texture. It’s a delicate balance of cold and warm, a culinary magic trick that takes a bit of practice but yields spectacular results. And that’s where the fun really begins!
2. The Dough Dance: A Gentle Touch
The way you handle the dough is crucial. Imagine yourself a sculptor, shaping a delicate masterpiece with a light touch. You want to work quickly, blending the flour and butter with a gentle, even pressure. My go-to method is the "rubbing" technique. Using your fingertips, gently rub the cold butter into the flour, almost as if you’re creating tiny flakes of butter. This helps to maintain those air pockets that are so important for a flaky texture. It’s a tactile process, a connection with the ingredients, a careful dance that results in a light and airy crust.
3. The Chilling Effect: A Moment of Rest
Once you’ve blended the dough, patience becomes your best friend. Give it a rest! Chill the dough in the refrigerator for at least 30 minutes, allowing the gluten in the flour to relax. This prevents the dough from becoming tough and ensures a tender, workable texture. I often chill the dough overnight, allowing it to rest and rejuvenate. This extra time in the refrigerator really brings out the best in the dough, making it easier to roll and shape. It’s like giving the dough a good night’s sleep, allowing it to wake up refreshed and ready for the next stage of the baking adventure.
(Part 2) The Apple Symphony: A Chorus of Flavors
4. The Apple Orchestra: A Blend of Melodies
No apple pie is complete without the perfect blend of apples. Each variety brings its own unique melody to the symphony of flavors. I like to use a combination of tart and sweet apples for the perfect balance. Granny Smiths, with their bright, sharp notes, provide a delightful contrast to the sweeter melodies of Honeycrisp or Braeburn apples. For an extra touch of complexity, I often add a few slices of Golden Delicious, their delicate sweetness and gentle texture adding another layer of nuance to the overall taste profile. It’s like conducting an apple orchestra, finding the perfect harmony between different varieties for the most delicious and satisfying flavor profile.
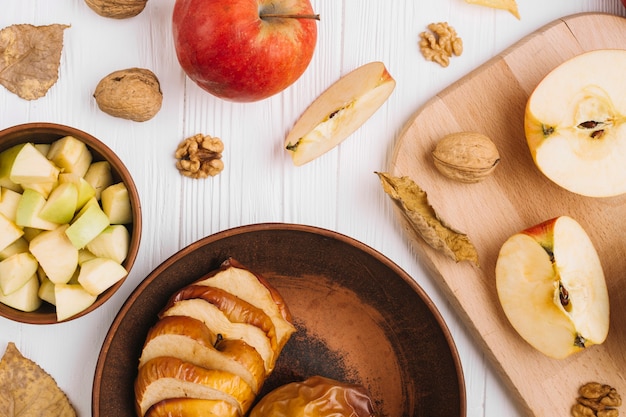
5. The Art of Slicing: A Precision Approach
Slicing the apples is a crucial step, a process that requires a careful hand and a sharp knife. Thin, even slices are key to ensure they cook through evenly, releasing their juices and creating a rich, flavorful filling. I prefer using a sharp chef's knife for this task, but if you’re feeling fancy, a mandoline can help achieve perfectly uniform slices. However, don’t fret over perfection; a little rustic charm always adds a touch of warmth and homeliness to a homemade apple pie. Think of it as creating a beautiful, but slightly imperfect, mosaic of flavors.
6. The Spice Blend: A Symphony of Aromas
Now, comes the magic of adding the spices and sugars that transform your humble apple filling into a symphony of aromas. Cinnamon is a classic choice, adding a warm, comforting melody to the apple orchestra. A pinch of nutmeg adds a subtle, earthy note, while a touch of allspice introduces a warm, spicy depth. I often use a blend of brown and white sugar, the brown sugar adding a hint of caramel richness while the white sugar provides a clean, balanced sweetness. And don’t forget a squeeze of lemon juice – it adds a touch of brightness and helps prevent the apples from browning, enhancing the overall flavor profile. It’s like adding a sprinkle of magic to your pie, a final touch that elevates the simple to the extraordinary.
(Part 3) The Pie Assembly: A Journey of Patience and Skill
7. The Dough Roll: A Test of Dexterity
Now comes the fun part: rolling out the dough. This is where your patience and precision really shine. Imagine yourself as a potter, gently shaping the dough into a beautiful, even circle. You want to roll the dough out evenly, aiming for a thickness of about 1/8 inch. Use a rolling pin and a light touch, working from the center outwards to avoid tearing the dough. If the dough becomes too sticky, sprinkle a little flour onto the surface, but use sparingly as too much flour can lead to a tough crust. Experiment with different rolling techniques – some people prefer a rolling pin with handles, while others prefer a plain rolling pin. Ultimately, it comes down to personal preference and what feels most comfortable for you.
8. The Crust Shaping: A Symphony of Shapes
Transfer the rolled-out dough to your pie pan. You can use a round, square, or rectangular pan – the choice is yours. Gently press the dough into the pan, making sure to get it all the way up the sides. Now comes the creative part – shaping the edges of the crust. You can use a fork to crimp the edges, creating a classic look, or try a more decorative approach. Some people like to use a pie crust crimper for a fancier touch, while others use their fingers to pinch and fold the edges of the dough, creating a rustic, handmade look. It’s all about expressing your own personal style, a way to add your unique touch to a timeless classic.
9. The Filling Insertion: A Careful Dance
Once you’ve shaped your crust, it’s time to add the filling. Pour the prepared apple mixture into the crust, spreading it out evenly. You can leave some space at the top for the juices to bubble up as the pie bakes, creating a rustic, overflowing look, or you can fill it right to the top, ensuring a more traditional appearance. It’s up to you – both options have their own charm and appeal.
(Part 4) Baking Time: A Culinary Symphony
10. The Oven's Embrace: A Moment of Anticipation
Now, the moment of truth. Slide your pie into a preheated oven, and let the magic unfold. As the oven’s warmth embraces the pie, you’ll notice the filling begin to bubble and the crust start to turn a beautiful golden brown. This is a moment of anticipation, a time to step back and appreciate the culinary transformation taking place. It’s a reminder of the power of heat and time, the alchemy of baking that transforms simple ingredients into a masterpiece of taste and texture.
11. The Cooling Process: A Patience Game
Once the pie is out of the oven, resist the temptation to slice into it immediately. Let it cool completely before slicing. This allows the juices to set and the crust to firm up, ensuring a clean slice every time. You can speed up the cooling process by placing the pie on a wire rack, allowing air to circulate around it. Patience is key here – remember, it’s not just about the taste, but about the overall experience, the anticipation building with each passing minute.
12. The Serving Ritual: A Feast for the Senses
And there you have it – your masterpiece is ready to be enjoyed. Serve your apple pie warm with a scoop of vanilla ice cream, a dollop of whipped cream, or a drizzle of caramel sauce. Let the aroma of cinnamon and apples fill the air as you savor each delicious bite. Take your time, relish the moment, and remember – it's all about creating memories, one slice at a time. It’s about experiencing the satisfaction of a job well done, the joy of sharing a delicious creation with loved ones, and the simple pleasure of savoring a truly perfect apple pie.
(Part 5) Tips and Tricks: From a Seasoned Baker
Baking is a journey of discovery, a constant process of learning and experimenting. Over the years, I've picked up a few tips and tricks that I think will be helpful to anyone embarking on their apple pie baking journey.
13. The Importance of Precision: A Lesson in Measurement
When it comes to baking, accuracy is key. Always measure your ingredients carefully, using a kitchen scale for the best results. This ensures that your ingredients are in the right proportions, which will make a significant difference in the overall outcome of your pie. Think of it as a scientific experiment, where precision is crucial to achieve a successful and delicious result.
14. The Secrets of a Tender Crust: A Guide to Success
To prevent a tough crust, avoid overworking the dough. The more you knead it, the more gluten develops, resulting in a tougher crust. Use a light touch and handle the dough as little as possible. Also, remember that cold butter is your friend. Don't let it soften too much during the mixing process. Chill the dough well before rolling it out – this will ensure a tender and flaky crust. It’s all about striking a delicate balance between the ingredients and the process, ensuring the dough develops a beautiful, flaky texture.
15. The Magic of Water: A Balancing Act
Don't add too much water to your dough. Too much water can make the dough sticky and difficult to work with. Start with a small amount of water and add more gradually until the dough comes together. You want the dough to be just moist enough to hold together, but not too wet. Think of it as a balancing act, finding the perfect point where the dough is cohesive but not overly sticky. It’s a subtle, but crucial, part of the process.
16. The Role of Sugar: Sweetening the Deal
Don’t be afraid to add a little extra sugar to your filling. It helps to bring out the sweetness of the apples and enhances the overall flavor of the pie. But remember, moderation is key – you don't want to overpower the natural sweetness of the apples. It’s all about finding a delicate balance between sweetness and tartness, ensuring the apple flavors are fully expressed.
17. The Power of Patience: Waiting for Perfection
Be patient! Let the pie cool completely before slicing. This allows the filling to set and the crust to firm up. Rushing the cooling process can result in a soggy pie. So take your time, relax, and enjoy the anticipation. It’s about understanding that time is a crucial part of the baking process, allowing the ingredients to meld and create a truly satisfying result.
(Part 6) The Apple Pie Variations: A World of Possibilities
Apple pie is a classic, but that doesn't mean it has to be boring. There are endless possibilities for adding your own personal touch. Here are a few ideas to get your creative juices flowing.
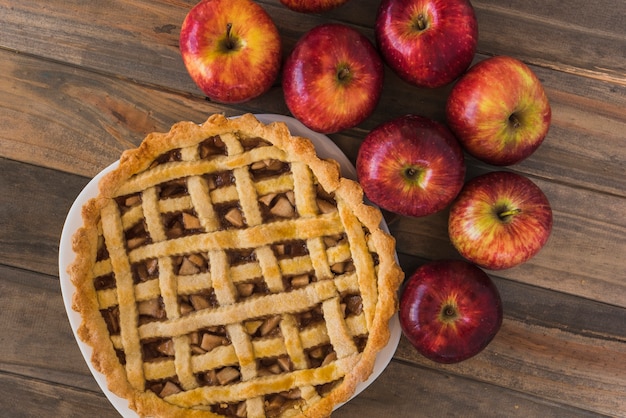
18. The lattice crust: A Work of Art
For a more elegant look, try a lattice crust. Simply roll out the dough and cut it into thin strips. Weave the strips over the filling to create a beautiful lattice design. This technique adds a touch of sophistication to your pie and allows the filling to show through, showcasing its gorgeous colors and textures. It’s like creating a culinary tapestry, where the delicate lattice pattern adds a visual element to your pie, enhancing both its appearance and appeal.
19. The Crumble Topping: A Crunchy Delight
For a more rustic and comforting appeal, try a crumble topping. Simply mix together flour, sugar, and butter until it forms a crumbly mixture. Sprinkle the crumble topping over the filling before baking for a delicious and crunchy contrast. It’s a simple, yet satisfying addition, offering a delightful textural contrast to the soft, juicy filling.
20. The Caramel Drizzle: A Touch of Decadence
For a touch of decadence, drizzle your finished pie with a homemade caramel sauce. This sweet and gooey topping adds another layer of flavor and texture to your pie, elevating it to new heights of deliciousness. It’s a simple, yet impactful, addition, taking your pie from good to extraordinary.
21. The Flavor Infusion: A Symphony of Spices
Experiment with different spices to add your own unique twist to your apple pie. Try adding a pinch of ginger for a warming spice, a dash of cardamom for a subtle floral note, or a sprinkle of ground cloves for a warm, earthy flavor. The possibilities are endless! Think of it as a spice palette, allowing you to create unique and interesting flavor profiles to suit your personal taste.
22. The Nutty Twist: A Crunchy Addition
Add a handful of chopped nuts to your filling for a delightful crunch. Walnuts, pecans, and almonds all pair beautifully with apples and spices. You can also sprinkle the nuts over the top of the pie before baking for a more visually appealing and flavorful experience. It’s a simple way to add texture and a nutty flavor dimension to your pie.
23. The Fruit Fusion: A Colorful Blend
Don’t be afraid to add other fruits to your apple pie. Peaches, blueberries, cranberries, and pears all work well with apples. You can mix and match different fruits to create your own unique flavor combinations. Just make sure to adjust the baking time accordingly. It’s all about experimentation, exploring different flavors and textures to create your own signature apple pie.
(Part 7) FAQs: Your Baking Questions Answered
24. What are the best apples for apple pie?
The best apples for apple pie are those that hold their shape well during baking and have a good balance of sweetness and tartness. Here are a few of my favorites:
- Granny Smith: Tart and crisp, providing a delicious contrast to the sweetness of other apples.
- Honeycrisp: Sweet and juicy, with a delightful crunch.
- Braeburn: Sweet and tart, with a firm texture that holds up well during baking.
- Golden Delicious: Mildly sweet and slightly tart, with a soft texture.
- Pink Lady: Sweet and tangy, with a firm texture that holds its shape well.
You can use a combination of different apple varieties for a more complex flavor profile. For example, I often use a mix of Granny Smith, Honeycrisp, and Golden Delicious for a perfectly balanced apple pie.
25. How do I prevent the crust from getting soggy?
Here are a few tips to prevent a soggy crust:
- Chill the dough well before rolling it out. This helps to prevent the butter from melting too quickly, resulting in a flaky and tender crust.
- Blind bake the crust for 10 minutes before adding the filling. This helps to prevent the bottom crust from getting soggy by pre-baking it. To blind bake, simply line the crust with parchment paper and weigh it down with pie weights or dry beans.
- Don’t overfill the pie. Leave some space at the top for the juices to bubble up as the pie bakes. This helps to prevent the crust from becoming soggy.
- Use a baking sheet to catch any spills. Place the pie on a baking sheet before baking. This will help to prevent any spills from dripping onto the oven bottom.
26. How long should I bake the pie?
The baking time for an apple pie will vary depending on the size of the pie and the oven temperature. A general guideline is 45-60 minutes at 375°F (190°C). Check the pie after 45 minutes to make sure it's not burning. The crust should be golden brown and the filling should be bubbly.
27. How do I store apple pie?
Apple pie can be stored at room temperature for up to 2 days. For longer storage, you can refrigerate it for up to 5 days. To freeze apple pie, wrap it tightly in plastic wrap and then in aluminum foil. It can be frozen for up to 3 months. To thaw, let the pie thaw in the refrigerator overnight.
28. What are some other apple pie variations I can try?
Here are a few other apple pie variations to try:
- Apple Crumble Pie: This variation features a crunchy crumble topping made from flour, sugar, and butter. It's a delicious and comforting twist on the classic apple pie.
- Apple Pie with Caramel Glaze: This variation features a sweet and gooey caramel glaze that adds a touch of decadence to the pie.
- Apple Pie with Pecan Streusel: This variation features a crunchy streusel topping made from pecans, flour, sugar, and butter. It's a delicious and nutty twist on the classic apple pie.
- Apple Pie with a Lattice Crust: This variation features a beautiful lattice crust that is both decorative and delicious. It's a perfect option for a special occasion.
- Apple Pie with a Cheddar Crust: This unique variation features a savory cheddar cheese crust that pairs surprisingly well with the sweet apple filling. It's a delicious and unexpected twist on the classic apple pie.
The possibilities are endless! Get creative and experiment with different flavors and textures to create your own signature apple pie.
(Part 8) The Apple Pie Legacy: A Culinary Tradition
Apple pie isn’t just a dessert; it’s a culinary tradition, a symbol of comfort and warmth. It’s a dish that brings families together, a reminder of happy times shared around the table. And as we continue to bake and enjoy this beloved dessert, we’re not just making a pie; we’re carrying on a legacy, a tradition that will be passed down for generations to come. So, the next time you bake an apple pie, take a moment to appreciate the history and the joy that this simple dish represents. It's more than just a pie; it’s a connection to something bigger, something that transcends time and brings us together.
And as you take that first bite, let the sweetness of the apples and the flaky texture of the crust transport you to a place of pure joy. Let the warmth of the cinnamon and the richness of the butter fill your senses. Let the apple pie be a reminder of the simple pleasures in life, the things that make us feel truly happy and content. It's a reminder that even in the midst of a busy world, there's always time for a little bit of sweetness, a little bit of love, and a lot of deliciousness.
So grab your aprons, gather your ingredients, and let’s embark on this baking journey together. Let’s create a masterpiece, one slice at a time, and savor the magic of the perfect apple pie.
Everyone is watching

Prime Rib Roast Cooking Time Chart: Per Pound Guide
Cooking TipsPrime rib roast. Just the name conjures images of lavish dinners, crackling fires, and hearty laughter. It’s ...

How Long to Bake Potatoes in the Oven (Perfect Every Time)
Cooking TipsBaked potatoes are a staple in my kitchen. They're incredibly versatile, delicious, and surprisingly easy to m...

Perfect Rice Every Time: The Ultimate Guide to Cooking Rice
Cooking TipsAs a self-proclaimed foodie, I've always been a bit obsessed with rice. It's the foundation of countless cuisi...

The Ultimate Guide to Cooking Asparagus: Tips, Techniques, and Recipes
Cooking TipsAsparagus. The mere mention of this spring delicacy conjures up images of vibrant green spears, crisp and burs...

Ultimate Guide to Cooking the Perfect Thanksgiving Turkey
Cooking TipsThanksgiving. Just the word conjures up images of overflowing tables laden with delicious food, the scent of r...